APsystems ECU-B Quick Installation Manual
Energy communication unit
Hide thumbs
Also See for ECU-B:
- Installation & user manual (23 pages) ,
- Quick installation manual (28 pages) ,
- Quick installation manual (2 pages)
Advertisement
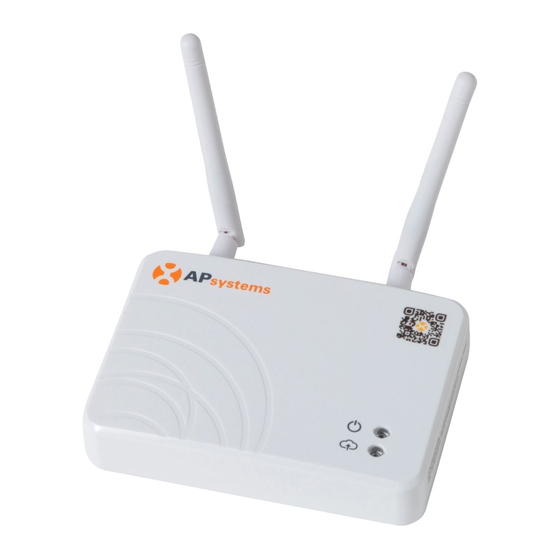
APsystems Energy Communication Unit
This guide is for reference only and assumes you have access to, and have read the detailed
instructions in the ECU-B User Manual (available at APsystems.com).
Step 1: Power-on ECU-B
Make sure the adapter is properly connected to the power port on the top of the ECU-B.
Plug the adapter into a dedicated standard AC electrical outlet.
Step 2: Antenna Up ECU-B
Make sure the antenna is properly connected to corresponding position on the top of the
ECU-B.
Step 3: Connect your smartphone to ECU-B
1 : Open Wi-Fi setting in your smartphone, select ECU-B hotspot.
2 : Connect to the ECU-B via the Local Wireless, the default password is "88888888".
3 : Once the connection is established with the ECU-B hotspot, open the EMA Manager APP.
Step 4 : Connect Microinverter to ECU-B
1 : Open the EMA Manager.
2 : Click "ECU APP" on the login page to enter the Local Control.
3 : Click "Workspace", select the ID management, input the micro ID with the SCAN function or
manually, select the IDs and click Sync to enter IDs into ECU-B. If you want to clean up all the IDs,
please select the IDs and click "Delete" and then "Sync".
4 : Select "Home" at the bottom of the page. The Home Page is displayed.
5 : View the real-time system operation data statistics for your solar array.
ECU-B Quick Installation Guide
1
2021/09/08 REv2.1 Quick Installation Guide
Advertisement
Table of Contents

Related Manuals for APsystems ECU-B


Summary of Contents for APsystems ECU-B
- Page 1 3 : Click “Workspace”, select the ID management, input the micro ID with the SCAN function or manually, select the IDs and click Sync to enter IDs into ECU-B. If you want to clean up all the IDs, please select the IDs and click “Delete” and then “Sync”.
- Page 2 Please scan QR code below to have access to our products and APP catalogue, or click this link to download our APPs: http://q-r.to/1OrC. Product information is subject to change without notice.(Please download manuals at www.APsystems.com). 2021/09/08 REv2.1 Quick Installation Guide...
Need help?
Do you have a question about the ECU-B and is the answer not in the manual?
Questions and answers