
Related Manuals for Clearaudio Emotion-CMB


Summary of Contents for Clearaudio Emotion-CMB
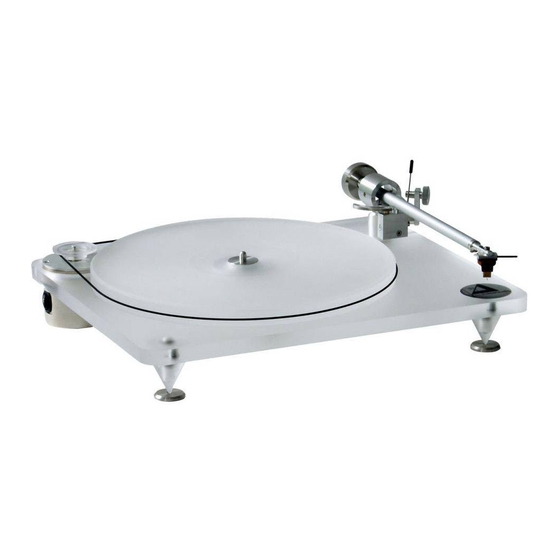
- Page 1 Emotion-CMB Upgrade Kit - Nachrüstsatz User manual Bedienungsanleitung Pic. similar / Abb. ähnlich © clearaudio electronic GmbH, 2021-04 Made in Germany...
- Page 2 Please read this instructions carefully, to avoid any damages or loss of warranty. These instructions will help you with an easy set-up and guarantee the highest pleasure for a long time. Emotion-CMB We wish you a lot of musical enjoyment with your new Clearaudio turntable. Clearaudio electronic GmbH Important:...
- Page 3 User manual / Bedienungsanleitung Contents 1. Packing contents ..................4 Emotion-CMB 2. Installation of the ............. 5 - 8 3. Special information ..................9 Made in Germany Page / Seite 3...
- Page 4 Emotion-CMB Please store this original packing, in case you need to ship the Please use the list below to check the packing contents of your newly purchased clearaudio CMB- Bearing: 1 Upper part of the CMB-bearing 3 Tool to remove the bearing ball...
- Page 5 User manual / Bedienungsanleitung Emotion-CMB 2. Installation of the The installation of the Emotion-CMB upgrade kit is easy and done in a few minutes. Emotion-CMB Please follow the steps to install your upgrade kit: Step 1: Taking off the belt (Pic. 1).
- Page 6 Remove the bearing ball by pushing the tool into the bearing (Pic. 5). Pic. 5 Step 6: Pull the tool out of the bearing. The bearing ball is now removed (Pic. 6). Pic. 6 © clearaudio electronic GmbH, 2021-04 Page / Seite 6...
- Page 7 User manual / Bedienungsanleitung Step 7: IMPORTANT: Please remove the protection foil from the magnetic ring before applying the ring on the turntable chassis (Pic.7). Pic. 7 Step 8: The side of the magnet ring with glue must face to the turntable chassis. Place the magnet ring onto the bearing shaft (Pic.
- Page 8 Before listening to music, please check the set-up of the VTA (Vertical Tracking Angle) of your tonearm and cartridge combination. Emotion-CMB We wish you a lot of pleasure with your new upgrade. Your Clearaudio-team © clearaudio electronic GmbH, 2021-04 Page / Seite 8...
- Page 9 User manual / Bedienungsanleitung 3. Special information • If any servicing or repair of a Clearaudio product is necessary, please first contact your dealer or distributor. Alternatively contact Clearaudio directly and we will advise you of your nearest service location.
- Page 10 User manual / Bedienungsanleitung Sehr verehrte clearaudio – Kundin, sehr verehrter clearaudio - Kunde, das clearaudio (Ceramic Magnetic Bearing) ist in langjähriger Forschungsarbeit entwickelt worden und beruht auf einem clearaudio Patent. Zwei übereinander angeordnete, gleichpolige, homogene Magnetfelder wirken auf kleinem, definierten Raum und stoßen sich gegenseitig ab.
- Page 11 User manual / Bedienungsanleitung Inhaltsverzeichnis 1. Lieferumfang ..................12 Emotion-CMB 2. Einbau des Lagers ............13 - 16 3. Besondere Hinweise ................17 Made in Germany Page / Seite 11...
- Page 12 Bitte kontrollieren Sie anhand der unten aufgeführten Liste den Lieferumfang Ihres neu erworbenen Emotion-CMB clearaudio Lagers. Dieser besteht aus: CMB-Lager Oberteil Vorrichtung zum Herausnehmen der Lagerkugel Magnetring (unteres Lagerteil) Ohne Abbildung: Bedienungsanleitung © clearaudio electronic GmbH, 2021-04 Page / Seite 12...
- Page 13 User manual / Bedienungsanleitung Emotion-CMB 2. Einbau des Lagers Emotion-CMB Der Einbau des Lager Nachrüstsatzes ist einfach und innerhalb kurzer Zeit abgeschlossen. Folgen Sie dabei bitte den nachfolgenden Anweisungen: Schritt 1 Abnehmen des Riemens (Abb. 1). Abb. 1: Schritt 2 Abnehmen des Plattentellers (Abb.
- Page 14 Sie einen leichten Druck aus (Abb. 5). Abb. 5 Schritt 6 Entfernen der Lagerkugel: Ziehen Sie die Vorrichtung wieder aus der Lagerbuchse. Nun ist die Lagerkugel entfernt (Abb. 6). Abb. 6 © clearaudio electronic GmbH, 2021-04 Page / Seite 14...
- Page 15 User manual / Bedienungsanleitung Schritt 7 WICHTIG: Bitte entfernen Sie die Schutzfolie auf der Unterseite des Magnetrings! (Abb.7) Abb. 7 Schritt 8 Aufsetzen des Magnetrings auf die Achse. Die mit Kleber beschichtete Seite des Magnetrings muss zur Laufwerksoberfläche weisen. Bitte pressen Sie den Magnetring über die Lagerbuchse zentriert auf das Laufwerkschassis an (Abb.
- Page 16 Der Umbau Ihres Emotion-Laufwerks mit dem ist nun abgeschlossen! Prüfen Sie vor Ihrem ersten Musikgenuss die VTA (Vertical Tracking Angle) Einstellung Ihrer Tonarm-/ Tonabnehmerkombination. Wir wünschen Ihnen nun viel Freude beim Musik hören! Ihr clearaudio-Team © clearaudio electronic GmbH, 2021-04 Page / Seite 16...
- Page 17 User manual / Bedienungsanleitung 3. Besondere Hinweise • Wenn eine Wartung oder Reparatur an einem clearaudio Produkt erforderlich ist, wenden Sie sich bitte zuerst immer an Ihren Händler oder Vertriebspartner. Alternativ können Sie clearaudio direkt kontaktieren und wir werden Sie über Ihre nächstgelegene Servicestelle informieren.
- Page 18 User manual / Bedienungsanleitung © clearaudio electronic GmbH, 2021-04 Page / Seite 18...
- Page 19 User manual / Bedienungsanleitung Made in Germany Page / Seite 19...
- Page 20 Irrtümer vorbehalten- Kopien und Abdrucke – auch nur auszugsweise – bedürfen der schriftlichen Genehmigung durch die clearaudio electronic GmbH, Deutschland. Clearaudio Electronic accepts no liability for any misprints. Technical specifications are subject to change or improvement without prior notice. Product availability is as long as stock lasts.
Need help?
Do you have a question about the Emotion-CMB and is the answer not in the manual?
Questions and answers