ALTA Bliss Automation Programming And Users Manual
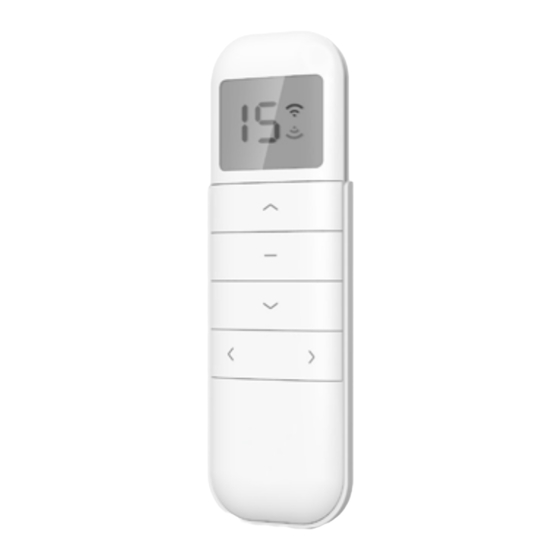
15 channel remote control
Hide thumbs
Also See for Bliss Automation:
- Installation and reference manual (9 pages) ,
- Programming and users manual (2 pages)
Advertisement
Table of Contents
- 1 Table of Contents
- 2 Declarations
- 3 Safety Instructions
- 4 BLISS Remote Overview
- 5 BLISS™ Remote Functions
- 6 P1 Button Instructions
- 7 Initial Set-Up
- 8 Adjust Limits
- 9 Favorite Position
- 10 Add or Remove Additional Remote
- 11 Adjust Motor Speed
- 12 Roller or Sheer Mode
- 13 Quick Index
- 14 Troubleshooting
- Download this manual
BLISS
Automation
™
15 CHANNEL REMOTE CONTROL
PROGRAMMING AND USERS GUIDE
ALTA
by
2
3
4
5
6
7
8
8-9
9
10
10
11
11
Advertisement
Table of Contents

Related Manuals for ALTA Bliss Automation


Summary of Contents for ALTA Bliss Automation
-
Page 1: Table Of Contents
BLISS Automation ™ ALTA 15 CHANNEL REMOTE CONTROL PROGRAMMING AND USERS GUIDE Declarations Safety Instructions BLISS™ Remote Overview BLISS™ Remote Functions P1 Button Instructions Initial Set-up Adjust Limits Favorite Position Add or Remove Additional Remote Adjust Motor Speed Roller or Sheer Mode... -
Page 2: Declarations
Declarations U.S. RADIO FREQUENCY FCC COMPLIANCE This device complies with Part 15 of the FCC Rules. Operation is subject to the following two conditions: (1) This device may not cause harmful interference, and (2) This device must accept any interference received, including interference that may cause undesired operation. This equipment has been tested and found to comply with the limits for a Class B digital device, pursuant to Part 15 of the FCC Rules. -
Page 3: Safety Instructions
Safety Instructions Attention Never drop, knock, drill or submerge the motor. Keep the power cable in the proper position as shown below. Read all safety instructions before installation. Incorrect installation can lead to serious injury and will void manufacturer’s liability and warranty. ×... -
Page 4: Bliss Remote Overview
BLISS Remote Overview 1. Available Products Dual Faux / Wood Honeycomb Natural Shades Tilt-Only Shades Wovens Roller Window Shades Shadings 2. Specifications Voltage 3V (CR2450) Radio Frequency 433.92 MHz Bi-directional Transmitting Power 10 milliwatt Operating Temperature 14°F to 122°F (-10°C to 50°C) RF Modulation Lock Function IP Rating... -
Page 5: Bliss™ Remote Functions
BLISS Remote Function 1. Channel Options Select A Channel Action on Remote Control Lower Higher a. Press “<” button on the remote to select a lower Channel Channel channel. Remote Re- sponse b. Press “>” button on the remote to select a higher channel. -
Page 6: P1 Button Instructions
P1 Button Instructions P1 Button Location P1 Button Power line LED light P1 button Signal line Button Lithium Battery Switch BLISS TILT BLISS 1.1 and BLISS 2.0 BLISS LIFT 2. P1 Button Instruction BLISS Lift and BLISS Tilt motors do not beep Test Motor Happening as you press for 1 second when released... -
Page 7: Initial Set-Up
Initial Set-up BLISS Lift and BLISS Tilt motors DO NOT Beep 1. Pair / Unpair Remote Control a. Press “P1” button (about 2 sec) on the motor Action on Motor head until motor jogs x1 and beeps x1. b. In the next 10 secs, press and hold “Stop” button Motor Response Jog x1 Beep x1... -
Page 8: Adjust Limits
Adjust Limits 1. Adjust the Upper Limit Action on Remote Control Stop a. Press and hold (about 5 sec) “Up” and “Stop” buttons simultaneously until motor jogs x1 and Motor Response Jog x1 Beep x1 beeps x1. b. Use “Up” button to raise the shade to the desired highest position, and use “Up”... -
Page 9: Add Or Remove Additional Remote
Favorite Position 3. Delete Favorite Position Action on Remote Control Stop a. Press and hold (about 2 sec) one “P2” button until motor jogs and beeps x1. Motor Response Jog x1 Beep x1 Jog x1 Beep x1 b. Press and hold (about 2 sec) “Stop” button until motor jogs and beeps x1. -
Page 10: Adjust Motor Speed
Adjust Motor Speed 1. Acceleration Speed Action on Remote Control a. Press one “P2” button until motor jogs x1 and beeps x1. Motor Response Jog x1 Beep x1 Jog x1 Beep x1 b. Press “Up” button until motor jogs x1 and beeps Action on c. -
Page 11: Quick Index
Quick Index Settings Steps 1 Pairing P1 (hold down for 2s) > Stop (hold down for 2s) 2 Switch Rotating Direction Up + Down (hold down for 2s) Upper Limit: Up (hold down for 2s) > Up + Stop (hold down for 2s) 3 Setting Upper &...
Need help?
Do you have a question about the Bliss Automation and is the answer not in the manual?
Questions and answers
We have a Remote PN: 1026655 that has worked great but today after changing the batteries the remote does not light up
If the ALTA Bliss Automation remote PN: 1026655 does not light up after changing the batteries, possible issues include:
- Dead batteries: Replace the batteries.
- Battery not inserted correctly: Check the polarity.
- Battery voltage is low: Use the provided charger or check the solar panel connection and positioning if applicable.
This answer is automatically generated
We moved into place with 2 shades that are synced with remote. They worked fine- today only 1 responds.
Only one ALTA Bliss Automation shade is responding to the remote likely because the remote is set to control a specific channel assigned to that one shade. To control all shades, the remote must be switched to the channel programmed for all devices (e.g., channel 0), and then the command should be sent.
This answer is automatically generated
Shade will not move either direction - new remote battery and unit charged fully
The ALTA Bliss Automation shade may not move in either direction despite a new remote battery and a fully charged unit because the motor direction cannot be changed if the upper and lower limits are already set. In this case, direction change can only be done using the P1 button. If the motor is set to move in a direction that is blocked by the preset limits, it will not respond to remote commands.
This answer is automatically generated
Reset to factory, did pairing step. Unit is charged. When I press up or down it jogs but does not keep moving. I have been working on this for hours and hours.
If the ALTA Bliss Automation unit jogs but does not keep moving after a factory reset, follow these troubleshooting steps:
1. Check Battery and Power:
- Ensure the battery is not dead or inserted incorrectly (check polarity).
- If using a solar panel, recharge with the provided charger and check panel positioning.
- Verify that the motor is properly connected to power.
2. Check for Radio Interference:
- Keep the remote control and motor antenna away from metal objects.
- Move the remote closer to the receiver.
3. Check Remote Pairing:
- After a factory reset, the motor must be re-paired with the remote.
- Press the P1 button on the motor for about 2 seconds until the motor jogs once and beeps once.
- Within 10 seconds, press and hold the “Stop” button on the remote until the motor jogs twice and beeps three times.
4. Sleep Mode or Multiple Motors:
- Ensure other motors are in sleep mode to avoid interference.
- Make sure only one motor is paired to the remote channel being used.
5. Check Wiring:
- Confirm wiring is connected correctly if applicable.
If the motor jogs but does not continue operation, it is likely not fully paired with the remote or affected by one of the above issues. Re-pairing and checking power and signal conditions should resolve the issue.
This answer is automatically generated
BLINDS NOT CHARGING
ALTA Bliss Automation blinds may not be charging due to the following reasons:
1. Low Battery Alert – If the battery has run out, it needs to be recharged.
2. Charging Issues – Ensure the battery is connected to the correct USB power source (USB 5V 1A or USB 5V 2A).
3. Blinking Indicators – A blinking red light indicates a low battery, while a blinking green light shows charging is in progress. A solid green light means charging is complete.
4. Environmental Factors – The motor should not be exposed to moisture or extreme temperatures (-10℃ to +50℃).
5. Hardware Issues – If power cables are damaged or incorrectly connected, charging may not work.
Checking these factors can help diagnose and resolve charging issues.
This answer is automatically generated
When selecting a channel with L or R button, channel numbers cycle to the whole list
I have 16 channel remote. Six are used. One for each window. Can I use the additional channels to add, say window #3+#4 to raise and lower, etc.