AEG BPK742320M User Manual
Hide thumbs
Also See for BPK742320M:
- User manual (51 pages) ,
- User manual (40 pages) ,
- User manual (48 pages)
Table of Contents
Advertisement
Quick Links
Advertisement
Table of Contents

Related Manuals for AEG BPK742320M


Summary of Contents for AEG BPK742320M
- Page 1 BPK742320M User Manual Oven USER MANUAL...
-
Page 2: Table Of Contents
Products must be used, installed and operated in accordance with this manual. You may not be able to claim on the AEG manufacturer’s warranty in the event that your product fault is due to failure to adhere to this manual. -
Page 3: Safety Information
ENGLISH General information and tips Environmental information Subject to change without notice. SAFETY INFORMATION Before the installation and use of the appliance, carefully read the supplied instructions. The manufacturer is not responsible for any injuries or damage that are the result of incorrect installation or usage. -
Page 4: Conditions Of Use
WARNING: The appliance and its accessible parts • become hot during use. Care should be taken to avoid touching heating elements. Always use oven gloves to remove or put in • accessories or ovenware. Before carrying out any maintenance, disconnect the •... -
Page 5: Safety Instructions
ENGLISH 3. SAFETY INSTRUCTIONS 3.1 Installation Built in depth of the 546 mm WARNING! appliance Only a qualified person must install this appliance. Depth with open door 1027 mm Ventilation opening 560 x 20 mm • Remove all the packaging. •... - Page 6 • Use only correct isolation devices: line – do not put ovenware or other protecting cut-outs, fuses (screw type objects in the appliance directly fuses removed from the holder), earth on the bottom. leakage trips and contactors. – do not put aluminium foil directly •...
- Page 7 ENGLISH • Clean regularly the appliance to operation to a well ventilated prevent the deterioration of the area. surface material. • Small pets can also be highly • Clean the appliance with a moist soft sensitive to the localized temperature cloth.
-
Page 8: Product Description
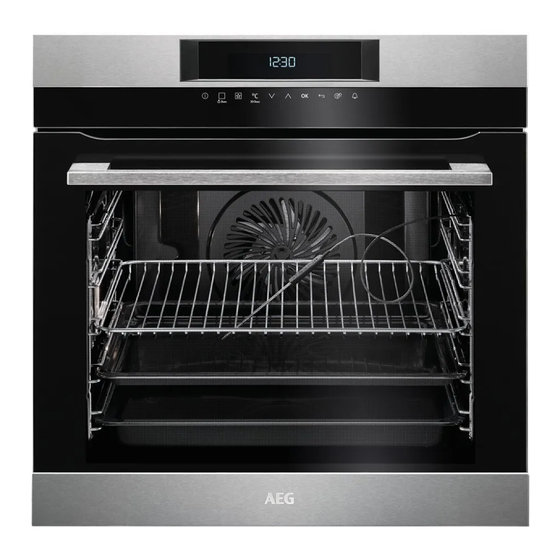
• Remove the door catch to prevent children or pets from becoming trapped in the appliance. 4. PRODUCT DESCRIPTION 4.1 General overview Control panel Electronic programmer Socket for the food sensor Heating element Lamp Shelf support, removable Shelf positions 4.2 Accessories... -
Page 9: Control Panel
ENGLISH Food Sensor Telescopic runners To measure the temperature inside food. To insert and remove trays and wireshelf more easily. 5. CONTROL PANEL 5.1 Electronic programmer Use the sensor fields to operate the oven. Sensor Function Comment field Display Shows the current settings of the oven. ON / OFF To turn on and off the oven. - Page 10 Sensor Function Comment field Up key To move up in the menu. To confirm the selection or setting. Back key To go back one level in the menu. To show the main menu, press the field for 3 seconds.
-
Page 11: Before First Use
ENGLISH Symbol Function Heat-up Indicator The display shows the temperature in the oven. Fast Heat Up The function is on. It decreases the heat up time. Weight Automatic The display shows that the automatic weight system is on or that weight can be changed. -
Page 12: Daily Use
Preheat the empty oven before the first use. Step 3 Set the maximum temperature for the function: Let the oven operate for 15 min. The oven can emit an odour and smoke during preheating. Make sure that the room is ventilated. - Page 13 ENGLISH Symbol / Menu Application Symbol / Menu Description item item Contains recommen‐ Sets the language for ded oven settings for a the display. Assisted Cooking Set Language wide choice of dishes. Select a dish and start Adjusts the volume of the cooking process.
- Page 14 The lamp may automatically Heating func‐ Application deactivate at a temperature tion below 60 °C during some oven functions. To bake food on one shelf position for a more Specials intensive browning and Pizza Function a crispy bottom. Set the Heating func‐...
- Page 15 ENGLISH Heating func‐ Application Dish tion Chicken wings, For dishes such as la‐ fresh sagna or potato gratin. Chicken wings, fro‐ To make gratins and to Au Gratin brown. Chicken Chicken legs, fresh Notes on: Moist Fan Baking Chicken legs, fro‐ This function was used to comply with the energy efficiency class and Chicken, 2 halves...
- Page 16 Dish Dish Leg of lamb Swiss Tarte, savou‐ Lamb Saddle of lamb Quiche lorraine Lamb joint, medium Savory flan Hare • Leg of hare Food Category: Cake / Pastry • Saddle of hare Dish • Saddle of hare Ring cake Venison Apple cake, cov‐...
-
Page 17: Clock Functions
ENGLISH Dish Dish Brownies Ciabatta Swiss roll Bread crown Yeast cake Bread Yeast plait Crumble cake Unleavened bread Sugar cake Food Category: Side dishes Short pastry flan Dish base Flan base French fries, thin Sponge mixture flan French fries, thick base French fries, frozen Short pastry fruit... -
Page 18: Automatic Programmes
5. Press any symbol to stop the signal. When the function ends, a signal sounds. 8.3 Heat + Hold 8.4 Time Extension Conditions for the function: The function: Time Extension makes the heating function continue after the end of •... - Page 19 ENGLISH • Ingredients should be at room The display shows the food sensor temperature. symbol. • Food sensor cannot be used for liquid 4. Press in less than 5 dishes. seconds to set the food core • During cooking the food sensor must temperature.
- Page 20 When the dish is at the set temperature, an acoustic signal sounds. The appliance deactivates automatically. 9. Touch any symbol to stop the signal. 10. Remove the food sensor plug from the socket and remove the dish from the appliance.
- Page 21 ENGLISH Wireshelf, Baking tray / Deep pan: Push the tray between the guide bars of the shelf support and the wire shelf on the guide bars above. 10.3 Using telescopic runners Make sure you push back the telescopic runners fully in the oven before you close Do not oil the telescopic runners.
-
Page 22: Additional Functions
Step 2 Put the deep pan on the recommended shelf position. Roasting larger pieces of meat or poultry Grilling and toasting thin pieces of food on one shelf position. in large quantities. Make sure the supports of the wire shelf Make sure the supports of the wire shelf point up. - Page 23 ENGLISH 2. Press at the same time until the display shows a message . • Function Lock is on when To turn off the Child Lock function repeat the heating function step 2. works. • The menu: Basic Settings 11.3 Function Lock lets you turn the function: Set + Go on and off.
-
Page 24: Hints And Tips
11.7 Cooling fan It is on when the When the oven operates, the cooling fan oven is turned on. turns on automatically to keep the surfaces of the oven cool. If you turn off It is on for 10 sec... - Page 25 ENGLISH The function allows you to rise yeast Cakes and pastries at different heights dough. Put the dough into a big dish and do not always brown equally. There is no cover it with a wet towel or plastic foil. need to change the temperature setting if Set function: Dough Proving and the an unequal browning occurs.
- Page 26 12.6 Baking on one level BAKING IN TINS (°C) (min) Ring cake / Brioche True Fan Cook‐ 150 - 160 50 - 70 Madeira cake / True Fan Cook‐ 140 - 160 70 - 90 Fruit cakes Flan base - short True Fan Cook‐...
- Page 27 ENGLISH CAKES / PASTRIES / BREADS ON BAKING TRAYS Preheat the empty oven unless specified otherwise. (°C) (min) Cake with crumble True Fan Cook‐ 150 - 160 20 - 40 topping, preheating is not needed Buttered almond Conventional 190 - 210 20 - 30 cake / Sugar cakes Cooking...
- Page 28 12.7 Bakes and gratins Use the first shelf position. (°C) (min) Pasta bake Conventional Cooking 180 - 200 45 - 60 Lasagne Conventional Cooking 180 - 200 25 - 40 Vegetables au gratin, Turbo Grilling 160 - 170 15 - 30...
- Page 29 ENGLISH Put some water in the tray to prevent Baste meat joints with their own juice dripping fat from burning. several times during roasting. Turn the roast after 1/2 - 2/3 of the 12.10 Roasting cooking time. Use the first shelf position. Roast meat and fish in large pieces (1 kg or more).
- Page 30 VEAL Use the function: Turbo Grilling. (kg) (°C) (min) Roast veal 160 - 180 90 - 120 Veal knuckle 1.5 - 2 160 - 180 120 - 150 LAMB Use the function: Turbo Grilling. (kg) (°C) (min) Lamb leg / Roast 1 - 1.5...
- Page 31 ENGLISH POULTRY Use the function: Turbo Grilling. (kg) (°C) (min) Poultry, portions 0.2 - 0.25 200 - 220 30 - 50 Chicken, half 0.4 - 0.5 190 - 210 35 - 50 Chicken, poulard 1 - 1.5 190 - 210 50 - 70 Duck 1.5 - 2...
- Page 32 BREAD (°C) (min) Rye bread 190 - 210 50 - 70 Wholemeal bread 180 - 200 50 - 70 Whole grain bread 170 - 190 60 - 90 Bread rolls 190 - 210 20 - 35 12.12 Crispy baking with Pizza Function PIZZA Use the first shelf position.
- Page 33 ENGLISH PIZZA Preheat the empty oven before cooking. Use the second shelf position. (°C) (min) Unleavened bread 230 - 250 10 - 20 Puff pastry flan 160 - 180 45 - 55 Flammkuchen 230 - 250 12 - 20 Pierogi 180 - 200 15 - 25 Vegetable pie...
- Page 34 Set the temperature to 120 °C. (kg) (min) Steaks 0.2 - 0.3 20 - 40 Fillet of beef 1 - 1.5 90 - 150 Roast beef 1 - 1.5 120 - 150 Roast veal 1 - 1.5 120 - 150 12.15 Frozen Foods...
- Page 35 ENGLISH (kg) (min) (min) Defrosting Further de‐ time frosting time Chicken 100 - 140 20 - 30 Put the chicken on an upturned saucer in a big plate. Turn halfway through. Meat 100 - 140 20 - 30 Turn halfway through. Meat 90 - 120 20 - 30...
- Page 36 For 2 trays use the first and fourth shelf position. VEGETA‐ (min) (min) VEGETA‐ BLES Cooking Continue to BLES (°C) time until cook at simmering 100 °C Beans 60 - 70 6 - 8 Carrots 50 - 60 5 - 10...
- Page 37 ENGLISH PORK Food core temperature (°C) Less Medium More Ham / Roast Saddle chop / Pork loin, smoked / Pork loin, poached VEAL Food core temperature (°C) Less Medium More Roast veal Veal knuckle MUTTON / LAMB Food core temperature (°C) Less Medium More...
- Page 38 FISH (SALMON, TROUT, Food core temperature (°C) ZANDER) Less Medium More Fish, whole / large / steamed / Fish, whole / large / roasted CASSEROLES - PRE‐ Food core temperature (°C) COOKED VEGETABLES Less Medium More Zucchini casserole / Broccoli cas‐...
- Page 39 ENGLISH 12.21 Moist Fan Baking For the best results follow suggestions listed in the table below. Use the third shelf position. (°C) (min) Pasta gratin 200 - 220 45 - 55 Potato gratin 180 - 200 70 - 85 Moussaka 170 - 190 70 - 95 Lasagne...
- Page 40 BAKING ON ONE LEVEL. Biscuits Use the third shelf position. (°C) (min) Short bread / Pastry strips True Fan Cooking 25 - 40 Short bread / Pastry strips, Conventional Cooking 20 - 30 preheat the empty oven Small cakes, 20 per tray,...
-
Page 41: Care And Cleaning
ENGLISH GRILL Preheat the empty oven for 5 minutes. Grill with the maximum temperature setting. (min) Beef steak, turn halfway Grill 24 - 30 through 13. CARE AND CLEANING WARNING! Refer to Safety chapters. 13.1 Notes on cleaning Clean the front of the oven with a soft cloth with warm water and a mild detergent. - Page 42 Step 1 Turn off the oven and wait un‐ til it is cold. Step 2 Pull the front of the shelf sup‐ port away from the side wall. Step 3 Pull the rear end of the shelf support away from the side wall and remove it.
- Page 43 ENGLISH 13.4 How to remove: Grill WARNING! There is a risk of burns. Step 1 Turn off the oven and wait until it is cold to clean it. Remove the shelf supports. Step 2 Grab the grill corners. Pull it for‐ wards against the spring pres‐...
- Page 44 Step 4 Hold the door trim (B) on the top edge of the door at the two sides and push in‐ wards to release the clip seal. Step 5 Pull the door trim to the front to remove it.
-
Page 45: Troubleshooting
ENGLISH Side lamp Step 1 Remove the left shelf support to get access to the lamp. Step 2 Use a narrow, blunt object (e.g. a teaspoon) to remove the glass cover. Step 3 Clean the glass cover. Step 4 Replace the lamp with a suitable 300 °C heat-resistant lamp. -
Page 46: Energy Efficiency
Problem Possible cause Remedy The food sensor does not The plug of the food sensor Put the plug of the food sen‐ operate. is not correctly installed into sor as far as possible into the socket. the socket. The display shows F111. -
Page 47: Warranty
This document sets out the terms and (collectively “Electrolux”) of 3-5 conditions of the product warranties Niall Burgess Road, Mount for AEG Appliances. It is an important Wellington, in respect of document. Please keep it with your Appliances purchased in New proof of purchase documents in a Zealand;... - Page 48 3. Warranty Period: Subject to these Electrolux authorised repairer terms and conditions, this warranty or ASC; continues for in Australia for a period – normal wear and tear; of 60 months and in New Zealand for – power surges, electrical storm...
- Page 49 Important Notice Before calling for service, please ensure that the steps listed in clause 8 above have been followed. SERVICE AUSTRALIA aeg.com/au FOR SERVICE FOR SPARE PARTS or to find the address of your nearest au‐ or to find the address of your nearest spare...
- Page 52 www.aeg.com/au...
Need help?
Do you have a question about the BPK742320M and is the answer not in the manual?
Questions and answers