Advertisement
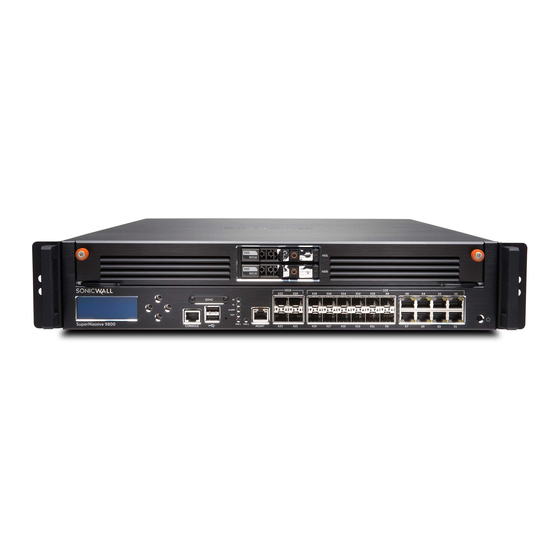
SonicWall® SuperMassive™ 9800 AC
Power Supply Installation and
Replacement
This document provides instructions for removing and installing a
replacement AC power supply in your SuperMassive 9800 network
security appliance.
WARNING:
Power supply surfaces can be hot. Handle and store
with care until the surfaces are cool.
Review the safety and regulatory information in the Getting Started
Guide provided with the SuperMassive 9800 appliance.
Rear view of SuperMassive 9800 appliance
Fans (6)
Auto-throttling fans for system temperature control
Expansion module bay
Power supplies (2)
For SonicWall-approved expansion
modules
Dual power supplies for redundant AC power and added reliability
Field conversion is available to convert to DC mains
DC power supplies use different input connector and power cables
Removing the AC Power Supply from the Appliance
To remove a defective AC power supply from the back of the
SuperMassive 9800:
1
Unplug the power cord from the SonicWall appliance power supply
module that is being replaced.
2
Loosen the retaining thumbscrew (A) of the #3 fan module with a
Phillips (cross) screwdriver. Open the fan's retaining arm to expose
the power supply's locking bracket.
3
Using the screwdriver (B), remove both of the retaining screws (C,
D) from the locking bracket and set them aside.
4
Taking note of the power supply orientation as it relates to the
appliance, suppress the power supply release tab (E) while using
the module's handle to pull the module outwards and remove it.
Installing a new AC Power Supply
WARNING:
Do NOT insert anything except the SuperMassive
9800 AC Power Supply into the appliance.
To install a new SuperMassive 9800 AC Power Supply:
1
Insert the new power supply module into the empty slot using the
same orientation you noted when you removed the defective
module.
2
Carefully and firmly push the power supply module until it is
completely seated and snaps into place.
3
Replace the metal locking bracket and secure it with its retaining
screws.
4
Return the fan retaining arm across the fan module and tighten the
retaining screw (A) with a Phillips (cross) screwdriver until it cannot
be loosened without a screwdriver.
5
Connect the power cord to the power supply that was replaced and
to the power source.
6
Confirm that the new power supply is operating correctly. On the
front panel, the LED indicator for the power supply should display a
blue light. A yellow light indicates a problem.
Installation et remplacement du bloc
d'alimentation électrique CA
Ce document indique la marche à suivre pour retirer et installer un bloc
d'alimentation électrique CA dans votre appareil de sécurité réseau
.
SuperMassive 9800
AVERTISSEMENT :
Les surfaces du bloc d'alimentation peuvent
être chaudes. Manipulez et entreposez l'appareil avec soin jusqu'à
ce que les surfaces soient froides.
Consultez les consignes de sécurité et les informations sur la
réglementation en vigueur décrites dans le Guide de prise en main fourni
avec l'appareil SuperMassive 9800.
Retrait du bloc d'alimentation CA de l'appareil
Pour retirer un bloc d'alimentation CA défectueux de l'arrière du
SuperMassive 9800 :
1
Débranchez le cordon d'alimentation du module d'alimentation à
remplacer dans l'appareil SonicWall.
2
Desserrez la vis de fixation moletée (A) du module de ventilation n
l'aide d'un tournevis cruciforme. Ouvrez le bras de retenue du
ventilateur pour exposer la bride de verrouillage du bloc
d'alimentation.
3
À l'aide du tournevis (B), enlevez les deux vis de fixation (C, D) de la
bride de verrouillage et mettez-les de côté.
4
En prenant soin de noter l'orientation du bloc d'alimentation par
rapport à l'appareil, enfoncez la languette de dégagement du bloc.
Installation d'un bloc d'alimentation CA dans l'appareil :
AVERTISSEMENT :
N'INSÉREZ AUCUN OBJET autre que le
SuperMassive 9800 AC Power Supply dans ce dernier.
Pour installer un nouveau SuperMassive 9800 AC Power Supply :
1
Insérez le nouveau module d'alimentation dans le logement vide dans
le sens noté lors du retrait du module défectueux.
2
Poussez le module d'alimentation soigneusement et fermement
jusqu'à ce qu'il soit complètement inséré et qu'il s'enclenche en place.
3
Replacez la bride de verrouillage en métal et fixez-la avec ses vis de
fixation.
4
Replacez le bras de retenue du ventilateur contre le module de
ventilation et serrez la vis de fixation (A) à l'aide d'un tournevis
cruciforme jusqu'à ce qu'il soit impossible de la desserrer sans
tournevis.
5
Branchez le cordon d'alimentation au bloc d'alimentation remplacé et
à la source d'alimentation.
6
Vérifiez que le nouveau bloc d'alimentation fonctionne correctement.
Le voyant DEL de l'alimentation électrique situé sur le panneau avant
devrait être allumé en bleu. Un voyant jaune indique un problème.
Entfernen des Netzteils aus der SonicWall
Appliance
WARNUNG:
Stromversorgung Oberflächen können heiß sein.
Handhaben und speichern Sie vorsichtig, bis die Oberflächen kühl
sind.
Führen Sie zum Entfernen eines defekten Netzteils aus der SonicWall
Appliance die folgenden Schritte aus:
1
Ziehen Sie das Netzkabel aus der SonicWall Appliance
Stromversorgungsmodul, das ersetzt wird.
2
Lösen Sie die Schraube (A) des # 3 Lüftermodul mit einem Phillips
(Kreuz) Schraubendreher. Öffnen Sie die Lüfter Haltearm zum
Verriegelungsbügel des Netzteils gelangen.
3
Entfernen Sie die beiden Befestigungsschrauben (C, D) von der
Sperrbügel und legen Sie sie beiseite.
o
3 à
Advertisement
Table of Contents

Related Manuals for SonicWALL SuperMassive 9800 AC


Summary of Contents for SonicWALL SuperMassive 9800 AC
- Page 1 Auto-throttling fans for system temperature control module. Pour installer un nouveau SuperMassive 9800 AC Power Supply : Carefully and firmly push the power supply module until it is Insérez le nouveau module d'alimentation dans le logement vide dans le sens noté...
- Page 2 This AC power supply module is for use only with SonicWall appliances indicated below. Use wurde, und an die Stromquelle. of this module with a SonicWall appliance that is not approved will void the warranty for that appliance. This module is provided as a replacement power supply, and is provided on an “as Überprüfen Sie, ob die Betriebs-LED jetzt blau leuchtet.
Need help?
Do you have a question about the SuperMassive 9800 AC and is the answer not in the manual?
Questions and answers