
Related Manuals for Signature Kitchen Suite SKSCV3002S


Summary of Contents for Signature Kitchen Suite SKSCV3002S
- Page 1 OWNER’S MANUAL ELECTRIC CONVECTION BUILT-IN OVEN SKSCV3002S www.signaturekitchensuite.com Copyright © 2020 - 2021 Signature Kitchen Suite. All Rights Reserved. MFL51224534_02...
-
Page 2: Table Of Contents
Wi-Fi Gourmet Steam Guide Remote Start Sous Vide Brightness Display SMART FUNCTIONS Convection Auto Conversion Language Selection SIGNATURE KITCHEN SUITE Application Volume Smart Diagnosis™ Feature Preheat Alarm Light FCC Notice Temperature Adjustment FCC RF Radiation Exposure Statement Temperature Units MAINTENANCE Smart Diagnosis™... -
Page 3: Important Safety Instructions
IMPORTANT SAFETY INSTRUCTIONS IMPORTANT SAFETY INSTRUCTIONS Read and follow all instructions when using the oven to prevent the risk of fire, electric shock, personal injury, or damage. This guide does not cover all possible conditions that may occur. Always contact your service agent or manufacturer about problems that you do not understand. - Page 4 IMPORTANT SAFETY INSTRUCTIONS IMPORTANT SAFETY INSTRUCTIONS (UPPER OVEN) When using electrical appliances basic safety precautions should be followed, including the following: WARNING • To reduce the risk of burns, electric shock, fire, injury to persons or exposure to excessive microwave energy when using the upper oven, follow basic safety precautions, including the following.
- Page 5 IMPORTANT SAFETY INSTRUCTIONS WARNING • Do not cover or block any openings on the appliance. • Do not run the oven while it is empty. • Install or locate this appliance only in accordance with the provided installation instructions. • This appliance should be serviced only by qualified service personnel. Contact the nearest authorized service facility for examination, repair, or adjustment.
- Page 6 IMPORTANT SAFETY INSTRUCTIONS WARNING • The oven should be cleaned regularly and any food deposits should be removed. - Failure to maintain the oven in a clean condition could lead to deterioration of the surface that could adversely affect the life of the appliance and possibly result in a hazardous situation.
- Page 7 IMPORTANT SAFETY INSTRUCTIONS PRECAUTIONS TO AVOID POSSIBLE EXPOSURE TO EXCESSIVE MICROWAVE ENERGY • Do not attempt to operate this oven with the door open since open-door operation can result in harmful exposure to microwave energy. It is important not to defeat or tamper with the safety interlocks.
- Page 8 IMPORTANT SAFETY INSTRUCTIONS • Never attempt to dry a pet in the oven. • Never use your appliance for warming or heating the room. • Always use pot holders or oven mitts when removing food from the oven. Cookware will be hot.
- Page 9 IMPORTANT SAFETY INSTRUCTIONS WARNING Before replacing the oven light bulb, switch off the electrical power to the oven at the main fuse or circuit breaker panel. Failure to do so can result in severe personal injury, death, or electric shock. WARNING •...
- Page 10 10 IMPORTANT SAFETY INSTRUCTIONS SAFETY DURING USE • Do not touch the oven racks while they are hot. • Always place oven racks in the desired location while the oven is cool. If a rack must be moved while the oven is hot, do not let the pot holder contact the hot heating element in the oven.
- Page 11 IMPORTANT SAFETY INSTRUCTIONS • If there is a fire in the oven during self-clean, turn the oven off and wait for the fire to go out. Do not force the door open. Introduction of fresh air at self-clean temperatures may lead to a burst of flame from the oven.
-
Page 12: Product Overview
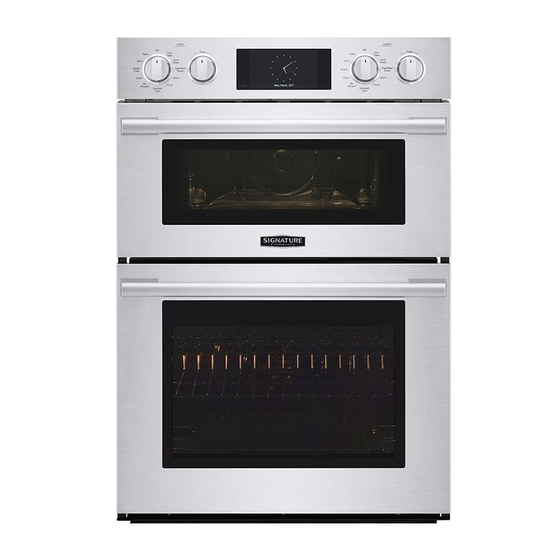
12 PRODUCT OVERVIEW PRODUCT OVERVIEW Parts Make sure to understand the name and function of each part. Control panel Rating label, model and serial number plate Steam feeder tank Broiler pan & grid Spacer (2) - One on each side Standard racks Gasket Gliding racks (2) -
Page 13: Accessories
Installation manual NOTE • Contact SIGNATURE KITCHEN SUITE Customer Service if any accessories are missing. • For your safety and for extended product life, only use authorized components. • The manufacturer is not responsible for product malfunction or accidents caused by the use of separately purchased, unauthorized components. -
Page 14: Operation
14 OPERATION OPERATION Control Panel Overview 1 Upper Oven Mode Knob 4 LCD Touchscreen for Oven 2 Upper Temp Knob 5 Lower Oven Mode Knob 3 LCD Display On/Off 6 Lower Temp Knob Display Icons *Icons appear in display when activated. Lamp Icon (Upper Oven) Auto Conversion Icon Touch to turn light on/off... -
Page 15: Getting Started
OPERATION Getting Started Changing Oven Settings Settings After turning on the range for the first time, adjust the settings to suit your preferences. To adjust settings after the initial setup, touch the Touch POWER on the LCD display. display to open the Main screen. Touch Settings at the bottom center of the Main screen. -
Page 16: Lockout
16 OPERATION Lockout Clock Themes The Lockout feature automatically prevents most There are six different clock themes available, oven controls from being turned on. It does not including several analog and digital clocks. disable the clock, timer and the interior oven light. Selecting a Clock Theme Touch Settings at the center bottom of the Main Lock... -
Page 17: Wi-Fi
OPERATION Wi-Fi Display Connect the appliance to a home Wi-Fi network to Set the length of time before the display sleeps. use Remote Start and other smart functions. See the There are three options you can select. Smart Functions section for more details. •... -
Page 18: Language Selection
18 OPERATION Language Selection Temperature Adjustment Set the display language to English, Spanish, or Your new oven may cook differently than the one French. it replaced. Use your new oven for a few weeks to become more familiar with it before changing the temperature settings. -
Page 19: Smart Diagnosis
OPERATION Smart Diagnosis™ Factory Data Reset Smart Diagnosis™ can be run through a smartphone This function returns all settings to the factory application or by calling for support. Place your defaults. smartphone's mouthpiece near the top left corner of Touch Settings at the center bottom of the Main the screen. -
Page 20: Timer
20 OPERATION Timer Adjusting or Cancelling the Timer Touch the remaining time next to the clock icon The oven timers don't affect oven operation or cooking time. Use them as extra kitchen timers. Once in the display. the time runs out, the oven chimes and "Timer 1 or 2 To cancel the timer, touch Reset ( ) in the finished"... -
Page 21: Using The Upper Oven
OPERATION Using the Upper Oven NOTE • Do not rinse containers by placing them in water Before Using the Upper Oven immediately after cooking. This may cause breakage. Also, always allow the turntable to NOTE cool before removing it from the oven. •... -
Page 22: Microwave Cooking Tips
22 OPERATION Microwave Cooking Tips Bone and Fat Content of Food Bones conduct heat and fat cooks more quickly than Keeping an Eye on Things meat. Care must be taken when cooking bony or fatty Always watch your food while it cooks. The light cuts of meat in order to prevent unevenly cooked or inside the upper oven turns on automatically when overcooked meat. -
Page 23: Microwave Power Levels
OPERATION Microwave Power Levels Shielding Strips of aluminium foil (which block microwaves) This upper oven is equipped with 10 power levels to can be placed over the corners or edges of square give you maximum flexibility and control over cooking. and rectangular foods to prevent those portions from See the table for suggested power levels for various overcooking. -
Page 24: Defrost
24 OPERATION Defrost Cooking at High Power Level Turn the Oven Mode knob to select the The oven has 4 preset defrost cycles. The defrost Microwave mode. feature provides the best defrosting method for frozen foods. The Defrost Table shows the suggested defrost Touch numbers to set the cook time. - Page 25 OPERATION Weight Conversion Table Defrost Table Most food weights are given in pounds and ounces. Category Food to be Defrosted If using pounds, food weights must be entered into Auto Defrost in pounds and tenths of pounds Meat Beef (decimals). 0.1 - 6.0 lbs Ground beef, round steak, stew Use the following table if necessary to convert food...
-
Page 26: Sensor Operation
26 OPERATION Sensor Operation Defrosting Tips • When using Defrost, the weight to be entered is Sensor Cook reheats favorite foods without selecting the net weight in pounds and tenths of pounds (the cooking times and power levels. weight of the food minus the container). The oven automatically determines required cooking •... -
Page 27: Using Sensor Cook
OPERATION Using Sensor Cook To Stop Cooking Touch Stop in the display and select Yes, or turn Use Sensor Cook to heat common microwave- prepared foods without needing to program times and the Mode knob to the OFF position. power levels. Sensor Cook has preset programs for 9 food categories. -
Page 28: Convection Bake
28 OPERATION Convection Bake Broil During Convection Bake, a heating element is used This feature will allow you to brown and crisp food to raise the temperature of the air inside the oven. quickly. There is no need for preheating. Convection cooking temperature ranges from 100 °F to 450 °F. -
Page 29: Speed Cook
OPERATION Speed Cook Changing the Speed Cook Settings Touch Edit in the display to bring up the Cook This feature uses power from a halogen light, heaters, and microwaves simultaneously to allow quick Settings screen. cooking. Adjust the settings. NOTE Touch Start. - Page 30 30 OPERATION Auto Cook Table Category Weight Cookware Food Temp. Instructions 1. Bacon Microwave- Refrigerated Place bacon slices on a microwave rack for best results. (regular safe bacon Use a plate lined with paper towels if rack is not available. sliced) slices rack or plate...
- Page 31 OPERATION Category Weight Cookware Food Temp. Instructions 15. Hamburger 2, 3-4, 5-6 Metal tray Refrigerated Turn food over at the beep. (1/2″ thick) patties 16. Lamb chops 1, 2, 3-4 Metal tray Refrigerated Brush with oil and season with salt and pepper. (1/2″...
- Page 32 32 OPERATION Category Weight Cookware Food Temp. Instructions 23. Rice ½, 1 cup Deep and large Room Ingredients microwave- ½ cup 1 cup safe bowl on Rice ½ cup (96 g) 1 cup (192 g) the glass tray Water 1 cup (230 g) 2 cups (460 g) Salt Optional...
-
Page 33: Soften
OPERATION Soften To Stop Cooking Touch Stop in the display and select Yes, or turn The oven uses low power to soften foods such as butter, cream cheese, frosting, and ice cream. the Mode knob to the OFF position. See the following table. Setting the Soften Function Turn the Oven Mode knob to select the Soften/ Melt mode. -
Page 34: Melt
34 OPERATION Melt To Stop Cooking Touch Stop in the display and select Yes, or turn The oven uses low power to melt foods such as butter, caramel, cheese, chocolate, and the Mode knob to the OFF position. marshmallows. See the following table. Setting the Melt Function Turn the Oven Mode knob to select the Soften/ Melt mode. -
Page 35: Warm
OPERATION Warm Popcorn Setting the Popcorn Function The WARM function maintains an oven temperature of less than 230°F. This function should not be used to reheat Turn the Oven Mode knob to select the Popcorn cold food. The Warm function keeps cooked food warm mode. -
Page 36: Using The Lower Oven
36 OPERATION Using the Lower Oven Removing and Replacing Standard Oven Racks Before Using the Oven The racks have a turned-up back edge that prevents them from being pulled completely out of the oven NOTE cavity. • The temperature registered by an oven thermometer may differ from the actual set CAUTION oven temperature. -
Page 37: Rack And Pan Placement
OPERATION Rack and Pan Placement Using Gliding Oven Racks If cooking on two racks: The gliding racks slide in and out on a frame. This keeps heavy cookware level and prevents it from Place standard oven racks in positions 2 and 4. sliding forward when the rack is completely extended. -
Page 38: Bake
38 OPERATION Bake Baking Tips Follow the recipe or convection food directions for Use BAKE to prepare foods such as pastries, breads baking temperature, time, and rack position. Baking and casseroles. The oven can be programmed to time and temperature will vary depending on the bake at any temperature from 170°F (80°C) to 550°F ingredients, size, and shape of the baking pan used. -
Page 39: Convection Modes
OPERATION Convection Modes Changing the Cook Settings Touch Edit in the display to bring up the Cook Convection Bake and Convection Roast use a fan to circulate heat evenly within the oven. This improves Settings screen. heat distribution and allows for even cooking and Adjust the settings using the number pad or excellent results whether cooking on one rack or scroll function. -
Page 40: Rapidheat Roast
40 OPERATION Tips for Convection Roasting NOTE Use a broiler pan and grid when preparing meats for • The recommended cook time is 55~65 minutes Convection roast, RapidHeat Roast and Broil. The for the oven for a whole chicken weighing 3.3 lb. broiler pan catches grease spills and the grid helps •... -
Page 41: Broil
OPERATION Broil Setting the BROIL Mode Place food on the broiler pan grid. Broiling uses an intense, radiant heat to cook food. Both the inner and outer broil elements heat during full broiling. Only the inner broil element heats during Turn the Oven Mode knob to select the Broil center broiling. -
Page 42: Recommended Broiling Guide
42 OPERATION Recommended Broiling Guide Smoking Due to the intense heat associated with broiling, it The size, weight, thickness, starting temperature, and is normal to experience smoke during the cooking your preference of doneness will affect broiling times. process. This smoke is a natural by-product of The following guide is based on meats at refrigerator searing and should not cause you to worry. -
Page 43: Well Done
OPERATION Broiling Chart First Side Second Quantity and/ or Rack Food Time Side Time Comments Thickness Position (min.) (min.) Ground Beef 1 lb. (4 patties) Space evenly. Up to 9 patties may 1/2 to 3/4” thick be broiled at once. Beef Steaks Steaks less than 1”... -
Page 44: Warm
44 OPERATION Warm Broiling Tips Beef The WARM mode maintains an oven temperature of 200°F (93°C) or less. Use the Warm mode to keep • Steaks and chops should always be allowed to rest cooked food at serving temperature for up to three for 5 minutes before being cut into and eaten. -
Page 45: Proof
OPERATION Proof Probe The Proof feature maintains a warm environment for The probe accurately measures the internal rising yeast-leavened products before baking. temperature of meat, poultry and casseroles. It should not be used during the broiling, sous vide, steam NOTE maintenance, rapid heat roast +, self cleaning, speed cleaning, warming or proofing mode. - Page 46 46 OPERATION Using the Meat Probe Feature Changing the Probe Temperature while Cooking Insert the probe into the food. Touch Edit in the display to bring up the Cook Settings screen. Connect the probe to the jack in the oven, “Probe Adjust the settings as desired.
-
Page 47: Well Done
OPERATION Recommended Probe Temperature Chart Target Internal Category Examples of Food Desired Doneness Temp. Meatloaf 160 °F (71 °C) Ground Meat & Meat Mixtures Meatballs 165 °F (74 °C) Rare : 120 °F (49 °C) Medium rare : 125 °F (52 °C) Fresh Beef, Veal, Roasts 145 °F (63 °C) -
Page 48: My Recipes
48 OPERATION My Recipes Editing My Recipes • The Edit function cannot add or remove cooking For frequently used cooking menus, you can combine stages to a recipe. Only the oven temperature, up to three different temperatures and cooking modes probe temperature and cook time can be changed. -
Page 49: Auto Cook Guide
OPERATION Auto Cook Guide NOTE • When cooking thin cuts of meat, insert the probe • Preheat oven first for most items. into the thickest part of the meat. If the probe is • Preheat for 5 minutes when broiling. inserted incorrectly, the oven could turn off too •... - Page 50 50 OPERATION Shelf Cooking time in Category Menu Accessories/Cookware Position min. Directly on rack 10~20 Frozen Thin Crust On pizza pan 10~20 On pizza stone 10~20 Directly on rack 10~20 Pizza Frozen Rising Crust On pizza pan 10~20 On pizza stone 10~20 Directly on rack 10~20...
-
Page 51: Steam Function
OPERATION Steam Function CAUTION Steam cooking uses the moist heat of steam to cook • Make sure the tank cover and fill lid are closed food. This is an ideal cooking method for delicate before putting in the oven. food items such as seafood, which can lose nutrients •... -
Page 52: Gourmet Steam Guide
52 OPERATION Once Steam-Combi cooking is started, an indicator Gourmet Steam on the display shows the status of the steam function. Get great results using preset steam cooking recipes Make sure the steam feeder tank is filled with water that include recommendations for accessories and before starting the Steam-Combi mode. -
Page 53: Sous Vide
OPERATION Sous Vide Changing the Sous Vide Settings Touch Edit in the display to bring up the cook Sous vide cooking uses steam to cook foods “low and slow.” Use it to cook meat, fish, seafood, poultry settings screen. or vegetables. Food must be vacuum packced in Adjust the settings as desired. -
Page 54: Smart Functions
Push Alert Turn on the push alerts to receive updates on the status of the appliance. The alerts are sent whether or not the SIGNATURE KITCHEN SUITE app is running. Timer You can set the timer from the app. -
Page 55: Operation
Internet service provider or refer to your wireless router manual. Preparing the Oven for a Remote Start • SIGNATURE KITCHEN SUITE is not Open the oven door to make sure the oven is responsible for any network connection empty and ready for preheating. Do not place problems or any faults, malfunctions, or errors food in the oven. -
Page 56: Signature Kitchen Suite Application
SIGNATURE KITCHEN SUITE application. • Launch the SIGNATURE KITCHEN SUITE application and select the Smart Diagnosis feature in the menu. Follow the instructions for audible diagnosis provided in the SIGNATURE KITCHEN SUITE application. -
Page 57: Fcc Notice
This SIGNATURE KITCHEN SUITE will also provide open equipment generates, uses, and can radiate radio source code to you on CD-ROM for a charge covering... -
Page 58: Maintenance
58 MAINTENANCE MAINTENANCE Cleaning the Exterior Use a soft cloth sprayed with glass cleaner. Caring for the Upper Oven Apply the glass cleaner to the soft cloth; do not spray directly on the oven. To make sure the microwave oven looks good and NOTE works well for a long time, maintain it properly. -
Page 59: Caring For The Lower Oven
MAINTENANCE Caring for the Lower Oven Before Starting Self Clean • Remove the water tank, oven racks, broiler pan, Self Clean broiler grid, all cookware, aluminum foil or any other material from the oven. The Self Clean cycle uses extremely hot temperatures Leaving items in the oven will cause permanent to clean the oven cavity. - Page 60 60 MAINTENANCE Setting Self Clean During Self Clean The Self- Clean function has cycle times of 3, 4, or 5 • The self clean cycle uses extremely hot hours. temperatures to clean the oven cavity. While running the Self Clean cycle, you may notice smoking or an odor.
-
Page 61: Steam Feeder Tank
MAINTENANCE Steam Feeder Tank After 1 hour 43 minutes of descaling, a popup will appear in the display. Following the instructions, The steam feeder tank is used during the steam cooking drain the tank and fill it with clean water. functions. -
Page 62: Speedclean
SpeedClean™ feature takes advantage of • Makes for a better Self Clean experience SIGNATURE KITCHEN SUITE'S new enamel to help − Delays the need for a Self Clean cycle lift soils without harsh chemicals, and it runs using ONLY WATER for just 10 minutes in low temperatures −... - Page 63 MAINTENANCE Cleaning Tips SpeedClean™ Instruction Guide • Allow the oven to cool to room temperature before Remove oven racks and accessories from the using the SpeedClean™ cycle. oven. • A plastic spatula can be used as a scraper to Scrape off and remove any burnt-on debris with scrape off any chunks or debris before and during a plastic scraper.
-
Page 64: Cleaning The Exterior
64 MAINTENANCE Cleaning the Exterior Clean the oven cavity immediately after the SpeedClean™ cycle by scrubbing with a wet, Painted Surfaces non-scratch scouring sponge or pad. (The For general cleaning, use a cloth with hot soapy scouring side will not scratch the finish.) Some water. - Page 65 MAINTENANCE Oven Door Broiler Pan and Grid • Use soapy water to thoroughly clean the oven door. Rinse well. DO NOT immerse the door in water. • You may use a glass cleaner on the outside glass of the oven door. DO NOT spray water or glass cleaner on the door vents.
-
Page 66: Changing The Oven Light
66 MAINTENANCE Changing the Oven Light Removing and Replacing the Oven Door The oven light is a standard 25-watt halogen bulb. CAUTION WARNING • The door is very heavy. Be careful when • Make sure that the oven and bulb are cool. removing and lifting the door. -
Page 67: Door Care Instructions
MAINTENANCE Door Care Instructions Replacing the Door Firmly grasp both sides of the door at the top. Most oven doors contain glass that can break. CAUTION With the door at the same angle as the removal position, seat the indentation of the hinge cams •... -
Page 68: Troubleshooting
68 TROUBLESHOOTING TROUBLESHOOTING Can my upper oven be damaged if food is cooked for too long? Like any other cooking appliance, it is possible to FAQs overcook food to the point that the food creates smoke and even possibly fire, and damage to the My new oven doesn’t cook like my old one. - Page 69 TROUBLESHOOTING Can I pop popcorn in my upper oven? Can I use aluminum foil to catch drippings in the How do I get the best results? lower oven cavity? Yes. Pop packaged microwave popcorn following Never use aluminum foil to line the bottom or sides manufacturer’s guidelines or use the preprogrammed of the oven.
- Page 70 70 TROUBLESHOOTING My oven is still dirty after running the Is it safe for my convection fan, broil burner or SpeedClean™ cycle. What else should I do? heater element to get wet during SpeedClean™? The SpeedClean™ cycle only helps to loosen light Yes.
-
Page 71: Before Calling For Service
TROUBLESHOOTING Before Calling for Service Before you call for service, review this list. It may save you time and expense. The list includes common occurrences that are not the result of defective workmanship or materials in this appliance. Symptoms Possible Causes / Solutions •... - Page 72 72 TROUBLESHOOTING Symptoms Possible Causes / Solutions • Make sure cord is plugged correctly into outlet. Check circuit breakers. Appliance does not • Service wiring is not complete. Contact your electrician for assistance. operate • Power outage. Check house lights to be sure. Call your local electric company for service.
- Page 73 TROUBLESHOOTING Symptoms Possible Causes / Solutions • The oven temperature is too high to set a Self Clean operation. - Allow the oven to cool and reset the controls. • Oven controls improperly set. Oven will not Self Clean - See the Self Clean section. •...
- Page 74 74 TROUBLESHOOTING Symptoms Possible Causes / Solutions Moisture collects on • This is normal when cooking foods high in moisture. oven window or steam • Excessive moisture was used when cleaning the window. comes from oven vent • Make sure to slide the tank into the slot until it clicks into place. Oven will not Steam •...
-
Page 75: Warranty
WARRANTY WARRANTY (USA) SIGNATURE KITCHEN SUITE will repair or replace your product, at SIGNATURE KITCHEN SUITE'S option, if it proves to be defective in material or workmanship under normal use, during the warranty period set forth below, effective from the date of original consumer purchase of the product. This limited warranty is good only to the original purchaser of the product and effective only when used in the U.S.A. - Page 76 76 MEMO MEMO...
- Page 77 MANUAL DEL PROPIETARIO HORNO DE CONVECCIÓN ELÉCTRICO EMPOTRADO SKSCV3002S www.signaturekitchensuite.com Copyright © 2020 - 2021 Signature Kitchen Suite. Todos los Derechos Reservados. MFL51224534_02...
- Page 78 Wi-Fi Cocción al vacío (Sous Vide) Inicio remoto Brillo FUNCIONES INTELIGENTES Pantalla Aplicación SIGNATURE KITCHEN SUITE Conversión automática a convección Función Smart Diagnosis™ Selección de idioma Aviso de la FCC Volumen Declaración sobre exposición a la radiación de RF de...
- Page 79 INSTRUCCIONES IMPORTANTES DE SEGURIDAD INSTRUCCIONES IMPORTANTES DE SEGURIDAD Lea y siga todas las instrucciones cuando utilice la cocina para evitar riesgos de incendios, descargas eléctricas, lesiones personales o daños. Esta guía no incluye todas las situaciones posibles que podrían ocurrir. Siempre comuníquese con su agente de servicio técnico o con el fabricante cuando haya problemas que no comprenda.
- Page 80 INSTRUCCIONES IMPORTANTES DE SEGURIDAD INSTRUCCIONES IMPORTANTES DE SEGURIDAD (HORNO SUPERIOR) Al utilizar aparatos eléctricos, deben seguirse precauciones de seguridad básicas, incluidas las siguientes: ADVERTENCIA • Para reducir el riesgo de quemaduras, descargas eléctricas, incendios, lesiones personales, o la exposición a una dosis excesiva de energía de microondas al usar el horno superior, siga las precauciones de seguridad básicas, incluidas las siguientes.
- Page 81 INSTRUCCIONES IMPORTANTES DE SEGURIDAD ADVERTENCIA • No cubra ni bloquee ninguna abertura del artefacto. • No encienda el horno mientras esté vacío. • Instale o ubique este electrodoméstico solo en conformidad con las instrucciones de instalación proporcionadas. • El servicio técnico de este artefacto solo debe ser realizado por personal calificado. Para que lo revisen, reparen o ajusten, comuníquese con el centro de servicio autorizado más cercano.
- Page 82 INSTRUCCIONES IMPORTANTES DE SEGURIDAD ADVERTENCIA • El horno debe limpiarse regularmente y debe eliminarse cualquier resto de alimentos. - Si el horno no se mantiene bien limpio, su superficie podría deteriorarse, lo que podría afectar negativamente la vida útil del electrodoméstico y provocar una situación peligrosa. •...
- Page 83 INSTRUCCIONES IMPORTANTES DE SEGURIDAD PRECAUCIONES PARA EVITAR LA POSIBLE EXPOSICIÓN A EXCESIVA ENERGÍA DE MICROONDAS • No intente operar este horno con la puerta abierta ya que, de hacerlo, puede producirse una exposición dañina a la energía de microondas. Es importante no vencer o alterar las trabas de seguridad.
- Page 84 INSTRUCCIONES IMPORTANTES DE SEGURIDAD • No permita que nadie se suba, se pare o se cuelgue de la puerta, del cajón de almacenamiento ni de la placa de cocción. Podrían causar daños a la cocina e incluso volcarla, lo que generaría lesiones personales graves.
- Page 85 INSTRUCCIONES IMPORTANTES DE SEGURIDAD SEGURIDAD ELÉCTRICA PRECAUCIÓN Asegúrese de retirar todos los materiales del embalaje antes de la puesta en funcionamiento. Mantenga el plástico, telas, papel y otros materiales inflamables lejos de las partes del electrodoméstico que se podrían calentar. •...
- Page 86 10 INSTRUCCIONES IMPORTANTES DE SEGURIDAD SUGERENCIAS PARA AHORRAR ENERGÍA • Cocinar en varios estantes ahorra tiempo y energía. Siempre que sea posible, cocine alimentos que requieran la misma temperatura de cocción en un único horno. • Para un desempeño óptimo y ahorro de energía, siga las pautas colocar correctamente los estantes y las bandejas.
- Page 87 INSTRUCCIONES IMPORTANTES DE SEGURIDAD SEGURIDAD AL LIMPIAR • Abra una ventana y encienda un ventilador o campana extractora antes de realizar la autolimpieza. • Si el horno está muy sucio con aceite, realice la autolimpieza antes de volver a utilizarlo. El aceite podría causar un incendio.
- Page 88 12 DESCRIPCIÓN GENERAL DEL PRODUCTO DESCRIPCIÓN GENERAL DEL PRODUCTO Partes Asegúrese de entender el nombre y la función de cada parte. Panel de control Etiqueta de calificación, placa de número de serie y modelo Tanque del alimentador de vapor Asadera y rejilla Separador (2) - Uno en cada lado Estantes estándar...
- Page 89 Guía de instalación NOTA • Póngase en contacto con el Servicio de Atención al Cliente de SIGNATURE KITCHEN SUITE si le falta algún accesorio. • Para su seguridad y para extender la vida útil del producto, solo debe utilizar componentes autorizados.
- Page 90 14 FUNCIONAMIENTO FUNCIONAMIENTO Descripción general del panel de control 1 Perilla de modo Oven (horno superior) 4 Pantalla táctil LCD para horno 2 Perilla de temperatura superior 5 Perilla de modo Lower Oven (horno inferior) 3 Pantalla LCD Encendida/Apagada 6 Perilla de temperatura inferior Íconos de visualización Los íconos aparecen en la pantalla cuando están activados.
- Page 91 FUNCIONAMIENTO Guía de inicio Después del primer encendido, ajuste la configuración para adaptarla a sus preferencias. Presione POWER (ENCENDER) en la pantalla LCD. Después de la animación de inicio, seleccione el idioma deseado y presione NEXT (SIGUIENTE). Deslícese por los campos hacia arriba y abajo para establecer la fecha correcta y presione NEXT Ubicación de las configuraciones (SIGUIENTE).
- Page 92 16 FUNCIONAMIENTO Bloqueo Aspecto del reloj La función bloqueo evita que se activen automáticamente la Hay disponibles seis aspectos del reloj diferentes, incluidos mayoría de los controles del horno. No inhabilita el reloj, el varios relojes análogos y digitales. temporizador ni la luz interior del horno. Seleccionar un aspecto para el reloj Presione Settings (Configuración) en la parte inferior Bloqueo...
- Page 93 FUNCIONAMIENTO Wi-Fi Pantalla Conecte el artefacto a una red de Wi-Fi doméstica para utilizar Establezca la duración de tiempo antes de que la pantalla el Inicio remoto y otras funciones inteligentes. Diríjase a la entre en modo de suspensión. sección Funciones Inteligentes para más detalles. Puede seleccionar entre tres opciones.
- Page 94 18 FUNCIONAMIENTO Selección de idioma Ajuste de la temperatura Configure el idioma de la pantalla para inglés, español o El horno nuevo podría cocinar de manera diferente a su francés. horno anterior. Use el horno nuevo durante algunas semanas para familiarizarse con él antes de cambiar los ajustes de temperatura.
- Page 95 FUNCIONAMIENTO Smart Diagnosis™ Restablecimiento de los datos de fábrica Puede ejecutar el Smart Diagnosis™ desde una aplicación en su teléfono o llamando al Servicio Técnico. Coloque el Esta función regresará todas las configuraciones a los valores micrófono de su teléfono cerca de la esquina superior izquierda predeterminados de fábrica.
- Page 96 20 FUNCIONAMIENTO Temporizador Ajuste o cancelación del temporizador Presione el tiempo restante que aparece al lado del Los temporizadores del horno no afectan su funcionamiento ícono del reloj en la pantalla. ni el tiempo de cocción. Utilícelos como temporizadores de cocina extra.
- Page 97 FUNCIONAMIENTO Uso del Horno Superior NOTA • No enjuague los recipientes colocándolos en agua Antes de usar el Horno Superior inmediatamente después de la cocción. Podrían romperse. Además, siempre deje que la plataforma NOTA giratoria se enfríe antes de sacarla del horno. •...
- Page 98 22 FUNCIONAMIENTO Consejos de Cocina en Microondas Contenido de Grasa y Hueso en la Comida Los huesos conducen el calor y la grasa se cocina más rápido Vigilar la Cocción que la carne. Debe tenerse precaución cuando se utilizan Siempre mire la comida mientras la cocina. La luz del interior cortes de carne grasosos o con hueso para evitar que se del horno de superior se enciende automáticamente cuando cocinen de forma despareja o que se cocine de más la carne.
- Page 99 FUNCIONAMIENTO Niveles de Potencia de Microondas Protección de la Comida Pueden colocarse tiras de papel de aluminio (que bloquean las Este horno superior cuenta con 10 niveles de potencia para microondas) sobre las esquinas o los bordes de los alimentos brindarle máxima flexibilidad y control de la cocción.
- Page 100 24 FUNCIONAMIENTO Defrost Cocinar a Nivel de Potencia Alto Gire la perilla de modo Oven (Horno) hasta seleccionar El horno tiene 4 ciclos para descongelar predeterminados. el modo Microwave (Microondas). Esta función proporciona el mejor método para descongelar alimentos congelados. La Tabla de Descongelado muestra los Toque los números para configurar el tiempo de cocción.
- Page 101 FUNCIONAMIENTO Tabla de Descongelado Tabla de Conversión de Unidades de Peso. La mayoría de los pesos de los alimentos están expresados en Categoría Alimento a Descongelar libras y onzas. Si utiliza la libra como unidad de peso, el peso de los alimentos Carne Filete debe ingresarse en Descongelado Automático en libras y...
- Page 102 26 FUNCIONAMIENTO Funcionamiento del sensor Consejos para el descongelado • Cuando use la función Defrost, el peso que debe ingresar La función Cocción con sensor recalienta sus alimentos es el peso neto en libras y décimas de libras (el peso de la favoritos sin que tenga que seleccionar tiempos de cocción y comida menos el del recipiente).
- Page 103 FUNCIONAMIENTO Uso de la función Cocción con Sensor Cómo detener la cocción Presione Stop (Detener) en la pantalla y seleccione Use la Cocción con Sensor para calentar comidas comunes Yes (Sí) o gire la perilla de modo a la posición OFF preparadas en microondas sin necesidad de programar (APAGADO).
- Page 104 28 FUNCIONAMIENTO Horneado por Convección Broil (Asado) Durante el Horneado por Convección, se utiliza un quemador Esta función le permitirá dejar la comida dorada y crujiente para elevar la temperatura del aire dentro del horno. rápidamente. No es necesario precalentar. Las temperaturas de cocción por convección oscilan entre 100 °F y 450 °F.
- Page 105 FUNCIONAMIENTO Cocción Rápida Cómo cambiar la configuración de cocción rápida Presione Edit (Editar) en la pantalla para que aparezca Esta función usa simultáneamente la energía de una luz la pantalla Cook Settings (Configuración de cocción). halógena, los quemadores y las microondas para posibilitar una cocción rápida.
- Page 106 30 FUNCIONAMIENTO Tabla de cocción automática Batería de Temp. de los Categoría Peso Instrucciones Cocina Alimentos 1. Tocino Plato o estante Refrigerada Coloque las rebanadas de tocino en una parrilla de microondas (cortado para tocino apto para obtener mejores resultados. regular) rebanadas para microondas...
- Page 107 FUNCIONAMIENTO Batería de Temp. de los Categoría Peso Instrucciones Cocina Alimentos 14. Pan de ajo 1-2, 3-4, 5-6 Bandeja de Congelada Dé vuelta la comida cuando suene la alarma. congelado trozos metal 15. Hamburguesa 2, 3-4, 5-6 Bandeja de Refrigerada Dé...
- Page 108 32 FUNCIONAMIENTO Batería de Temp. de los Categoría Peso Instrucciones Cocina Alimentos 22. Filete de 1, 2 filetes Bandeja de Refrigerada Pincele con aceite y condimente con sal y pimienta. entrecot metal Dé vuelta la comida cuando suene la alarma. (1 pulgada de espesor, 14-15 oz)
- Page 109 FUNCIONAMIENTO Ablandar Cómo detener la cocción Presione Stop (Detener) en la pantalla y seleccione El horno utiliza poca potencia para ablandar alimentos como Yes (Sí) o gire la perilla de modo a la posición OFF mantequilla, queso crema, glaseado y helado. (APAGADO).
- Page 110 34 FUNCIONAMIENTO Derretir Cómo detener la cocción Presione Stop (Detener) en la pantalla y seleccione El horno utiliza poca potencia para derretir alimentos como Yes (Sí) o gire la perilla de modo a la posición OFF mantequilla, caramelo, queso, chocolate, y malvaviscos. (APAGADO).
- Page 111 FUNCIONAMIENTO Warm (Calentar) Palomitas de Maíz La función CALENTAR mantiene una temperatura del horno de Configuración de la función Palomitas de Maíz menos de 230 °F. Esta función no debe usarse para recalentar Gire la perilla de modo Oven (Horno) hasta seleccionar alimentos fríos.
- Page 112 36 FUNCIONAMIENTO Uso del Horno Inferior Extracción y colocación de los estantes estándar del horno Antes de usar el horno Los estantes tienen un borde trasero doblado hacia arriba que evita que se salgan por completo de la cavidad del horno. NOTA •...
- Page 113 FUNCIONAMIENTO Colocación de estantes y bandejas Uso de los estantes deslizantes del horno Si cocina en dos estantes: Las estantes deslizantes se deslizan dentro y fuera de un Coloque los estantes estándar del horno en las posiciones 2 y marco. Esto mantiene nivelados los recipientes pesados y evita que se deslicen cuando el estante está...
- Page 114 38 FUNCIONAMIENTO Hornear Sugerencias de horneado Siga la receta o las directivas de cocción de alimentos por Utilice BAKE (HORNEAR) para preparar alimentos como convección para establecer la temperatura, el tiempo de pasteles, panes y estofados. Es posible programar el horno horneado y la posición del estante.
- Page 115 FUNCIONAMIENTO Modos de convección Cambiar la configuración de cocción Presione Edit (Editar) en la pantalla para que aparezca la El horneado por convección y el rostizado por convección pantalla Cook Settings (Configuración de cocción). utilizan un ventilador para hacer circular el calor de manera pareja dentro del horno.
- Page 116 40 FUNCIONAMIENTO Sugerencias para rostizar por convección NOTA Use una asadera con rejilla al preparar carnes para rostizar • El tiempo de cocción recomendado es de 55~65 minutos por convección, rostizado con RapidHeat y para asar. La para el horno para un pollo entero con un peso de 3,3 lb. asadera recibe los derrames de grasa y la rejilla ayuda a evitar •...
- Page 117 FUNCIONAMIENTO Asar Configuración del modo BROIL (ASADO) Coloque los alimentos en la asadera con rejilla. La función de asar utiliza un calor intenso y radiante para cocinar los alimentos. Durante el asado completo se calientan los elementos asadores internos y externos. Durante el asado Gire la perilla de modo Oven (Horno) hasta seleccionar el central, solo se calienta el elemento asador interno.
- Page 118 42 FUNCIONAMIENTO Guía de recomendaciones para asar Humo Debido al calor intenso que se produce cuando se asa, es El tamaño, el peso, el espesor, la temperatura inicial y su normal que haya humo durante el proceso de cocción. Este preferencia de cocción afectarán el tiempo de asado.
- Page 119 FUNCIONAMIENTO Tabla de recomendaciones para asar Posición Tiempo Tiempo del Alimento Cantidad o espesor del primer segundo Comentarios estante lado (min.) lado (min.) Carne molida 450 g (1 lb) Espaciar de manera uniforme. Se pueden (4 hamburguesas) asar hasta 9 hamburguesas. 1/2 a 3/4"...
- Page 120 44 FUNCIONAMIENTO Calentar Consejos para asar Carne de vaca El modo WARM (CALENTAR) mantiene una temperatura del horno de 93 °C (200 °F) o menos. Utilice el modo Warm • Los bistecs y las chuletas siempre se deben dejar reposar (Calentar) para mantener los alimentos cocidos a temperatura durante cinco minutos antes de cortarlos y comerlos.
- Page 121 FUNCIONAMIENTO Leudar Sonda La función Proof (Leudar) mantiene el horno cálido para La sonda mide con precisión la temperatura interna de la favorecer el leudado de la masa con levadura antes del carne, las aves y los estofados. No se debe utilizar durante horneado.
- Page 122 46 FUNCIONAMIENTO Cómo utilizar la función Meat Probe (sonda para carne) Cómo cambiar la temperatura de la sonda durante la cocción Inserte la sonda en el alimento. Presione Edit (Editar) en la pantalla para que aparezca la pantalla Cook Settings (Configuración de cocción). Conecte la sonda al conector hembra del horno.
- Page 123 FUNCIONAMIENTO Cuadro de temperatura recomendada para la sonda Temperatura Categoría Ejemplos de alimentos Punto de cocción deseado interna objetivo Pastel de carne 71 °C (160 °F) Carne molida y mezclas de carne Albóndigas 74 °C (165 °F) Poco cocido: 49 °C (120 °F) Poco cocido a medio cocido: 52 °C (125 °F) Carne fresca de Alimentos rostizados...
- Page 124 48 FUNCIONAMIENTO Mis recetas Cómo editar mis recetas • La función Edit (Editar) no puede agregar o eliminar Para menús de cocción de uso frecuente, puede combinar fases de cocción a una receta. Solo se puede modificar hasta tres temperaturas y modos de cocción diferentes en una la temperatura del horno, la temperatura de la sonda y el tarjeta de recetas.
- Page 125 FUNCIONAMIENTO Guía del cocción automática NOTA • Cuando cocine cortes de carne delgados, inserte la • Precaliente el horno para la mayoría de los elementos. sonda en la parte más gruesa de la carne. Si la sonda • Precaliente por 5 minutos cuando tenga que asar. se inserta de forma incorrecta, el horno podría apagarse demasiado pronto.
- Page 126 50 FUNCIONAMIENTO Posición Tiempo de cocción Categoría Menú Accesorios/recipientes del estante en minutos Directamente sobre el estante 10~20 A la piedra congelada Sobre una bandeja para pizza 10~20 Sobre una piedra para pizza 10~20 Directamente sobre el estante 10~20 Pizza De molde congelada Sobre una bandeja para pizza 10~20...
- Page 127 FUNCIONAMIENTO Función de vapor PRECAUCIÓN La cocción al vapor utiliza el calor húmero del vapor para • Asegúrese de que la cubierta del tanque y la tapa de cocinar los alimentos. Este es un método de cocción ideal llenado estén cerradas antes de colocar el tanque en el para alimentos delicados como mariscos, que pueden perder horno.
- Page 128 52 FUNCIONAMIENTO Una vez que se inicia la función Steam-Combi, un indicador en Cocción al vapor al estilo gourmet la pantalla muestra el estado de la función de vapor. Obtenga excelentes resultados utilizando las recetas Asegúrese de que el tanque del alimentador de vapor esté de cocción al vapor preconfiguradas, que incluyen lleno de agua antes de iniciar el modo Steam-Combi.
- Page 129 FUNCIONAMIENTO Cocción al vacío (Sous Vide) Cómo cambiar las configuraciones de cocción al vacío Presione Edit (Editar) en la pantalla para que aparezca la La cocción al vacío utiliza vapor para cocinar alimentos de pantalla Cook Settings (Configuración de cocción). modo "lento y suave".
- Page 130 KITCHEN SUITE su publicación. La aplicación está sujeta a cambios, con fines de mejorar el producto, sin previo aviso a los La aplicación SIGNATURE KITCHEN SUITE le permite usuarios. comunicarse con el electrodoméstico usando un teléfono • Esta característica solo está disponible en algunos inteligente.
- Page 131 • Desconecte la sonda si se encuentra instalada. Instalación de la aplicación SIGNATURE KITCHEN SUITE Busque la aplicación SIGNATURE KITCHEN SUITE en la tienda Google Play o App Store desde su teléfono inteligente. Siga las instrucciones para descargar e instalar la aplicación.
- Page 132 NFC o Wi-Fi pueden también transmitir datos a un teléfono inteligente usando la aplicación SIGNATURE KITCHEN • Inicie la aplicación SIGNATURE KITCHEN SUITE y SUITE. seleccione la función Smart Diagnosis en el menú. Siga las instrucciones para el diagnóstico audible provistas en la aplicación SIGNATURE KITCHEN SUITE.
- Page 133 15 y Parte 18 de las Reglas de la FCC. Estos límites están autor. diseñados para ofrecer una protección razonable contra SIGNATURE KITCHEN SUITE también le proporcionará interferencias dañinas en una instalación residencial. Este el código abierto en un CD-ROM por un costo que cubra equipo genera, usa y puede emitir energía de radiofrecuencia...
- Page 134 58 MANTENIMIENTO MANTENIMIENTO Limpieza del exterior Utilice un paño suave rociado con limpiador de vidrios. Cuidado del Horno Superior Aplique el limpiador de vidrios en el paño, no lo rocíe directamente sobre el horno. Para asegurarse de que su horno de microondas luzca NOTA y funcione bien durante mucho tiempo, debe mantenerlo correctamente.
- Page 135 MANTENIMIENTO Cuidado del Horno Inferior Antes de comenzar la autolimpieza • Retire del horno el tanque de agua, los estantes del horno, Self Clean (Autolimpieza) la asadera, la rejilla de la asadera, cualquier recipiente, el papel aluminio y cualquier otro material. El ciclo de autolimpieza usa temperaturas sumamente altas Dejar los elementos en el horno podría causar un daño para limpiar la cavidad del horno.
- Page 136 60 MANTENIMIENTO Configuración de la autolimpieza Durante la autolimpieza La función de autolimpieza tiene ciclos de 3, 4 o 5 horas. • El ciclo de autolimpieza usa temperaturas sumamente altas para limpiar la cavidad del horno. Mientras se ejecute el ciclo de autolimpieza, es posible que perciba humo u olor.
- Page 137 MANTENIMIENTO Tanque del alimentador de vapor Después de 1 hora y 43 minutos de descalcificación, aparecerá un mensaje emergente en la pantalla. El tanque del alimentador de vapor se utiliza durante las Siguiendo las instrucciones, desagote el tanque y llénelo funciones de cocción al vapor.
- Page 138 SpeedClean™ BENEFICIOS DE SpeedClean™ • Ayuda a aflojar la suciedad leve antes de la limpieza El nuevo horno de SIGNATURE KITCHEN SUITE con manual tecnología de esmalte SpeedClean™ proporciona dos opciones de limpieza para el interior del horno. La función •...
- Page 139 MANTENIMIENTO Consejos de limpieza Guía de Instrucciones de SpeedClean™ • Permita que el horno se enfríe a temperatura ambiente Quite los estantes y los accesorios del horno. antes de usar el ciclo SpeedClean™. • Se puede usar una espátula plástica como raspador para Raspe y retire los residuos quemados con un raspador quitar los restos o residuos grandes antes de la limpieza del plástico.
- Page 140 64 MANTENIMIENTO Limpieza del Exterior Limpie la cavidad del horno inmediatamente después del ciclo SpeedClean™. Para ello, friegue con una esponja o Superficies pintadas un paño de limpieza húmedos que no rayen. El lado para refregar no rayará el acabado). Se puede derramar un Para la limpieza general, use un paño con agua jabonosa poco de agua en las ventilaciones de caliente.
- Page 141 MANTENIMIENTO Puerta del horno Asadera y rejilla • Use agua jabonosa para limpiar bien la puerta del horno. Enjuague bien. NO sumerja la puerta en agua. • Puede usar un limpiador para vidrios en la parte externa de la puerta del horno. NO rocíe agua ni limpiador para vidrios en las ventilaciones de la puerta.
- Page 142 66 MANTENIMIENTO Cómo cambiar la luz del horno Extracción y reemplazo de la puerta del horno La luz del horno es una bombilla halógena estándar de 25 vatios. PRECAUCIÓN ADVERTENCIA • La puerta es muy pesada. Tenga cuidado cuando quite y levante la puerta.
- Page 143 MANTENIMIENTO Instrucciones para el cuidado de la Cómo colocar la puerta puerta Tome firmemente ambos lados de la puerta desde la parte superior. La mayoría de las puertas de hornos contienen un vidrio que puede romperse. Con la puerta en el mismo ángulo que la posición de remoción, apoye la hendidura de los brazos de las PRECAUCIÓN bisagras en el borde inferior de las ranuras de las...
- Page 144 68 SOLUCIÓN DE PROBLEMAS SOLUCIÓN DE ¿Por qué se recomienda un tiempo de reposo una vez cumplido el tiempo de cocción por microondas? PROBLEMAS El tiempo de reposo permite que las comidas se sigan cocinando de manera pareja durante unos minutos después del ciclo de cocción en microondas.
- Page 145 SOLUCIÓN DE PROBLEMAS ¿Puedo hacer palomitas de maíz en el horno superior? ¿Puedo usar papel de aluminio para que recolecte las ¿Cómo obtengo los mejores resultados? gotas en la cavidad del horno inferior? Sí. Haga palomitas de maíz envasadas siguiendo las No utilice nunca papel de aluminio para revestir el fondo o instrucciones del fabricante o use la tecla predeterminada para los costados del horno.
- Page 146 70 SOLUCIÓN DE PROBLEMAS Mi cocina todavía está sucia después de ejecutar el ciclo ¿Es seguro que el ventilador de convección, el quemador SpeedClean™. ¿Qué más debo hacer? para asar o el elemento calentador se mojen durante la función SpeedClean™? El ciclo SpeedClean™...
- Page 147 SOLUCIÓN DE PROBLEMAS Antes de llamar al servicio técnico Antes de llamar para solicitar servicio, revise esta lista. Puede ahorrarle tiempo y gastos. La lista incluye sucesos comunes que no son consecuencia de problemas de fabricación ni de los materiales de este aparato. Síntomas Causas / soluciones posibles •...
- Page 148 72 SOLUCIÓN DE PROBLEMAS Síntomas Causas / soluciones posibles • Asegúrese de que el cable esté correctamente enchufado en el toma. Revise los disyuntores. • El cableado de servicio no está completo. Comuníquese con su electricista para solicitar El electrodoméstico no asistencia.
- Page 149 SOLUCIÓN DE PROBLEMAS Síntomas Causas / soluciones posibles • La temperatura del horno es muy alta para configurar la operación de Autolimpieza. - Espere que la cocina se enfríe y restablezca los controles. • Los controles del horno están mal configurados. El horno no se limpia automáticamente - Consulte la sección Autolimpieza.
- Page 150 74 SOLUCIÓN DE PROBLEMAS Síntomas Causas / soluciones posibles Se acumula humedad en • Es normal cuando se cocinan alimentos con gran contenido de humedad el visor del horno o sale vapor de la ventilación del • Se usó demasiada humedad cuando se limpió el visor. horno •...
- Page 151 GARANTÍA (EE. UU.) SIGNATURE KITCHEN SUITE reparará o reemplazará su producto, según criterio de SIGNATURE KITCHEN SUITE, si se comprueba que presenta algún defecto en el material o la mano de obra en condiciones normales de uso, durante el período de garantía establecido más abajo, vigente desde la fecha de compra original del producto.
- Page 152 76 MEMO MEMO...
- Page 153 MEMO MEMO...
- Page 154 78 MEMO MEMO...
- Page 155 MEMO MEMO...
- Page 156 Customer Information Center For inquires or comments, call: 1-855-790-6655 USA Printed in Korea...
Need help?
Do you have a question about the SKSCV3002S and is the answer not in the manual?
Questions and answers