
Subscribe to Our Youtube Channel
Related Manuals for Donaldson Torit DCE WSO Flex


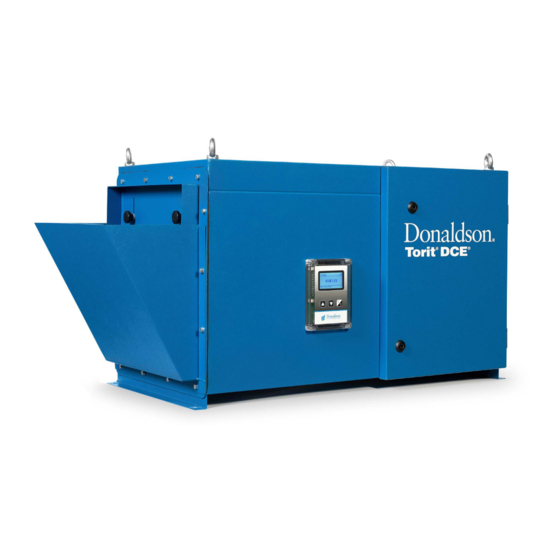
Summary of Contents for Donaldson Torit DCE WSO Flex
- Page 1 INSTALLATION, OPERATION AND MAINTENANCE MANUAL WSO Flex Mist Collectors DOC-AM04506-01 REV 03 0520 MASTER LANGUAGE - ENGLISH...
-
Page 2: Table Of Contents
Installation, Operation and Maintenance manual WSO Flex TABLE OF CONTENT SAFETY RECOMMENDATIONS ....................4 INTRODUCTION ........................... 6 Product information ......................6 Function ..........................6 PRIOR TO INSTALLATION ......................8 Location ..........................8 Required tools and equipment .................... 8 Delivery and inspection ....................... 8 INSTALLATION .......................... - Page 3 Installation, Operation and Maintenance manual WSO Flex LIST OF FIGURES Figure 1: Operational schematic .....................7 Figure 2: Enclosed machines ......................9 Figure 3: Wet surface grinder ......................10 Figure 4: Mounting options ......................10 Figure 5: WSO Flex ceiling mounting - option 1 ................12 Figure 6: WSO Flex ceiling mounting - option 2 ................13 Figure 7: Adjustable mounting stand ....................15 Figure 8: Vibration isolation ......................16...
-
Page 4: Safety Recommendations
Regular maintenance is important for a good performance of your mist collector. A prudent user of Donaldson equipment should consult and comply with all relevant Fire Codes and / or other appropriate codes when determining the location and operation of mist collector equipment. A hand operated supply disconnecting device is necessary for each incoming electrical supply in accordance with the Declaration of Conformity. - Page 5 Installation, Operation and Maintenance manual WSO Flex WSO Flex mist collectors cannot be placed or operated in potentially explosive atmospheres as classified by the Declaration of Conformity, unless stated otherwise on the nameplate of the unit and scope of delivery. The user of the mist collector is responsible to dispose of any contaminant generated by the process, according to local regulations.
-
Page 6: Introduction
The filter element is either a Dryflo or a Synteq XP element depending on the scope of the delivery. Technical and field support are available from your local Donaldson representative or distributor to answer your questions. -
Page 7: Figure 1: Operational Schematic
Installation, Operation and Maintenance manual WSO Flex Dirty air inlet Fan set Clean air chamber Optional HEPA Clean air outlet Second stage filter element (Dryflo or Synteq XP) First stage filter Figure 1: Operational schematic... -
Page 8: Prior To Installation
Compare the parts received against the packing list. If there is damage or parts missing, notify the delivery company and your local Donaldson representative. Parts shipped loose with the delivery (depending on your order): •... -
Page 9: Installation
Installation, Operation and Maintenance manual WSO Flex INSTALLATION Unloading and transport to location Before unloading, remove all packing and strapping. A crane or forklift is recommended for the unloading, transport and installation of the mist collector. Connect lifting sling to the lifting eye bolts with clevis pins and distribute loads equally. Use spreader bar if necessary. -
Page 10: Figure 3: Wet Surface Grinder
Installation, Operation and Maintenance manual WSO Flex Collection hood Figure 3: Wet surface grinder Examples of additional mounting options Ceiling mounting Teleduct mounting Adjustable mounting stand with impact separator and collection bottle (only for MMA) Figure 4: Mounting options... -
Page 11: Installation And Assembly
Installation, Operation and Maintenance manual WSO Flex Installation and assembly a. Ceiling mounting When ceiling mounting the WSO Flex mist collector, you must first calculate the total mist collector weight including material being collected, ductwork and any auxiliary equipment that is attached to the unit. Option 1 Remove the lifting eyebolts. -
Page 12: Figure 5: Wso Flex Ceiling Mounting - Option 1
Installation, Operation and Maintenance manual WSO Flex M10 / M12 threaded rod M10 / M12 nut M10 / M12 lock washer M10 / M12 washer Existing mounting hole 300 mm minimum clearance between ceiling and top of collector Figure 5: WSO Flex ceiling mounting - option 1... -
Page 13: Figure 6: Wso Flex Ceiling Mounting - Option 2
Installation, Operation and Maintenance manual WSO Flex Option 2 Remove the lifting eyebolts. 2. Apply MS polymer sealant around the existing mounting holes on the top of the unit. 3. Place an M10 / M12 washer on each eyebolt and thread into the unit until tight. 4. - Page 14 Installation, Operation and Maintenance manual WSO Flex b. Adjustable mounting stand (only for WSO Flex-MMA) An adjustable mounting stand is available for machines with no mounting surface and for machines, which need to be totally isolated from vibration. Use M10 anchor bolts to fasten the mounting stand to the floor. The anchor bolts should extend 40 mm above the floor.
-
Page 15: Figure 7: Adjustable Mounting Stand
Installation, Operation and Maintenance manual WSO Flex Washer Stand extension Washer Washer Locking bolt Stand base Figure 7: Adjustable mounting stand... -
Page 16: Figure 8: Vibration Isolation
Installation, Operation and Maintenance manual WSO Flex c. Vibration isolation These are standard delivered for all units. This option is a must for top mounted units that are installed on machines that are sensitive to vibration. When installing, make sure unit stays level. Figure 8: Vibration isolation... -
Page 17: Figure 9: Sealing Details
Installation, Operation and Maintenance manual WSO Flex d. Inlets Before installing inlet option and to ensure correct sealing, apply MS polymer sealant around every hole and along inside of hole pattern, as shown in figure. BOTTOM VIEW Figure 9: Sealing details... -
Page 18: Figure 10: Teleduct
Installation, Operation and Maintenance manual WSO Flex Teleduct Teleduct is the default option for the WSO Flex. Make sure that the gasket is installed as on image. WSO Flex collector Teleduct collector side Gasket Teleduct client side Figure 10: Teleduct Inlet hopper with flex duct pack This option is available for mist collectors which are mounted off the machine. -
Page 19: Figure 11: Inlet Hopper With Flex Duct Pack
Installation, Operation and Maintenance manual WSO Flex Depending on the option provided, please apply MS polymer sealant or use the included gasket. When using gasket, do not overcompress (more than 50%). WSO Flex collector Hopper Flex-duct collar Flex-duct Inlet collar Clamp Figure 11: Inlet hopper with flex duct pack Inlet hopper / impact separator... -
Page 20: Figure 12: Inlet Hopper / Impact Separator
Installation, Operation and Maintenance manual WSO Flex When using gasket, do not overcompress (more than 50%). 3. Align the top flange of the hopper with the hole pattern on the bottom of the mist collector and fasten it with the bolts and washers supplied. 4. -
Page 21: Figure 13: Collection Bottle
Installation, Operation and Maintenance manual WSO Flex Collection bottle (only for use with the inlet hopper / impact separator) The collection bottle can be installed during stand installation or after the unit has been installed in its operating position. This collection bottle can hold up to 3,7 litres of collected liquid. -
Page 22: Figure 14: Damper Valve
Installation, Operation and Maintenance manual WSO Flex e. Outlet accessories Damper valve (for AC fan only) The damper valve is situated at the outlet. This damper valve functions as an airflow regulator to change airflow speed. To adjust the damper valve’s position and thus the speed of the airflow, unscrew the 2 knobs and lower or lift the slide according to the required airflow needed for your application. -
Page 23: Controller, Electrics And Pneumatics
Installation, Operation and Maintenance manual WSO Flex CONTROLLER, ELECTRICS AND PNEUMATICS Controller terminal allocation plan Terminal No. Description 24 V DC / Motor overload External ON (closed = on, open = off; if contact is closed and the controller is running, stop with I/O button will be possible; To restart the Fan by pressing the I/0 button while the “External ON”... -
Page 24: Controller Mounted On The Unit
Installation, Operation and Maintenance manual WSO Flex A complete purpose made WSOflex-controller is manufactured to control the unit’s operation. The WSOflex-controller is designed with a display to show the lifetime of the filter element. The display is showing continuously the real-time pressure drop value over the used main filter element (and optional HEPA) to follow maintenance of the element (and optional HEPA). - Page 25 Installation, Operation and Maintenance manual WSO Flex 2. Wire the supply cable inside the unit using glands at the back of the unit and the gland inside the controller back plate and connect phases and PE of the supply cable to the controller panel with mentioned terminals in the allocation plan (16, 17 , 18 and 14).
-
Page 26: Remote Controller With Wire
Installation, Operation and Maintenance manual WSO Flex Remote controller with wire A remote controller consists of 2 casings: connection box and controller box. connection box controller box connect bulkhead connection with tubing close off both DP couplings with blanking plug motor cable Figure 17: Remote controller If a HEPA was delivered with the unit, change the mounted bulkhead connector... - Page 27 Installation, Operation and Maintenance manual WSO Flex 3. Change Δp tubes inside the unit according below picture and connect to the mounted bulkhead connectors. 4. Plug the 4 holes of the Δp couplings with delivered blanking plug to block the gap. 5.
- Page 28 Installation, Operation and Maintenance manual WSO Flex 6. Install 2 (without HEPA) or 3 (with HEPA) times Δp tubes onto the recently installed bulkhead connectors and let them hang out the unit. Apply the delivered adhesive gasket to the connection box with hole in the back, like illustrated below and remove the lid from the box (if not done yet).
-
Page 29: Retrofit Remote Controller With Wire
Installation, Operation and Maintenance manual WSO Flex 14. Open the controller box with taking off the lid. If the controller panel is still to be mounted on the controller box install the controller panel using 4 times of each delivered M4 screws and M4 nuts. Install the 2 plastic strips inside the box on top of the recently installed nuts and fasten strips with nuts delivered. -
Page 30: Ec Fan
Installation, Operation and Maintenance manual WSO Flex EC fan Please see EC Fan version terminal diagram on page 11 of the WSOflex-controller manual. On this page the connections are described to be done. See below terminal allocation plan. The EC fan is rotating always in the correct direction, no need for fan rotation check-up. -
Page 31: Mma Ec Fan Terminal Allocation Plan
EC centrifugal module - RadiPac Installation, Operation and Maintenance manual WSO Flex K3G250-PR02-J2 backward-curved, single-intake with support bracket MMA EC fan terminal allocation plan Connection diagram Conn. Designation Color Function/assignment 1, 2 green/yellow Protective earth black Power supply black Power supply black Power supply white 1... -
Page 32: Mmb Ec Fan Terminal Allocation Plan
EC centrifugal module - RadiPac K3G310-PH38-02 backward-curved, single-intake Installation, Operation and Maintenance manual WSO Flex with support bracket MMB EC fan terminal allocation plan Connection diagram Conn. Designation Function/assignment KL 1 Supply connection, power supply 3-phase 380-480 VAC, 50/60 Hz KL 1 Supply connection, power supply 3-phase 380-480 VAC, 50/60 Hz KL 1... -
Page 33: Start-Up Check List
Installation, Operation and Maintenance manual WSO Flex START-UP CHECK LIST Follow all steps before first start-up and when the mist collector is not been used for a long period. For daily use follow steps 1, 2, 3, 4 and 6. Check that the outlet of the fan is free of debris before starting. -
Page 34: Operation Schedule
Installation, Operation and Maintenance manual WSO Flex OPERATION SCHEDULE To ensure a good performance of your mist collector, follow the check points below according to the time table. Weeks Checkpoint Type of control Recommended action Fan set Excessive noise See trouble shooting guide •... -
Page 35: Service
Installation, Operation and Maintenance manual WSO Flex SERVICE Disconnect and lock out electrical power before servicing. No welding should be performed inside without fire protection. Avoid contact or exposure to collected liquids during servicing. Inlet hopper / impact separator For applications where both liquid and particulate are collected, it may become necessary to clean the hopper and impact separator (if supplied). -
Page 36: Figure 19: First Stage Filter Removal
Installation, Operation and Maintenance manual WSO Flex Figure 19: First stage filter removal b. Dryflo wrap Only round Dryflo comes with wrap. To determine if the wrap needs replacement, install a clean filter element wrap, restart the mist collector and check the dp value on the controller. If MAIN dP value is low (7dP), the second stage filter element will not require replacement and can continue operation with the clean wrap. -
Page 37: Nd Stage Filter Element Replacement
Installation, Operation and Maintenance manual WSO Flex c. Second stage filter element The genuine filter element is the only replacement filter that will provide the high level of performance that you expect from your investment in the WSO Flex Mist collector. Do not drop or rap the new filter element on the floor or any other hard surface. -
Page 38: Figure 22: Hepa Or 3Rd Stage Filter Replacement
Installation, Operation and Maintenance manual WSO Flex d. HEPA filter or 3rd stage filter element Replace the HEPA filter at the same time as the second stage filter element is replaced. Remove the HEPA filter by unscrewing the outlet access panel at the side. 2. -
Page 39: Trouble Shooting Guide
Installation, Operation and Maintenance manual WSO Flex TROUBLE SHOOTING GUIDE Disconnect all power supply before services. Trouble Possible cause Remedy Fan does not start Not wired correctly Check and correct internal motor wiring for proper connections for your voltage (use controller manual). Proper wire size not used for Rewire per national and local electric codes motor... - Page 40 Installation, Operation and Maintenance manual WSO Flex Trouble Possible cause Remedy Liquid leaking from Plugged or full collection bottle Drain, remove and clean collection bottle collector door and bottle faucet. Controller MAIN dP alarm Plugged second stage filter Replace second stage filter element and/ element and/or Dryflo wrap or Dryflo wrap.
Need help?
Do you have a question about the Torit DCE WSO Flex and is the answer not in the manual?
Questions and answers