Table of Contents
Advertisement
Quick Links
DECLARATION OF CONFORMITY
Manufacturer:
Declares that the CE-marked Product:
Product Model(s):
FCC Compliance Statement:
This device complies with part 15 of the FCC Rules. Operation is subject to the following two
conditions: (1) This device may not cause harmful interference, and (2) this device must accept
any interference received, including interference that may cause undesired operation.
Complies With:
Compliance Standards:
December 18, 2013
CID Bio Science, Inc.
rd
1554 NE 3
Ave
Camas, WA 98607
Model CI-203
Model CI-203CA
89/336/EEC Electromagnetic Compatibility Directive
73/23/EEC Low Voltage Directive
EN 55027
EN 50082-1
EN 60950
Leonard Felix
President
RF Emissions Information
Technology Equipment
EMC Immunity Standard
Safety of Information
Technology Equipment
Including Electrical
Business Equipment
Advertisement
Table of Contents

Related Manuals for CID Bio-Science CI-203


Summary of Contents for CID Bio-Science CI-203
- Page 1 1554 NE 3 Camas, WA 98607 Declares that the CE-marked Product: Product Model(s): Model CI-203 Model CI-203CA FCC Compliance Statement: This device complies with part 15 of the FCC Rules. Operation is subject to the following two conditions: (1) This device may not cause harmful interference, and (2) this device must accept any interference received, including interference that may cause undesired operation.
-
Page 2: Table Of Contents
Setup Scanner Thresholds ......................7 Threshold Adjustment (Width Calibration) ................8 Scanner Step Length Calibration.................... 9 Re-computing the CI-203 Parameters ..................9 Setup Scanner Filter ........................9 Setup Scanner Adjustment Menu ....................9 Setup Storage (SPI Flash Management) ................. 11 Format Storage ........................ - Page 3 Technical Support ........................25 Customer Service ........................25 Error Message .......................... 26 Frequently Asked Questions ....................27 Appendix A: Operating the CI-203 with the CI-203CA Conveyor Attachment ......29 Hardware Setup ........................29 Measure ............................ 32 CI-203 Conveyor Calibration ....................33 Setup Instrument ........................
-
Page 4: Introduction
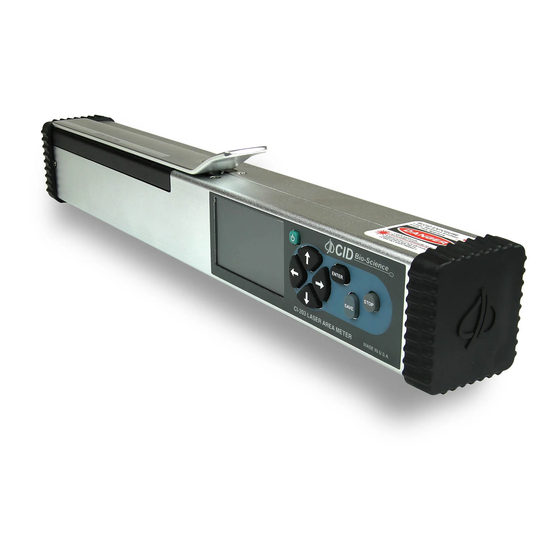
Congratulations on the purchase of your new CI-203 Portable Laser Area Meter. Making leaf measurements, in the field or laboratory, is now very easy with the CI-203 Portable Laser Area Meter. This state-of-the-art instrument has been designed to be the most portable leaf area measurement system available. -
Page 5: Features
CI-203 Instruction Manual rev. 3/17/2020 Features Single-action data collection—sweep the CI-203 over a leaf to yield seven measurement parameters: area, width, length, perimeter, shape factor, ratio, and void count Non-destructive and multipurpose Flattens curled leaves to provide accurate measurements ... -
Page 6: Operating Instructions
Measure, Setup, View, and File. Figure 2: CI-203 Keypad Error messages should rarely appear during normal operation of the CI-203. However, in the event that the display does not show the “Measure” prompt after displaying the copyright notice, see the Error Message section on page 26. -
Page 7: Menus And What They Do
Measurement mode, requiring a hard shutdown. Menus and What They Do The CI-203 menu system allows the instrument to be operated quickly and easily without repeatedly consulting the manual. Reading the entire manual before performing measurements in the field is recommended. -
Page 8: Measure Menu
Below these, the parameter names appear on the left and parameter values on the right of the screen. Figure 3: CI-203 display read out and keypad To bring an image into view, press the right arrow button. Pressing the right arrow button again will display the barcode data. - Page 9 The user may verify and transfer files by connecting the instrument to a computer using the USB port on the CI-203, or by mounting the SD card into the SD slot on the computer and using it as a local drive. Files should be copied from the SD card and saved to the hard drive before proceeding with any calculations or data manipulation.
-
Page 10: Setup Instrument Menu
CI-203 Instruction Manual rev. 3/17/2020 Setup Instrument Menu The CI-203 has a number of utility functions that allow the user to manage the instrument’s capabilities. These functions are accessed by pressing the right arrow when Setup is highlighted on the main menu. The setup utility options are: Autosave, Measure, Scanner, Storage, Time, and SD card. -
Page 11: Threshold Adjustment (Width Calibration)
In the event that the normal threshold settings need to be altered, perform the following steps. First, check the threshold of the CI-203 alone, with its arm in place. To do so, access the Setup Scanner menu, select “HiThld”, then press the right arrow button. The instrument’s motor will activate, and the “t”... -
Page 12: Scanner Step Length Calibration
After drawing a piece of white paper through the CI-203 a few times, push STOP. The lens should now be calibrated. To see the image and measurement information, press the right or left arrow buttons. Compare known length to measured length. - Page 13 CI-203 Instruction Manual rev. 3/17/2020 Press the right arrow to access the Precharge setting and press ENTER to spin up the motor. Press the left arrow button or STOP to stop the motor or to return to the Adjustment menu. Use the up/down arrow to change the Precharge value in the upper right corner.
-
Page 14: Setup Storage (Spi Flash Management)
1 MB, or 16 sectors, with 64 KB in each sector. Currently the CI-203 uses four sectors; sector 0 is inerasable while sectors 1-3 can be erased in the Setup Storage menu. Sector 0 is protected because it holds all of the scan/timing parameters. The user is allowed to modify these parameters, but not to erase them. -
Page 15: Setup Sd Card
CI-203 Instruction Manual rev. 3/17/2020 should now be highlighted and the date can be changed using the up and down arrow buttons. When done changing the date, press SAVE, or press STOP to clear any changes made. <stop> <save>... -
Page 16: View Menu
“View” is highlighted on the display. This menu allows the user to navigate to and view the files and data saved on the instrument, as well as check on many features of the CI-203. Options from the View menu are: Files, Voltage, Battery, Flash, Time, GPS, and SD card. -
Page 17: Barcode Data
Figure 5: Barcode data View GPS The new CI-203 has a built-in GPS system which can relay the longitude, latitude, and altitude of the instrument when performing measurements. The figure below shows the GPS menu display. The GPS uses GMT or Greenwich Mean Time for a standardized time. The GMT is displayed as the time (TIM) on the GPS menu and is synchronized with minute and second alignment. - Page 18 CI-203 Instruction Manual rev. 3/17/2020 The View Time screen displays the current time on the instrument. The View GPS screen displays the current GPS values for latitude, longitude, and altitude and it indicates the number of satellites it is currently connected to. Press the up/down arrow to display more GPS information.
-
Page 19: File Menu
Here, the user can manipulate files on the CI-203, with options to clear, delete, create, and open files. The CI-203 uses an SD card to store all measurements. This means the user is able to create, clear, and delete any measurement file. The instrument uses a regular FAT32 file system to access stored data. - Page 20 <enter> The CI-203 will save all parameters for each measurement (width, length, perimeter, area, aspect ratio, and shape factor) on the SD card. Use the left/right arrows to scroll through the parameters and the up/down arrows to include or exclude parameters. Once finished creating...
-
Page 21: Transfer Data To A Computer
Do not edit the file directly on the instrument. Figure 7: SD card and USB cable connection for the CI-203 Do not connect the USB cable to the instrument and the computer while performing measurements. -
Page 22: How Data Appears In A File
Pix_Len How to Work with or Manipulate Data Files The CI-203’s removable SD card makes it easy to work with and manipulate data files after taking measurements. Remove the SD card from the CI-203 after powering off the instrument. Insert the card into a computer. Copy and save the files from the SD card onto the hard drive of the computer. -
Page 23: Theory Of Operation
Overview of the Parts of the Instrument The CI-203 consists of a number of subsystems. It has a laser width scanner that is capable of measuring the width of an object in its objective 500 times a second, with a resolution of 0.01 cm... -
Page 24: Computing Aspect Ratio And Shape Factor Information
CI-203 Instruction Manual rev. 3/17/2020 Computing Aspect Ratio and Shape Factor Information Aspect ratio and shape factor information can be easily determined from other calculated values. These derived quantities are not stored but calculated, whenever necessary, for the purposes of display or data dumping. The calculations used are shown below. -
Page 25: Care And Cleaning
Taking Care of the Rubber Roller in the CI-203 When the rubber roller in the CI-203 gets dirty, it may stick or fail to spin smoothly. As a result, certain sections of the leaf may be scanned multiple times, causing the measurement to be inaccurate. -
Page 26: Ci-203 Firmware Update
Extract the files from the .zip archive before moving on to the next step 3. Place both files into one directory on the computer that has the CI-203 drivers installed. 4. Turn on the instrument and plug in the USB cable 5. -
Page 27: Ci-203 Driver Installation
There are two driver files (CI-203.inf and CI-203.cat) that need to be downloaded at: https://cid- inc.com/support/CI-203/software/ If the CI-203 USB drivers need to be installed on a Windows computer, the software that was sent with the CI-203 can be used or it can be downloaded from: http://sourceforge.net/projects/libusb-win32/files/libusb-win32-releases/1.2.4.0/libusb-win32-bin- 1.2.4.0.zip/download... -
Page 28: Troubleshooting
CID Bio-Science, Inc. products. Customers sometimes find that they need CID Bio-Science, Inc. to upgrade, recalibrate or repair their system. In order for CID Bio-Science, Inc. to offer these services, the customer must first contact us and obtain a Return Merchandise Authorization (RMA) number. -
Page 29: Error Message
CI-203 Instruction Manual rev. 3/17/2020 Error Message The following error messages should rarely appear in normal operation. Message: Meaning: Instrument setup data has been lost. Pressing the ENTER button will restore default values and display the message “NVRAM Defaults Saved”. -
Page 30: Frequently Asked Questions
This webpage has links for CI-203 transfer software, USB driver, and firmware downloads. 2. How do I turn the CI-203 off if the instrument is hung-up and the display is frozen? a. Connect the instrument to the computer with the USB cable. This should cause the instrument to unfreeze, allowing it to be able to restart. - Page 31 8. How do I transfer files off the CI-203? a. There are two commonly used ways to transfer data from a CI-203 with an SD card. The first is to connect the CI-203 to a computer using the USB cable.
-
Page 32: Appendix A: Operating The Ci-203 With The Ci-203Ca Conveyor Attachment
Hardware Setup To use the CI-203 with the CI-203CA, the CI-203 must be installed in the CI-203CA. Do not turn the CI-203 on from its keypad. To install the CI-203CA, follow these steps: Figure 8: Illustration of how to remove the arm 1. - Page 33 CI-203 Instruction Manual rev. 3/17/2020 Figure 9: Insert the CI-203 into the housing (hole) in the side of the CI-203CA Figure 10: Insert the CI-203 until flush with side of conveyor CID Bio-Science Phone: +1 (360) 833-8835 sales@cid-inc.com 1554 NE 3 Fax: +1 (360) 833-1914 www.cid-inc.com...
- Page 34 The CI-203/CI-203CA combination must be turned on with the switch for the CI-203CA in order to take measurements. Anytime a CI-203 is inserted into a conveyor, or if any problems are encountered, press the right and left buttons simultaneously. This will match the conveyor to the CI-203. The CI-203CA will run for a few seconds, then turn off.
-
Page 35: Measure
CI-203 Instruction Manual rev. 3/17/2020 Measure When the CI-203 is used with the CI-203CA, it is assumed the user wishes to measure a large number of leaves all in one batch. Because of this, the instrument does not stop after each measurement to allow the user to preview and make a save/no save decision. -
Page 36: Ci-203 Conveyor Calibration
CI-203 Instruction Manual rev. 3/17/2020 CI-203 Conveyor Calibration A new CI-203 needs to be calibrated to the conveyor. Put the CI-203 in the conveyor, plug the conveyor in, then turn on the conveyor. If you have more than one CI-203 or updated the firmware, the instrument and conveyor should be re-calibrated together. -
Page 37: Setup Instrument
Setup Scanner Threshold The operation of this menu item is identical to the operation described in the CI-203 portion of this manual. However, when the CI-203CA is being used, the threshold that is being set is the one that is used during conveyor measurements. -
Page 38: Warranty Information
Repair or alteration by an unauthorized technician voids warranty. Material and equipment which is not manufactured by CID Bio-Science is to be covered only by the warranty of its manufacturer. CID Bio-Science will not be liable to the Buyer for loss, damage, or injury to persons or to property by the use of equipment manufactured by other companies. -
Page 39: Ci-203 Production Test Check Sheet
CI-203 Instruction Manual rev. 3/17/2020 CI-203 Production Test Check Sheet SERIAL NUMBER: TESTING FUNCTION THRESHOLD: H THRESHOLD SET: PRECHARGE: SCAN WIDTH: SCAN TIME: STEP LENGTH: NOTES: CONVEYOR AND/OR ROOT LENGTH THRESHOLD SET: SCAN WIDTH: SCAN TIME: PRECHARGE: STEP LENGTH: ROOT LENGTH...
Need help?
Do you have a question about the CI-203 and is the answer not in the manual?
Questions and answers