
Related Manuals for CID Bio-Science CI-600


Summary of Contents for CID Bio-Science CI-600
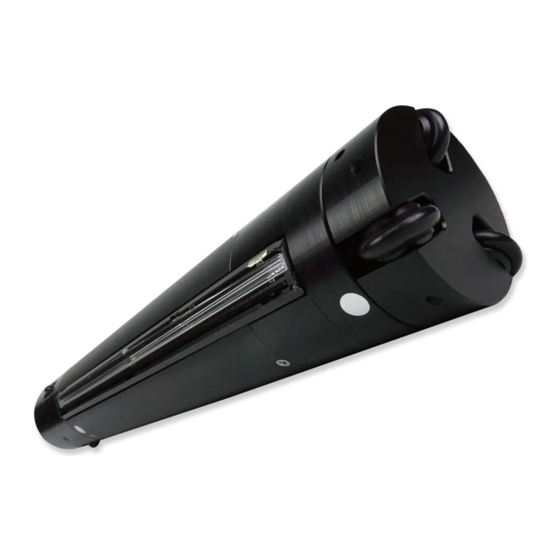
- Page 1 Bio-Science Inc. Portable Instruments for Precision Plant Measurement In-Situ Root Imager CI-600 Instruction Manual CI-600 1554 NE 3 Ave, Camas, WA USA | www.cid-inc.com | (360) 833-8835 | products@cid-inc.com...
-
Page 3: Table Of Contents
INTRODUCTION ..........................1 Unpacking ............................ 2 HARDWARE ASSEMBLY ........................3 Scanner Home Position ....................... 6 Procedure to Return the CI-600 to Home ................6 CI-600 Adjustable Scan Window ....................7 SOFTWARE/DRIVER INSTALLATION ....................9 Windows 7 ..........................10 Windows Vista ........................... 18 Windows XP .......................... -
Page 4: Introduction
CI-600 Operation Manual Rev 5/15/2013 INTRODUCTION Root development and function are vitally important for plant adaptation to an environment. The CI-600 In-Situ Root Imager helps examine root activity and health, which are critical indicators of plant or crop performance. The CI-600... -
Page 5: Unpacking
1 USB Cable This cable is used to connect the CI-600 to the computer running the CI-600 software. 1 Collapsible Measuring Rod This is used to lower and raise the CI-600 in the root tube. -
Page 6: Hardware Assembly
HARDWARE ASSEMBLY Please follow these important instructions on how to setup the CI-600 hardware. 1. Connect the USB cable to the CI-600’s USB cable connector. Refer to the illustration below to locate the USB Cable connector. 2. Use the Allen wrench to tighten the screw to hold the USB cable in place securely. Do not over-tighten this screw. - Page 7 CI-600 Operation Manual Rev 5/15/2013 3. Connect the collapsible slider rod to the scanner by screwing in the end of the collapsible rod to the hole next to the USB cable connection. 4. Unscrew the black knob from the end of the collapsible rod.
- Page 8 Notes: CI-600 imaging units manufactured before March 2010 will have a U-Joint style connector instead of the more durable threaded screw connectors. The measuring rod is now collapsible with several sections that screw into each other creating a long pole to lower the scanner to the bottom of the root tube.
-
Page 9: Scanner Home Position
If the CI-600 is not returned to Home, the scanner will first rotate itself into this position before scanning or calibrating. Return the CI-600 to Home prior to sliding the scanner in a root tube and beginning a scanning sequence in order to have images start at the same point for each window. -
Page 10: Ci-600 Adjustable Scan Window
To adjust the scan window: 1. Use the screw-driver to slowly turn the 2 inner screws on the opposite side of the CI-600 as the scan window. Each screw at each end will raise and lower that end of the scan window. - Page 11 CI-600 Operation Manual Rev 5/15/2013 There are four screws along the bottom of the CI-600 housing. The inner 2 screws adjust the scan window. The outer screws attach the upper and lower pieces to the scanner body. Use a screw- driver to raise or lower the scan head, one end at a time.
-
Page 12: Software/Driver Installation
CI-600 Operation Manual Rev 5/15/2013 SOFTWARE/DRIVER INSTALLATION The following steps should be carried out on each computer used with the CI-600 Root Scanner. If the computer has been previously used with a CI-600 root scanner and has a CI-600 driver installed, follow the directions to replace the previous version of the CI-600 driver with the current version. -
Page 13: Windows 7
Often the CI-600 will be listed in the Device Manager of the computer as “canoscan” or another name that is the not the “CI-600.” If the computer system already has a previous version of CI-600 driver installed these steps must be followed when installing the new version of software. For new driver installations, please see the next page. - Page 14 CI-600 Operation Manual Rev 5/15/2013 Windows 7 Driver Installation To initially install the CI-600 driver on a computer, follow these instructions. The driver is compatible with 32 bit systems only. Once the driver is installed, the computer will automatically recognize the instrument when it is connected to the computer.
- Page 15 CI-600 Operation Manual Rev 5/15/2013 Plug the supplied USB Cable into the host computer and CI-600 Root Scanner. The Device Manager's list will refresh and a new entry named CanoScan will appear (below). This may take a few seconds or a few minutes the first time the CI-600 is connected.
- Page 16 CI-600 Operation Manual Rev 5/15/2013 Select "Let me pick from a list of device drivers on my computer". Select "Imaging Devices" and click the Next button. 1554 NE 3 Ave, Camas, WA 98607, USA Phone (360) 833-8835 Fax (360) 833-1914...
- Page 17 CI-600 Operation Manual Rev 5/15/2013 Select "Have Disk" and a dialog will appear asking you to browse for the driver software. Type (or browse to select) the path of the CI-600 driver software. By default the path is… C:\Users\YourUserName\Documents\CI-600 Driver Press the OK button.
- Page 18 CI-600 Operation Manual Rev 5/15/2013 Choose to “Install the software anyways” if a warning appears. The dialog below will appear confirming the driver installation was complete. Reboot the computer. Consult the Scanning and Calibration sections of this manual for use instructions.
- Page 19 Windows UAC. For more troubleshooting information, please see the Troubleshooting section towards the end of this manual. To install the CI-600 software on a computer, first install the driver. Then, disable or turn off the Windows UAC.
- Page 20 There is a work-around for a bug in the way the ClickOnce technology handles the requirement for administrator privileges. After installing the CI-600 software, please follow the simple instructions below to turn off the Windows User Account Control. This will allow the software to open and work properly.
-
Page 21: Windows Vista
CI-600 Operation Manual Rev 5/15/2013 Windows Vista Removing Previous Versions of CI-600 Software If this system already has a previous version of CI-600 software installed these steps must be followed before attempting to setup the new CI-600 software. 1. Click the Start button. - Page 22 CI-600 Operation Manual Rev 5/15/2013 Replacing Previous Versions of the CI-600 Driver If this system already has a previous version of CI-600 driver installed these steps must be followed: 1. Plug-in the CI-600 instrument. 2. Click the Start button. 3. Right click Computer and select Properties.
- Page 23 Follow the steps below to install the hardware driver which allows Windows to communicate with the CI-600 Root Scanner. If you have already completed the steps outlined under “Replacing Previous Versions of the CI-600 Driver” these instructions should be ignored.
- Page 24 CI-600 Operation Manual Rev 5/15/2013 5. A dialog will display saying Windows could not find the driver. Click Browse my computer for driver software. 6. A dialog will appear asking you to browse for the driver software. Type (or browse to select) the path of the CI-600 driver software.
- Page 25 Calibration sections of this manual for use instructions. Note: If your CI-600 software does not seem to be working or not working well on Windows Vista, make sure you have Windows Vista Service Pack 1 (SP1) installed. You can download this update for free at: http://www.microsoft.com/en-us/download/details.aspx?id=30...
-
Page 26: Windows Xp
CI-600 Operation Manual Rev 5/15/2013 Windows XP Removing Previous Versions of CI-600 Software If this system already has a previous version of CI-600 software installed these steps must be followed before attempting to setup the new CI-600 software. 1. Click the Start button. - Page 27 Driver Software as prescribed in the next section of this document. Replacing Previous Versions of the CI-600 Driver If this system already has a previous version of CI-600 driver installed these steps must be followed. 1. Plug-in the CI-600 instrument.
- Page 28 Follow the steps below to install the hardware driver which allows Windows to communicate with the CI-600 Root Scanner. If you have already completed the steps outlined under “Replacing Previous Versions of the CI-600 Driver” these instructions should be ignored.
- Page 29 5. The dialog to the right will appear. Click Have Disk to proceed. 6. The dialog to the right will appear. Type (or browse to select) the path of the CI-600 driver software, then click OK to continue. By default the path is… C:\Users\YourUserName\...
- Page 30 CI-600 Operation Manual Rev 5/15/2013 7. The dialog to the right will appear. Click Next to continue. 8. The dialog to the right will appear. Click Continue Anyway to proceed. 9. The dialog to the right will display confirming that the driver was installed properly.
-
Page 31: Operating The Ci-600 Software
CI-600 Operation Manual Rev 5/15/2013 OPERATING THE CI-600 SOFTWARE To open the CI-600 software, click on the Start button, and select CI-600 Root Scanner from the CID Bio-Science folder. Or, click the icon on the desktop or taskbar. The dialog below will appear…... -
Page 32: Calibration
Click on the Start button, go to Programs and select CI-600 Root Scanner from the CID Bio-Science folder. Click the Calibration button. Place the CI-600 Root Scanner in the white Calibration Tube with the scanner lined up at the Home Position. Click OK to proceed with calibration. -
Page 33: Using The Ci-600 Software
CI-600 Operation Manual Rev 5/15/2013 Using the CI-600 Software The CI-600 software is setup to be easy to use and if enabled, informational popup boxes will appear as you hover the mouse over different items or parameters. 1. Select the resolution of the image. - Page 34 CI-600 Operation Manual Rev 5/15/2013 6. Specify the folder to store scanned images 7. If you wish to automatically load an image editor after each scan… a. Chose the image editor to use in the Editor input box or click ... to browse and select the image editor desired.
- Page 35 12. There are two common error messages that can appear after hitting the scan button. a. The CI-600 needs to be calibrated. To fix this error message: i. Disconnect and reconnect the CI-600. ii. Calibrate the CI-600 in the white calibration tube.
- Page 36 CI-600 Operation Manual Rev 5/15/2013 b. The computer cannot detect the CI-600. To fix this error message: i. Disconnect and reconnect the CI-600. ii. If the error appears again, re-start the computer. iii. Check the USB cable and connection of the instrument. Try a different USB port of the computer.
-
Page 37: Deploying Root Tubes
CI-600 Operation Manual Rev 5/15/2013 DEPLOYING ROOT TUBES Make sure the inside of the tube is clean (see the Cleaning & Maintenance section). The slider rod connected to the scanner, can be used as a measuring rod, which each section of the collapsible scanner being the equivalent of the scan window length. -
Page 38: Auger Usage
To create the hole for inserting the soil tube into the ground, use a gasoline powered auger, such as the EarthQuake Auger sourced by CID Bio-Science, Inc. Use the auger to remove just enough soil to slide the CI-600 root tube into the ground. Minimizing the soil disturbance directly around the root tube will decrease the length of time necessary to wait for soil and roots to grow around the tube. -
Page 39: Cleaning And Maintenance
CLEANING AND MAINTENANCE To keep your CI-600 Root Scanner and computer clean, wipe the exterior with a slightly damp cloth. A mild detergent may be used if necessary. Do not use solvents of any kind. Clean the lens with a soft, non-abrasive cloth, using a small amount of commercial lens cleaning fluid if necessary. -
Page 40: Using The Ci-600 For Ci-690 Rootsnap
When the CI-600 is used to acquire images being analyzed with CI-690 RootSnap!, there are several features that, if used, make the importing and analysis process easier and faster. First, always use the ICAP file-naming feature to save images. -
Page 41: Troubleshooting
CI-600 Operation Manual Rev 5/15/2013 TROUBLESHOOTING Technical Support If you have a question about the CI-600 features or functions, first look in the CI-600 Operation Manual. There is also online support available for the CI-710 and SpectraSnap! at http://www.cid- inc.com/root-image/ci-600-support.php. If you cannot find the answer, you can contact a Technical Support Representative located in your country. -
Page 42: Frequently Asked Questions
CI-600 Operation Manual Rev 5/15/2013 Frequently Asked Questions If there are any questions about the CI-600, please check the Frequently Asked Questions below, as well as the CID Bio-Science support webpage and forum at http://www.cid-inc.com/root-image/ci- 600-support.php. 1. Where do I download the most current version of CI-600 software? a. - Page 43 CI-600. 8. How do I prevent root tube cracks or condensation? a. A suggestion to protect the CI-600 tubes from cracking is to insulate them between scans. This will decrease the temperature difference between the soil and the air trapped inside the tube, which will decrease condensation build-up and cracks.
- Page 44 LiDE 20/30 when prompted. 15. Does the CI-600 take 1200 DPI images? a. The CI-600 always scans at 1200 DPI because that is the native format of the image sensor in the scanner. You will probably only see a marginal benefit from scanning at 1200 DPI using the CID software.
- Page 45 This issue has been fixed with version 3.1.22. Please upgrade your software. b. There is a known problem with our automatic upgrade solution for the CI-600 for version 3.1.21. Due to changes in Windows our CI-600 app requires admin access.
- Page 46 If you receive an error asking you to release the lock switch, you should update the software and driver of the CI-600. This error does not exist in new software and with new driver and calibration, the unit should function properly.
-
Page 47: Hardware Warranty
Any defect must be called to the attention of CID Bio-Science, Inc., Camas, Washington, USA, in writing, within 90 days after receipt of the unit. -
Page 48: Product Test Check Sheet
CI-600 Operation Manual Rev 5/15/2013 PRODUCT TEST CHECK SHEET CI-600 Serial Number: RMA # Computer Serial Number: Computer Model No: Windows Version: Testing Function Final Clear Image Scanned Image Size Set: 8.5 x 7.7 USB Cable Tested Scan Window Clean... -
Page 49: Warranty Registration Card
CI-600 Operation Manual Rev 5/15/2013 WARRANTY REGISTRATION CARD 1554 NE 3 Ave, Camas, WA 98607, USA Phone: (360) 833-8835 Fax: (360) 833-1914 e-mail: sales@cid-inc.com Web: www.cid-inc.com PRODUCT REGISTRATION CARD Please complete and return this form to CID within 30 days to validate your Warranty on Parts and Labor.
Need help?
Do you have a question about the CI-600 and is the answer not in the manual?
Questions and answers