Table of Contents
Advertisement
Available languages
Available languages
Quick Links
• READ ALL INSTRUCTIONS BEFORE ASSEMBLY AND USE OF GATE.
!
• KEEP INSTRUCTIONS FOR FUTURE USE.
www.carlsonpetproducts.com
Carlson Pet Products, Inc.
3200 Corporate Center Drive, Suite 105 | Burnsville, MN 55306, USA
952.435.1084
Made in China
DESIGN PAW FREESTANDING GATE
OWNER'S MANUAL MODEL:
2070, 2870
Advertisement
Table of Contents

Related Manuals for Carlson 2070


Summary of Contents for Carlson 2070
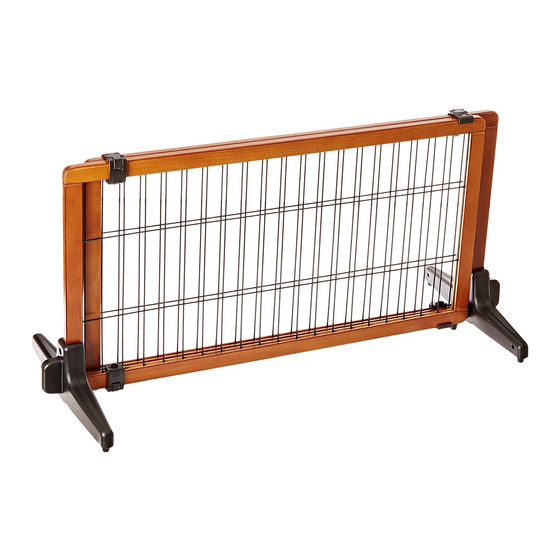
- Page 1 DESIGN PAW FREESTANDING GATE • READ ALL INSTRUCTIONS BEFORE ASSEMBLY AND USE OF GATE. • KEEP INSTRUCTIONS FOR FUTURE USE. www.carlsonpetproducts.com Carlson Pet Products, Inc. 3200 Corporate Center Drive, Suite 105 | Burnsville, MN 55306, USA 952.435.1084 Made in China...
-
Page 3: Before Using Product
Before Using Product Read and follow all instructions carefully to ensure that your gate is properly installed. Please keep these instructions for your reference. WARNING • To prevent serious injury or death, securely install gate or enclosure and use according to manufacturer’s instructions. •... -
Page 4: Before Assembly
Before Assembly PLEASE CHECK TO MAKE SURE YOU HAVE THE FOLLOWING PARTS: Main Gate Panels Stabilizing Leg Assemblies (2) Crosshead Screws (8) (requires a Phillips/crosshead screwdriver) Connector Bolts (4) ENGLISH... - Page 5 Assembling Your Gate STEP 1 Connect two halves of one stabilizing leg, then secure the leg with (4) crosshead screws to secure the leg. Repeat on the other stabilizing leg. STEP 2 Using the (4) connector bolts and a Phillips screwdriver connect the stabilizing legs to the ends of the gate.
- Page 6 STEP 3 Extend the length of your gate to your desired size by unlocking the (4) locking hinges. Re- lock the hinges when the gate reaches your desired size. UNLOCKED LOCKED NOTE: The locking hinges must be correctly lined up within the gap between the metal fencing.
-
Page 7: Care And Maintenance
Carlson Pet Products, Inc. will replace or repair it at Carlson’s option. PROOF OF PURCHASE REQUIRED. - Page 8 Replacement Parts Crosshead Screw Connector Bolt #10054 #10052 Stabilizing Leg Assembly Black = #11053 ENGLISH...
- Page 9 BARRIÈRE AUTONOME DESIGN PAW • LIRE TOUTES LES INSTRUCTIONS AVANT D’ASSEMBLER ET D’UTILISER LA BARRIÈRE. • CONSERVER CES INSTRUCTIONS POUR UNE UTILISATION ULTÉRIEURE. www.carlsonpetproducts.com Carlson Pet Products, Inc. 3200 Corporate Center Drive, Suite 105 | Burnsville, MN 55306, É.-U. 952.435.1084 Fabriqué en Chine...
- Page 10 Avant d’utiliser le produit Lire et suivre attentivement les instructions pour assurer une installation conforme de la barrière. Conserver ces instructions pour consultation. AVERTISSEMENT • Pour prévenir des blessures graves voire mortelles, assembler solidement la barrière ou le parc; leur utilisation doit être conforme aux directives du fabricant.
-
Page 11: Avant L'assemblage
Avant l’assemblage VEUILLEZ VÉRIFIER QUE VOUS DISPOSEZ DES ARTICLES SUIVANTS : Panneaux de barrière principale Ensemble de pattes stabilisatrices (2) Vis à tête cruciforme (8) (tournevis cruciforme/Phillips requis) Boulons raccord (4) FRENCH... - Page 12 Assemblage de la barrière ÉTAPE 1 Réunir les deux parties d'une patte stabilisatrice, puis bien maintenir la patte en place en la fixant au moyen de (4) vis à tête cruciforme. Répéter la procédure pour l'autre patte stabilisatrice. ÉTAPE 2 À...
- Page 13 ÉTAPE 3 Étendre la barrière à la longueur désirée en débloquant les (4) charnières de verrouillage. Verrouiller de nouveau les charnières lorsque la barrière a atteint la longueur désirée. DÉVERROUILLÉES VERROUILLÉES REMARQUE: Les charnières de verrouillage doivent être correctement alignées dans l'espace séparant le grillage métallique.
-
Page 14: Garantie Limitée De 90 Jours
à l’acheteur original, s’avère défectueux en ce qui a trait à la qualité des matériaux ou aux travaux de finition et d’assemblage, Carlson Pet Products, Inc. le replacera ou le réparera à son choix. PREUVE D’ACHAT REQUISE. - Page 15 Pièces de rechange Vis à tête cruciforme Boulon raccord n° 10054 n° 10052 Assemblage de la patte stabilisatrice Noir = n° 11053 FRENCH...
- Page 16 VALL A INDEPENDIENTE DESIGN PAW • LEA TODAS LAS INSTRUCCIONES ANTES DE MONTAR Y USAR LA REJA. • GUÁRDELAS PARA UTILIZARLAS COMO REFERENCIA. www.carlsonpetproducts.com Carlson Pet Products, Inc. 3200 Corporate Center Drive, Suite 105 | Burnsville, MN 55306, EE.UU. 952.435.1084 Hecha en China...
-
Page 17: Antes De Usar El Producto
Antes de usar el producto Lea y siga todas las instrucciones cuidadosamente para garantizar que la reja esté correctamente instalada. Conserve estas instrucciones para su referencia. ADVERTENCIA • Para evitar lesiones graves o letales, instale firmemente la reja o puerta y úsela de acuerdo con las instrucciones del fabricante. -
Page 18: Antes Del Montaje
Antes del montaje CERCIÓRESE DE QUE ESTÉN LAS PIEZAS A CONTINUACIÓN: Paneles de la compuerta principal Conjuntos de patas estabilizadoras (2) Tornillos de cabeza en cruz (4) (se requiere un destornillador Phillips/de estrella) Pernos conectores (4) SPANISH... - Page 19 Montaje de la reja PASO 1 Conecte las dos mitades de una pata estabilizadora, luego fije la pata con los 4 tornillos de cabeza en cruz para afianzarla. Repita el paso con la otra pata estabilizadora. PASO 2 Usando los 4 pernos conectores y un destornillador Phillips conecte las patas estabilizadoras en los extremos de la compuerta.
- Page 20 PASO 3 Extienda la longitud de la compuerta al tamaño deseado destrabando las 4 bisagras trabantes. Vuelva a trabar las bisagras cuando la compuerta haya alcanzado el tamaño deseado. DESTRABADO TRABADO NOTA: Las bisagras trabantes deben estar alineadas correctamente dentro de la brecha que hay entre la cerca metálica.
-
Page 21: Cuidado Y Mantenimiento
Carlson Pet Products, Inc., lo reemplazará o reparará a discreción de Carlson. SE REQUIERE EL RECIBO DE COMPRA. - Page 22 Piezas de repuesto Tornillo de cabeza en cruz Perno conector #10054 #10052 Conjunto de pata estabilizadora Negro = #11053 SPANISH...
- Page 24 Carlson Pet Products, Inc. 3200 Corporate Center Drive, Suite 105 Burnsville, MN 55306, USA 952.435.1084 20161107EF...
Need help?
Do you have a question about the 2070 and is the answer not in the manual?
Questions and answers