Advertisement
Quick Links
Advertisement

Related Manuals for Pro's Kit GE-895


Summary of Contents for Pro's Kit GE-895
- Page 1 GE-895 合 機械編程機器人 Manual Assembly Instruction & 組裝說明手冊...
-
Page 2: Table Of Contents
目錄 Contents ............Product Introduction 產品介紹 ............Tools You May Need 自備工具 Mechanical Parts List ............零件清單 ..............Plastic Parts 塑膠模型零件 ......Tip: Cut Off the Burrs Before Assembly 小技巧提醒 ..........Head Module Assembly 頭部組裝 ..........Gear Box Module Assembly 齒輪箱組裝... - Page 3 合 機械編程機器人 5 IN 1 Mechanical Coding Robot 產品介紹 Product Introduction 5合1機械編程機械人以機械編程輪為核心,機器人將依照編程輪與編碼豆的組合進行不同方向的行動並執行任務。只要將編碼豆插入編碼輪上,機器人 就能執行如前進,後退,右/左轉,旋轉或暫停等各種動作,運用這種簡單的編程方法,機器人還能執行更進階的動作,如投擲、堆高、踢球和繪圖,這 樣的機械編程,簡單有趣又極富挑戰性!。 這款初階STEM編碼機器人以簡單的方式、有趣的模式引導孩子們學習機械工程和基礎編程,同時也鼓勵孩子們在面對各種不同的任務與困難時學習、思 考和培養解決問題的能力。歡迎加入編程世界,無限挑戰即將展開-與您的第一個編程機器人一起征服吧! The mechanical coding wheel is placed into the heart of the robot to steer its coded courses and tasks. Coding is easily implemented by snapping the coding buttons onto the wheel and having the robot perform its basic functions –...
- Page 4 P7x3...
- Page 5 正確 錯誤 Correct Incorrect 完成圖 Finish 齒輪箱組裝完成 Gear Box Assembly Process Finished...
- Page 6 配件模組組裝 Accessory Module Assembly 模組 模組 MODULE 1 MODULE 2 模組 模組 MODULE 3 MODULE 4 編碼輪組裝 Coding Wheel Assembly...
- Page 7 關於編程輪 About Coding Wheel 編程輪 CODING WHEEL 編程輪 CODING WHEEL 無齒輪邊(左) Left side 齒輪邊(右) Right side 任務編程軌道 Assignment 後退編程軌道 coding track Backward coding track 任務起點 齒輪 Start point 編程輪 GEAR CODING WHEEL 左側編程軌道 右側編程軌道 Left angle Right angle coding track coding track 編碼豆安裝方式...
- Page 8 編程輪安裝方式 How to Install the Coding Wheel Top View 俯視圖 推 PUSH 推 PUSH 推 PUSH 推 PUSH 推 PUSH 推 PUSH PUSH PUSH 推 PUSH 推 PUSH 推 PUSH 推 PUSH PUSH PUSH 推 PUSH 推 PUSH 推 PUSH 推...
- Page 9 正確 錯誤 Correct Incorrect 編程輪 編程輪 Coding Wheel Coding Wheel 任務起始位置 Home Position 正確 錯誤 Correct Incorrect...
- Page 10 正视图 拉 拉 拉 拉 拉 拉 拉 拉 拉 拉 拉 拉 拉 拉 拉...
- Page 11 編碼豆運作原理 How the Coding Buttons Work 45° 右轉 45° Right Turn 90° 右轉 90° Right Turn 右側編程軌 右側編程軌 Right Coding Track Right Coding Track 45° 左轉 45° Left Turn 90° 左轉 90° Left Turn 左側編程軌 左側編程軌 Left Coding Track Left Coding Track...
- Page 12 45°右後轉 45°Back Right Turn 90°右後轉 90°Back Right Turn 右側編程軌道 右側編程軌道 Right Coding Track Right Coding Track E7x2 後退編程軌道 後退編程軌道 Backward Track Backward Track E7x3 45°左後轉 45°Back Left Turn 90°左後轉 90°Back Left Turn 後退編程軌道 後退編程軌道 Backward Track Backward Track E7x2 E7x3 左側編程軌道...
- Page 13 停止 Stop 後退 Backward 後退編程軌道 E8x2 右側編程軌道 Backward Track Right Coding Track 左側編程軌道 Left Coding Track 堆高機下降 任務 Task Forklift descending 右側 Right side 左側 Left side 左側 Left side...
- Page 14 請依照組裝步驟將所需的零件剪下,以免組裝時造成零件混淆。 塑膠模型零件 Plastic Parts Cut off the plastic parts when they are required. Do not cut them in advance. 9 10 MADE IN TAIWAN MADE IN TAIWAN MADE IN TAIWAN 13 14 16 17 MADE IN TAIWAN MADE IN TAIWAN 12 16 19 20 小技巧提醒...
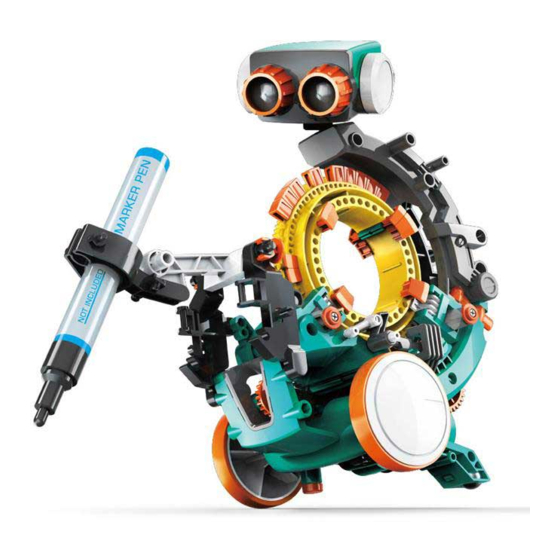
- Page 15 繪圖機器人組裝 Drawing-bot Assembly 繪圖機器人組裝 Drawing-bot Assembly...
- Page 16 麥克筆(細體) Marker Pen (Fine) 比例 Scale 1:1...
-
Page 17: Drawing-Bot Example 01
Video Tips Drawing-bot Example 01 繪圖機器人編碼範例 影片教學 https://www.youtube.com/playlist?list=PLCDHXNSOfhXMsuOyGT2QytmDgF8gOnFhP 所需零件: Parts Required: E5x10 E8x5 請注意編程輪兩側的組裝順序和位置。 Pay attention to assembly sequence and position on both sides of the coding wheel. 編程輪 CODING WHEEL 編程輪 CODING WHEEL 無齒輪邊(左) Left side 齒輪邊(右) Right side 10 pcs 5 pcs 到... - Page 18 堆高機機器人組裝 Forklift-bot Assembly 堆高機機器人組裝 Forklift-bot Assembly...
- Page 19 模組 MODULE 1 模組 MODULE 2...
-
Page 20: Forklift-Bot Example 01
Forklift-bot Example 01 Video Tips 堆高機機器人編碼範例 影片教學 https://www.youtube.com/playlist?list=PLCDHXNSOfhXN3oaLILkAh15QLNl4huXVn 所需零件: Parts Required: E4x2 E5x6 E6x5 E7x6 E8x11 請注意編程輪兩側的組裝順序和位置。 Pay attention to assembly sequence and position on both sides of the coding wheel. 編程輪 CODING WHEEL 編程輪 CODING WHEEL 無齒輪邊(左) Left side 齒輪邊(右) Right side 2 pcs 2 pcs... - Page 21 投擲機器人組裝 Throwing-bot Assembly 投擲機器人組裝 Throwing-bot Assembly 小技巧: 如需拆解以下零件, 向2側扳開即可 Tip:disassemble below modules. 模組 MODULE 3 模型 MODULE 3...
-
Page 23: Throwing-Bot Example
Video Tips 投擲機器人編碼範例 Throwing-bot Example 01 影片教學 https://www.youtube.com/playlist?list=PLCDHXNSOfhXPwlkNvIARmnTlWdePDtgB5 所需零件: Parts Required: E5x2 E6x3 E8x10 請注意編程輪兩側的組裝順序和位置。 Pay attention to assembly sequence and position on both sides of the coding wheel. 編程輪 CODING WHEEL 編程輪 CODING WHEEL 無齒輪邊(左) Left side 齒輪邊(右) Right side 2 pcs 1 pc 4 pcs... - Page 24 夾爪機器人組裝 Gripper-bot Assembly Gripper-bot Assembly 夾爪機器人組裝 模組 MODULE 1 模組 MODULE 2...
- Page 25 頭部模型組裝 Head Module Assembly AAA(x2) •電池的更換應由成人或成人監督下更換。 •避免電池盒中的接觸點或電池端子的短路。 •請勿將廢舊電池與新電池或不同類型的電池混用。 •不要混用鹼性,標準(碳 - 鋅)或可充電(鎳鎘)電池。 •請將電池極性放置正確。 •請勿嘗試為非充電電池充電。 •從產品中取出耗盡的電池,以免洩漏。 • Removal and replacement of batteries should be carried out by adults or under adult supervision. • Avoid short circuiting the contacts in the battery compartment or the battery terminals.
- Page 26 模組 MODULE MODULE 3...
-
Page 27: Gripper-Bot Example
Gripper-bot Video Tips Example 01 夾爪機器人編程範例 影片教學 https://www.youtube.com/playlist?list=PLCDHXNSOfhXM6ym4TOAzuX2fg3jm5mGym 所需零件: Parts Required: E5x9 E6x2 E7x6 E8x9 請注意編程輪兩側的組裝順序和位置。 Pay attention to assembly sequence and position on both sides of the coding wheel. 編程輪 CODING WHEEL 編程輪 CODING WHEEL 無齒輪邊(左) Left side 齒輪邊(右) Right side 9 pcs 6 pcs 1 pc... - Page 28 足球機器人組裝 Soccer-bot Assembly 足球機器人組裝 Soccer-bot Assembly 模組 模組 MODULE 3 MODULE 3 齒輪箱 Gear Box...
-
Page 30: Soccer-Bot Example 01
Video Tips Soccer-bot Example 01 足球機器人編碼範例 影片教學 https://www.youtube.com/playlist?list=PLCDHXNSOfhXPsUHzAokocWmGMxVvQVA5k 所需零件: Parts Required: E5x4 E8x5 請注意編程輪兩側的組裝順序和位置。 Pay attention to assembly sequence and position of both sides of the coding wheel. 編碼輪 CODING WHEEL 編碼輪 CODING WHEEL 無齒輪邊(左) Left side 齒輪邊(右) Right side 4 pcs 2 pcs 3 pcs... - Page 31 電池更換 How to Replace the Batteries 移除 REMOVE 打開 OPEN 電池 Battery( AAA) x2 •電池的更換應由成人或成人監督下更換。 •避免電池盒中的接觸點或電池端子的短路。 •請勿將廢舊電池與新電池或不同類型的電池混用。 •不要混用鹼性,標準(碳 - 鋅)或可充電(鎳鎘)電池。 •請將電池極性放置正確。 •請勿嘗試為非充電電池充電。 •從產品中取出耗盡的電池,以免洩漏。 • Removal and replacement of batteries should be carried out by adults or under adult supervision. • Avoid short circuiting the contacts in the battery compartment or the battery terminals. •...
- Page 32 簡易故障排除 Trouble Shooting 1.確認所有編碼豆組裝正確(參見第13頁)。 2.確認編碼輪裝配正確(參見第14~16頁,步驟 ) 3.如果機器人無法平穩地向右/向左轉或停止時,請返回第8~9頁,確認步驟 是否 有執行。 4.如果機器人不能平穩地向後移動時,請返回第5頁步驟 ,檢查B5,B7和D12部件是 否以正確的方式組裝。 5.如果繪圖機器人沒有正確地遵循編碼程序運行,請返回第20頁步驟 檢查零件D3和 C15是否以正確的方式組裝。 6.如果堆高機器人沒有正確地遵循編碼程序運行,請返回第25頁檢查E5部件是否以正確 的方式組裝。 7.如果投擲機器人沒有正確地遵循編碼程序運行,請返回第16頁步驟 檢查E21和E22 部件是否以正確的方式組裝。 8.如果夾爪機器人沒有正確地遵循編碼程序運行,請返回第30頁步驟 檢查C16部件是 否以正確的方式組裝。 9.如果足球機器人沒有正確地遵循編碼程序運行,請返回第33頁步驟 檢查C16部件是 否以正確的方式組裝。 1.Ensure all coding buttons are assembled correctly (refer to page 13). 2.Ensure the coding wheel is assembled correctly (refer to pages 14~16, steps 3.If the robot does not move smoothly or appropriately when turning right/left or stopping, please go back to pages 8~9 and ensure steps are correctly executed.
- Page 33 Name, address (no P.O. Box), telephone number, and email address. 2. 請註明產品名稱、產品型號、零件名稱、零件型號以及數量 Model name and model number.Part number, part name, and quantity. 3. 如有任何需求,請洽您的經銷商 Please contact local distributor if any query. Parts List GE-895 5合1機械編程機器人 零件表 數 量 Part Number Part Name 零件型號...
- Page 35 組裝時如有困難,請尋求家長協助 Please ask for parents assistance if any problem during assembly. 寬面 窄面 將墊圈置於 螺絲頂端後, 直接鎖緊螺絲即可 Place the washer on the tip of the screw, and then screwin directly. 齒輪箱模型組裝 Gear Box Module Assembly 小技巧 : 壓緊C3較易鎖附螺絲 小技巧 : 壓緊C3較易鎖附螺絲 Tip : Press C3 to A2 to fasten P7 Tip : Press C3 to A2 to fasten P7 P2 (黑Black)
- Page 36 正確 Correct 錯誤 Incorrect 正確 Correct 正確 Correct 錯誤 Incorrect 錯誤 Incorrect P4 (橘Orange) P5 (黑Black) 錯誤 Incorrect P3 (黃Yellow) P3 (黃Yellow) P3 (黃Yellow) P5 (黑Black) P4 (橘Orange) P3 (黃Yellow) P2 (黑Black)
- Page 37 齒輪箱測試(1) Rear Gear Box Testing (1) 頭部模組 將頭部模組電源線連接至馬達基本端子組(參考第3頁步驟 頭部模組組裝 ) 電源端子 Head Module 將電源開關向右撥開啟電源 如圖所示,齒輪將按逆時針方向運行 測試完成後,關掉電源,移除電源線,如果齒輪箱 運轉不順利或發出不正常的聲音,請回到第四頁 橘Orange 步驟 重新組裝 Fully connect the power supply cable of assembled 藍Blue head (refer to page 4, step , Head Module Assembly) to the terminal base. Push the switch to the right to turn the power on.
- Page 38 小技巧 : 壓緊C2較易鎖附螺絲 Tip : Press C2 to A5 to fasten P7...
- Page 39 齒輪箱測試(2) Rear Gear Box Testing (2) 將頭部模組電源線連接至馬達基板組端子 (參考第4頁步驟 將電源開關向右撥開啟電源 如圖所示,齒輪將按逆時針方向運行 測試完成後,關掉電源,移除電源線,如果齒輪箱運轉不順利或發生不正常 的聲音,請回到第四頁步驟 重新組裝 Fully connect the power supply cable of assembled head (refer to page 4, step to the terminal base. Push the switch to the right to turn the power on. The gear will run counterclockwise as illustration.
- Page 40 正確 錯誤 Correct Incorrect 請做2組...
Need help?
Do you have a question about the GE-895 and is the answer not in the manual?
Questions and answers