Advertisement
The New Concept
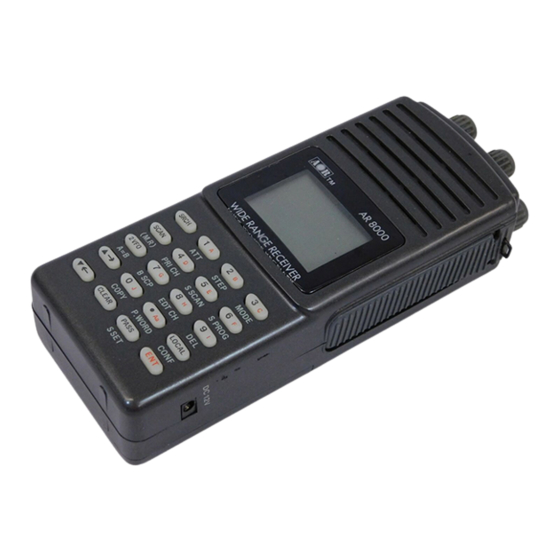
AR8000UK
-
Basic operation quick reference guide
© AOR UK LTD 1994
(1) NEWUSER / EXPERT status BEEP & FUNCTION
The AR8000 has been preprogrammed with defaults when shipped from the factory. Two parameters
(NEWUSER/EXPERT and FUNC/2ndF) greatly affect the way in which the AR8000 microprocessor operates so careful setting is required. This procedure may be
skipped should you be happy to accept the default settings. It is strongly recommended that NEWUSER mode and
2nd Function are used during familiarisation of the AR8000 receiver. Press and hold the [FUNC] key on the top left hand side panel. Use a combination of the
UP/DOWN keys and [DIAL] to change the settings. Press [ENT] to accept the new parameters. (Refer to section 6-3 page 31 of the operating manual).
(2) Entering a frequency through the keypad
Press the [2VFO] key to first select "VFO mode" (should the receiver be scanning or searching etc). Each
time the [2VFO] key is pressed VFO "A" and VFO "B" alternate between active and stand-by (the top frequency being active). Example of frequency entry 145.800 MHz.
Press [1] [4] [5] [.] [8] [ENT] (Refer to section 6-4 page 33 of the operating manual).
(3) Correcting frequency readout during input
Should an error be made while entering frequency data (by pressing the wrong numeric key), it may be
corrected using the BACKSPACE facility. This facility enables rapid correction of errors prior to the completion of entry by the [ENT] key. Example of frequency data
correction while keying 433.250 MHz. Press [4] [3] [3] [.] [2] then assume [7] by mistake. Press [UP>] and the number "7" clears from the LCD. Press [5] [ENT] to
finalise the correct entry. (Refer to section 6-5 page 35 of the operating manual).
(4) Correcting incorrect frequencies after input
If for any reason the currently displayed active VFO frequency is incorrect, it may be changed by two
methods: Firstly the correct frequency may be input to replace the currently displayed incorrect frequency, there is no need to clear the VFO data first. Secondly the
frequency data may be "edited" by means of a highlight flashing cursor. Example of frequency data correction using the cursor:- Start by keying in a frequency to
start with: Press [8] [1] [.] [8] [ENT] to input 81.8 MHz. For this example let's assume that the actual frequency required is 82.8 MHz. Press [FUNC] and then either
the [UP] or [DOWN] key to call the highlight cursor. Initially the flashing highlight cursor appears in the MHz position. Key in [2] to correct the current incorrect display
(which is showing 81.8 MHz rather than 82.8 MHz). Alternatively use the [DIAL] to scroll through the digits just like a tuning dial. When the correct frequency is
displayed press [ENT] to accept the corrected frequency data. (Refer to section 6-6 page 35 of the operating manual).
(5) Changing frequency - Using the [UP] [DOWN] keys
The UP / DOWN keys and rotary [DIAL] provide convenient methods of frequency change. The
speed at which the receiver steps up or down depends upon the STEP SIZE which is default to AUTO. Should you press and hold either the [UP] or [DOWN] key for
more than one second, the squelch will be defeated and the receiver made to tune automatically either upward or downward depend ing upon the key in use. Tuning will
stop when the key is released. The speed of tuning using the [DIAL] may be increased by a factor of x10 while the "F" function legend is displayed (by using the [FUNC]
key). (Refer to sections 6-7 & 6-8 page 36 of the operating manual).
(6) Changing frequency STEP size
The preprogramming of AUTO step size may be manually overridden so you may choose alternative settings at will or
when bandplans are updated. Should you wish to change the default step size press [FUNC] [2]. The third line of the LCD will flash the current default size (perhaps
"25.00" kHz) and the word "AUTO" to indicate default operation. The fourth line of the LCD has the legend "STEP SET" to indicate that the AR8000 is expecting you to
change the step size. In NEWUSER mode, the [DIAL] is used to alter the STEP size. The sizes available being: 0.05 kHz (50 Hz), 0.1 kHz (100 Hz), 0.2 kHz (200 Hz),
0.5 kHz (500 Hz), 1.00 kHz, 2.00 kHz, 5.00 kHz, 6.25 kHz, 9.00 kHz, 10.00 kHz, 12.50 kHz, 20 kHz, 25.00 kHz, 30 kHz, 50 kHz, 100.00 kHz, 200.00 kHz, 250 kHz,
500.00 kHz. When the desired step size is displayed press [ENT] to accept the new step size.
Active frequency must be divisible by step size. There is just one small point to keep in mind, the active frequency must be divisible by the step size... in 99% of
cases they will be. Note: AUTO-STEP and AUTO-MODE are linked to the preprogrammed bandplan data. When one of the parameters is changed from the default
"AUTO" the bandplan will be ignored. This is useful for tuning through bands with unusual modes and channel steps.
To reinstate AUTO step size, the receive MODE must be returned to "AUTO" using the "MODE SET" menu which is accessed by pressing [FUNC] [3]. In
EXPERT user mode the tuning step size may also be programmed in multiples of 50 Hz (between the limits of 50 Hz to 999.95 kHz) so that unusual step sizes other
than stated are possible. (Refer to section 6-9 page 37 of the operating manual).
(7) STEP OFFSET facility
To ensure that the AR8000 can follow unusual bandplans, the active frequency (in VFO mode) or lower band edge (in search mode)
may be offset in a positive (+) direction by half the current step size. For example, to tune from 71 MHz in 12.5 kHz steps offset by 6.25 kHz carry out the following key
sequence: [7] [1] [ENT] to select 71.000 MHz. [FUNC] [2] to enter the "STEP SET" menu. Press [PASS] to select STEP OFFSET the legend "+" appears to the right
of the word "STEP". Rotate the [DIAL] on the top cabinet until the "12.50" kHz step size is displayed. Press [ENT] to select the data input. The receiver will return to
VFO mode and the frequency displayed will be updated to read 71.0062 MHz (the actual frequency is 71.006250 MHz but the LCD does not show the 50 Hz digits).
This means that the displayed frequency has been offset by +6.25 kHz. Rotating the [DIAL] clockwise will increase the frequency by 12.5 kHz so that the new
frequency will be displayed as 71.0187 MHz (the actual frequency being 71.018750 MHz). The receiver is now tuning in 12.5 kHz steps with a step offset of +6.25 kHz.
(Refer to section 6-10 page 39 of the operating manual).
(8) Changing receive mode
The AUTO MODE defaults may me manually overridden at any time should you wish to select an alternative receive mode on any
frequency. To change the receive mode press [FUNC] [3]. The third line of the LCD will indicate the current mode in use. A hash symbol "#" to the left of the mode
indicates the current setting. The right arrow symbol ">" indicates the new mode choice which is altered by using the [DIAL] control on the top panel of the cabinet. To
return the STEP and MODE to default, select ">AUT" and press [ENT]. The display returns to VFO mode. The modes are allocated in order: "NFM AM USB LSB CW
AUT WFM", "AUT" refers to AUTO MODE. When "AUT" is selected, the receive mode and step size will be selected automatically using the preprogrammed AR8000
bandplan data.
Note: AUTO-STEP and AUTO-MODE are linked to the preprogrammed bandplan data. When one of the parameters is changed from the default "AUTO" then the
bandplan will be ignored. This is useful for tuning through bands in unusual modes and channel steps. To reinstate AUTO step size, the receive MODE must be
returned to "AUTO" using the "MODE SET" menu which is accessed by pressing [FUNC] [3]. (Refer to section 6-11 page 40 of the operating manual).
(9) [ATT] Attenuator ON/OFF
To toggle the attenuator On/Off while in VFO mode press [FUNC] [1] the legend "A" confirms selection and incoming signals will
be reduced in strength. To toggle On/Off again just repeat the sequence [FUNC] [1], the legend "A" is extinguished when the attenuator is OFF. The selection of
attenuator may also be programmed into memory channels and when defining program search. (Refer to sections 6-12 page 42, 4-5, 22 & 23 of the operating
manual).
(10) Storing receive data into memory - memory input in VFO mode
Lets assume that you wish to store the frequency of 88.3 MHz with the
attenuator Off into memory bank "A" location "00" (A00) while in VFO mode. Start by selecting VFO mode then key in the frequency of 88.3 MHz, "mode and step size"
are set to the default AUTO. Press:- [2VFO] to place the receiver into VFO mode. [8] [8] [.] [3] [ENT] to select the desired frequency, the mode and step size will be
automatically set by the AR8000 microprocessor. Press and hold the [ENT] key for more than one second to enter memory input mode. The third line of the LCD
will display the legend "BANK" and the highlight cursor will be positioned over the bank identification letter such as "A". The microprocessor will automatically select the
youngest free memory location. You may change the bank identifier at this time by rotating the [DIAL] on the top cabinet or by typing in a new letter using the numeric
keypad. Note: You will notice that to the right of the keypad numbers, there are small orange letters which are bank identifiers. Key 1 is "A", key 2 is "B" etc. The lower
case bank identifiers may be accessed using the CASE SHIFT key [.Aa]. Remember, if you take too long entering data (90 seconds) the display will revert to it's
original condition (2VFO mode). Assuming that you wish to store 88.3 MHz in the very first memory channel irrespective of what may already be stored there press
[1A] then select the first channel by pressing [0] [0] Next type [ENT] to accept the memory location A00. The highlight cursor will move to the fourth line to the right of
the legend "TXT".
Should you wish to change the alphanumeric comment rotate the [DIAL] on the top cabinet until the chosen letter or symbol is displayed. A maximum word length of
seven characters may be chosen. To move to the right and left character positions use the arrow keys. If you are happy with the alphanumeric description press [ENT]
and the display will return to VFO mode. At any time you may abort the memory input by pressing the [CLEAR] key, the display will return to VFO mode. (Refer to
section 7-1 page 45 of the operating manual).
(11) Memory recall (M.R) - Recalling receive data from memory
Once receive frequency and mode data has been stored into a memory location, its
retrieval is quick and simple. Let's assume that you wish to retrieve the frequency of 88.3 MHz which has been programmed into to memory "A00" during the example in
the preceding section 7-1 of the operating manual (and above). Press [SCAN] to place the receiver into memory recall mode (M.R). The legend "M.RE" appears on
the top left of the LCD to confirm operation. The receiver will display a memory channel, mode, frequency and text. If the desired memory channel is not immediately
displayed it may be RECALLED by keying in the required location. To recall memory channel "A00" type [1A] [0] [0] there is no need to press [ENT]. The "M.RE
SELECT" menu automatically appears when the [1A] key is pressed so that the frequency and comments are displayed on the third and fourth lines of the LCD for easy
recognition. The receiver will monitor whatever memory channel first appeared when you entered memory recall mode.
Memory channel review / hunt
The [DIAL] may be rotated to review, hunt for and select memory channels. From VFO mode press [SCAN] to enter memory
recall "M.RE" mode then rotate the [DIAL] to select the required memory channel. This is a useful tool for reviewing memory contents and hunting for a specific channel
when you forget where you stored it! Should you know the location of the required memory channel, the keypad method of memory recall will be much faster. The
receiver will monitor whatever memory channel is displayed in "M.RE" mode.
Advertisement
Table of Contents

Related Manuals for AOR AR8000UK


Summary of Contents for AOR AR8000UK
- Page 1 The New Concept AR8000UK Basic operation quick reference guide © AOR UK LTD 1994 (1) NEWUSER / EXPERT status BEEP & FUNCTION The AR8000 has been preprogrammed with defaults when shipped from the factory. Two parameters (NEWUSER/EXPERT and FUNC/2ndF) greatly affect the way in which the AR8000 microprocessor operates so careful setting is required. This procedure may be skipped should you be happy to accept the default settings.
- Page 2 The password facility prevents preying eyes from accessing and reviewing your memory, scan and search banks. PASSWORD PROTECTION of the AR8000UK IS NOT INTENDED AS AN ABSOLUTE SECURITY SYSTEM. The special protected banks have a small identifier a, b, c, d, e, f, g, h, j. Password operation does not affect the access of data in banks A, B, C, D, E, F, G, H, I & J. As default from the factory the "password"...
Need help?
Do you have a question about the AR8000UK and is the answer not in the manual?
Questions and answers