Table of Contents
Advertisement
Advertisement
Table of Contents

Related Manuals for Matica M1100


Summary of Contents for Matica M1100
- Page 1 COLOR ID CARD PRINTER USER MANUAL Revision 1.3...
- Page 2 Copyright Important: the technical information contained in this manual is property of MATICA System S.r.l. and is secured by copyright. The terms of the license define and specify permitted uses and other limitations. Reproduction of any part of this manual, in any form, is forbidden without the explicit written permission of MATICA System S.r.l.
-
Page 3: Table Of Contents
2.2 Loading Cards..................... 12 2.3 Installation the Printer Driver............... 14 2.4 Test Printing....................22 2.5 Maticard Pro Desktop configuration for M1100 – M1200 ......24 2.6 Changing a Ribbon and Cleaning Roller ............. 29 3. Checking and changing the Printer Properties ......30 3.1 Checking the Printer Properties .............. - Page 4 <Figure 25> Driver location ................17 <Figure 26> Driver selection ................18 <Figure 27> Hardware Installation “Continue Anyway”........18 <Figure 28> Driver installation finished ............19 <Figure 29> Close Driver installation ..............19 M1100 – M1200 User Manual Rev. 1.3 Page 4/40...
- Page 5 <Figure 31> Smart Card Reader Driver location..........20 <Figure 32> Smart Card Reader Driver selection ..........21 <Figure 33> Smart Card Reader Driver installation finished ......21 <Figure 34> M1100–M1200 Card Printer ............22 <Figure 35> Printer Properties ................22 <Figure 36> Printer Test Page................23 <Figure 37>...
-
Page 6: Introduction
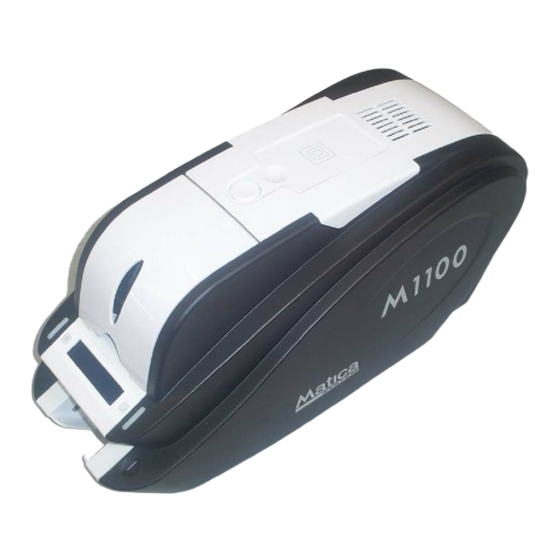
Card Printer. 1.1 Printer Outside Features This M1100 – M1200 Card Printer takes a power via the adaptor provided with the printer. Using USB port, it communicates with user’s PC. For the user’s convenience, the printer process status can be seen through LCD and most of the operations can be controlled by two LED buttons. -
Page 7: Printer Inside Features
1. Introduction 1.2 Printer Inside Features M1100 – M1200 Printer adopts a semi-permanent Ribbon cartridge. The following shows the internal functional features found on your M1100 – M1200 Printer. Thermal Printer Head Ribbon Cartridge Card Thickness Control lever Hopper Stacker(Output Hopper) -
Page 8: Ribbon Cartridge Features
It removes dust in the surface of card to improve print quality before the card is printed. It should be changed together with the Ribbon. (Caution! This disposable cleaning roller is provided with the Ribbon. If this is not changed, print quality mighty be degraded.) M1100 – M1200 User Manual Rev. 1.3 Page 8/40... -
Page 9: Lcd Panel Display And Button Operation
LED ON / LED BLINKING ▪ M1100 - M1200 System Ready : System is ready to print. Press left button to see the printer setting information and press right button or Power ON/OFF by software. ▪ Ver X.XX… Initialize… : Under checking the printer’s version and initializing. -
Page 10: Installing The Printer
<Figure 6> Take out the cartridge 2.1.4. Prepare the ribbon before inserting it into the cartridge. Refer to the illustration on the inside of the cartridge. <Figure 7> Prepare the ribbon M1100 – M1200 User Manual Rev. 1.3 Page 10/40... -
Page 11: Figure 8> Install The Ribbon
To avoid contamination, always hold the cleaning roller. Be careful of touching, dust and contamination because it is adhesive. (Caution! Do not use without peeling off the protective wrapper. The cleaning roller do not perform its function.) <Figure 10> Peel the protective wrapper M1100 – M1200 User Manual Rev. 1.3 Page 11/40... -
Page 12: Loading Cards
<Figure 12> Close Top Cover 2.2. Loading Cards This section shows how to load plastic cards into the M1100 – M1200 Printer. 2.2.1. If the card hopper cover is closed, open it. 2.2.2. Adjust the card thickness with control lever. -
Page 13: Figure 14> Holding The Cards
<Figure 16> Restore the card stack 2.2.6. Place the card to the input hopper and close the hopper cover. <Figure 17> Placing the cards and close the hopper cover M1100 – M1200 User Manual Rev. 1.3 Page 13/40... -
Page 14: Installation The Printer Driver
2.3.2. Run the Printer Driver double clicking the DDInstall.exe file from the CD provided with the printer. 2.3.3. Select the language and click “Next” in the STEP 1 window. <Figure 19> Driver Installation STEP 1 M1100 – M1200 User Manual Rev. 1.3 Page 14/40... -
Page 15: Figure 20> Driver Installation Step 2
2. Installing the Printer 2.3.4. Click “Next” in the STEP 2 window. <Figure 20> Driver Installation STEP 2 2.3.5. Click “Continue Anyway” in the Software Installation window. <Figure 21> Software Installation “Continue Anyway” M1100 – M1200 User Manual Rev. 1.3 Page 15/40... -
Page 16: Figure 22> Driver Installation Step 3
2. Installing the Printer 2.3.6. Connect the power cord and USB cable to the printer. <Figure 22> Driver Installation STEP 3 2.3.7. Turn On the printer. <Figure 23> Printer Turn ON M1100 – M1200 User Manual Rev. 1.3 Page 16/40... -
Page 17: Figure 24> Install From A Location
2.3.8. Select the “Install the software from a list or a specific location” option and click “Next”. <Figure 24> Install from a location 2.3.9. Browse the Matica User CD to find the driver and click “Next”. <Figure 25> Driver location M1100 – M1200 User Manual Rev. -
Page 18: Figure 26> Driver Selection
2. Installing the Printer 2.3.10. Select the desired driver and click “Next”. <Figure 26> Driver selection 2.3.11. Click “Continue Anyway” in the Hardware Installation window. <Figure 27> Hardware Installation “Continue Anyway” M1100 – M1200 User Manual Rev. 1.3 Page 18/40... -
Page 19: Figure 28> Driver Installation Finished
2. Installing the Printer 2.3.12. Click “Finish” in Completing the Found New Hardware Wizard. <Figure 28> Driver installation finished 2.3.13. Click “Finish” in Completing the Found New Hardware Wizard. <Figure 29> Close Driver installation. M1100 – M1200 User Manual Rev. 1.3 Page 19/40... -
Page 20: Figure 30> Install Smart Card Reader Usb
Contactless Reader), select the “Install the software from a list or a specific location” option and click “Next”. <Figure 30> Install Smart Card Reader USB 2.3.15. Browse the Matica User CD to find the driver and click “Next”. <Figure 31> Smart Card Reader Driver location M1100 – M1200 User Manual Rev. -
Page 21: Figure 32> Smart Card Reader Driver Selection
2.3.16. Select the desired driver and click “Next”. <Figure 32> Smart Card Reader Driver selection 2.3.17. Click “Finish” in Completing the Found New Hardware Wizard. <Figure 33> Smart Card Reader Driver installation finished M1100 – M1200 User Manual Rev. 1.3 Page 21/40... -
Page 22: Test Printing
<Figure 34> M1100–M1200 Card Printer. 2.4. Test Printing In this step, you can check if the printer driver installation has been finished successfully. 2.4.1. In “Printer and Fax” window, click right button on ‘M1100-M1200 Card Printer’ icon, then select “Properties”. <Figure 35> Printer Properties. -
Page 23: Figure 36> Printer Test Page
2. Installing the Printer 2.4.2. After selecting “General” tab in “M1100-M1200 Card Printer Properties” window, click “Print Test Page” button. <Figure 36> Print Test Page. 2.4.3. Printer will start printing, and on the screen it will be asked whether printing... -
Page 24: Maticard Pro Desktop Configuration For M1100 - M1200
2. Installing the Printer 2.5. Maticard Pro Desktop configuration for M1100 – M1200 2.5.1. Run the Setup_Maticard_Pro_For_Desktop.exe file to install the Maticard Pro Desktop program. In the InstallShield Wizard start window, click Next. <Figure 38> Install Maticard Pro Desktop 2.5.2. In the InstallShield Wizard welcome windows, click Next. -
Page 25: Figure 40> License Agreement
2. Installing the Printer 2.5.3. Accept the terms in the license agreement and click Next. <Figure 40> License agreement 2.5.4. Choose the destination folder and click Next. <Figure 41> Destination folder M1100 – M1200 User Manual Rev. 1.3 Page 25/40... -
Page 26: Figure 42> Setup Type
2. Installing the Printer 2.5.5. Choose the setup type and click Next. <Figure 42> Setup type 2.5.6. To start the installation, click Install. <Figure 43> Start installation M1100 – M1200 User Manual Rev. 1.3 Page 26/40... -
Page 27: Figure 44> Installation Completed
<Figure 44> Installation completed 2.5.8. On the PC desktop, double click the Maticard Pro Desktop icon. In the Maticard Pro Desktop window, click Program Settings from the Options menu. <Figure 45> Program settings M1100 – M1200 User Manual Rev. 1.3 Page 27/40... -
Page 28: Figure 46> Printer Name
2.5.9. In the Program Setting window, select the M1100-M1200 Card Printer option from the Printer name dropdown list. <Figure 46> Printer name 2.5.10. Then select the M1100 or the M1100 from the Printer type dropdown list. To save the settings click OK. <Figure 47> Printer type M1100 –... -
Page 29: Changing A Ribbon And Cleaning Roller
Lift up the ribbon bars in order of 3 and 4. <Figure 48> Ribbon Separation 2.6.4. Remove the used ribbon. Set up the new ribbon and cleaning roller together, with the reference of 2.1 “Ribbon Setting”. M1100 – M1200 User Manual Rev. 1.3 Page 29/40... -
Page 30: Checking And Changing The Printer Properties
3. Checking and changing the Printer Properties 3.1. Checking the Printer Properties To check the M1100 – M1200 Printer Properties, go to “Control Panel”, click right button on “M1100 – M1200 Card Printer” in Printers and Faxes. Then select “Properties” as in <Figure 35>. -
Page 31: Figure 50> Layout
You can select either horizontal or vertical printing direction; then click “OK” button. (Caution! Default value is recommended in advanced option. If you want to change the value, please contact Matica System Reseller.) <Figure 50> Layout. M1100 – M1200 User Manual Rev. -
Page 32: Figure 51> Paper/Ribbon/Quality
You can set the type of paper, ribbon, and quality. Paper Tray Select tray and card type option. M1100 – M1200 has only one hopper and supports only CR-80 type card. You need not to change default value in this option. -
Page 33: Figure 52> Side/Media
You can select one side printing or both Sides printing. Front / Back The previously defined mask (standard, smartcard, magnetic, etc) can be applied to front or back side. <Figure 52> Side/Media. M1100 – M1200 User Manual Rev. 1.3 Page 33/40... -
Page 34: Changing The Printer Properties
3. Checking and changing the Printer Properties 3.3. Changing the Printer Properties 3.3.1 Share tab “Share” option allows printer to share through network. Default value is “Not Share”. <Figure 53> Sharing Printer. M1100 – M1200 User Manual Rev. 1.3 Page 34/40... -
Page 35: Figure 54> Ports
3. Checking and changing the Printer Properties 3.3.2 Ports tab Ports tab shows the port connecting with M1100 – M1200. M1100 – M1200 has connection with USB Virtual printer port because M1100 – M1200 uses USB to connect with PC. -
Page 36: Figure 55> Advanced
It is for “Time option” setting, “Priority order”, “Spool”, and etc are available in “Advanced” tab. “Advanced” setting follows MS Windows standard. If you want to change the setting, refer to the Window manual. (It is recommended to maintain default value.) <Figure 55> Advanced. M1100 – M1200 User Manual Rev. 1.3 Page 36/40... -
Page 37: Figure 56> Color
3.3.4 Color Management tab In “Color management” tab, you can select color management profile fit to the printer. M1100 – M1200 uses color profile to express optimal color. The default profile is ‘cardprinter_k’. (It is recommended to maintain default value.) <Figure 56>... -
Page 38: Troubleshooting
When the printer roller is stained with dirt: Remove the dirt with the cleaning kit. When the surface of the card is stained with dirt: After checking the card, change it to another card. M1100 – M1200 User Manual Rev. 1.3 Page 38/40... -
Page 39: Printing Quality
When the printer head is stained with dirt: Clean the printer head. Damaged printer head surface: Please contact Matica System Reseller for replacement. <Figure 58> Print Quality Trouble Example 2 4.2.3. The print is not clear, or is uneven. -
Page 40: Magnetic Stripe Encoder
Change the card. Too high value of the depth of color: Please contact Matica System Reseller. The default value of the depth of color for your printer needs to be changed. 4.4.2. LCD screen displays the error message “Ribbon Not Found”. - Page 41 Make the USB cable connection again. Bad USB cable for printer transfer: Change the USB cable. If the selected printer is different model rather than M1100 – M1200: Select M1100 – M1200 to print. Wrong port setting of the printer driver: Check the port setting of the printer driver whether it is USB port or not.
-
Page 42: Printer Specification
SIM Type - ISO7816 (ID-000) Two Contactless ISO14443 (Type A / B), ISO15693, MIFARE Encoding (Internal & External) Rotator Option Default * Specifications are subject to change with or without notice. M1100 – M1200 User Manual Rev. 1.3 Page 42/40...
Need help?
Do you have a question about the M1100 and is the answer not in the manual?
Questions and answers