Table of Contents
Advertisement
Quick Links
Advertisement
Table of Contents

Related Manuals for Matica moca espresso


Summary of Contents for Matica moca espresso
- Page 1 USER GUIDE...
-
Page 2: Copyright Notice
Refer to the warranty statement provided with the printer for the warranty terms and conditions, and its limitations of liability. Environmental Impact Matica is committed to reducing the environmental impact of its products through improvements in energy efficiency. DIRECTIVE 2002/96/EC ON THE TREATMENT, COLLECTION, RECYCLING AND DISPOSAL OF ELECTRIC AND ELECTRONIC DEVICES AND THEIR COMPONENTS 1. - Page 3 For Europe Warning “This is a Class A product. In a domestic environment this product may cause radio interference in which case the user may be required to take adequate measures.” For US “This equipment has been tested and found to comply with the limits for a Class A digital device, pursuant to part 15 of the FCC Rules.
-
Page 4: Table Of Contents
Wi-Fi Connection with Fixed IP....................3-9 Uninstall Program Tabs ......................3-11 Add a second printer or change the type of connection ............3-11 Matica Printer Manager ......................3-11 Using the Printer Manager Instrument Bar with the Mouse..........3-12 Printers Management....................... 3-12 Printer Manager ........................ - Page 5 PRINTING ........................4-1 Card Printing ..........................4-1 Card Printing Using Word ...................... 4-1 Double-side Printing ........................4-2 Color Settings ..........................4-4 PRINTER MAINTENANCE ..................... 5-1 Printer Routine Cleaning ......................5-1 Standard Cleaning ........................5-1 Standard Cleaning Procedure....................5-1 Card Path Advanced Cleaning....................5-4 Advanced Cleaning Procedure ....................
-
Page 6: Product Overview
If it is returned without its original packaging and any components are damaged during transportation, such components will no longer be covered by the warranty. Matica will also charge for the new packaging which will be required to ship the printer back... -
Page 7: Unpacking The Printer
Unpacking the Printer The following items are included in the box: • Printer • Software CD-ROM containing the installer, printer driver and Printer Manager • The Placemat • Warranty and Customer Service Information • Cleaning kit • Power cord • Power supply •... -
Page 8: Functional Description
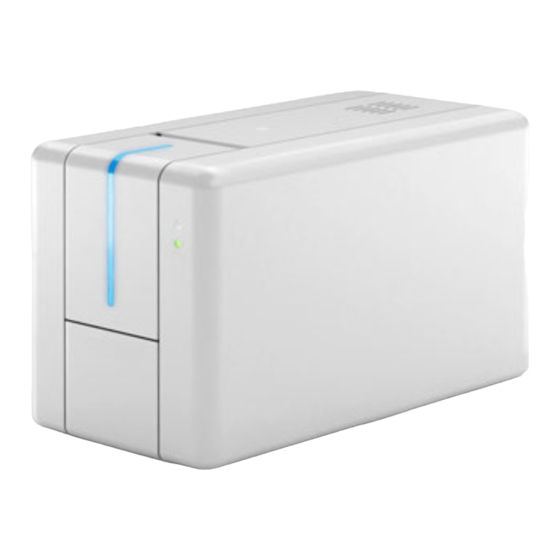
Functional Description Front View The front of the printer is the operator side and features: 1) Front slot (only when this option has been ordered) 2) Input Hopper 3) Operator panel and printer status indicators: ON/OFF button and a 3-color printer status LED. Operator Panel The front operator panel consists of: 1) Soft touch ON/OFF button with a white LED that, when on, indicates when the printer is switched ON:... -
Page 9: Rear View
Rear View The following components are located on the back panel: 1) Power cord socket 2) Two USB connectors (Type A and B) 3) Ethernet connector with traffic LED 4) SD card (option) slot 5) Reject bin attachment slots 6) External smart encoder (option) connector 7) Kensington lock. -
Page 10: Installation Procedures
Installing the Ribbon Original Matica ribbons are to be installed carefully. The ribbon carrier that comes with the printer helps to install the ribbon quickly, easily and accurately. Once the ribbon is in its carrier, the carrier can then be easily dropped into the printer using the yellow guides. -
Page 11: Card Feeding
5) Close the printing module compartment cover. Note: Keep away from the printhead so as avoid damaging it. Card Feeding The input Hopper (automatic card feeder) can hold a maximum of one hundred 0.76 mm thick cards. A label inside the door gives the instructions for correctly positioning and orienting the card. When the single card manual feeder option is present, it can be used without needing to empty the input Hopper. -
Page 12: Front Slot (Manual Card Hopper)
Front Slot (Manual Card Hopper) The manual card feeder is always ready for use and is prioritized. It is suggested that it be used when the job requires a card that different than the ones loaded in the input Hopper. 1) Insert the card into slot (a) indicated in the figure below. -
Page 13: Connecting The Power Supply And Powering On The Printer
Connecting the Power Supply and Powering ON the Printer Connect the power cord to the power outlet, to the power supply and then connect the power supply to the printer as shown below. Press the ON/OFF button to power on the printer. User Guide... -
Page 14: Installing The Software And Configuring The Printer
Installing the Software and Configuring the Printer The CD-ROM that comes with the printer contains the following: • Windows Vista, Seven, Win8, Win 8.1 (32 and 64 bit) printer driver for USB, Ethernet LAN and Wireless connections (if supported by the purchased model) •... - Page 15 The possible choices are USB, Ethernet/LAN and Wireless (WiFi). Note: If Launch Add Printer Wizard check box is deselected, the Add Printer Wizard can still be executed manually from Start > Programs > Matica. User Guide...
-
Page 16: Add Printer Wizard Program Communication
Add Printer Wizard Program Communication When the CD-ROM software installation is complete, a help Wizard is displayed for configuring the connection mode to be used. Note: Connection setup can be changed at any time by activating the Wizard mode from the Print Management Program. -
Page 17: Ethernet (Lan) Connection Using Dhcp
Ethernet (LAN) Connection using DHCP Click the LAN radio button on the Add Printer Wizard Program screen. The following screen is displayed: Choose the LAN connection required, selecting either DHCP supplied automatically by the network server or manual insertion on the basis of specific requirements, then click Next. Note: For more information regarding a specific company network, ask the network administrator. -
Page 18: Ethernet (Lan) Connection With Fixed Ip
Once found, the printer appears in the list of available printers with its related information (IP Address, Printer name, Mac Address). Click Next and wait for the configuration software to identify the printer and to display a message indicating that installation was successful. Ethernet (LAN) Connection with Fixed IP Click the LAN radio button on the Add Printer Wizard Program screen. - Page 19 The following screen is displayed: Attach the network cable to the printer and then click Next. The following screen is displayed by the configuration software: Enter the data required for the manual configuration of the network (if part of a company network, it may be necessary to refer to the network administrator for information).
-
Page 20: Wi-Fi Connection Using Dhcp
Click Next upon completion. The following configuration software screen is displayed: If the printer is not found, click Start to search for the network printer and wait until it is found. Once found, the printer appears in the list of available printers with its related information (IP Address, Printer name, Mac Address). - Page 21 Note: For more information regarding a specific company network, ask the network administrator. The automatic selection DHCP Network Installation is suggested for the more common installation types. WARNING: before proceeding to connect to your wireless network; if necessary you must to manually enter the data of the wireless network (SSID and password).
-
Page 22: Wi-Fi Connection With Fixed Ip
Wi-Fi Connection with Fixed IP Click the WiFi radio button on the Add Printer Wizard Program screen. The following screen is displayed for the search of the SSID wireless connection. Choose the wireless connection available by using the password associated to the WIFI network. The following screen is displayed: Click the Fixed IP Wifi Network installation radio button. - Page 23 Store the data just entered by clicking Apply Changes and then click Next. The following screen is displayed: Follow the instructions displayed: • Power OFF the printer • Disconnect the USB Cable • Connect the printer to the network using the LAN cable •...
-
Page 24: Uninstall Program Tabs
1) in Windows XP, select Start > Control Panel > Add/Remove Programs > DCP Version 1.xx. 2) in Windows 7, Windows 8/8.1, select Start > Control Panel > Remove Programs > DCP Version 1.xx. Note: Alternatively, remove manually the DCP Matica applications. 1) in Windows XP, run the program C:\Programs\Matica\Espresso\unins000.exe 2) in Windows 7, Windows 8/8.1, run the program... -
Page 25: Using The Printer Manager Instrument Bar With The Mouse
Right-clicking the related icon on the instrument bar opens the Windows menu popup program. The menu consists of the following: • Printer Manager: Opens the Printer Manager program • Where To Buy: Opens a web browser with a link to the Matica Technologies commercial website • Popup Print Errors • Popup Job Status •... -
Page 26: Printer Manager
Printer Manager Open the Print Manager by double-clicking in the Application bar icon 1) Information regarding the printer installed, or on its configuration, is displayed in this area. These contents are associated to the icon button displayed on the left hand-side of the window. The following Printer Manager function icon buttons are provided: •... - Page 27 Printer Status Area The printer status and error or warning messages are displayed in this area. The possible conditions are: Ready, Busy, Disconnected. Ribbon Status Area Ribbon-related information is displayed in this area. 1) Type of ribbon installed. 2) Ribbon Preferences button: click this button to open the printer driver’s Media tab from where the ribbon settings can be changed.
-
Page 28: Preferences
Preferences Open the Preferences by clicking on the icon This button to run the printer driver user interface program from where Printer Preferences and other printer parameters can be set. It provides a short-cut to the printer driver program without having to exit the Printer Manager. The first tab displayed by default is the Card tab. -
Page 29: Encoding (Optional)
Encoding (optional) Open the Encoding by clicking on the icon . If available, this feature enables magnetic encoding and the retrieval of the Smart Card ATR number. The following can be defined in this area: 1) Magnetic encoding: test the module and single card read/write on the magnetic stripe of the card 2) Chip encoding: test the module and read the ATR of smart cards. -
Page 30: Updating The Printer Firmware
Energy Saving Set the energy saving features in this area. Selecting or deselecting the Enable Energy Saving check box enables or disables, respectively, the Energy Saving area. When disabled, the default timing is set by the FW to 5 minutes and is displayed in grey. (Default: Enabled). -
Page 31: Printer Status Pop-Up
Printer Status Pop-up The Printer status pop-up consist of a card window containing several areas that the software compiles in real time every time the pop-up needs to be displayed. 1) Printer Name area: the printer’s default name or its name assigned during installation is displayed in this area. -
Page 32: Printing
- Barcode, etc. Once the operation is complete, click File followed by Print. 7) Click Print or click on the printer icon. Select Matica printer. 8) Select Properties to customise the print options from this screen: 9) Select the Output choosing between Output Hopper or Rear Bin. -
Page 33: Double-Side Printing
10) Click the Media tab to configure specific settings such as: • Ribbon Identification • Color Panel Adjustment (brightness, contrast, sharpness) • Overlay Panel Adjustment • K Panel /Monochrome Adjustment (greyscale, black text, etc..) Note: If necessary, configure the settings in the Configuration tab to enable use of particular options or additional accessories installed on the printer. - Page 34 If Dual-sided printing was selected, by clicking the Media tab of Printer Preferences the following parameters for the two sides of the card can be selected independently: • Color Panel Adjustment (brightness, contrast, sharpness) • Overlay Panel Adjustment • K Panel /Monochrome Adjustment (greyscale, black text, etc..) Note: The Back Mode button default selection optimizes the consumption of the ribbon installed in the machine.
-
Page 35: Color Settings
Color Settings To customize color printing, click Printer Driver Properties and then click the Color Settings tab. You can modify the saturation of each colour being printed by moving its related cursor. When the cursors are moved, the image with the coloured pencils illustrates how the settings change. However, to be sure that the actual result obtained meets your expectations, it is necessary to run a few print tests. -
Page 36: Printer Maintenance
Printer Maintenance Printer Routine Cleaning Four different cleaning processes are implemented in the printers. Standard Cleaning Suggested frequency: • Color printing: Each time the ribbon is changed Mandatory frequency (to prevent voiding the warranty) • Every 1,200 cards printed. Standard cleaning is performed using the specific cleaning card as explained below. The product has an internal counter that keeps track of the number of cards printed and warns the user when the mandatory cleaning procedure must be performed. - Page 37 5) Insert the cleaning card (A) in the rear slot of insert the extended card (B) in the rear slot of the printer. the printer as represented in Figure. The adhesive surface should remain at the The adhesive surface is on both sides. top.
- Page 38 7) The counter indicates the number of cards that have been printed starting from the last cleaning operation performed. Click the Standard Cleaning button to start the cleaning procedure. Once the cleaning procedure is completed, the card is ejected from the rear slot and the counter is reset.
-
Page 39: Card Path Advanced Cleaning
Card Path Advanced Cleaning The card path advanced cleaning procedure is required after performing five Standard cleaning procedures: • The special (alcohol impregnated) T-card must be used. • The procedure involves cleaning the card path, removing the dust on the rollers and cleaning the magnetic head. - Page 40 5) Open the Printer Manager and click the Maintenance button. The Maintenance window is displayed. 6) The counter indicates the number of cards that have been printed starting from the last cleaning operation performed. Click the Advanced Cleaning button to start the cleaning procedure. Once the cleaning procedure is completed, the card is ejected from the rear slot and the counter is reset.
-
Page 41: Cleaning Roller Advanced Cleaning
9) Close the printing module compartment covers. 10) The advanced cleaning procedure is now concluded and the printing counter is reset to zero. Cleaning Roller Advanced Cleaning It is suggested to perform an advanced cleaning of the cleaning roller when the standard cleaning procedure does not efficiently remove all the dust from the cleaning roller. - Page 42 4) Identify the roller. 5) Remove the roller by extracting it parallel to the printing module and slightly upwards, until hearing a release click. Clean the roller using water and dry it. 7) Reinsert the roller, pushing it into its seat, 8) Insert the ribbon carrier.
-
Page 43: Printhead Cleaning
Printhead Cleaning It is suggested to clean the printhead when dots are missing on the printed cards: • The edge of the printhead must be cleaned using the special impregnated swab or the cleaning pen. • The edge of the printhead must be cleaned to remove residual ink or dust. Printhead Cleaning Procedure 1) Unplug the printer from the power supply. -
Page 44: Printing Test Cards
Printing Test Cards Test Cards are used to check that the printer is operating correctly and to obtain some important printing parameters. Open the Printer Manager and click the Maintenance button. The following screen is displayed. Printing a Text Test Card In the Test Card area, click the Monochromatic button to launch the Text Test Card print quality test. -
Page 45: Encoding Options
Allows you to run chip encoding using an encoding system off the printer Code PR000020 • CONTACT STATION FOR CHIP ENCODING Allows you to run chip encoding with user-selected. Encoder boards other than those proposed by Matica Code PR000223 Install the module according to the instructions contained in the package. Encoding Test Warning: Before proceeding with the configuration of the module make sure the printer is turned on and connected to your computer via USB. -
Page 46: Test
Test Open Printer Manager and click the Encoding button. The following screen is displayed from where it is possible obtain the Smart Card ATR number. Reading the Chip Encoding This area provides the ATR number of the contact card. This operation is performed to ensure that the contact encoder is working correctly. -
Page 47: External Encoding
External Encoding The machine configured with an external encoder is equipped with a specific 12-pin connector, configured in the following way: Name Description CLOCK 7 12 RESET VCC=5V CDD_NO CARD DETECT NO Binder female socket 12 ways CDD_NC CARD DETECT NC black connector 720 series Free p/n 99 9136 00 12... -
Page 48: Configuration
Configuration To print using the Magnetic Encoder, enable these modules on the printer so that the printer driver can use them correctly. 1) Set the Coercitivity values from High, Low. 2) Set the "Standard" encoding preferences. With this drop down menu is possible to set which standard to use for encoding the cards. -
Page 49: Test And Encoding
Test and Encoding The magnetic card is read and written in the magnetic encoding area. 1) The Track Area contains the fields (ISO Standard or JIS-II Standard) where the magnetic tracks can be read or written. Printer Driver Track Track Window Result Box Track Status Label... -
Page 50: Trobleshooting
Trobleshooting Printer does not power on USER Disconnect and reconnect again the power cables making sure Printer does not power on that an electricity supply is actually present Printer has printing problems USER • Make sure that a Moca/Espresso printer appears in Printer does not start “Devices and Printers”... -
Page 51: Printer Has Problem With Ribbon
USER Printer takes up the card • The card thickness setting does not correspond with that but remains blocked of the card being used: set the correct value, remove the card, then switch the printer off and on again. • If you are using non-original ribbon, check that the type of ribbon set for the driver corresponds with the one actually being used •... -
Page 52: Ribbons
Monochrome GOLD-500: 500 prints PR000163 Each Matica ribbon has an RFID tag with ribbon identification data that allows the printer to configure all the counting and optimization parameters and procedures. It is strongly suggested to exclusively use original Matica ribbons. The use of non-original accessories could damage the product and therefore void the factory warranty. -
Page 53: Technical Characteristics
• Smart Ribbon level memory and management • Smart Ribbon optimization in monochrome printing • Available ribbon: please refer to Matica website: www.maticatech.com Print Speed • Single-side Monochrome: up to 850 cph (*) • Single-side YMCKO: up to 210 cph (*) •... -
Page 54: Dimensions And Weight
Software • Printer driver • Printer Manager • Automatic Installer • Compatible with Windows: XP SP3; W7 32/64 bit, W8.x 32/64 bit Security • Slot for Kensington lock ® • Lockers with keys for input Hopper, rear bin and ribbon (*) Power Supply •... - Page 55 Card Printer Models: ESPRESSO, MOCA XXXXX (X = A-Z, 0-9 or BLANK) The undersigned hereby declares, on behalf of Matica Technologies AG, that the above- referenced product, to which this declaration relates, complies with the following council directives and harmonized standards.
- Page 56 CM00000154en revision C Matica Technologies - www.maticatech.com – All rights reserved...
Need help?
Do you have a question about the moca espresso and is the answer not in the manual?
Questions and answers