Stihl HLA 66 Instruction Manual
Hide thumbs
Also See for HLA 66:
- Instruction manual (436 pages) ,
- Instruction manual (296 pages) ,
- Instruction manual (160 pages)
Table of Contents
Advertisement
Available languages
Available languages
Quick Links
Advertisement
Chapters
Table of Contents

Related Manuals for Stihl HLA 66


Summary of Contents for Stihl HLA 66
- Page 1 STIHL HLA 66, 86 Instruction Manual Notice d’emploi...
- Page 2 G Instruction Manual 1 - 40 F Notice d’emploi 41 - 82...
-
Page 3: Table Of Contents
2.1 Signal Words........2 11.1 STIHL AP Battery ........22 2.2 Symbols in Text . -
Page 4: Introduction
24.1 STIHL HLA 66 ........ -
Page 5: Symbols In Text
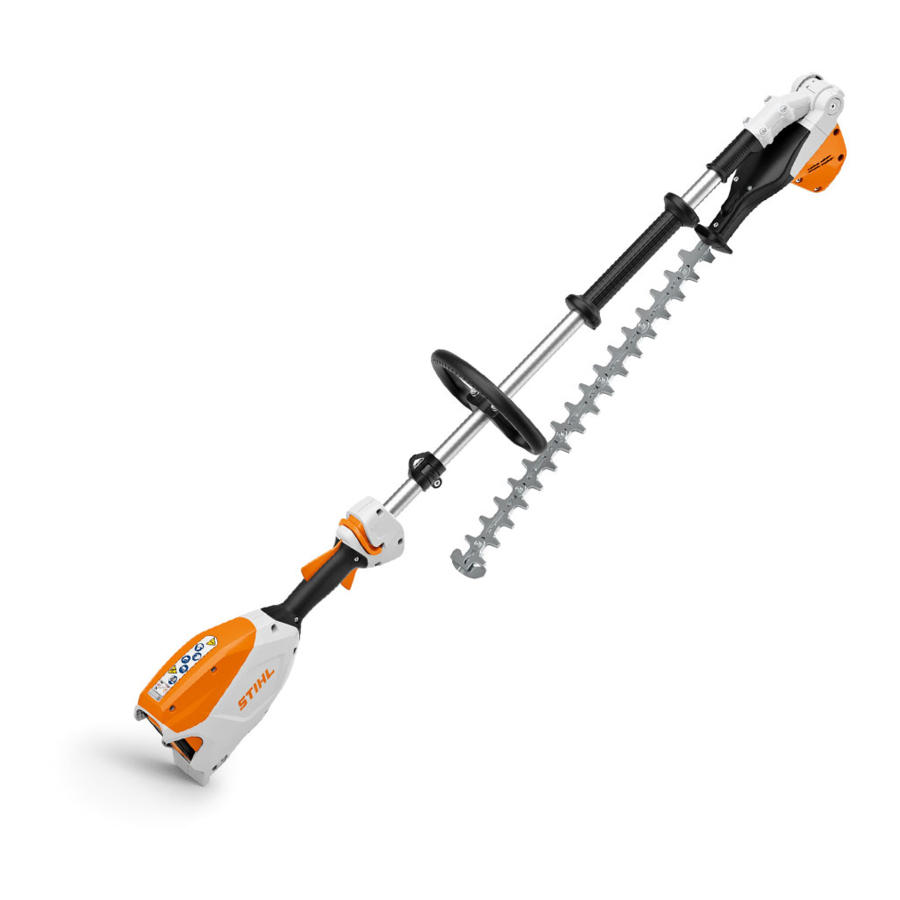
3 Main Parts WARNING Indicates a hazardous situation that, if not avoided, could result in death or serious injury. HLA 66 Hedge Trimmer and Battery NOTICE Indicates a risk of property damage, including damage to the machine or its individual components. -
Page 6: Hla 86 Hedge Trimmer And Battery
English 3 Main Parts HLA 86 Hedge Trimmer and Battery 5 Blade Scabbard Covers the cutting blades to reduce the risk of injury from inadvertent contact during transportation and storage. 6 Blade Adjustment Release Unlocks the cutting blades to allow angle adjustment. 7 Blade Adjustment Grip Used to set the cutting blades to the desired angle. -
Page 7: Safety Symbols On The Products
English 4 Safety Symbols on the Products 6 Clamping Nut 4 Safety Symbols on the Products For adjusting the length of the drive tube. 7 Blade Adjustment Release Unlocks the cutting blades to allow angle adjustment. Hedge Trimmer 8 Blade Adjustment Grip The following safety symbols are found on the hedge trimmer: Used to set the cutting blades to the desired angle. -
Page 8: Battery
Additional important warnings and the STIHL tool powered by this battery. Improper instructions are provided in subsequent chapters of this use can lead to serious or fatal personal injury or manual. -
Page 9: Electrical Safety
English 5 General Power Tool Safety Warnings Electrical Safety c) Prevent unintentional starting. Ensure the switch is in the off-position before connecting to power source and/or a) Power tool plugs must match the outlet. Never modify the battery pack, picking up or carrying the tool. Carrying plug in any way. -
Page 10: Battery Tool Use And Care
English 5 General Power Tool Safety Warnings e) Maintain power tools and accessories. Check for e) Do not use a battery pack or tool that is damaged or misalignment or binding of moving parts, breakage of modified. Damaged or modified batteries may exhibit parts and any other condition that may affect the power unpredictable behaviour resulting in fire/explosion or risk tool's operation. -
Page 11: Extended-Reach Hedge Trimmer Safety Warnings
Contact with or use near power lines may cause serious injury or electric shock resulting in death. ■ This power tool may be powered by a STIHL AP series b) Always use two hands when operating the extended- battery. Alternatively, it may be powered by a STIHL reach hedge trimmer. -
Page 12: Operator
– Do not permit minors to use the hedge trimmer. marked as complying with CSA Z94. ■ According to STIHL's current knowledge, the electric – Wear an approved protective helmet when there is a motor of this hedge trimmer should not interfere with a risk of head injury. -
Page 13: Hedge Trimmer
– Never hold the material to be cut. dangerous. Only attachments supplied by STIHL or – Never remove cut material without first releasing the expressly approved by STIHL for use with this specific trigger switch and removing the battery. model are recommended. -
Page 14: Using The Hedge Trimmer
– Take the hedge trimmer to your authorized STIHL – If your hedge trimmer or any part is damaged or servicing dealer to be checked before further does not function properly, take it to your authorized operation. - Page 15 Holding and Controlling the Hedge Trimmer following steps to reduce the risk of personal injury, loss of control or inadvertent contact with the cutting HLA 66 / HLA 86 attachment: – Be sure that the cutting blades are clear of you and all other obstructions and objects, including the ground.
- Page 16 English 6 IMPORTANT SAFETY INSTRUCTIONS – Position the hedge trimmer in such a way that all ■ Any working position above shoulder height is tiring. To parts of your body are clear of the cutting attachment reduce the risk of injury from fatigue: whenever the battery is inserted.
- Page 17 English 6 IMPORTANT SAFETY INSTRUCTIONS ■ To reduce the risk of injury to bystanders and – To the extent possible, operate the hedge trimmer so unauthorized users: that the wind or operating process directs any dust, mist or other particulate matter raised by the hedge –...
- Page 18 – STIHL recommends that you spray the cutting blades with a resin solvent, such as STIHL Resin – Take particular care when cutting next to, against or Remover and Lubricant, before starting work.
-
Page 19: Battery Safety
Hold the power tool by insulated gripping ■ Use of STIHL AR or AP series batteries for any purpose surfaces only, because the cutting other than powering STIHL power tools could be blades may contact hidden wiring. - Page 20 – If a STIHL AP or AR L battery has been – Evacuate the area. Fire can spread rapidly. Stay exposed to rain during work, remove it...
-
Page 21: Maintenance, Repair And Storage
English 8 Maintenance, Repair and Storage ■ Use of parts that are not authorized or approved by STIHL 8 Maintenance, Repair and Storage may cause serious or fatal injury or property damage. – STIHL recommends that only identical STIHL replacement parts be used for repair or Warnings and Instructions maintenance. -
Page 22: Before Starting Work
► Fully charge the battery, @ 10.2. expected electrical draw before charging your battery. ► Mount the loop handle (HLA 66 only), @ 13.1. ► Charge multiple batteries one at a time or on separate ► Adjust the angle of the cutting blades, @ 17.1. -
Page 23: Charging
► Push the AP Adapter into the charger (5) until it stops. A battery is not fully charged when it ships from the factory. The LED on the charger (4) glows green when the battery STIHL recommends that you fully charge the battery before is charging. using it the first time. -
Page 24: Led Diagnostics And Acoustic Signals
The LED on the charger glows green when the battery is the power tool has an electrical malfunction. Do not operate charging. the power tool. Have it checked by an authorized STIHL servicing dealer before use or storage. The LEDs (1) on the AP battery glow green and show the state of charge. - Page 25 If three LEDs flash red when you activate the trigger switch: the power tool has an electrical malfunction. Do not operate the power tool. Have it checked by an authorized STIHL servicing dealer before use or storage. For troubleshooting information, @ 23.
-
Page 26: Stihl Ar Backpack Battery
English 12 STIHL AR Backpack Battery 12 STIHL AR Backpack Battery 12.1 Positioning the Connecting Cord WARNING To reduce the risk of injury from tripping on the connecting cord or losing control of the power tool, always secure the connecting cord with the hook and eye fasteners as described below. -
Page 27: Assembling The Hedge Trimmer
► Fasten the chest strap (1) and adjust it so that it fits 13 Assembling the Hedge Trimmer comfortably but securely across your chest. 13.1 Mounting the Loop Handle (HLA 66 only) WARNING To reduce the risk of injury from loss of control, ensure that the loop handle is properly mounted and adjusted before starting work. -
Page 28: Inserting And Removing The Battery
Use or storage outside the Since a new battery is not fully charged, STIHL recommends recommended ambient temperature range can reduce the that you fully charge the battery before using it the first time, performance and/or service life of the battery. -
Page 29: Switching The Hedge Trimmer On And Off
English 15 Switching the Hedge Trimmer On and Off The motor will not switch on unless the retaining latch is 15 Switching the Hedge Trimmer On and pushed forward and the trigger switch is pressed at the same time. Once the trigger switch is activated, you may release the retaining latch. -
Page 30: During Operation
If the hedge trimmer does not switch off after you release the trigger switch, remove the battery and take the hedge trimmer to an authorized STIHL servicing dealer to be repaired before use. Retaining Latch (1), Trigger Switch (2) and Ergo-Lever (3) -
Page 31: Adjusting The Length Of The Drive Tube
English 17 During Operation 45° 70° ► Unlock the drive tube (2) by turning the clamping nut (1) a ► Hold the blade adjustment grip (2) firmly. half turn in the direction ► Pull back the blade adjustment release (1) and hold it in ►... -
Page 32: Using The Hedge Trimmer
English 17 During Operation ► Adjust the length of the shoulder strap (1) so that the Cutting at ground level carabiner (2) is about a hand’s width below the top of your hip. ► Set the cutting attachment to a suitable angle. ►... -
Page 33: After Finishing Work
English 18 After Finishing Work ► Cut the other side of the hedge in the same way. ► If cutting performance deteriorates: Sharpen the cutting blades. Cutting top of hedge ► Set the cutting attachment to a suitable angle. ► Hold the cutting attachment at an angle of 0° to 10° as you move the cutting attachment horizontally, using both sides of the cutting attachment (see illustration above). -
Page 34: Transporting The Hedge Trimmer And Battery
Normally, no further conditions have to be met by the user in cutting blades are parallel to the drive tube (2). order to transport STIHL batteries by road to the power tool's ► Release the blade adjustment release. operating site. Check and comply with any special Blade adjustment release reaches the transporting regulations that may apply to your situation. -
Page 35: Storing The Hedge Trimmer And Battery
English 20 Storing the Hedge Trimmer and Battery To properly store the battery: 20 Storing the Hedge Trimmer and ► Take the battery out of the hedge trimmer or the charger. Battery ► Make sure the battery is dry and store it indoors in a dry and secure location. -
Page 36: Cleaning The Cutting Blades
@ 8.1. Carry out only the maintenance operations described in this manual. There are no user-authorized repairs. STIHL recommends that repair work be performed by authorized STIHL servicing dealers. To properly maintain the hedge trimmer: ►... - Page 37 ► After sharpening, wipe away filing or grinding dust with a dry or slightly dampened cloth and then spray the cutting blades with a resin solvent, such as STIHL Resin Remover and Lubricant. If you make a warranty claim for a component which has not been serviced or maintained properly, coverage may be denied.
-
Page 38: Troubleshooting Guide
► Reinsert the battery, @ 14.1. 1 LED flashes Battery has low ► Charge the battery, @ 10. green. charge. STIHL AR Series: four long beeps are emitted (AR L - six beeps). 1 LED glows Battery too hot / too ►... - Page 39 Run-time is too short. Battery not fully ► Charge the battery, @ 10. charged. Useful life of battery ► Have the battery checked by an authorized STIHL servicing has been reached or dealer. exceeded. Battery is not being 1 LED glows Battery too hot / too ►...
-
Page 40: Specifications
For technical information regarding the STIHL AP and AR / AR L series batteries, see the product information Hertz accompanying your battery. Ampere For technical information regarding the STIHL AL 101, 300 Ampere hour and 500 series chargers, see the product information Watt accompanying your charger. -
Page 41: Engineering Improvements
If the operating characteristics or the Shoulder Strap appearance of your machine differs from those described in this manual, please contact your STIHL dealer or the STIHL distributor in your area for assistance. STIHL Battery Belt with STIHL AP Battery Bag... -
Page 42: Disposal
STIHL servicing dealer for recycling free of charge. 27.1 Disposal of the Power Tool STIHL products must not be thrown in household trash or disposed of except as outlined in this manual. ► Take the power tool, accessories and packaging to an approved disposal site for environmentally friendly recycling. - Page 43 Principales pièces ........43 11.1 Batterie STIHL AP ....... . . 63 3.1 HLA 66 taille-haies et batterie .
-
Page 44: Préface
24.1 STIHL HLA 66 ........ -
Page 45: Symboles Employés Dans Le Texte
DANGER Indique une situation dangereuse qui, si elle n’est pas évitée, entraînera la mort ou des blessures graves. HLA 66 taille-haies et batterie AVERTISSEMENT Indique une situation dangereuse qui, si elle n’est pas évitée, pourrait entraîner la mort ou des blessures graves. -
Page 46: Hla 86 Taille-Haies Et Batterie
français 3 Principales pièces 5 Fourreau à lame # Plaque signalétique Comporte des caractéristiques électriques ainsi que le Couvre les lames de coupe afin de réduire le risque de numéro de série du produit. blessure par un contact involontaire pendant le transport et le stockage. -
Page 47: Symboles De Sécurité Sur Les Produits
français 4 Symboles de sécurité sur les produits 4 Lames de coupe 18 Bretelles Lames en acier pour la coupe des haies, des arbustes et Aide à soutenir le taille-haies lors du travail. des buissons. # Plaque signalétique 5 Fourreau à lame Comporte des caractéristiques électriques ainsi que le Couvre les lames de coupe afin de réduire le risque de numéro de série du produit. -
Page 48: Batterie
Ne l’immergez jamais dans l’eau ou sécurité dans le présent manuel de la batterie et d’autres liquides, @ 7.1. dans le manuel de l’outil électrique STIHL Batteries vendues séparément. alimenté par cette batterie. Une utilisation incorrecte peut causer des blessures graves, voire mortelles, ou des dommages matériels. -
Page 49: Sécurité De La Zone De Travail
français 5 Indications générales de sécurité pour outils électroportatifs AVERTISSEMENT d) Ne maltraitez pas le cordon d’alimentation. N’utilisez jamais le cordon d’alimentation pour transporter, tirer ou ■ Lisez tous les avertissements, instructions, illustrations et débrancher l’outil électrique. Gardez le cordon spécifications de sécurité... -
Page 50: Utilisation Et Entretien Des Outils Électriques
français 5 Indications générales de sécurité pour outils électroportatifs d) Retirez toute clé de réglage ou pince de serrage avant d) Rangez les outils électriques inutilisés hors de portée des d’allumer l’outil électrique.Une clé ou une pince attachée enfants et ne laissez pas des personnes non familiarisées à... -
Page 51: Entretien
français 5 Indications générales de sécurité pour outils électroportatifs Avertissements de sécurité relatifs au taille- c) Lorsque le bloc de batteries n’est pas en cours d’utilisation, tenez-le éloigné des autres objets haies métalliques, comme les trombones, pièces de monnaie, a) Gardez toutes les parties du corps éloignées de la lame. clés, clous, vis ou autres petits objets métalliques qui Ne retirez pas de matériel coupé... -
Page 52: Avertissements De Sécurité Relatifs Au Taille-Haie
■ Cet outil électrique peut être alimenté par une batterie Tout contact avec des lignes électriques ou toute STIHL série AP. Il peut également être alimenté par une utilisation à proximité de celles-ci peut provoquer des batterie à dos STIHL série AR en combinaison avec un blessures graves ou un choc électrique pouvant entraîner... -
Page 53: Équipement De Protection Individuelle
français 6 CONSIGNES DE SÉCURITÉ IMPORTANTES Équipement de protection individuelle – Portez des chaussures conséquentes équipées de semelles antidérapantes. AVERTISSEMENT Ne portez pas de sandales, de tongs, de chaussures à bout ouvert ou similaire. ■ Pour réduire les risques de lésion corporelle : –... - Page 54 – Faites vérifier le taille-haies par votre distributeur agréé STIHL avant toute autre opération. ■ Bien que certains accessoires non autorisés puissent être utilisés avec votre taille-haies STIHL, leur utilisation peut ■ Les pièces de rechange STIHL authentiques sont s’avérer extrêmement dangereuse. Seuls sont conçues spécifiquement pour correspondre à...
-
Page 55: Utilisation Du Taille-Haies
éloignées de vous-même ainsi que de tous les endommagé ou ne fonctionne pas correctement, autres obstacles et objets, y compris le sol. amenez-le à votre distributeur agréé STIHL. N’utilisez pas le taille-haies avant d’avoir corrigé le – Ne mettez jamais le taille-haies en marche alors que problème. - Page 56 Tenue et contrôle du taille-haies poignées, en gardant les poignées prises en tenaille entre le pouce et l’index (voir l’illustrations). HLA 66 / HLA 86 – Positionnez le taille-haies de manière à ce que toutes les parties de votre corps soient dégagées de l'outil de coupe lorsque la batterie est insérée.
- Page 57 français 6 CONSIGNES DE SÉCURITÉ IMPORTANTES – Ne vous penchez pas trop. Gardez une bonne tenue 6.5.3 Conditions de travail sur pieds et un bon équilibre à tout moment. AVERTISSEMENT ■ Toute position de travail au-dessus de la hauteur des épaules est fatigante.
- Page 58 français 6 CONSIGNES DE SÉCURITÉ IMPORTANTES pour causer des problèmes respiratoires, le cancer, des 6.5.4 Instructions d’utilisation malformations congénitales et d’autres problèmes de AVERTISSEMENT reproduction. – Consulter les organismes gouvernementaux tels ■ Pour réduire le risque de coupures graves ou mortelles à que l’ECCC, le CCHST et l’ASPC et d’autres l’opérateur ou aux spectateurs par un contact avec la sources faisant autorité...
- Page 59 : ■ L'outil à moteur a une grande portée. Pour réduire le – STIHL recommande de pulvériser un solvant de risque de blessures personnelles ou même mortelles pour résine, tel que STIHL Resin Remover & Lubricant,...
-
Page 60: Sécurité De La Batterie
AP authentiques avec cet outil électrique. pourraient être sous tension. – Ne comptez pas sur l’isolation du taille- ■ L’utilisation de batteries STIHL séries AR ou AP à des fins haies pour vous protéger des autres que l’alimentation des outils électriques STIHL électrocutions. - Page 61 7 Sécurité de la batterie – N’exposez jamais la batterie à des microondes ou – Si une batterie STIHL AP ou AR L a été des hautes pressions. exposée à la pluie pendant le travail, retirez-la du produit et laissez-la sécher –...
-
Page 62: Maintenance, Réparation Et Rangement
– Respectez scrupuleusement les instructions de nettoyage et de maintenance dans la section appropriée du présent manuel d’utilisation. – STIHL recommande de faire effectuer toutes les opérations de réparation par un distributeur agréé STIHL. 0458-185-8221-A... -
Page 63: Avant D'entreprendre Le Travail
■ Pour réduire les risques de court-circuit et d’incendie : ► Chargez complètement la batterie, @ 10.2. – Gardez les guides de la batterie exempts de corps ► Montez la poignée tubulaire, (uniquement HLA 66) étrangers. Nettoyez suivant le besoin avec un @ 13.1. -
Page 64: Charge
La capacité d’un circuit électrique domestique classique est batterie. de 15 à 20 A. Un seul chargeur STIHL AL 500 consomme ► Positionnez le cordon d’alimentation (2) de manière à ce environ 4,8 A. Un seul chargeur AL 300 consomme environ qu’il ne risque pas d’être piétiné, de provoquer un... -
Page 65: Del De Diagnostic Et Signaux Sonores
STIHL AL 101, lorsque le chargeur n'est pas utilisé. AL 300 ou AL 500. ► Chargez uniquement les batteries en sac à dos STIHL AR avec des chargeurs originaux de la série STIHL AL 300 ou AL 500. -
Page 66: Batterie En Sac À Dos Stihl Ar
être remplacée. N’essayez pas de charger, d’utiliser ou d’entreposer la batterie. 11.2 Batterie en sac à dos STIHL AR 11.1.2 État de l’outil électrique 11.2.1 État de la batterie L’état de la batterie est indiqué par six DEL et un signal Les mêmes DEL sur la batterie indiqueront l’état de l’outil... -
Page 67: Batterie En Sac À Dos Stihl Ar
12 Batterie en sac à dos STIHL AR Pour déterminer l’état de charge de la batterie : Si une DEL qui reste continuellement allumée en rouge : la batterie est trop chaude ou trop froide. Laissez la batterie se réchauffer ou refroidir progressivement à... -
Page 68: Enfiler Le Harnais
12 Batterie en sac à dos STIHL AR AVERTISSEMENT Arrangez le cordon de raccordement de manière appropriée pour l’empêcher d’entrer en contact avec l’outil de coupe/de travail ou d’être saisi par d’autres objets, ce qui risquerait de vous faire perdre l’équilibre ou le contrôle de votre outil électrique, avec pour conséquence des blessures graves et... -
Page 69: Assemblage Du Coupe-Haies
13 Assemblage du coupe-haies ce qu'elle s'adapte confortablement mais solidement à votre poitrine. 13.1 Montage de la poignée tubulaire (uniquement HLA 66) AVERTISSEMENT Pour réduire le risque de blessure résultant d’une perte de contrôle, assurez-vous que la poignée tubulaire est montée et réglée correctement avant de commencer le travail. -
Page 70: Insertion Et Retrait De La Batterie
Comme une batterie neuve n’est pas entièrement chargée, Évitez d’exposer la batterie à une chaleur excessive ou les STIHL recommande de charger complètement la batterie périodes prolongées d’exposition directe au soleil. avant de l’utiliser pour la première fois, @ 10.2. -
Page 71: Mise En Marche Et Arrêt Du Taille-Haies
français 15 Mise en marche et arrêt du taille-haies Le moteur ne s’allumera pas, sauf si le verrou de retenue est 15 Mise en marche et arrêt du taille-haies poussé vers l'avant et la gâchette est enfoncée en même temps. Vous pouvez relâcher le verrou de retenue une fois que la gâchette est activée. -
Page 72: Pendant L'utilisation
@ 6.5.2. Gardez les haies à un distributeur agréé STIHL pour le faire réparer spectateurs à une distance d'au moins 17 ft. (5m) lorsque avant de l'utiliser. -
Page 73: Ajustement De La Longueur Du Tube D'entraînement (Hla 86 Uniquement)
français 17 Pendant l’utilisation L'angle des lames de coupe peut être réglé sur deux positions différentes vers le haut et quatre positions La longueur du système d’entraînement peut se régler en différentes vers le bas pour s'adapter à l'application et à la fonction de la hauteur et la portée des bras de l’utilisateur. -
Page 74: Utilisation Du Taille-Haies
français 17 Pendant l’utilisation AVERTISSEMENT Portez toujours des vêtements adéquats et une combinaison de protection ainsi qu’une protection oculaire appropriée, @ 6.3. Travaillez avec prudence et gardez une bonne maîtrise du taille-haies, @ 6.5.2. Le taille-haies est conçu pour être utilisé à deux mains. ►... - Page 75 français 17 Pendant l’utilisation Coupe du côté de la haie ► Maintenez l’outil de coupe à un angle de 0° à 10° à mesure que vous le déplacez dans le sens horizontal, en utilisant les deux côtés de l’outil de coupe (voir l’illustration ci-dessus).
-
Page 76: Après Avoir Terminé Le Travail
français 18 Après avoir terminé le travail Lorsque vous transportez le taille-haies : 18 Après avoir terminé le travail ► Glissez un fourreau de lame sur les lames de coupe de sorte qu’il recouvre entièrement l’outil de coupe. 18.1 Préparation pour le transport ou l’entreposage AVERTISSEMENT Pour réduire le risque de blessures corporelles dues à... -
Page 77: Batterie
Aucune autre condition ne doit normalement être remplie batterie et peuvent également amener la batterie à produire par l’utilisateur pour pouvoir transporter des batteries STIHL de la chaleur, se rompre, fuir, prendre feu ou exploser, par la route vers le site d’utilisation. Vérifiez et conformez- entraînant des blessures graves ou mortelles ou des... -
Page 78: Nettoyage
@ 6.3. Pour nettoyer les lames de coupe : 21 Nettoyage ► Pulvérisez un solvant de résine, tel que STIHL Resin Remover & Lubricant, des deux côtés des lames de coupe. 21.1 Nettoyage du taille-haies et de la batterie ►... -
Page 79: Inspection Et Maintenance Des Lames De Coupe
Enlevez aussi peu de matière taille-haies ou de ses lames de coupe, @ 6.3. STIHL que possible. recommande de faire affûter les lames de coupe par un ►... -
Page 80: Guide De Dépannage
1 DEL clignote La charge de la ► Chargez la batterie, @ 10. en vert. batterie est insuffisante. Série STIHL AR : quatre bips longs sont émis (AR L - six bips). 1 DEL s’allume Batterie trop chaude ► Laissez la batterie se réchauffer ou se refroidir en rouge. - Page 81 ► Chargez la batterie, @ 10. fonctionnement est entièrement trop court. chargée. La durée de vie utile ► Faites vérifier la batterie par un distributeur agréé STIHL. de la batterie est atteinte ou dépassée. La batterie ne se 1 DEL s’allume Batterie trop chaude ►...
-
Page 82: Spécifications
– Poids sans la batterie : 8,5 lbs. (3,8 kg) Symbole Explication Volt Pour des informations techniques concernant les batteries STIHL série AP et AR / AR L, consultez les informations sur Hertz le produit qui accompagnent votre batterie. Ampère Pour des informations techniques concernant les chargeurs Ampère-heure... -
Page 83: Améliorations Technologiques
STIHL. Les pièces STIHL authentiques peuvent comme vous le feriez en cas d'urgence. Pour éviter tout être identifiées par le numéro de référence STIHL, le logo dommage, ne jetez pas l'outil électrique au sol lors du et, dans certains cas, par le symbole des pièces travail. -
Page 84: Élimination
Le scellé de la RBRC indique que le recyclage de la batterie 27 Élimination a été prépayé par STIHL. Le RBRC dispose d’un numéro d’appel gratuit (1-800-822-8837) qui vous permet d’obtenir des informations sur les centres de recyclage des batteries 27.1 Mise au rebut de l’outil électrique... - Page 85 français 27 Élimination 0458-185-8221-A...
- Page 86 français 27 Élimination 0458-185-8221-A...
- Page 88 0458-185-8221-A www.stihl.com *04581858221A* 0458-185-8221-A...
Need help?
Do you have a question about the HLA 66 and is the answer not in the manual?
Questions and answers