
Related Manuals for Technoline WS1900


Summary of Contents for Technoline WS1900
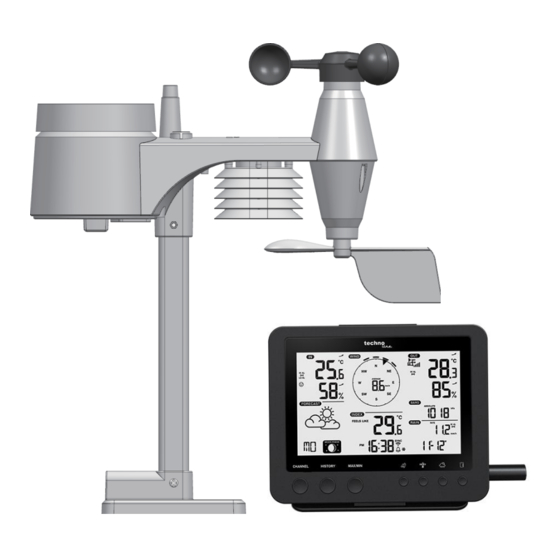
- Page 1 WI-FI Wetterstation mit Professionellen 5-in-1 Sender Modell: WS1900 Bedienungsanleitung CHANNEL HISTORY MAX/MIN...
-
Page 2: Table Of Contents
Inhaltsverzeichnis Einführung Übersicht Installation und Einrichtung Inbetriebnahme der Station Drahtlosen 5-in-1 Sender mit der Wetterstation koppeln Zusätzliche drahtlose Sender mit der Station koppeln (optional) Wetterserver-Account erstellen & Einrichtung der Wi-Fi-Verbindung Weather Underground-Konto erstellen Weathercloud -Konto erstellen Einrichtung der Wi-Fi-Verbindung Verbindung zum Wetterserver einrichten Erweiterte Einstellung in der Weboberfläche Ihre Wetterdaten in WUnderground anschauen Ihre Wetterdaten in Weathercloud anschauen... -
Page 3: Einführung
Einführung Vielen Dank, dass Sie sich für eine Wi-Fi-Wetterstation mit 5-in-1-Profisensor entschieden haben. Dieses System sammelt und lädt automatisch genaue und detaillierte Wetterdaten auf die Weather Underground und Weathercloud Websites - den berühmten Wetterdienst, der es Wetterbeobachtern ermöglicht, ihre lokalen Wetterdaten mit automatisierten persönlichen Wetterstationen (PWS) hochzuladen - auf denen Sie Ihre Wetterdaten frei abrufen und hochladen können. - Page 4 1 . Standfuß 10 . LCD-Anzeige 19 . [ °C / °F ] Schiebeschalter 2 . [ SNOOZE ] Taste 11 . [ CLOCK SET ] Taste 20 . [ BARO UNIT ] Taste 3 . [ CHANNEL ] Taste 12 .
- Page 5 Regenmesser 1 . Regen- sammler 2 . Messwippe 3 . Regensender 4 . Abflusslöcher Temperatur- und Luftfeuchtigkeitssensor 1 . Strahlenschutzgehäuse des Senders 2 . Temperatur- und Luftfeuchtigkeitssender (innerhalb des Strahlenschutzes) Windsensor 1 . Windschalen (Anemometer) 2 . Windfahne DE 4...
-
Page 6: Installation Und Einrichtung
Installation und Einrichtung Kabellosen 5-in-1 Sender installieren Ihr kabelloser 5-IN-1 Außensender misst für Sie Windgeschwindigkeit, Windrichtung, Niederschlag, Temperatur und Luftfeuchtigkeit. Er ist montiert und kalibriert für eine einfache Installation. Batterien einlegen Lösen Sie die Batteriefachabdeckung an der Unterseite des Gerätes und legen Sie die Batterien gemäß der angegebenen +/- Polarität ein. - Page 7 Befestigungsstange und –sockel montieren Schritt 1 Stecken Sie die Oberseite der Befestigungsstange in die quadratische Öffnung des Wettersenders. Hinweis: Vergewissern Sie sich, dass die Markierungen der Stange und des Sensors richtig ausgerichtet sind. Schritt 2 Setzen Sie die Mutter in das Sechskantloch am Sender ein, setzen Sie dann die Schraube auf der anderen Seite ein und ziehen Sie sie mit einen Schraubendreher fest.
-
Page 8: Inbetriebnahme Der Station
Installieren Sie den drahtlosen 5-IN-1- Fügen Sie Gummipuffer hinzu, bevor Sie diese an der Sensor an einem offenen Ort ohne Stange Hindernisse über und um den Sensor Nach montieren. herum, um eine genaue Regen- und NORDEN Windmessung ermöglichen. ausrichten Installieren Sie den Sensor mit dem kleineren Ende nach Norden, um die Windrichtungsschaufel richtig... -
Page 9: Drahtlosen 5-In-1 Sender Mit Der Wetterstation Koppeln
Drahtlosen 5-in-1 Sender mit der Wetterstation koppeln Nach dem Einsetzen der Batterien sucht die Station automatisch das Signal des drahtlosen 5-IN-1-Sensors (das Antennensymbol des Senders blinkt). Sobald die Verbindung erfolgreich hergestellt wurde, erscheint auf der LCD-Anzeige das Antennensymbol und die Messwerte für Außentemperatur und -feuchtigkeit, Windgeschwindigkeit, Windrichtung und Niederschlag. -
Page 10: Weathercloud-Konto Erstellen
4. Füllen Sie mindestens alle Pflichtfelder aus. Für ”Device Hardware” wählen Sie “Other” aus. Akzeptieren Sie die Datenschutzerklärung und fahren Sie fort. 5. Notieren Sie sich Ihre „Station-ID“ und Ihren „Station Key“. Weathercloud-Konto erstellen 1 . Gehen Sie auf https://weathercloud.net und tragen Sie Ihre Daten im "Join us today" Bereich ein. -
Page 11: Einrichtung Der Wi-Fi-Verbindung
3 . Geben Sie alle Informationen auf der Seite Create new device ein, für das Auswahlfeld Model* wählen Sie die Option "W100 Series" unter "CCL" aus. Für das Auswahlfeld Link type* wählen Sie das Feld "Pro Weather Link" aus. Wenn alles abgeschlossen ist, klicken Sie auf Create. -
Page 12: Verbindung Zum Wetterserver Einrichten
3 . Gehen Sie auf dem PC in die WiFi-Netzwerkeinstellungen oder im Android / iOS in die Einstellung WI-FI und wählen Sie die Station SSID: PWS-XXXXXX in der Liste aus. Es dauert einige Sekunden, bis die Verbindung hergestellt ist. PWS-XXXXXX PWS-XXXXXX Netzwerkschnittstelle: PC Wi-Fi Netzwerkschnittstelle: Android Wi-Fi... - Page 13 Drücken Sie das SETUP- Language: English Symbol um auf die ADVANCED Einstellungsseite zu gelangen Wählen Sie den Wi-Fi-Router (SSID), mit WiFi Router setup Drücken Sie zum Suchen dem Sie sich verbinden wollen Search Router: ROUTER_A des Routers Geben Sie die SSID manuell ein, wenn sie nicht in Add Router der Liste enthalten ist.
-
Page 14: Erweiterte Einstellung In Der Weboberfläche
Zeitzone: Um die Zeit Ihrer Zeitzone anzuzeigen, ändern Sie die Zeitzone im CLOCK Einstellmodus von '00' (Werkeinstellung) zu Ihrer Zeitzone (z.B. 01 für Deutschland). 1 . Halten Sie die [ CLOCK SET ] Taste für 2 Sekunden gedrückt, um mit der Zeiteinstellung zu beginnen. - Page 15 Kalibrierung 1 . Der Benutzer kann die Abweichungen für verschiedene Messparameter eingeben oder ändern, während die aktuellen Abweichungen neben den entsprechenden Feldern angezeigt werden. 2 . Drücken Sie nach Abschluss der Eingabe auf der SETUP-Seite. Apply Hinweis: Eine Kalibrierung der meisten Parameter ist nicht erforderlich, mit Ausnahme des relativen Luftdrucks, der auf Meereshöhe kalibriert werden muss, um einen relativen Luftdruck anzeigen zu lassen.
-
Page 16: Firmware Aktualisieren
Funk aktualisiert werden. Die Aktualisierung ist jedoch nicht für mobile Smart Geräte verfügbar. Falls eine neue Firmware verfügbar ist, finden Sie diese unter https://www.technoline.de/software/ws1900 Wenn keine neue Firmware verfügbar ist, dann kann in obiger URL kein Firmware-Update gefunden werden. Zwei Arten von Firmware-Updates sind verfügbar, die Funktions-Firmware und die System-WI-FI-Firmware, die sich unten auf der Seite ADVANCED befinden. -
Page 17: Weitere Einstellungen & Funktionen Der Station
Einzelschritte zur Firmware-Aktualisierung 1 . Laden Sie die neueste Version der Firmware (Funktion oder WI-FI) auf Ihren PC herunter. 2 . Bringen Sie die Station in den AP (Access Point) Modus und verbinden Sie den PC mit der Station ( siehe "Einrichtung des WI-FI-Anschlusses“ auf den vorherigen Seiten.) 3 . -
Page 18: Mondphasen
3. Drücken Sie die [ ] oder die [ ] Taste, um die Einstellungswerte anzupassen. Halten Sie die Taste gedrückt, um die Einstellung zu beschleunigen. 4 . Drücken sie die [ CLOCK SET ] Taste, um den Einstellungen zu speichern und zu beenden, oder das Gerät verlässt den Einstellungsmodus automatisch, wenn für 60 Sekunden keine Taste gedrückt wird. -
Page 19: Einstellen Der Alarmzeit
Hinweis: Wenn Sie die Einstellung der Halbkugel ändern, wird die Richtung der Mondphase auf dem Display automatisch umgeschaltet. Einstellen der Alarmzeit Halten Sie in der normalen Zeitanzeige die [ ALARM ] Taste für 2 Sekunden gedrückt, um in die Alarmzeiteinstellung zu gelangen und die Alarmzeit blinkt. Drücken Sie die [ ] oder die [ ] Taste, um die Einstellungswerte anzupassen. -
Page 20: Raumkomfortanzeige
Minuten an. Pfeilsymbol Temperatur-/ Luftfeuchtetrend Steigt Ist konstant Sinkt Hinweise: Wenn die Innentemperatur unter -40°C liegt, zeigt die LCD-Anzeige "Lo" an. Wenn die Temperatur über 70°C liegt, zeigt die LCD-Anzeige "HI" an. Wenn die Außentemperatur unter -40°C liegt, zeigt die LCD-Anzeige "Lo" an. Wenn die Temperatur über 80°C liegt, zeigt die LCD-Anzeige "HI"... -
Page 21: Wind
Wind Übersicht über Windgeschwindigkeit und -richtung Echtzeit- Windrichtungsanzeiger Windrichtungs- anzeiger der letzten 5 Minuten Durchschnitt- liche / Böen- Windgeschwin -digkeit Einheit der und Anzeigeformat der Windgeschwindigkeit einstellen 1. Halten Sie im normalen Anzeigemodus die [ WIND ] Taste für 2 Sekunden gedrückt, um in den Einheitenmodus für die Windgeschwindigkeit zu gelangen und die Einheit blinkt. -
Page 22: Wettervorhersage
Windchill (WIND CHILL) Eine Kombination aus den Temperatur- und Windgeschwindigkeitsdaten des drahtlosen 5-in-1- Senders bestimmt den aktuellen Windchill-Faktor. Taupunkt (DEW POINT) Der Taupunkt ist die Temperatur, unter der der Wasserdampf in der Luft bei konstantem Luftdruck in der gleichen Geschwindigkeit, in der er verdampft, zu flüssigem Wasser kondensiert. -
Page 23: Niederschlag
Relative Luftdruckwerte einstellen Gehen Sie zu "Erweiterte Einstellung in der Weboberfläche" auf Seite 13. Wenn Ihr lokaler REL-Wert z.B. 1010 hPa beträgt und der absolute Luftdruck, z.B. 1013 hPa, dann geben Sie "-3" in das Feld ein. Niederschlag Der RAINFALL-Bereich zeigt die Informationen zu Niederschlag und Regenmenge an. -
Page 24: Historiendaten Der Letzten 24 Stunden
MAX / MIN Aufzeichnungen löschen Halten Sie die [ MAX / MIN ] Taste für 2 Sekunden gedrückt, um die MAX/MIN Aufzeichnungen der ausgewählten Wetteranzeige zu löschen. Hinweis: Der LCD zeigt auch das “ “ Symbol an, sowie die Aufzeichnungszeit und das Datum. Historiendaten der letzten 24 Stunden Die Station speichert automatisch die Wetterdaten der letzten 24 Stunden. -
Page 25: Wartung
2 . Halten Sie die [ ALERT ] Taste in der aktuellen Anzeige für 2 Sekunden gedrückt, um die Alarmeinstellung zu beginnen und die entsprechende Anzeige blinkt. 3 . Drücken Sie die [ Ʌ ] oder die [ V ] Taste, um die Werte anzupassen oder halten Sie die Taste gedrückt, um die Einstellung der Werte zu beschleunigen. -
Page 26: Reinigung Des Regensammlers
Insekten zu entfernen (lassen Sie die Sensoren nicht nass werden). 5 . Montieren Sie alle Teile wieder, wenn sie sauber und vollständig getrocknet sind. Hiermit erklärt Technotrade, dass sich das Produkt WS1900 in Übereinstimmung mit den grundlegenden Anforderungen und den übrigen einschlägigen Bestimmungen der Richtlinie 2014/53/EU und ROHS 2011/65/EG befindet. - Page 27 Empfohlener Webbrowser Webbrowser, die HTML 5 unterstützen, wie beispielsweise für die Einrichtung der die neueste Version von Chrome, Safari, Edge, Firefox oder Benutzeroberfläche Opera. Technische Daten zur Kommunikation mit dem kabellosen 5-in-1-Sender 1 x Kabelloser 5-in-1-Sender und bis zu 7 Thermo- Unterstützte Sensoren Hygro-Sensoren Funkfrequenz...
- Page 28 Technische Daten zu Innen-/Außenluftfeuchteanzeige und -funktionen // Hinweis: Die folgenden Details sind so aufgelistet, wie sie auf der Konsole angezeigt oder bedient werden. Luftfeuchtigkeitseinheit Anzeigebereich 1 ~ 99% 20~39% oder 71~90% RH ±8%RH @ 25°C (77°F) Innengenauigkeit 40~70% RH ±5%RH @ 25°C (77°F) 1 ~ 20% RH ±...
-
Page 29: Vorsichtsmaßnahmen
Kabelloser 5-in-1-Sender Ausmaße (B x H x T) 343,5 x 393,5 x 136mm (13,5 x 15,5 x 5,35in) Gewicht 734g (mit Batterien) 3 x AA, 1.5V Batterien Stromversorgung ( Lithium-Batterien empfohlen) Wetterdaten Temperatur, Luftfeuchtigkeit, Windgeschwindigkeit, Windrichtung, und Niederschlag Übertragungsreichweite 150m Funkfrequenz 868Mhz &... -
Page 30: Batteriesicherheitshinweise
Technische Daten und Inhalte der Bedienungsanleitung für dieses Produkt können ohne Vorankündigung geändert werden. Wenn Ersatzteile benötigt werden, stellen Sie sicher, dass der Servicetechniker vom Hersteller angegebene Ersatzteile verwendet, die die gleichen Eigenschaften wie die Originalteile aufweisen. Unbefugter Austausch kann zu Bränden, Stromschlägen oder anderen Gefahren führen. - Page 31 Externe Stromversorgung Veröffentlichte Präziser Einheit Informationen Wert Modell-Nr. HX075-0501000-AG-001 Eingangsspannung 100-240 Eingangs-Wechsel- 50/60 stromfrequenz Ausgangsspannung DC 4,75-5,25 Ausgangsstrom Ausgangsleistung Durchschnittliche ≥ 73,62 aktive Effizienz Wirkungsgrad bei 64,93 niedriger Last (10 %) Leistungsaufnahme ≤ 0.1 bei Nulllast Die relevanten Lastbedingungen sind wie folgt: Prozentualer Anteil des Ausgangsstroms auf dem Typenschild Lastzustand 1...
- Page 32 WI-FI weather station with 5-In-1 professional sensor Model: WS1900 User Manual CHANNEL HISTORY MAX/MIN...
- Page 33 Table of contents Introduction Overview Installation and setup Power-up station Pairing wireless 5-in-1 weather sensor & station Pairing additional wireless sensor & station (optional) Create weather server account & setup of wi-fi connection Create Weather Underground account Create Weathercloud account Setup of wi-fi connection Setup the weather server connection Advanced setting in web interface...
-
Page 34: Introduction
Introduction Thank you for selecting Wi-fi weather station with 5-in-1 professional sensor. This system gathers and automatically uploads accurate and detailed weather data to Weather Underground and Weathercloud website - the famous weather service which allows weather observers to upload their local weather data with automated personal weather stations (PWS) - at which you can access and upload your weather data freely. - Page 35 1 . Table stand 10 . LCD display 19 . [ °C / °F ] slide switch 2 . [ SNOOZE ] key 11 . [ CLOCK SET ] key 20 . [ BARO UNIT ] key 3 . [ CHANNEL ] key 12 .
-
Page 36: Installation And Setup
Rain gauge 1 . Rain collector 2 . Tipping bucket 3 . Rain sensor 4 . Drain holes Temperature and humidity sensor 1 . Radiation shield Sensor casing 2 . Temperature and humidity sensor (inside the radiation shield) Wind sensor 1 . - Page 37 Assemble the stand and pole Step 1 Insert the top side of the pole to the square hole of the weather sensor. Note: Ensure the pole and sensor's indicator align. Step 2 Place the nut in the hexagon hole on the sensor, then insert the screw in other side and tighten it by the screw driver.
-
Page 38: Power-Up Station
Install the wireless 5-IN-1 sensor in an Add rubber open location with no obstructions above pads before Point to and around the sensor for accurate mount on NORTH rain and wind measurement. Install the pole the sensor with the smaller end facing the North to properly orient the wind direction vane. -
Page 39: Pairing Wireless 5-In-1 Weather Sensor & Station
Pairing 5-in-1 weather sensor & station After insert of batteries, the console will automatically search and connect the wireless 5-IN-1 sensor (the sensor antenna icon blinking). Once the connection is successful, antenna icon and readings for outdoor temperature & humidity, wind speed, wind direction and rainfall will appear on the LCD. Changing batteries and manual pairing of sensor Whenever you changed the batteries of the wireless 5-IN-1 sensor, pairing must be done manually. -
Page 40: Create Weathercloud Account
5. Note your Station ID and Station Key. Create Weathercloud account 1 . In https://weathercloud.net enter your information in "Join us today" section, then follow the instructions to create your account . Note: Use the valid email address to register your account. 2 . -
Page 41: Setup Of Wi-Fi Connection
4 . Jot down your ID and key for the further setup step. Setup wi-fi connection 1 . When you first power up the console, or press and hold the [ WI-FI / SENSOR ] key for 6 seconds in normal mode, the console LCD will show "AP" and " "... -
Page 42: Setup The Weather Server Connection
PWS-XXXXXX PWS-XXXXXX PC WI-FI network interface Android WI-FI network interface 4 . Once connected, enter the following IP address into your internet browser’s address bar, to access the console’s web interface: http://192.168.1.1 Note: Some browsers will treat 192.168.1.1 as a search, so make sure you include http:// header. ... - Page 43 Press “SETUP” icon Language: English to SETUP page ADVANCED WiFi Router setup Press to search router Select the Wi-fi router (SSID) you will connect to Search Router: ROUTER_A Manually enter the SSID if not on the list Add Router Press to allow add router manually Select router’s security type (usually WAP2) Security type:...
-
Page 44: Advanced Setting In Web Interface
The time will automatically synchronize Internet time server at 12:00AM and 12:00PM per day. Also you can press the [REFRESH ] key to get the internet time manually within 1 minute. Advanced setting in web interface Press "ADVANCED" key at the top of web interface to enter the advance setting page, this page allow you to set and view the calibration data of the console, also you can update the firmware in here (Only available in PC platform). -
Page 45: Firmware Update
Update function, however, is not available through mobile/smart devices. In case that a new firmware is available you can find it at: https://www.technoline.de/software/ws1900 If no new firmware is available, then no firmware update can be found in above URL. Two types of firmware updates are available, namely Function Firmware and System WI-FI Firmware, and are located at the bottom of ADVANCED page. -
Page 46: Other Settings & Functions Of The Station
Current Function firmware version Current WI-FI firmware version Firmware update steps 1 . Download the latest version firmware (function or WI-FI) to your PC. 2 . Set the Console into AP (access point) mode then connect the PC to the console (ref to "SETUP WI-FI CONNECTION"... -
Page 47: Moon Phase
startup, press and hold the [ WI-FI / SENSOR ] key for 6 seconds and let the console back to normal mode. 1 . In normal mode, press and hold [ CLOCK SET ] key for 2 seconds to enter setting. 2 . -
Page 48: Setting The Alarm Time
Note: - Changing the hemisphere setting will automatically switch the direction of the moon phase on the display. Setting the alarm time 1 . In normal time mode, press and hold [ ALARM ] key for 2 seconds until the alarm hour digit flashes to enter alarm time setting mode. -
Page 49: Room Comfort Indicator
Note: When indoor temperature is below -40°C, the LCD will display “Lo”. If temperature is above 70°C, LCD will display “HI”. When outdoor temperature is below -40°C, the LCD will display “Lo”. If temperature is above 80°C, LCD will display “HI”. ... -
Page 50: Wind
Wind Wind speed and direction section overview Real time wind direction indicator Past wind directions indicator of last 5 minutes Average / gust wind speed To set the wind speed unit and direction display format 1 . In normal mode, press and hold [ WIND ] key for 2 seconds to enter into wind speed unit mode and the unit will flash. -
Page 51: Weather Forecast
The dew point temperature is determined by the temperature & humidity data from wireless IN-1 sensor . Weather forecast The built-in barometer can notice atmosphere pressure changes. Based on the data collected, it can predict the weather conditions in the forthcoming 12~24 hours within a 30~50km (19~31 miles) radius. -
Page 52: Max / Min Data Recording
To select the rainfall display mode Press [ RAIN ] key to toggle between: 1. HOURLY - the total rainfall in the past hour 2. DAILY - the total rainfall from midnight 3. WEEKLY - the total rainfall of the current week 4. - Page 53 To set alert 1 . Press [ ALERT ] to select and display the desired weather alert reading in the sequence below: Alert reading Sequence Setting Range Display Section Default Value Indoor Temperature High Alert 40°C (current channel) -40°C ~ 80°C Indoor Temperature Low Alert 0°C (current channel)
-
Page 54: Maintenance
Hereby, Technotrade declares that this product WS 1900 is in compliance with the essential requirements and other relevant provisions of Directive 2014/53/EU and ROHS 2011/65/EC. The original EU declaration of conformity may be found at: www.technoline.de/doc/4029665019000 Specifications Station General Specification Dimensions (W x H x D) 136 x 168 x 24.5mm (5.4 x 6.6 x 1in) - Page 55 Recommended web browser Web browsers that support HTML 5, such as the latest for setup UI version of Chrome, Safari, Edge, Firefox or Opera. Wireless Sensor side Communication Specification 1 Wireless 5-in-1 weather outdoor sensor and up to 7 Support sensors Wireless hygro-thermo indoor sensors RF frequency 868Mhz...
- Page 56 Indoor / Outdoor Humidity Display & Function Specification Note: The following details are listed as they are displayed or operate on the console. Humidity unit Display range 1 ~ 99% 20~39% or 71~90% RH ±8%RH @ 25°C (77°F) Indoor Accuracy 40~70% RH ±5%RH @ 25°C (77°F) 1 ~ 20% RH ±...
-
Page 57: Precautions
Wireless 5-in-1 sensor Dimensions (W x H x D) 343.5 x 393.5 x 136mm (13.5 x 15.5 x 5.35in) Weight 734g (with batteries) 3 x AA size 1.5V batteries Main power ( Lithium batteries recommended) Weather data Temperature, Humidity, Wind speed, Wind direction and Rainfall RF transmission range 150m RF frequency... -
Page 58: Battery Safety Warnings
Place the console at least 20cm from nearby persons. This main unit is intended to be used only indoors. Do not subject the unit to excessive force or shock. Do not expose the unit to extreme temperatures, direct sunlight, dust or humidity. ... - Page 59 Station météo Wi-Fi avec capteur professionnel 5-en-1 Modèle : WS1900 Guide d'utilisation...
- Page 60 Table des matières Introduction ........................2 Vue d’ensemble ....................... 2 Installation et configuration ................... 4 Allumer la station ......................6 Couplage du capteur 5-en-1 et la station météo ............7 Couplage de capteurs et stations sans fil supplémentaires (en option) ....7 Créer un compte de serveur météo et configurer une connexion Wi-Fi ....
-
Page 61: Introduction
Introduction Nous vous remercions d’avoir choisi la station météo Wi-Fi avec capteur professionnel 5-en-1. Ce système collecte et télécharge automatiquement des données météo précises et détaillées à partir des sites Web Weather Underground et Weathercloud, les célèbres services météo qui permettent aux observateurs météo de télécharger leurs données météo locales avec des stations météo personnelles automatisées (SMP), grâce auxquelles vous pouvez accéder à... - Page 62 Socle Écran LCD Commutateur [°C/°F] Bouton [ SNOOZE ] Bouton [ CLOCK SET ] Bouton [ BARO UNIT ] Bouton [ CHANNEL ] Bouton [ ALARM ] Bouton [ SENSOR/WI-FI ] Bouton [ HISTORY ] Support pour accrochage au Bouton [ REFRESH ] Bouton [ MAX/MIN ] Bouton [ ALERT ] Compartiment à...
-
Page 63: Installation Et Configuration
Pluviomètre Collecteur de pluie Auget basculant Capteur de pluie Trous de drainage Capteur de température et d’humidité Boîtier antiradiation du capteur Capteur de température et d’humidité (à l’intérieur du boîtier antiradiation) Capteur de vent Coupelles à vent (anémomètre) Girouette Installation et configuration Installer le capteur sans fil 5-en-1 Le capteur sans fil 5-en-1 permet de mesurer la vitesse et la direction du vent, les précipitations, la température et l’humidité. - Page 64 Assemblage du socle et du mât Étape 1 Insérez le côté supérieur du mât dans le trou carré du capteur météo. Remarque : Assurez-vous que le mât et l’indicateur du capteur sont bien alignés. Étape 2 Placez l’écrou dans le trou hexagonal du capteur, puis insérez le boulon de l’autre côté...
-
Page 65: Allumer La Station
Placez le capteur sans fil 5-en-1 dans un endroit Ajouter des ouvert, sans obstruction au-dessus et autour, tampons en Tourné caoutchouc pour avoir des mesures de pluie et de vent e vers avant de précises. Installez le capteur avec l’extrémité la le nord monter sur le plus petite tournée vers le nord pour orienter... -
Page 66: Couplage Du Capteur 5-En-1 Et La Station Météo
Couplage du capteur 5-en-1 et la station météo Après l’insertion des piles, la console recherche le capteur sans fil 5-en-1 et s’y connecte automatiquement (icône d’antenne du capteur clignotant). Une fois la connexion établie, l’icône de l’antenne et les mesures de température et d’humidité extérieures, la vitesse et la direction du vent, et des précipitations apparaissent sur l’écran LCD. -
Page 67: Créer Un Compte Weathercloud
Notez l’identifiant et la clé de votre station. Créer un compte Weathercloud Dans https://weathercloud.net, entrez vos informations dans la section « Join us today », puis suivez les instructions pour créer votre compte. Remarque : Utilisez une adresse e-mail valide pour créer votre compte. Connectez-vous à... -
Page 68: Configurer Une Connexion Wi-Fi
Notez votre identifiant et votre clé pour la prochaine étape de configuration. Configurer une connexion Wi-Fi Lorsque vous allumez la console pour la première fois ou que vous maintenez appuyé le bouton [ WI-FI/SENSOR ] pendant 6 secondes en mode normal, l’écran LCD affiche les »... -
Page 69: Configurer La Connexion Du Serveur Météo
Interface réseau PC Wi-Fi Interface réseau Android Wi-Fi Une fois connecté, entrez l’adresse IP suivante dans la barre d’adresse de votre navigateur Internet pour accéder à l’interface Web de la console : http://192.168.1.1 Remarque : • Certains navigateurs traitent 192.168.1.1 comme une recherche, assurez-vous donc d’inclure l'en-tête http://. - Page 70 Appuyez sur l’icône « SETUP » pour accéder à la page SETUP Sélectionnez le routeur Wi-Fi (SSID) Appuyez pour rechercher le routeur auquel vous allez vous connecter. Entrez manuellement le SSID s’il n’est Appuyez sur pour autoriser l’ajout de pas dans la liste routeur manuellement Sélectionnez le type de sécurité...
-
Page 71: Réglage Avancé Dans L'interface Web
Appuyez sur le bouton [ ] pour accéder à votre fuseau horaire, puis maintenez appuyé le bouton [ CLOCK SET ] pour confirmer et quitter. Reportez-vous à la session du manuel RÉGLAGE DE L’HORLOGE pour plus d’informations sur les autres réglages de la console. -
Page 72: Afficher Vos Données Météo Dans Wunderground
être mis à jour par voie hertzienne à tout moment (si nécessaire) via n’importe quel navigateur Web sur un PC doté d’une connectivité Wi-Fi. La fonction de mise à jour n’est toutefois pas disponible via les appareils mobiles/intelligents. Si un nouveau microprogramme est disponible, vous pouvez le trouver à l’adresse suivante : https://www.technoline.de/software/ws1900 FR 13... - Page 73 Si aucune nouvelle version du microprogramme n’est disponible, aucune mise à jour ne peut être trouvée dans l’URL ci-dessus. Deux types de mises à jour du microprogramme sont disponibles, à savoir Microprogramme de fonctionnement et Microprogramme de système Wi-Fi, et se trouvent en bas de la page ADVANCED.
-
Page 74: Autres Réglages Et Fonctions De La Station
termine avec succès. Si la console ne peut pas se connecter à votre routeur, terminez la page SETUP pour effectuer une nouvelle configuration. • Après la mise à jour du microprogramme, l’utilisateur devrait peut-être entrer à nouveau l’ID et le mot de passe Weather Underground. Autres réglages et fonctions de la station Réglage de l'heure Cette console est conçue pour obtenir l’heure locale en se synchronisant avec le serveur de temps... -
Page 75: Réglage De L'heure De Réveil
Installez le capteur sans fil 5-en-1 avec la girouette dirigée vers le sud. (Reportez-vous à la section INSTALLATION DU CAPTEUR SANS FIL pour les détails de montage) En mode normal de la console, maintenez appuyé le bouton [ INDEX ] pendant 10 secondes pour accéder au mode étalonnage, puis maintenez appuyé... -
Page 76: Fonction Température/Humidité Et Tendance De Celles-Ci
lendemain. Remarque : Le rappel d'alarme reste activé pendant 24 heures. Pendant la répétition d’alarme, l’icône « » ne cesse de clignoter. Fonction température/humidité et tendance de celles-ci Utilisez le sélecteur [ °C/°F ] pour choisir l’unité d’affichage de la température. L’indicateur de tendance température/humidité... -
Page 77: Vent
Si vous avez 2 capteurs ou plus, vous pouvez appuyer sur le bouton [ CHANNEL ] pour basculer entre différents canaux sans fil en mode normal, ou maintenez appuyé le bouton [ CHANNEL ] pendant 2 secondes pour basculer en mode de cycle automatique pour afficher les canaux connectés à... -
Page 78: Prévisions Météo
soleil Refroidissement éolien Une combinaison des données de température et de vitesse du vent du capteur sans fil 5-en-1 détermine le facteur de refroidissement éolien actuel. Point de rosée • Le point de rosée est la température en dessous de laquelle la vapeur d’eau contenue dans l’air à... -
Page 79: Précipitations
l’unité est 1013 hPa, entrez «-3» dans la case. Précipitations La section RAINFALL contient des informations sur les précipitations et l'intensité de pluie. Pour définir l’unité des précipitations Maintenez appuyé le bouton [ RAIN ] pendant 2 secondes pour accéder au mode réglage d’unité. -
Page 80: Réglage De L'alerte Météo
actuelle, ex. l’heure actuelle est 7h25, 8 mars, l’écran affiche les données de 7h00, le 8 mars. Appuyez plusieurs fois sur le bouton [ HISTORY ] pour afficher les lectures les plus anciennes des dernières 24 heures, ex. 6h00 (8 mars), 5h00 (8 mars),…, 10h00 (7 mars), 9h00 (7 mars), 8h00 (7 mars) Remarque : L’écran LCD affiche également l’icône «... -
Page 81: Entretien
Par la présente, Technotrade déclare que ce produit WS 1900 est conforme aux exigences essentielles et aux autres dispositions pertinentes de la directive 2014/53/UE et de la directive ROHS 2011/65/CE. La déclaration de conformité EU originale est disponible à : www.technoline.de/doc/4029665019000 FR 22... -
Page 82: Spécifications
Spécifications Station Caractéristiques générales Dimensions (L x H x D) 136 x 168 x 24,5mm (5,4 x 6,6 x 1 po) Poids 370g (avec piles) Alimentation Adaptateur HX075-0501000-AG-001 5VCC, 1A Piles de secours CR2032, Piles 3V Plage de température de -5°C ~ 50°C fonctionnement Caractéristiques de communication Wi-Fi... - Page 83 Précision (700 ~ 1100hPa ± 5hPa)/(540 ~ 696hPa ± 8hPa) (20,67 ~ 32,48inHg ± 0,15inHg)/(15,95 ~ 20,55inHg ± 0,24inHg) (525 ~ 825mmHg ± 3.8mmHg)/(405 ~ 522mmHg ± 6mmHg) Typiquement à 25°C (77°F) Résolution 1hPa/0,01inHg/0,1mmHg Prévisions météo Ensoleillé/Clair, Légèrement nuageux, Nuageux, Pluvieux, Pluvieux/Orageux et Neigeux Modes d'affichage Courant...
- Page 84 du vent Plage d’affichage de la vitesse 0 ~ 112mph, 50m/s, 180km/h, 97nœuds du vent 0.1mph, 0,1m/s, 0,1km/h, 0,1nœuds Résolution Précision de la vitesse < 5m/s : +/- 0,5m/s; > 5m/s : +/- 6% (la plus élevée des deux) Mode d'affichage Rafale/Moyenne Modes Mémoire Historique des données des dernières 24 heures,...
-
Page 85: Précautions
868Mhz Fréquence RF et puissance de transmission 7dBm • 12 secondes pour les données de vitesse et de direction du vent • Intervalle de transmission 24 secondes pour les données de température, d’humidité et de pluie Plage de fonctionnement -40 ~ 60°C (-40 ~ 140°F) Piles au lithium nécessaires Précautions •... -
Page 86: Avertissements De Sécurité Concernant Les Piles
• Cet appareil n'est destiné qu'à une utilisation intérieure. • Ne soumettez pas l’appareil à une force ou à un choc excessif. • N’exposez pas l’appareil à la lumière directe du soleil, à des températures extrêmes, à l’humidité ou à la poussière. •... - Page 87 Estación meteorológica wifi con sensor profesional 5 en 1 Modelo: WS1900 Manual del usuario...
- Page 88 Índice de contenidos Introducción ........................2 Vista general ........................2 Instalación, configuración y puesta en marcha ............5 Encender la estación ...................... 7 Emparejar la estación y el sensor meteorológico 5 en 1 ..........8 Emparejar la estación con sensores inalámbricos adicionales (opcional) ....8 Crear una cuenta en el servidor meteorológico y configurar la conexión wifi ..
-
Page 89: Introducción
Introducción Gracias por seleccionar la estación meteorológica wifi con sensor profesional 5 en 1. Este sistema recopila y carga automáticamente datos meteorológicos precisos y detallados en las páginas web de Weather Underground y Weathercloud, el famoso servicio meteorológico que permite a los observadores meteorológicos cargar sus datos locales con estaciones meteorológicas personales automatizadas (PWS). - Page 90 Soporte para la mesa Pantalla LCD Interruptor deslizante [ °C/°F ] Tecla [ SNOOZE ] Tecla [ CLOCK SET ] Tecla [ BARO UNIT ] Tecla [ CHANNEL ] Tecla [ ALARM ] Tecla [ SENSOR/WI-FI ] Tecla [ HISTORY ] Soporte para montaje en pared Tecla [ REFRESH ] Tecla [ MAX/MIN ]...
- Page 91 Pluviómetro Colector de lluvia Cubeta basculante Sensor de lluvia Orificios de drenaje Sensor de temperatura y humedad Carcasa del sensor del escudo antirradiación Sensor de temperatura y humedad (dentro del escudo antirradiación) Sensor de viento Cazoletas para el viento (anemómetro) Veleta ES 4...
-
Page 92: Instalación, Configuración Y Puesta En Marcha
Instalación, configuración y puesta en marcha Instalar el sensor inalámbrico 5 en 1 El sensor inalámbrico 5 en 1 es el encargado de medir la velocidad del viento, la dirección del viento, la cantidad de lluvia, la temperatura y la humedad. Está ensamblado y calibrado para una fácil instalación. - Page 93 Paso 3 Inserte el otro extremo del poste en el orificio cuadrado del soporte de plástico. Nota: Asegúrese de que el poste y el indicador del soporte estén alineados. Paso 4 Coloque la tuerca en el orificio hexagonal del soporte, luego introduzca el tornillo en el otro lado y apriételo usando un destornillador.
-
Page 94: Encender La Estación
Instale el sensor inalámbrico 5 en 1 en un lugar Coloque las abierto sin obstrucciones por encima almohadillas Apunta de goma alrededor del sensor, para una medición precisa ndo al después de de la lluvia y el viento. Instale el sensor con el NORTE montar el extremo menor apuntando al norte para orientar... -
Page 95: Emparejar La Estación Y El Sensor Meteorológico 5 En 1
Emparejar la estación y el sensor meteorológico 5 en 1 Después de colocar las pilas, la consola buscará y se conectará automáticamente al sensor inalámbrico 5 en 1 (el icono de antena del sensor parpadeará). Después de conectarse correctamente al sensor, el icono de la antena, las lecturas de la temperatura y humedad, la velocidad y dirección del viento y la cantidad de lluvia del exterior aparecerán en la pantalla LCD. -
Page 96: Crear Una Cuenta Weathercloud
Anote el ID y la clave de su estación. Crear una cuenta Weathercloud En la página web https://weathercloud.net introduzca su información en la sección "Join us today" y, a continuación, siga las instrucciones para crear su cuenta. Nota: Use una dirección de correo electrónico válida para registrar su cuenta. Inicie sesión en Weathercloud y acceda a la página "Devices", haga clic en "+ New"... -
Page 97: Configurar La Conexión Wifi
Anote su ID y la clave para el siguiente paso de configuración. Configurar la conexión wifi La primera vez que encienda la consola, mantenga pulsada la tecla [ WI-FI/SENSOR ] durante 6 segundos desde el modo normal, la pantalla LCD mostrará "AP" y el icono " "... -
Page 98: Configurar La Conexión Del Servidor Meteorológico
Interfaz de red wifi del PC Interfaz de red wifi para Android Una vez conectado, introduzca la siguiente dirección IP en la barra de direcciones de su navegador de Internet para acceder a la interfaz web de la consola: http://192.168.1.1 Nota: •... - Page 99 Pulse en el icono “SETUP” para configurar la página Seleccione el enrutador wifi (SSID) al Pulse para buscar el enrutador que se conectará Introduzca manualmente el SSID si no Pulse para permitir añadir el enrutador aparece en la lista manualmente Seleccione el tipo de seguridad del enrutador (generalmente WAP2) Comentario del registro de contraseña...
-
Page 100: Configuración Avanzada De La Interfaz Web
Pulse la tecla [ ] o [ ] para introducir su zona horaria y, a continuación, mantenga pulsada la tecla [ CLOCK SET ] para confirmar y salir. Consulte la sección AJUSTAR LA HORA del manual para conocer los detalles de cómo realizar otros ajustes de la consola. La hora se sincronizará... -
Page 101: Ver Sus Datos Meteorológicos En Weathercloud
PC con conectividad wifi. La función de actualización, sin embargo, no está disponible para dispositivos móviles/inteligentes. En caso de que haya un nuevo firmware disponible, podrá encontrarlo en: https://www.technoline.de/software/ws1900 Si no hay ningún firmware nuevo disponible, no encontrará ninguna actualización en la URL anterior. - Page 102 Hay dos tipos de actualizaciones de firmware disponibles, a saber, el firmware de las funciones y el firmware del sistema wifi, y se encuentran en la parte inferior de la página de configuración AVANZADA. Versión actual del firmware de las funciones Versión actual del firmware del wifi Pasos para la actualización del firmware...
-
Page 103: Otras Configuraciones Y Funciones De La Estación
• Después de actualizar el firmware, es posible que tenga que volver a introducir el ID y la contraseña de Weather Underground. Otras configuraciones y funciones de la estación Ajustar la hora manualmente Esta consola está diseñada para obtener la hora local mediante la sincronización con el servidor de hora de Internet asignado. -
Page 104: Configurar La Hora De La Alarma
montaje) En modo normal de la consola, mantenga pulsada la tecla [ INDEX ] durante 10 segundos para entrar en el modo de calibración, luego pulse de nuevo la tecla [ INDEX ] hasta que aparezca el icono "N" en la esquina inferior izquierda de la pantalla LCD para entrar en el modo de orientación del sensor Use las teclas [ Ʌ... -
Page 105: Función De Temperatura/Humedad Y Tendencia
Nota: Puede usar el retardo de alarma continuadamente en 24 horas. Durante el retardo de la alarma, el icono de alarma “ ” continuará parpadeando. Función de temperatura/humedad y tendencia Use el conmutador deslizante [ °C/°F ] para seleccionar la unidad de presentación de la temperatura. -
Page 106: Viento
[ CHANNEL ] para cambiar entre los diferentes canales inalámbricos, o mantener pulsada la tecla [ CHANNEL ] durante 2 segundos para cambiar al modo de ciclo automático y mostrar los canales conectados con un intervalo de 4 segundos. Durante el modo de ciclo automático, pulse la tecla [ CHANNEL ] para detener el ciclo automático y mostrar el canal actual. -
Page 107: Previsión Meteorológica
de sol Viento helado Una combinación de los datos de temperatura y velocidad del viento del sensor inalámbrico 5-IN-1 determina el factor de viento helado actual. Punto de rocío • El punto de rocío es la temperatura por debajo de la cual el vapor de agua en el aire a presión barométrica constante se condensa en agua líquida a la misma velocidad a la que se evapora. -
Page 108: Precipitación
digamos 1013 hPa, introduzca entonces "-3" en la casilla. Precipitación En la sección de LLUVIA aparece la información de la lluvia y de su intensidad Establecer la unidad del pluviómetro Mantenga pulsada la tecla [ RAIN ] durante 2 segundos para entrar en el modo de selección de la unidad. -
Page 109: Datos Históricos De Las Últimas 24 Horas
Datos históricos de las últimas 24 horas La consola guarda automáticamente los datos meteorológicos de las últimas 24 horas. Pulse la tecla [ HISTORY ] para comprobar el comienzo de los datos meteorológicos de la hora actual, por ejemplo, si la hora actual es 7:25 a.m. del 8 de marzo, la pantalla mostrará los datos de las 7:00 a.m. -
Page 110: Mantenimiento
Alerta de Alerta lectura desactivada alta/baja Alerta activada Alerta desactivada activada Pulse cualquier tecla de la parte frontal para guardar el estado de activada/desactivada de la alerta y volver al modo normal, o volverá automáticamente al modo normal después de 30 segundos sin presionar ninguna tecla. -
Page 111: Especificaciones
Directiva 2014/53/EU y ROHS 2011/65/EC. Puede encontrar la declaración de conformidad de la EU original en: www.technoline.de/doc/4029665019000 Especificaciones Estación Especificaciones generales Dimensiones (An x Al x P) 136 x 168 x 24,5 mm (5.4 x 6.6 x 1 pulgadas) - Page 112 Rango de medida 540 hasta 1100 hPa (rango de ajuste relativo de 930 hasta 1050h Pa) Precisión (700 - 1100 hPa ± 5 hPa)/(540 - 696 hPa ± 8hPa) (20,67 - 32,48 inHg ± 0,15 inHg)/(15.95 - 20.55 inHg ± 0.24 inHg) (525 - 825 mmHg ±...
- Page 113 Resolución 0,1 mph, 0,1 m/s, 0,1 km/h, 0,1 nudos Precisión de la velocidad < 5 m/s: +/- 0,5 m/s; > 5 m/s: +/- 6 % (lo que sea mayor) Modo de presentación Ráfaga/Promedio Modos de memoria Datos históricos de las últimas 24 horas, Ráfaga máx/Promedio Alarma Alerta de velocidad de vientos fuertes (Promedio/Ráfaga) Resolución de la dirección del...
-
Page 114: Precauciones
Rango de funcionamiento -40 - 60 °C (-40 - 140°F) se requieren pilas de litio Precauciones • Es muy recomendable leer y conservar el "Manual del usuario". El fabricante y el proveedor no pueden aceptar ninguna responsabilidad por cualquier lectura incorrecta, pérdida de datos de exportación y cualquier consecuencia que ocurra en caso de que se produzca una lectura inexacta. -
Page 115: Advertencias De Seguridad Sobre Las Pilas
• No abra la carcasa posterior interna ni altere ningún componente de la unidad. Advertencias de seguridad sobre las pilas • Use solamente pilas alcalinas, no use pilas recargables. • Instale las pilas correctamente, haciendo coincidir las polaridades (+/-). • Cambie siempre el juego completo de pilas. - Page 116 WiFi-weerstation met professionele 5-in-1 sensor Model: WS1900 Gebruikshandleiding...
- Page 117 Inhoudsopgave Inleiding ........................... 2 Overzicht .......................... 2 Installatie, opstelling en instelling ................4 Het station inschakelen ....................6 De 5-in-1 weersensor en het station koppelen ............7 Extra draadloze sensor(en) met het station koppelen (optioneel) ......7 Een account creëren voor de weerserver & de WiFi-verbinding instellen ....7 Een Weather Underground-account creëren ...............
-
Page 118: Inleiding
Inleiding Hartelijk bedankt voor het kiezen van dit WiFi-weerstation met professionele 5-in-1 sensor. Dit systeem verzamelt nauwkeurige en gedetailleerde weergegevens en uploadt deze automatisch naar de websites Weather Underground en Weathercloud - de beroemde weerdiensten waarmee iedereen die het weer graag in de gaten houdt hun lokale weergegevens kan uploaden met geautomatiseerde persoonlijke weerstations (PWS) - waar u uw weergegevens vrij kunt controleren en uploaden. - Page 119 Tafelsteun LCD-scherm [ °C/°F ]-schuifschakelaar [ SNOOZE ]-toets [ CLOCK SET ]-toets [ BARO UNIT ]-toets [ CHANNEL ]-toets [ ALARM ]-toets [ SENSOR/WI-FI ]-toets [ HISTORY ]-toets Steun voor muurmontage [ REFRESH ]-toets [ MAX/MIN ]-toets [ ALERT ]-toets Batterijvak [ WIND ]-toets [ V ]-toets...
-
Page 120: Installatie, Opstelling En Instelling
Regenmeter Regenvanger Kantelbak Regensensor Afvoergaten Temperatuur- en vochtigheidssensor Stralingsscherm Sensorbehuizing Temperatuur- en vochtigheidssensor (binnenin het stralingsscherm) Windsensor Windcups (anemometer) Windvaan Installatie, opstelling en instelling De draadloze 5-in-1 sensor installeren Uw draadloze 5-in-1 sensor meet voor u de windsnelheid, windrichting, hoeveelheid neerslag, temperatuur en luchtvochtigheidsgraad. - Page 121 De steun en paal monteren Stap 1 Steek de bovenzijde van de paal in het rechthoekige gat van de weersensor. Opmerking: Zorg ervoor dat de indicatoren op de paal en sensor op elkaar zijn afgestemd. Stap 2 Plaats de moer in het zeshoekige gat van de sensor, steek de schroef vervolgens in de andere zijde en draai vast met de schroevendraaier.
-
Page 122: Het Station Inschakelen
Installeer de draadloze 5-in-1 sensor op een Plaats de rubberen open locatie zonder obstructies boven en Richting tussenstukje rondom de sensor, zodat de regen en wind s voordat u nauwkeurig kunnen worden gemeten. Installeer het apparaat NOOR op de paal de sensor met het kleinere uiteinde op het monteert Noorden gericht om de windrichtingvaan correct... -
Page 123: De 5-In-1 Weersensor En Het Station Koppelen
voor muurmontage of voor gebruik op een tafel. De 5-in-1 weersensor en het station koppelen Nadat de batterijen zijn geïnstalleerd, zal het station automatisch naar de draadloze 5-in-1 sensor beginnen te zoeken om de verbinding tot stand te brengen (het “sensorantenne”-icoontje knippert). Na een geslaagde verbinding zullen het antenne-icoontje en de gemeten buitentemperatuur en -vochtigheid, windsnelheid, windrichting en hoeveelheid neerslag op de LCD verschijnen. -
Page 124: Een Weathercloud-Account Creëren
Noteer uw station-ID en het wachtwoord van uw station. Een Weathercloud-account creëren Ga naar https://weathercloud.net, voer uw informatie in de sectie "Join us today" in en volg de instructies om uw account te creëren. Opmerking: Gebruik een geldig e-mailadres om uw account te registreren. Log in op Weathercloud en u zult vervolgens naar de pagina "Devices"... -
Page 125: De Wifi-Verbinding Instellen
Noteer uw ID en wachtwoord voor de volgende instellingsstap. De WiFi-verbinding instellen Wanneer u het station voor het eerst inschakelt of in de normale modus de toets [ WI-FI/SENSOR ] 6 seconden ingedrukt houdt, dan zal de LCD van het station "AP" en het icoontje "... -
Page 126: De Verbinding Met De Weerserver Instellen
Pc WiFi-netwerkinterface Android WiFi-netwerkinterface Voer nadat de verbinding is gemaakt het volgende IP-adres in de adresbalk van uw internetbrowser in om de webinterface van het station te openen: http://192.168.1.1 Opmerking: • Sommige browsers beschouwen 192.168.1.1 als een zoekopdracht, zorg er daarom voor het voorvoegsel http:// te gebruiken. - Page 127 Druk op het icoontje “SETUP” om naar de pagina SETUP te gaan Selecteer de WiFi-router (SSID) Indrukken om naar de router te zoeken waarmee u verbinding zult maken Voer de SSID handmatig in als deze niet Indrukken om handmatig toevoegen in de lijst staat van de router toe te staan Selecteer het beveiligingstype van uw...
-
Page 128: Geavanceerde Instelling In De Webinterface
Druk op de toets [ ] of [ ] om uw tijdzone in te voeren en houd vervolgens de toets [ CLOCK SET ] ingedrukt om te bevestigen en af te sluiten. Raadpleeg de paragraaf KLOKINSTELLING in deze handleiding voor meer informatie over andere instellingen voor het weerstation. -
Page 129: Uw Weergegevens Bekijken In Weathercloud
WiFi-connectiviteit. De updatefunctie is echter niet beschikbaar via mobiele apparaten of smartapparaten. Als er een nieuwe firmware beschikbaar is, dan is deze te vinden op: https://www.technoline.de/software/ws1900 Als er geen nieuwe firmware-update beschikbaar is, dan zult u geen firmware-update aantreffen op de bovengenoemde URL. -
Page 130: Overige Instellingen & Functies Van Het Station
Huidige Functie-firmwareversie Huidige WiFi-firmwareversie Firmware-updatestappen Download de nieuwste firmwareversie (functie of WiFi) naar uw pc. Stel het weerstation in op de TP-modus (toegangspunt) en verbind de pc vervolgens met het weerstation (zie paragraaf “DE WIFI-VERBINDING INSTELLEN” op de vorige pagina). Klik op in de sectie Functiefirmware en browse naar de locatie van het bestand dat u in stap 1 hebt gedownload om de functiefirmware te updaten. -
Page 131: Tijdinstelling
Tijdinstelling Dit weerstation is ontworpen om de lokale tijd te verkrijgen door synchronisatie met de toegewezen internettijdserver. Als u het offline wilt gebruiken, dan dient u de tijd en datum handmatig in te stellen. Houd tijdens de aanvankelijke start de toets [ WI-FI/SENSOR ] 6 seconden ingedrukt en laat het weerstation terug op de normale modus schakelen. -
Page 132: De Alarmtijd Instellen
Gebruik de toets [ Ʌ ] of [ V ] om naar de lagere sectie te bewegen (Zuidelijke hemisfeer). Druk op de toets [ INDEX ] om te bevestigen en verlaten. Opmerking: Als u de hemisfeerinstelling verandert, dan zal de richting van de maanfase op de display automatisch worden gewisseld. -
Page 133: Comfortindicator
Gebruik de schuifschakelaar [ °C/°F ] om de temperatuureenheid te selecteren. De indicator van de temperatuur-/vochtigheidstendens toont de tendens van veranderingen in de komende paar minuten. Pijlindicator Temperatuur-/vochtigheidstendens Stijgen Stabiel Vallen Opmerking: • Wanneer de binnentemperatuur lager is dan -40°C, dan zal de LCD “Lo” weergeven. Als de temperatuur hoger is dan 70°C, dan zal de LCD “HI”... -
Page 134: Wind
te stoppen en het huidige kanaal weer te geven. Wind Overzicht van de sectie windsnelheid en -richting Indicator van real-time windrichting Indicator van windrichtingen van de afgelopen 5 minuten Gemiddelde windsnelheid/windstoot De windsnelheidseenheid en het weergaveformaat voor de windrichting instellen Houd in de normale modus de toets [ WIND ] 2 seconden ingedrukt om de eenheidinstelling voor de windsnelheid te openen, de eenheid zal nu knipperen. -
Page 135: Weersvoorspelling
condenseert in vloeibaar water met dezelfde snelheid waarmee het verdampt. Het gecondenseerde water wordt dauw genoemd wanneer het zich op een vast oppervlak vormt. • Het dauwpunt wordt bepaald door de temperatuur- en luchtvochtigheidsgegevens van de draadloze 5-in-1 sensor. Weersvoorspelling De ingebouwde barometer kan schommelingen in de atmosferische druk waarnemen. -
Page 136: Max/Min Gegevensregistratie
Houd de toets [ RAIN ] 2 seconden ingedrukt om de instellingsmodus voor de eenheid te openen. Druk op de toets [ Ʌ ] of [ V ] om de neerslageenheid te wisselen tussen mm en inch. Druk op de toets [ RAIN ] om de instelling te bevestigen en verlaten. De weergavemodus selecteren voor de neerslag Druk op de toets [ RAIN ] om te wisselen tussen: HOURLY - de totale hoeveelheid neerslag van het afgelopen uur... -
Page 137: Weeralarminstelling
” en de tijd & datum van de historische De LCD zal ook het icoontje " gegevensregistraties weergeven. Weeralarminstelling Het weeralarm kan u waarschuwen in het geval van bepaalde weersomstandigheden. Zodra de criteria voor het alarm worden voldaan, dan zal het alarmgeluid klinken terwijl het waarschuwingsicoontje op de LCD begint te knipperen. -
Page 138: Onderhoud
Installeer alle onderdelen weer nadat deze schoon en volledig gedroogd zijn. Technotrade verklaart hierbij dat dit product WS 1900 voldoet aan de essentiële vereisten en andere relevante bepalingen van richtlijn 2014/53/EU en ROHS 2011/65/EC. De originele EU-conformiteitsverklaring is te vinden op: www.technoline.de/doc/4029665019000 Specificaties Station NL 22... - Page 139 Algemene specificaties Afmetingen (B x H x D) 136 x 168 x 24,5mm (5,4 x 6,6 x 1 in) Gewicht 370g (met batterijen) Hoofdvoeding DC 5V, 1A adapter HX075-0501000-AG-001 Back-upbatterij CR2032, 3V batterijen Temperatuurbereik -5°C ~ 50°C Specificaties WiFi-communicatie WiFi-standaard 802.11 b/g/n WiFi-bedrijfsfrequentie en 2,4GHz...
- Page 140 Regenachtig/Stormachtig en Sneeuwachtig Weergavemodi Huidig Geheugenmodi Historische gegevens van de afgelopen 24 uur, dagelijks Max/Min Alarm Alarm voor drukverandering Weergave en -functiespecificaties binnen-/buitentemperatuur Opmerking: De volgende details staan vermeld zoals deze op het weerstation werken of worden weergegeven. Temperatuureenheid °C en °F Weergavebereik Binnen:-40 ~ 70°C(-40 ~ 158°F), buiten:-40 ~ 80(-40 ~ 176°F) Nauwkeurigheid binnen...
-
Page 141: Voorzorgsmaatregelen
Windstoot/Gemiddeld Alarm Waarschuwing hoge windsnelheid (gemiddeld/windstoot) Resoluties windrichting 16 richtingen Weergave en -functiespecificaties neerslag Opmerking: De volgende details staan vermeld zoals deze op het weerstation werken of worden weergegeven. Neerslageenheid mm en in Nauwkeurigheid voor neerslag ± 7% of 1 kanteling Bereik van neerslag 0 ~ 19999mm (0 ~ 787,3 in) Resolutie... -
Page 142: Veiligheidswaarschuwingen Batterijen
• Dit product is uitsluitend ontworpen voor thuisgebruik ter indicatie van weersomstandigheden. Dit product dient niet te worden gebruikt voor medische doeleinden of voor openbare informatie • Stel het toestel niet bloot aan overmatige krachten, schokken, stof, temperatuur of vochtigheid. •... - Page 143 • Vervang altijd alle batterijen tegelijk. • Gebruik nooit nieuwe en gebruikte batterijen door elkaar. • Verwijder lege batterijen onmiddellijk. • Verwijder de batterijen als het toestel niet wordt gebruikt. • Herlaad de batterijen niet en gooi ze niet in vuur: de batterijen zouden kunnen ontploffen. •...
- Page 144 Stazione meteo Wi-Fi con sensore professionale 5 in 1 Modello: WS1900 Manuale dell'utente...
- Page 145 Indice Introduzione ........................2 Panoramica ........................2 Installazione e configurazione ..................4 Avvio della stazione ......................6 Accoppiamento del sensore 5 in 1 e della stazione meteo ........7 Accoppiamento di ulteriori sensori wireless e della stazione meteo (opzionale) ..7 Creazione di un account per l'accesso al server meteo e configurazione della connessione Wi-Fi ......................
-
Page 146: Introduzione
Introduzione Grazie per avere scelto la stazione meteo Wi-Fi con sensore professionale 5 in 1. Il sistema raccoglie e carica automaticamente informazioni precise e dettagliate sulle condizioni meteo sui siti web Weather Underground e Weathercloud, il famoso servizio meteo che consente agli osservatori meteo di caricare i dati meteo locali a partire da stazioni meteo personali automatizzate (PWS), ai quali è... - Page 147 Supporto da tavolo Display LCD Interruttore di selezione [ °C/°F ] Tasto [ SNOOZE ] Tasto [ CLOCK SET ] Tasto [ BARO UNIT ] Tasto [ CHANNEL ] Tasto [ ALARM ] Tasto [ SENSOR/WI-FI ] Tasto [ HISTORY ] Supporto da parete Tasto [ REFRESH ] Tasto [ MAX/MIN ]...
-
Page 148: Installazione E Configurazione
Pluviometro Collettore di pioggia Bilancino autosvuotante Pluviometro Fori di scarico Sensore di temperatura e umidità Involucro sensore dello scudo termico Sensore di temperatura e umidità (all'interno dello scudo termico) Anemometro Anemometro a coppette Banderuola Installazione e configurazione Installazione del sensore wireless 5 in 1 Il sensore wireless 5 in 1 misura la velocità... - Page 149 Montaggio del supporto e del palo Fase 1 Inserire il lato superiore del palo nel foro quadrato del sensore meteo. Nota: Assicurarsi che il palo e l'indicatore del sensore siano allineati. Fase 2 Posizionare un dado sul foro esagonale del sensore, quindi inserire la vite sull'altro lato e stringere con il cacciavite.
-
Page 150: Avvio Della Stazione
Aggiungere i Installare il sensore wireless 5 in 1 in un cuscinetti in ambiente aperto e senza ostacoli sopra e gomma prima Rivolto attorno al sensore, in modo da ottenere di procedere misurazioni precise delle precipitazioni e della all'installazione NORD sul palo. -
Page 151: Accoppiamento Del Sensore 5 In 1 E Della Stazione Meteo
Accoppiamento del sensore 5 in 1 e della stazione meteo Dopo avere inserito le batterie, la console ricercherà automaticamente e si collegherà al sensore wireless 5 in 1 (l'icona dell'antenna del sensore lampeggerà). Una volta avvenuta la connessione, l'icona dell'antenna e le letture della temperatura esterna, dell'umidità, della velocità... -
Page 152: Creazione Di Un Account Per L'accesso Al Sito Web Weathercloud
Annotare l'ID e il codice della stazione. Creazione di un account per l'accesso al sito web Weathercloud Accedere a https://weathercloud.net e inserire le informazioni richieste nella sezione "Join us today", quindi seguire le istruzioni per la creazione dell'account. Nota: Utilizzare un indirizzo e-mail valido per registrare l'account. Registrarsi a weathercloud e accedere alla pagina "Devices", quindi fare clic su "+ New"... -
Page 153: Configurazione Della Connessione Wi-Fi
Annotare l'ID e il codice per le ulteriori fasi di configurazione. Configurazione della connessione Wi-Fi Al momento della prima accensione della console, o tenendo premuto il tasto [ WI-FI/SENSOR ] in modalità normale, il display LCD della console visualizzerà "AP" e l'icona "... -
Page 154: Configurazione Della Connessione Al Server Meteo
Interfaccia di rete WI-FI per PC Interfaccia di rete WI-FI per Android Una volta avvenuta la connessione, immettere il seguente indirizzo IP nella barra degli indirizzi del browser Internet per accedere all'interfaccia web della console: http://192.168.1.1 Nota: • Alcuni browser considereranno 192.168.1.1 come un parametro di ricerca, pertanto si raccomanda di includere http:// nell'indirizzo. - Page 155 Premere l'icona "SETUP" alla pagina SETUP Selezionare il router Wi-Fi (SSID) al Premere per avviare la ricerca del quale connettersi router Immettere manualmente l'SSID se non è Premere per consentire l'aggiunta incluso nell'elenco manuale del router Selezionare il tipo di sicurezza del router (solitamente WAP2) Indicazione di registrazione della Password del router (lasciare vuoto...
-
Page 156: Impostazioni Avanzate Dell'interfaccia Web
Tenere premuto il tasto [ CLOCK SET ] per 2 secondi per accedere alla modalità di impostazione dell'ora. Premere i tasti [ ] o [ ] per accedere al proprio fuso orario, quindi tenere premuto il tasto [ CLOCK SET ] per confermare e uscire. Fare riferimento alla sezione IMPOSTAZIONE OROLOGIO del manuale per ulteriori dettagli sulle altre impostazioni della console. -
Page 157: Visualizzazione Delle Informazioni Meteo Sul Sito Web Weathercloud
La funzione di aggiornamento, tuttavia, non è disponibile dai dispositivi mobili o gli smartphone. Ogni volta che viene rilasciato un nuovo firmware, sarà disponibile al seguente link: https://www.technoline.de/software/ws1900 Se non ci sono firmware disponibili, nessun aggiornamento del firmware potrà essere ottenuto accedendo all'URL sopra specificato. - Page 158 Sono disponibili due tipi di aggiornamenti del firmware, Function Firmware e System Wi-Fi Firmware, disponibili in basso nella pagina ADVANCED. Versione attuale del Function Firmware Versione attuale del Wi-Fi Firmware Procedura di aggiornamento del firmware Scaricare l'ultima versione del firmware (Function o Wi-Fi) sul computer. Impostare la console in modalità...
-
Page 159: Altre Impostazioni E Funzione Della Stazione Meteo
• Una volta aggiornato il firmware, l'utente potrebbe dover immettere nuovamente l'ID e la password di accesso a Weather Underground. Altre impostazioni e funzione della stazione meteo Impostazione orario La console è progettata per ottenere l'ora locale attraverso la sincronizzazione con il server di riferimento dell'ora. -
Page 160: Impostazione Dell'orario Della Sveglia
sezione INSTALLAZIONE DEL SENSORE WIRELESS per i dettagli di montaggio) Con la console in modalità normale, tenere premuto il tasto [ INDEX ] per 10 secondi per accedere alla modalità di regolazione, quindi premere nuovamente il tasto [ INDEX ] fino a visualizzare l'icona "N"... -
Page 161: Funzione Di Rilevamento Della Temperatura/Dell'umidità E Delle Rispettive Tendenze
Nota: La funzione snooze potrebbe essere usata di continuo per 24 ore. Quando la funzione Snooze è attiva, l'icona di allarme " " lampeggerà ripetutamente. Funzione di rilevamento della temperatura/dell'umidità e delle rispettive tendenze Utilizzare l'interruttore di selezione [ °C/°F ] per selezionare l'unità di visualizzazione della temperatura. -
Page 162: Vento
termoigrometri wireless. Se si utilizzano 2 o più sensori, è possibile premere il tasto [ CHANNEL ] per scorrere tra i diversi canali in modalità normale, oppure premere e tenere premuto il tasto [ CHANNEL ] per 2 secondi per attivare/disattivare la modalità ciclo automatico e visualizzare i canali collegati ad intervalli di 4 secondi. -
Page 163: Previsioni Meteo
da 41 °C a 54 °C (da 106 °F a Pericolo Possibile esaurimento da calore 129 °F ) ≥ 55 °C (≥ 130 °F) Estremo pericolo Elevato rischio di disidratazione/colpo di sole Vento freddo La combinazione dei dati della temperatura e della velocità del vento trasmessi dal sensore wireless 5 in 1 determina il fattore corrente di vento freddo. -
Page 164: Precipitazioni
Ad esempio, se la lettura REL locale è uguale a 1010 hPa e vi è una differenza rispetto alla lettura dell'unità che è uguale a 1013 hPa, inserire il valore "-3" nella casella corrispondente. Precipitazioni La sezione RAINFALL visualizza le informazioni relative alle precipitazioni e all'intensità... -
Page 165: Impostazione Dell'allerta Meteo
La console memorizza automaticamente i dati meteo registrati nel corso delle ultime 24 ore. Premere il tasto [ HISTORY ] per controllare l'inizio della registrazione dei dati meteo relativi all'ora corrente; ad es. se in questo momento sono le 7.25 del mattino, del giorno 8 marzo, verranno visualizzati i dati a partire dalle 7.00 del mattino del giorno 8 marzo. -
Page 166: Manutenzione
Con il presente, Technotrade dichiara che il prodotto WS 1900 è conforme ai requisiti essenziali e alle altre disposizioni applicabili della Direttiva 2014/53/UE e della Direttiva ROHS 2011/65/CE. La dichiarazione di conformità UE originale è disponibile sul sito: www.technoline.de/doc/4029665019000 IT 22... -
Page 167: Caratteristiche Tecniche
Caratteristiche tecniche Stazione Specifiche generali Dimensioni (L x A x P) 136 x 168 x 24,5 mm (5,4 x 6,6 x 1 pollici) Peso 370 g (con batterie) Alimentazione principale Adattatore HX075-0501000-AG-001 5 V CC, 1 A Batteria di riserva Batterie CR2032, 3V Temperatura di funzionamento -5 °C - 50 °C... - Page 168 (525 - 825 mmHg ± 3,8 mmHg)/(405 - 522 mmHg ± 6 mmHg) La temperatura solitamente impostata è uguale a 25 °C (77°F) Risoluzione 1 hPa / 0,01 inHg / 0,1 mmHg Previsioni meteo Soleggiato/Sereno, Parzialmente Nuvoloso, Nuvoloso, Piovoso, Piovoso/Temporalesco e Nevoso Modalità...
- Page 169 Modalità di visualizzazione Raffiche/Velocità media Modalità di memorizzazione Dati cronologici delle ultime 24 ore, velocità max raffiche/velocità media Sveglia Allerta alta velocità vento (velocità media/raffiche) Risoluzione della direzione del 16 direzioni vento Specifiche di visualizzazione delle precipitazioni Nota: Di seguito vengono elencate le informazioni visualizzate o disponibili sulla console. Unità...
-
Page 170: Precauzioni
all'umidità e alle precipitazioni Intervallo di funzionamento -40 - 60 °C (-40 - 140 °F) Utilizzare batterie al litio Precauzioni • Si raccomanda di leggere e conservare il "Manuale dell'utente". Il fabbricante e il fornitore non si assumono alcuna responsabilità per eventuali letture errate, perdite di dati di esportazione e conseguenze derivanti da una lettura errata. -
Page 171: Avvisi Di Sicurezza Delle Batterie
• Non immergere in acqua. • Evitare il contatto con qualsiasi materiale corrosivo. • Non gettare l'unità nel fuoco in quanto potrebbe esplodere. • Non aprire l'alloggiamento posteriore interno o alterare componenti di questa unità. Avvisi di sicurezza delle batterie •... - Page 172 Meteostanice Wi-Fi s profesionálním senzorem 5 v 1 Model: WS1900 Návod k obsluze...
- Page 173 Obsah Úvod ..........................2 Přehled ..........................2 Montáž a nastavení ......................4 Napájení stanice ......................6 Párování stanice a senzoru počasí 5 v 1 ..............7 Párování stanice a doplňkových bezdrátových senzorů (volitelné) ......7 Vytvoření účtu na webu počasí a nastavení připojení Wi-Fi ........7 Vytvoření...
-
Page 174: Úvod
Úvod Děkujeme, že jste si vybrali meteostanici Wi-Fi s profesionálním senzorem 5 v 1. Tento systém shromažďuje a odesílá přesné a podrobné údaje o počasí na weby Weather Underground a Weathercloud, známé služby o počasí. Pozorovatelé počasí mohou na tyto weby odesílat své údaje o místním počasí pomocí automatizovaných osobních meteostanic (PWS). - Page 175 Stojánek na stůl Displej LCD Přepínač [ °C/°F ] Tlačítko [ SNOOZE ] Tlačítko [ CLOCK SET ] Tlačítko [ BARO UNIT ] Tlačítko [ CHANNEL ] Tlačítko [ ALARM ] Tlačítko [ SENSOR/WI-FI ] Tlačítko [ HISTORY ] Držák na zeď Tlačítko [ REFRESH ] Tlačítko [ MAX/MIN ] Tlačítko [ ALERT ]...
-
Page 176: Montáž A Nastavení
Srážkoměr Záchytný trychtýř na srážky Člunek Srážkový senzor Odvodňovací otvory Senzor teploty a vlhkosti Kryt senzoru s radiačním krytem Senzor teploty a vlhkosti (uvnitř radiačního krytu) Senzor větru Miskový anemometr Lopatkový anemometr Montáž a nastavení Montáž bezdrátového senzoru 5 v 1 Bezdrátový... - Page 177 Montáž tyče a stojanu Krok 1 Vložte horní část tyče do čtvercového otvoru senzoru počasí. Poznámka: Zajistěte, aby byla tyč vyrovnána se značkou senzoru. Krok 2 Do šestihranného otvoru senzoru vložte matici. Poté vložte na druhý konec šroub a šroubovákem jej utáhněte.
-
Page 178: Napájení Stanice
Umístěte bezdrátový senzor 5 v 1 na otevřené Před montáží místo bez jakýchkoli překážek nad senzorem k tyči přiložte Směrem pryžové i kolem senzoru, abyste zajistili přesné měření k SEVERU podložky. srážek i větru. Umístěte senzor menším koncem směrem k severu, aby byly lopatky anemometru správně... -
Page 179: Párování Stanice A Senzoru Počasí 5 V 1
Párování stanice a senzoru počasí 5 v 1 Po vložení baterií spustí konzole automatické vyhledávání a připojí se k bezdrátovému senzoru 5 v 1 (ikona antény senzoru bliká). Jakmile dojde k úspěšnému navázání spojení, zobrazí se na displeji LCD ikona antény a údaje teploty a vlhkosti, rychlosti a směru větru a srážek. -
Page 180: Vytvoření Účtu Na Webu Weathercloud
Poznamenejte si ID a klíč své stanice. Vytvoření účtu na webu Weathercloud Na webu https://weathercloud.net zadejte své údaje v části „Join us today“. Vytvořte účet podle zobrazených pokynů. Poznámka: K registraci účtu použijte platnou e-mailovou adresu. Přihlaste se na web Weathercloud a poté přejděte na stránku „Devices“. Kliknutím na možnost „+ New“... -
Page 181: Nastavení Připojení Sítě Wi-Fi
Kvůli dalšímu kroku nastavování si poznamenejte své ID a klíč. Nastavení připojení sítě Wi-Fi Po prvním spuštění konzole, nebo po stisknutí tlačítka [ WI-FI/SENSOR ] v normálním režimu a jeho podržení po dobu 6 sekund se na displeji LCD konzole zobrazí text „AP“ a ikona „ “, které... -
Page 182: Nastavení Připojení K Webům Počasí
Rozhraní sítí Wi-Fi v počítači Rozhraní sítí Wi-Fi v systému Android Webové rozhraní konzole zobrazíte po navázání spojení zadáním následující IP adresy do adresního řádku internetového prohlížeče: http://192.168.1.1 Poznámka: • Některé prohlížeče zpracují text 192.168.1.1 jako hodnotu k vyhledávání, je proto nutné vždy uvést i text http://. - Page 183 Výběrem možnosti „SETUP“ přejděte na stránku „SETUP“. Vyberte směrovač Wi-Fi (identifikátor Stisknutím vyhledáte směrovač. SSID), ke kterému se připojíte. Stisknutím přidáte směrovač ručně. Pokud není identifikátor SSID v seznamu uveden, zadejte jej ručně. Vyberte typ zabezpečení směrovače (obvykle zabezpečení WAP2). Zaznamenání...
-
Page 184: Pokročilá Nastavení Ve Webovém Rozhraní
Stisknutím tlačítka [ ] zadejte své časové pásmo. Poté stisknutím ] nebo [ a podržením tlačítka [ CLOCK SET ] svou volbu potvrďte a ukončete nastavování. Podrobnosti o dalších nastaveních konzole naleznete v části návodu Nastavení času. Čas se bude automaticky synchronizovat každý den v poledne a o půlnoci. Chcete-li získat čas v internetu do jedné... -
Page 185: Zobrazení Vlastních Údajů O Počasí Na Webu Weathercloud
Wi-Fi. Funkce aktualizace však není k dispozici pomocí mobilních nebo chytrých zařízení. Pokud je k dispozici nový firmware, lze jej nalézt na adrese: https://www.technoline.de/software/ws1900 Pokud není k dispozici žádný nový firmware, nelze na výše uvedeném odkazu URL nalézt žádnou aktualizaci firmwaru. -
Page 186: Další Nastavení A Funkce Stanice
Aktuální verze firmwaru funkcí Aktuální verze firmwaru Wi-Fi Postup aktualizace firmwaru Stáhněte do počítače nejnovější verzi firmwaru (funkcí nebo Wi-Fi). Nastavte konzoli do režimu AP (přístupového bodu) a poté se pomocí počítače připojte ke konzoli (viz část „Nastavení připojení sítě Wi-Fi“ na předchozí straně). K aktualizaci Function firmware klikněte na tlačítko v části Function firmware a vyhledejte umístění... -
Page 187: Fáze Měsíce
Tato konzole je navržena tak, aby místní čas získávala synchronizací s přiřazeným časovým serverem na internetu. Chcete-li ji používat offline, můžete nastavit datum a čas ručně. Během prvního spuštění stiskněte tlačítko [ WI-FI/SENSOR ] a podržte jej stisknuté po dobu 6 sekund, aby konzole přešla zpět do normálního režimu. -
Page 188: Nastavení Času Budíku
Poznámka: Změnou nastavení polokoule dojde k automatickému přepnutí směru fází Měsíce na displeji. Nastavení času budíku V režimu normálního zobrazení času stiskněte tlačítko [ ALARM ] a podržte jej stisknuté po dobu 2 sekund, dokud nezačnou blikat číslice hodin budíku. Konzole tak přejde do režimu nastavení... -
Page 189: Indikátor Komfortu V Místnosti
Trend teploty/vlhkosti Stoupající Trvalý Klesající Poznámka: • Klesne-li vnitřní teplota pod −40 °C, zobrazí se na displeji LCD text „Lo“. Stoupne-li teplota nad 70 °C, zobrazí se na displeji LCD text „HI“. • Klesne-li venkovní teplota pod −40 °C, zobrazí se na displeji LCD text „Lo“. Stoupne-li teplota nad 80 °C, zobrazí... -
Page 190: Vítr
Vítr Přehled části s ukazateli rychlosti a směru větru Ukazatel směru větru v reálném čase Ukazatel směrů větru za posledních 5 minut Průměrná rychlost větru / nárazy Nastavení jednotky rychlosti větru a formátu zobrazení směru větru V normálním režimu přejděte stisknutím tlačítka [ WIND ] a jeho podržením po dobu 2 sekund do režimu jednotky rychlosti větru. -
Page 191: Předpověď Počasí
Předpověď počasí Vestavěný barometr může zaznamenat změny atmosférického tlaku. Na základě shromážděných údajů lze v poloměru do vzdálenosti 30–50 km předpovídat podmínky počasí v následujících 12–24 hodinách. Zataženo Déšť Déšť/bouřka Sněhové srážky Jasno Polojasno Poznámka: • Přesnost celkové předpovědi počasí založené na tlaku je přibližně 70 až 75 %. •... -
Page 192: Záznam Max./Min. Údajů
DAILY – celkový úhrn srážek od půlnoci WEEKLY – celkový úhrn srážek za aktuální týden MONTHLY – celkový úhrn srážek za aktuální kalendářní měsíc Total – celkový úhrn srážek od posledního resetování Rate – aktuální intenzita srážek za poslední hodinu (aktualizuje se každých 24 sekund) Resetování... - Page 193 Nastavení upozornění Stisknutím tlačítka [ ALERT ] vyberete a zobrazíte požadovaný údaj upozornění na počasí v níže uvedeném pořadí: Pořadí údajů pro upozornění Výchozí Část displeje Rozsah nastavení hodnota Upozornění na vysokou vnitřní 40 °C teplotu (aktuální kanál) −40 až 80 °C Upozornění...
-
Page 194: Údržba
Společnost Technotrade tímto prohlašuje, že tento výrobek WS 1900 vyhovuje nezbytným požadavkům a dalším příslušným ustanovením směrnice 2014/53/EU a směrnice ROHS 2011/65/ES. Originál prohlášení o shodě EU lze nalézt na webu: www.technoline.de/doc/4029665019000 Technické údaje Stanice Obecné údaje Rozměry (Š × V × H) 136 ×... - Page 195 a přenosový výkon sítě Wi-Fi b: 17,0 dBm/g: 13,5 dBm/n: 12,5 dBm Podporovaný typ zabezpečení WPA/WPA2, OPEN, WEP (WEP podporuje pouze směrovače hexadecimální heslo) Podporovaná zařízení Chytrá zařízení, notebooky nebo počítače s vestavěnou funkcí sítě Wi-Fi s režimem AP: chytré telefony se systémem Android, k nastavení...
- Page 196 Přesnost vnitřní teploty <0 °C nebo >40 °C ±2 °C 0 až 40 °C ±1 °C Přesnost venkovní teploty 60,1 až 80 °C ±0,8 °C 5,1 až 60 °C ±0,4 °C −19,9 až 5 °C ±1 °C −40 až −20 °C ±1,5 °C Rozlišení...
-
Page 197: Bezpečnostní Opatření
Režim zobrazení úhrnu srážek Úhrn srážek za hodinu / den / týden / měsíc / celkový úhrn Upozornění na vysoký úhrn srážek za den Alarm Údaje funkce a zobrazení indexu počasí Poznámka: Následující údaje jsou uvedeny v zobrazovaném pořadí nebo tak, jak se pomocí konzole ovládají. -
Page 198: Bezpečnostní Opatření U Baterií
• Používejte výhradně přídavná zařízení a příslušenství doporučená výrobcem. • Obrázky obsažené v tomto návodu se mohou od skutečného vzhledu lišit. • Při likvidaci tohoto výrobku zajistěte, aby byl shromážděn samostatně a bylo s ním speciálně naloženo. • Použité baterie zlikvidujte podle pokynů. •... - Page 199 Staré baterie nepatří do domovního odpadu, protože by mohly ohrožovat zdraví a poškodit životní prostředí. Použité baterie můžete zdarma vrátit prodejci a do sběrných míst. Jako koncoví uživatelé jste vázáni zákonem použité baterie vrátit distributorům a do jiných sběrných míst! Povinnosti dle zákona o elektrických zařízeních Tento symbol znamená, že po ukončení...
- Page 200 Stacja pogody z Wi-Fi oraz profesjonalnym czujnikiem 5 w 1 Model: WS1900 Instrukcja obsługi...
- Page 201 Spis treści Wstęp..........................2 Przegląd ........................... 2 Montaż i konfiguracja ..................... 4 Włączanie stacji ....................... 6 Parowanie czujnika meteorologicznego 5 w 1 ze stacją ..........7 Parowanie dodatkowych czujników i stacji (opcjonalnych) ........7 Tworzenie konta na serwerze pogodowym i konfiguracja połączenia Wi-Fi .... 7 Tworzenie konta na Weather Underground ..............
-
Page 202: Wstęp
Wstęp Dziękujemy za zakup stacji pogody z Wi-Fi i profesjonalnym czujnikiem 5 w 1. System gromadzi i automatycznie wysyła dokładne i szczegółowe dane na temat pogody na strony Weather Underground oraz Weathercloud – popularnych pogodowych serwisów internetowych, które umożliwiają wprowadzanie lokalnych danych na temat pogody przez obserwatorów posiadających automatyczne osobiste stacje pogody oraz swobodny dostęp do tych danych dla pozostałych użytkowników internetu. - Page 203 Podstawka Wyświetlacz LCD Przełącznik [ °C/°F ] Przycisk [ SNOOZE ] Przycisk [ CLOCK SET ] Przycisk [ BARO UNIT ] Przycisk [ CHANNEL ] Przycisk [ ALARM ] Przycisk [ SENSOR/WI-FI ] Przycisk [ HISTORY ] Uchwyt do montażu Przycisk [ REFRESH ] naściennego Przycisk [ MAX/MIN ]...
-
Page 204: Montaż I Konfiguracja
Deszczomierz Zbiornik na deszcz Wywrotki Czujnik deszczu Otwory spustowe Czujnik temperatury i wilgotności Osłona radiacyjna, obudowa czujnika Czujnik temperatury i wilgotności (wewnątrz osłony radiacyjnej) Czujnik wiatru Czasze wiatromierza (anemometru) Wiatrowskaz Montaż i konfiguracja Montaż bezprzewodowego czujnika 5 w 1 Bezprzewodowy czujnik 5 w 1 mierzy prędkość wiatru, kierunek wiatru, opady atmosferyczne, temperaturę... - Page 205 Montaż uchwytu i słupka Krok 1 Umieść górną część słupka w kwadratowym otworze w czujniku meteorologicznym. Uwaga: Upewnij się, że oznaczenia na słupku i czujniku są do siebie dopasowane. Krok 2 Umieść nakrętkę w sześciokątnym otworze w czujniku, następnie umieść śrubę z drugiej strony i skręć...
-
Page 206: Włączanie Stacji
Bezprzewodowy czujnik należy Przed zamontowanie zamontować na otwartej przestrzeni, w której m na maszcie Skieruj nad czujnikiem i w jego pobliżu nie będą podłóż gumowe znajdowały się żadne przeszkody, podkładki PÓŁNO zapewnić prawidłowy pomiar opadów i wiatru. Zamontuj czujnik w taki sposób, aby jego mniejszy koniec wskazywał... -
Page 207: Parowanie Czujnika Meteorologicznego 5 W 1 Ze Stacją
Parowanie czujnika meteorologicznego 5 w 1 ze stacją Po włożeniu baterii konsola automatycznie wyszuka i połączy się z czujnikiem bezprzewodowym 5 w 1 (ikona anteny czujnika będzie migać). Po nawiązaniu połączenia na LCD pojawi się ikona anteny i odczyty temperatury i wilgotności na zewnątrz, prędkości wiatru, kierunku wiatru i opadów atmosferycznych. -
Page 208: Tworzenie Konta Weathercloud
Zapisz Station ID i Station Key swojej stacji. Tworzenie konta Weathercloud Na stronie https://weathercloud.net wprowadź swoje dane w sekcji „Join us today”, a następnie postępuj zgodnie ze wskazówkami, aby utworzyć konto. Uwaga: Utwórz konto, używając prawdziwego adresu e-mail. Zaloguj się w Weathercloud, aby przejść do strony „Devices”. Kliknij „+ New”, aby dodać nowe urządzenie. -
Page 209: Konfiguracja Połączenia Wi-Fi
Zapisz identyfikator i klucz swojej stacji, aby możliwe było przeprowadzenie kolejnych kroków konfiguracji. Konfiguracja połączenia Wi-Fi Po włączeniu konsoli po raz pierwszy lub naciśnięciu i przytrzymaniu przycisku [ WI-FI/SENSOR ] przez 6 sekund w trybie zwykłym, LCD konsoli wyświetli wskazanie „AP” oraz ikonę... -
Page 210: Konfiguracja Połączenia Z Serwerem Pogodowym
Interfejs sieci Wi-Fi na komputerze Interfejs sieci Wi-Fi w systemie Android Po nawiązaniu połączenia w pasku adresu przeglądarki wpisz poniższy adres IP, aby przejść do internetowego interfejsu konsoli: http://192.168.1.1 Uwaga: • Niektóre wyszukiwarki potraktują adres 192.168.1.1 jako hasło wyszukiwania, dlatego pamiętaj, aby poprzedzić... - Page 211 Naciśnij „SETUP”, aby przejść do strony SETUP Wybierz router Wi-Fi (SSID), z którym Naciśnij, aby wyszukać router chcesz się połączyć Jeżeli identyfikator sieciowy (SSID) nie znajduje się na liście, wprowadź go Naciśnij, aby zezwolić na ręczne ręcznie dodawanie routera Wybierz typ zabezpieczeń routera (zazwyczaj WAP2) Przypomnienie zapisanego hasła (jeśli Hasło routera (pozostaw puste pole, jeśli...
-
Page 212: Zaawansowana Konfiguracja W Interfejsie Internetowym
Naciśnij przycisk [ ], aby wprowadzić kod własnej strefy czasowej, a następnie ] lub [ naciśnij i przytrzymaj przycisk [ CLOCK SET ], aby potwierdzić i wyjść. Informacje na temat innych ustawień konsoli znajdziesz w sekcji instrukcji dotyczącej konfiguracji zegara. Czas jest automatycznie synchronizowany z internetowym serwerem czasu każdego dnia w południe i o północy. -
Page 213: Wyświetlanie Danych Meteorologicznych Na Stronie Weathercloud
łącznością Wi-Fi. Aktualizacja nie jest wykonywana z poziomu urządzeń przenośnych/smartfonów. Nowe oprogramowanie będzie dostępne pod adresem: https://www.technoline.de/software/ws1900 Jeżeli aktualizacja nie jest dostępna, nie znajdziesz jej na powyższej stronie. Dostępne są dwa typy aktualizacji oprogramowania: Function Firmware oraz System Wi-Fi Firmware, których wersje są... -
Page 214: Inne Ustawienia I Funkcje Stacji
Aktualna wersja oprogramowania funkcjonalnego Aktualna wersja oprogramowania Wi-Fi Procedura aktualizacji oprogramowania Pobierz najnowszą wersję oprogramowania (funkcjonalnego lub Wi-Fi) na komputer. Przełącz konsolę na tryb AP (punkt dostępowy), następnie podłącz komputer do konsoli (patrz sekcja „KONFIGURACJA POŁĄCZENIA WI-FI” na poprzedniej stronie). Aby zaktualizować... -
Page 215: Ustawianie Czasu
Ustawianie czasu Konsola wyświetla aktualny czas lokalny poprzez synchronizację z wybranym internetowym serwerem czasu. Jeżeli urządzenie będzie używane offline, datę i czas można ustawić ręcznie. Podczas pierwszego uruchomienia naciśnij i przytrzymaj przycisk [ WI-FI/SENSOR ] przez 6 sekund, aby przywrócić zwykły tryb pracy konsoli. W zwykłym trybie naciśnij i przytrzymaj przycisk [ CLOCK SET ] przez 2 sekundy, aby przejść... -
Page 216: Ustawianie Czasu Alarmu
Uwaga: Zmiana ustawienia półkuli spowoduje automatyczne przełączenie wyświetlanych ikon faz księżyca. Ustawianie czasu alarmu W zwykłym trybie konfiguracji czasu naciśnij i przytrzymaj przycisk [ ALARM ] przez 2 sekundy. Cyfry godziny alarmu zaczną migać, co oznacza przejście do trybu konfiguracji czasu alarmu. -
Page 217: Wskazanie Komfortu Warunków W Pomieszczeniu
Wskaźnik strzałkowy Trend temperatury/wilgotności Rosnący Stały Opadający Uwaga: • Gdy temperatura w pomieszczeniu jest niższa niż -40°C, na LCD wyświetlane jest wskazanie „Lo”. Gdy temperatura jest wyższa niż 70°C, na LCD wyświetlane jest wskazanie „HI”. • Gdy temperatura na zewnątrz jest niższa niż -40°C, na LCD wyświetlane jest wskazanie „Lo”. Gdy temperatura jest wyższa niż... -
Page 218: Wiatr
Wiatr Informacje ogólne na temat pomiaru prędkości i kierunku wiatru Wiatrowskaz działający w czasie rzeczywistym Wskazanie kierunku podmuchów wiatru z ostatnich 5 minut Średnia prędkość wiatru/porywy Konfiguracja jednostki prędkości wiatru i formatu wyświetlania kierunku W trybie zwykłym naciśnij i przytrzymaj przycisk [ WIND ] przez 2 sekundy, aby przejść do trybu wyboru jednostki prędkości wiatru. -
Page 219: Prognoza Pogody
• Punkt rosy to wartość temperatury, poniżej której para wodna zawarta w powietrzu o stałym ciśnieniu skrapla się w tym samym tempie co wyparowuje. Skroplona woda nazywana jest rosą, gdy gromadzi się na powierzchni ciała stałego. • Temperatura punktu rosy określona jest na podstawie temperatury i wilgotności zmierzonej przez bezprzewodowy czujnik 5 w 1. -
Page 220: Zarejestrowane Dane Maks./Min
Naciśnij przycisk [ Ʌ ] lub [ V ], aby wybrać jednostkę pomiaru opadów: mm lub in. Naciśnij przycisk [ RAIN ], aby potwierdzić i zakończyć konfigurację. Wybór trybu wyświetlania opadów Naciśnij przycisk [ RAIN ], aby wybrać jedną z opcji: HOURLY –... -
Page 221: Konfiguracja Alertu Pogodowego
Konfiguracja alertu pogodowego Alert pogodowy ostrzega o wystąpieniu określonych warunków pogodowych. Gdy zostanie spełniony warunek uruchomienia alertu, aktywowany zostanie dźwięk alarmu, a na LCD zacznie migać ikona alertu. Konfiguracja alertu Naciśnij [ ALERT ], aby wybrać i wyświetlić odczyt wybranego alertu. Kolejność wskazań jest następująca: Kolejność... -
Page 222: Konserwacja
Firma Technotrade oświadcza, że niniejsze urządzenie (WS 1900) jest zgodne z podstawowymi wymaganiami i innymi obowiązującymi zapisami dyrektywy 2014/53/UE oraz ROHS 2011/65/WE. Oryginał deklaracji zgodności UE można znaleźć pod adresem: www.technoline.de/doc/4029665019000 Specyfikacja Stacja Specyfikacja ogólna Wymiary (szer. x wys. x gł.) 136 ×... - Page 223 Zasilanie główne Zasilacz HX075-0501000-AG-001 DC 5 V, 1 A Bateria podtrzymująca CR2032, baterie 3 V Zakres temperatury roboczej -5°C ~ 50°C Specyfikacja komunikacji Wi-Fi Standard Wi-Fi 802.11 b/g/n Częstotliwość robocza i moc 2,4 GHz nadajnika: b: 17,0 dBm/g: 13,5 dBm/n: 12,5 dBm Obsługiwane typy WPA/WPA2, OPEN, WEP (WEP: obsługa wyłącznie haseł...
- Page 224 Tryby pamięci Dane historyczne z ostatnich 24 godzin, codzienne maks./min. Alert zmiany ciśnienia Alarm Specyfikacja wyświetlania i funkcji temperatury wewnętrznej/zewnętrznej Uwaga: poniższe elementy wymieniane są w kolejności wyświetlania lub obsługi na konsoli. Jednostka temperatury °C i °F Zakres wyświetlanych wartości W pomieszczeniu: -40 ~ 70°C (-40 ~ 158°F), na zewnątrz: -40 ~ 80 (-40 ~ 176°F) Dokładność...
-
Page 225: Środki Ostrożności
Jednostka opadów mm i cale Dokładność wskazań opadów ± 7% lub 1 przechył wywrotki Zakres danych opadów 0 ~ 19999 mm (0 ~ 787,3 cala) Rozdzielczość 0,254 mm (0,01 cala) Tryby wyświetlacza Bieżące Tryby pamięci Dane historyczne z ostatnich 24 godzin, maks. Tryb wyświetlania opadów Godzina/dzień/tydzień/miesiąc/opady całkowite Alarm... -
Page 226: Ostrzeżenia Bezpieczeństwa Dotyczące Baterii
• Nie narażać urządzenia na działanie dużych sił, wstrząsów, pyłu, temperatury lub wilgotności. • Nie zakrywaj otworów wentylacyjnych żadnymi przedmiotami, takimi jak gazety, zasłony itp. • Nie zanurzać urządzenia w wodzie. W razie wylania płynu na urządzenie należy je natychmiast osuszyć za pomocą miękkiej bezpyłowej ściereczki. •... - Page 227 • Wyjmować baterie, jeśli urządzenie nie jest używane. • Nie ładować ponownie baterii ani nie wyrzucać ich do ognia, ponieważ mogą eksplodować. • Należy upewnić się, że baterie są przechowywane z dala od metalowych obiektów, ponieważ zetknięcie z nimi może spowodować zwarcie. •...
Need help?
Do you have a question about the WS1900 and is the answer not in the manual?
Questions and answers