
Related Manuals for RedLeaf RD3019Pro


Summary of Contents for RedLeaf RD3019Pro
- Page 1 Instruction Manual WiFi Wildlife Camera V ID EO 2.4” 0.3S 120° total 4K Full HD 30 Megapixel Waterproof IPS TFT-LCD Trigger time PIR angle Video function...
-
Page 2: Contents Of Box
1. Contents of box... - Page 3 2. Contents 7.4.3. Exit WiFi...
-
Page 5: Hazard, Safety And Warning Notices
3. Hazard, safety and warning notices... - Page 7 4. Introduction • 30Megapixel photo and 4K Full HD video. • 2.4-2.5GHz 802.11 b/g/n WiFi high-speed up to 150Mbps. • 2.4GHz ISM frequency bluetooth. • WiFi function, you can preview, download, delete the taken photos and videos directly, take photos and videos, change settings, check battery and memory capacity in APP.
-
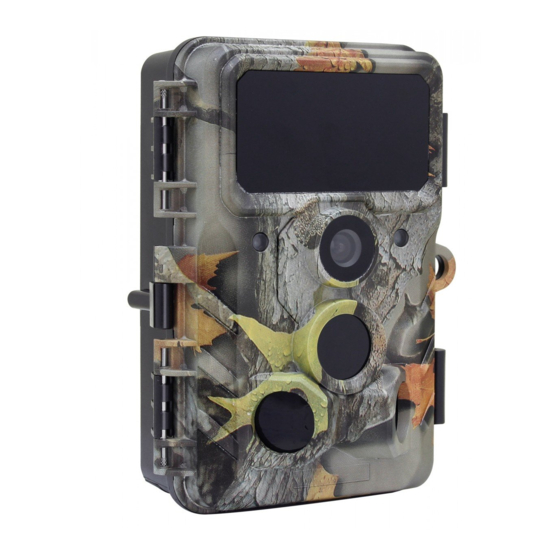
Page 8: Your Camera
5. Your camera 5.1. Front view Locking bracket Locking bracket... -
Page 9: Inside Views
5.2. Inside views... -
Page 10: Preparing The Camera
6. Preparing the camera 6.1. Opening and closing the camera Fig. 1. Fig. 2. -
Page 11: Inserting The Batteries
6.2. Inserting the batteries... -
Page 12: Inserting The Memory Card
6.3. Inserting the memory card Please use the SD/SDHC memory card for U1 CLASS 10 or above. - Page 13 6.4. External power supply 6.5. Assembly with strap...
- Page 14 6.6. Operation graphi expression Operation(see figures below): Insert U1 CLASS10 or above SD/SDHC memory card in the memory card slot before switching on the camera and select, SETUP mode to adjust settings. Format Default seting Date / Time Format Default seting Date / Time All data will be Return menu setting...
-
Page 15: Using The Camera
7. Using the camera 7.1. Mode switch 7.2. Operating buttons... - Page 16 Functions of operating buttons in standby mode Below, the operating buttons are described in the recording mode with non activated menu. : Open the Settings menu using the MENU button. : Press this button to start the replay mode. MODE : Change the working mode.
- Page 17 Functions of operating buttons in MENU setting Below, the operating buttons are described in the replay mode with activated menu. (Recording and Replay mode). : Close the Main menu or any sub menu by pressing the MENU button. : Move up one menu point or increment value by 1. : Move down one menu point or decrease value by 1.
- Page 18 • Mode : Photo , Video, Photo + Video Select whether photos or videos should be taken when motion is detected. When in the"Photo + Video" mode, the camera first takes a set number of photos prior to recording a video. •...
- Page 19 • Low Bat Night Shot: No IR Led/ No Shutting No IR Led: The camera takes photos and videos without opening IR LEDs at night when battery is quite low. No Shutting: The camera doesn't take photos and video at night when the battery is quite low.
- Page 20 • Picture NO:1P, 2P, 3P, 4P, 5P, 6P, 7P, 8P, 9P, 10P. Select the number of photos to be taken in succession when the camera is triggered in the Photo mode. Please also observe the parameter Interval! • Shutter speed: 1/15, 1/20, 1/30 •...
- Page 21 • Format: Cancel/OK All files are deleted by formatting the memory card. Press OK button and confirm formatting by selecting "OK". We recommend formatting the memory card if it has already been used in other devices or if it is a new card. Caution: Ensure that files still required have been backed up prior to formatting! •...
- Page 22 • WiFi Password: Default 12345678 • Auto WiFi Off: 1Minute, 2Minutes, 3Minutes If the camera turns on the WiFi hotspot, but the phone doesn’t connect to the WiFi hotspot successfully within selected time, then WiFi hotspot will disconnect automatically and the camera will return to SETUP mode or ON mode.
- Page 23 7.4. WiFi APP connection Android 7.4.1 Connect the Bluetooth Slide the mode switch of the camera to the TEST or ON position, and then turn on the moible phone, click the APP and enter STEP1 as shown in the following figure.
- Page 24 1. Click to enter “LOCAL ALBUM”, users can view, share, edit the pictures or videos which they download before. 2. Click “TURN ON BLUETOOTH”, and turn on the bluetooth accordingly to the prompt of the APP. The APP will enter “STEP2” and automatically search Bluetooth device by itself, as shown the figure below: CAMERA-XXXX 3.
- Page 25 4. Click the appropriate Bluetooth device, APP would connect with camera Bluetooth. The mobile phone will pop up the window “Connecting...*** please wait...”. After successful connection, the APP would enter into the “STEP3”, and then the camera Bluetooth match successfully with the mobile phone Bluetooth.
- Page 26 7.4.2. WiFi connection When the Bluetooth connection success, the APP would enter “STEP 3” as shown below diagram. 1. Click “RENAME BLUETOOTH”, user could modify the Bluetooth device name accordingly to their own needs, after the modification, click “OK” button and save it. Details as below shown diagram:...
- Page 27 2. Click “TURN ON WiFi”, after 5s countdown, it would jump to the interface of “WiFi SETTING”, details as below shown diagram: 1. Please switch from the app to the wifi 1. Click the ‘WiFi setting’ below setting on the phone 2.
- Page 28 When the camera receives the command to turn on WiFi, the hotspot would be turn on as below shown. AP mode SSID: 4K WiFi CAM f7a01f2aee74 PWD: 12345678 Operate the steps 1~4 following the interface. a. Open the WLAN in the phone. 4K WIFI CAM****...
- Page 29 b. Connect with the correct WiFi hotspot, the initial password is 12345678. 4K WIFI CAM**** Connected(no internet access) After successful connection, the interface display in the camera as below shown: c. Return back to APP after the WiFi successful connection, And then APP would automatically connect with camera or click ”+”...
- Page 30 4K WIFI CAM 1. In APP interface the icon funtions as below. The connection between camera and mobile phone Turn off the APP, the mobile phone will disconnect with the camera and the camera enters into SETUP mode or ON mode. The display of signal strength indicator Camera battery level display Switch to Video mode...
- Page 31 2. Click the icon to enter the pictures review as shown below diagram. Select the picture or video to download, and press the button to save files to mobile phone. Press this icon to delete the selected the pictures or videos. After the pictures or videos are deleted, the files could not be recovered, please use caution.
- Page 32 3. Click the icon to enter the menu setting, as shown below diagram. Settting Mode Photo> Image Size 5M> Sampling(valid in ‘ON’ mode) 1 Photo> Resolution 4K P30> Record Time(valid in ‘ON’ mde) 00:10> PIR Interval 00:30> PIR Sensitivity Med> IR LED Auto>...
-
Page 33: Aligning The Camera
7.5. Aligning the camera... - Page 34 7.6. Setting up the Live mode...
-
Page 35: Night Recording
7.7. Night recording 7.8. File format The Wildlife Camera stores photos and videos on the memory card in the folder "\DCIM\ MOVIE&PHOTO. Photos are given a file name with extension ”JPG”(Example: “IM_00001.JPG”), videos, are given the extension ".MP4" (Example: "VD_00002.MP4"). When in SETUP and OFF mode use the enclosed USB cable to transfer files onto the computer. -
Page 36: Connecting To Computer
8. Connecting to computer... -
Page 37: Technical Specification
9. Technical specification 30M:7392x4160; 24M:6544x3680; 20M:5888x3312; 16M:5376x3024; 12M:4608x2592; 8M: 3840x2160; 5M:2960x1664; 3M:2400x1344; 2M:1920x1088 2.4" IPS 320×240(RGB) DOT TFT-LCD Display F=4.3; F/NO=2.0; FOV=80°; Auto IR filter approx. 0.3 second; Pre boot 0.2 second 4K(3840 x 2160 30fps); 2K(2560 x 1440 30fps); 1296P(2304 x 1296 30fps);1080P(1920 x 1080 30fps);... -
Page 39: Simple Troubleshooting
10. Simple Trouble Shooting Please check the batteries if they are installed in proper way. The camera will not turn on Check if the battery capacity is low or exhausted. If so, please replace them with new batteries. Please check whether the battery capacity is less than 1%. - Page 40 If the memory of SD card is full, transfer images or videos to your computer or delete some files in the The camera does Replay Mode. not take images or record videos The memory card is not formatted properly. Format the SD card again or use a new card.
- Page 42 FCC WARNING: Note: This equipment has been tested and found to comply with the limits for a Class B digital device, pursuant to part 15 of the FCC Rules. These limits are designed to provide reasonable protection against harmful interference in a residential installation.
Need help?
Do you have a question about the RD3019Pro and is the answer not in the manual?
Questions and answers