Advertisement
Available languages
Available languages
Quick Links
Gebruiksaanwijzing
Inductie kookplaat
EKI1.5
Gefeliciteerd
met de aankoop van uw nieuwe inductie kookplaat.
Wij raden u aan om deze handleiding aandachtig door te lezen, zodat u goed
geïnformeerd bent over de juiste installatie en het gebruik van deze kookplaat. Lees
voor het installeren het hoofdstuk 'Install atie '. Lees alle veiligheidsvoorschriften goed
door en bewaar deze handleiding voor toekomstig gebruik.
EKI1.5
Versie NL 11/ 201 7
Pagina 1 van 28
Advertisement
Chapters

Related Manuals for Exquisit EKI1.5


Summary of Contents for Exquisit EKI1.5
- Page 1 Gebruiksaanwijzing Inductie kookplaat EKI1.5 Gefeliciteerd met de aankoop van uw nieuwe inductie kookplaat. Wij raden u aan om deze handleiding aandachtig door te lezen, zodat u goed geïnformeerd bent over de juiste installatie en het gebruik van deze kookplaat. Lees voor het installeren het hoofdstuk ‘Install atie ’.
-
Page 2: Table Of Contents
9.2 Voordat u de kookplaat installeert, zorg ervoor dat………………………..…………..………. 25 9.3 Nadat u de kookplaat heeft geïnstalleerd, zorg ervoor dat…………………..…..…………. 25 9.4 Voordat u de bevestigingsklemmen vastmaakt………………………………………….………… 25 9.5 De klempositie aanpassen…………………………………………………….…………………..…….…… 25 EKI1.5 Versie NL 11/ 201 7 Pagina 2 van 28... - Page 3 9.6 Waarschuwingen………………………………………………………………………..……………..………… 26 9.7 De kookplaat aansluiten op het lichtnet………………………………………………….…………… 26 Garantie- en servicebepalingen…………………………………………………………………….…………….. 28 Versie NL11/2017 EKI1.5 Pagina 3 van 28...
-
Page 4: Inleiding
1.2.2 Gevaar voor snijwonden Let op - de randen van de glasplaat zijn scherp. Als u niet voorzichtig bent kunt u letsel of snijwonden oplopen. Versie NL11/2017 EKI1.5 Pagina 4 van 28... -
Page 5: Belangrijke Veiligheidsinstructies
Dit apparaat dient op het lichtnet aangesloten te worden via een geïsoleerde schakelaar die de stroom volledig kan onderbreken. Het niet correct installeren van dit apparaat kan garanties en aansprakelijkheidsclaims ongeldig maken. Versie NL11/2017 EKI1.5 Pagina 5 van 28... -
Page 6: Gebruik En Onderhoud
Het niet opvolgen van deze adviezen kan resulteren in een elektrische schok en kan dodelijk zijn. Versie NL11/2017 EKI1.5 Pagina 6 van 28... -
Page 7: Gevaar Voor Verbranding Aan Een Heet Oppervlak
Wees hier erg voorzichtig mee en berg het veilig op buiten het bereik van kinderen. Als u niet voorzichtig bent kunt u letsel of snijwonden oplopen. Versie NL11/2017 EKI1.5 Pagina 7 van 28... -
Page 8: Belangrijke Veiligheidsinstructies
Vertrouw niet blindelings op de pan detectiefunctie die de kookzones uitzet nadat u de pannen van de plaat neemt. Laat kinderen niet met de kookplaat spelen, erop zitten, staan of klimmen. Versie NL11/2017 EKI1.5 Pagina 8 van 28... - Page 9 Ga niet op uw kookplaat staan. Gebruik geen pannen met een ruwe of gekartelde rand of bodem en schuif geen pannen heen en weer over de kookplaat, aangezien dit krassen op de glasplaat kan veroorzaken. Versie NL11/2017 EKI1.5 Pagina 9 van 28...
- Page 10 8 jaar en ouder en personen met verminderde lichamelijke, zintuiglijke of geestelijke vermogens of gebrek aan ervaring en kennis als ze onder toezicht staan of worden geïnstrueerd over een veilig gebruik van het apparaat en de mogelijke gevaren begrijpen. Versie NL11/2017 EKI1.5 Pagina 10 van 28...
- Page 11 Het is niet de bedoeling dat het apparaat wordt bediend door middel van een externe timer of een aparte afstandsbediening. Versie NL11/2017 EKI1.5 Pagina 11 van 28...
-
Page 12: Productoverzicht
Inductie koken is een veilige, geavanceerde, efficiënte en zuinige manier van koken. Het werkt door elektromagnetische trillingen die de warmte direct opwekken in de pan, in plaats van indirect door het verwarmen van het glasoppervlak. Het glas wordt alleen heet omdat de pan het uiteindelijk opwarmt. Versie NL11/2017 EKI1.5 Pagina 12 van 28... -
Page 13: Voor Gebruik Van Uw Nieuwe Inductie Kookplaat
2.4 Voor gebruik van uw nieuwe inductie kookplaat Lees deze handleiding goed door en besteed extra aandacht aan het hoofdstuk "Veiligheidsvoorschriften" Verwijder alle beschermfolie die nog op de kookplaat kan zitten. 2.5 Technische specificaties Kookplaat EKI1.5 Kookzones 4 zones Voltage 220-240V~... -
Page 14: Het Kiezen Van Het Juiste Kookgerei
14 cm heeft kan mogelijk niet worden gedetecteerd door de kookplaat. Zet uw pan altijd in het midden van de kook zone. Til pannen altijd van de inductie kookplaat af. Glijden kan krassen op de glasplaat veroorzaken. Versie NL11/2017 EKI1.5 Pagina 14 van 28... -
Page 15: Gebruik Van Uw Inductie Kookplaat
Er vindt geen verhitting plaats tenzij er een geschikte pan op de kookzone is geplaatst. Het bedieningspaneel gaat na 1 minuut automatisch uit als er geen geschikte pan op de kookzone staat. 3.3.2 Wanneer u klaar bent met koken EKI1.5 Versie NL 11/ 201 7 Pagina 15 van 28... -
Page 16: Bediening Vergrendelen
Wanneer de kookplaat vergrendeld is zijn alle toetsen uitgeschakeld, behalve de AAN/UIT-toets. In een noodgeval kunt u de kookplaat altijd uitschakelen met de AAN/UIT-toets , maar u dient de kookplaat de eerstvolgende keer dan wel eerst te ontgrendelen. Versie NL 11/2017 EKI1.5 Pagina 16 van 28... - Page 17 Opmerking: Het rode puntje naast de indicatie van de warmte-instelling zal oplichten om weer te geven dat de kookzone is geselecteerd. Als de kooktijd afloopt, zal de overeenkomstige kookzone automatisch worden uitgeschakeld. Versie NL 11/2017 EKI1.5 Pagina 17 van 28...
-
Page 18: Automatische Uitschakeling
• Gebruik zo min mogelijk water of vet om de kooktijd te verminderen. • Begin met koken op een hoge stand en ‘draai’ deze omlaag wanneer uw gerecht door en door verhit is. Versie NL 11/2017 EKI1.5 Pagina 18 van 28... -
Page 19: Sudderen, Rijst Koken
Warmte-instelling Geschiktheid • voorzichtig opwarmen van kleine hoeveelheden eten 1 - 2 • chocolade of boter smelten; eten koken dat gemakkelijk aanbrandt • laag sudderen • langzaam (op)warmen Versie NL 11/2017 EKI1.5 Pagina 19 van 28... -
Page 20: Verzorging En Reiniging
3. Veeg het tiptoetsen deel af met veegt voordat u de kookplaat weer aan zet. een vochtige spons of doek. 4. Goed afdrogen met keukenrol. 5. Schakel de stroom naar de kookplaat weer aan. Versie NL 11/2017 EKI1.5 Pagina 20 van 28... -
Page 21: Suggesties En Tips
(ongeveer) even groot is als niet detecteren, omdat de pan te de kookzone. klein voor de kookzo ne is of omdat de pan niet goed gecentreerd op de kookzone staat. Versie NL 11/2017 EKI1.5 Pagina 21 van 28... -
Page 22: Foutmelding Scherm En Inspectie
F5/F8 fout - ongeldig(F5 van 1#,F8 van 2#) Probleem temperatuursensor van de IGBT F9/FA (kortsluiting/onderbreking van 1#) Vervang het voedingsboard. FC /FD Probleem temperatuursensor van de IGBT Versie NL 11/2017 EKI1.5 Pagina 22 van 28... - Page 23 Bovenstaande lijst zijn de beoordelingen en inspecties van de meest voorkomende storingen. Probeer alstublieft niet zelf de kookplaat uit elkaar te halen om gevaarlijke situaties en schade aan de in ductie kookplaat te voorkomen. Versie NL 11/2017 EKI1.5 Pagina 23 van 28...
-
Page 24: Installatie
Indien de ventilatie onvoldoende is kan dit leiden tot schade aan uw kookplaat. Let op: Voor de veiligheid moet de afstand tussen de kookplaat en de keukenkast erboven minstens 760 mm bedragen. A(mm) B(mm) C(mm) 50 mini 20 mini luchtinlaat lucht uitlaat 5mm Versie NL 11/2017 EKI1.5 Pagina 24 van 28... -
Page 25: Voordat U De Kookplaat Installeert, Zorg Ervoor Dat
Maak de kookplaat aan het aanrechtblad vast door na de installatie 2 klemmen aan de onderkant van de kookplaat te schroeven (zie tekening). Afhankelijk van de dikte van het aanrechtblad de klemmen aanpassen. ▄ Klem Versie NL 11/2017 EKI1.5 Pagina 25 van 28... - Page 26 De installateur dient ervoor te zorgen dat de juiste elektrische verbinding gemaakt is en dat deze voldoet aan de veiligheidsregelgeving. De kabel mag niet verbogen of samengeperst worden. De kabel moet regelmatig worden gecontroleerd en mag alleen door een gekwalificeerd persoon worden vervangen. Versie NL 11/2017 EKI1.5 Pagina 26 van 28...
- Page 27 Dit soort afval dient afzonderlijk te met uw lokale afvalverwerking, uw gemeente, of de winkel waar u het heeft worden ingezameld en vereist een aangeschaft. speciale behandeling. speciale behandeling. Versie NL 11/2017 EKI1.5 Pagina 27 van 28...
- Page 28 Vervanging van onderdelen verlengt de garantietermijn niet. EXQUISIT SERVICEBEPALINGEN Beschadigde apparaten bij ontvangst niet in gebruik nemen maar direct melden bij uw leverancier. Eventuele terugname van beschadigde, gebruikte apparaten is niet mogelijk.
- Page 29 TABLE DES MATIERES CONSIGNES DE SECURITE IMPORTANTES……………………………………..2 . DESCRIPTION DE L’APPAREIL……………………………………………………...1 1 INSTRUCTIONS D’INSTALLATION………………………………………………..1 . 2 A PROPOS DE LA CUISSON PAR INDUCTION…………………………………...1 6 UTILISATION DE L’APPAREIL……………………………………………………… .1 8 CONSEILS DE CUISSON…………………………………………………………… ..2 4 ENTRETIEN ET NETTOYAGE……………………………………………………… .2 6 DEPANNAGE…………………………………………………………………………...2 7 SPECIFICATIONS TECHNIQUES…………………………………………………..
-
Page 30: Consignes De Securite Importantes
FAITES UN GESTE ECOCITOYEN EN TRIANT VOS EMBALLAGES CARTON À LA FIN DE VIE DE VOTRE PRODUIT, PENSEZ À LE RAPPORTER DANS UN POINT DE COLLECTE OU DÉPOSER LE À LA DÉCHETERIE PROCHE DE VOTRE DOMICILE CET APPAREIL EST DESTINE A UN USAGE DOMESTIQUE UNIQUEMENT! Veuillez lire attentivement toutes les instructions avant la premiè... - Page 31 Risque de coupure a) Soyez prudent! Les rebords du panneau sont tranchants. b) Une utilisation sans soin peut conduire à des blessures ou des coupures. Précautions de sécurité a) Lisez attentivement ces instructions avant d'installer ou d'utiliser cet appareil. b) Aucuns matériaux ou produits combustibles doivent être placés sur cet appareil à...
- Page 32 2. UTILISATION ET MAINTENANCE Risque de choc électrique a) N’utilisez pas une table de cuisson cassée ou fissurée. Si la surface de la table de cuisson est fissurée ou endommagée, éteignez-la immédiatement de la source de courant (commutateur mural) et contactez un technicien qualifié.
- Page 33 Danger de surface chaude a) Pendant l'utilisation, les parties accessibles de l'appareil pourront devenir assez chaudes pour causer des brûlures. b) Ne laissez pas votre corps, des vêtements ou tout autre élément autre qu’un ustensile approprié entrer en contact avec la vitre à induction jusqu'à...
- Page 34 Précautions de sécurité a) Ne laissez jamais l'appareil sans surveillance lors de l’utilisation. Une cuisson excessive peut causer des fumées et des résidus graisseux qui pourraient s'enflammer. b) N’utilisez pas votre appareil comme un espace de stockage ou une surface de travail. c) Ne placez jamais d’objets ou d’ustensiles au-dessus de l'appareil.
- Page 35 g) Après l’utilisation, éteignez toujours les zones de cuisson et la table de cuisson comme décrit dans ce manuel (en utilisant les touches sensitives) .Ne comptez pas sur la fonction de détection de la casserole pour éteindre les zones de cuisson lorsque vous retirez les casseroles.
- Page 36 p) N’utilisez pas de tampon à récurer ni de détergent abrasif pour nettoyer votre table de cuisson, car ils peuvent rayer le verre à induction. Si le cordon d'alimentation est endommagé, il doit être remplacé par le fabricant, son agent de service ou un technicien qualifié...
- Page 37 Cet appareil peut être utilisé par des enfants à partir de 8 ans et par des personnes ayant des capacités physiques, sensorielles ou mentales réduites ou un manque d’expérience et de connaissances à condition qu’elles aient été placées sous surveillance ou qu'elles aient reç...
- Page 38 En ce qui concerne les informations détaillées sur les dimensions, la méthode de l‟appareil installé à poste fixe et comment l'appareil doit être fixé sur son support, référez-vous dans la section “INSTRUCTION D‟INSTALLATION”. En ce qui concerne les informations détaillées sur l'utilisation de l'appareil en toute sécurité...
-
Page 39: Description De L'appareil
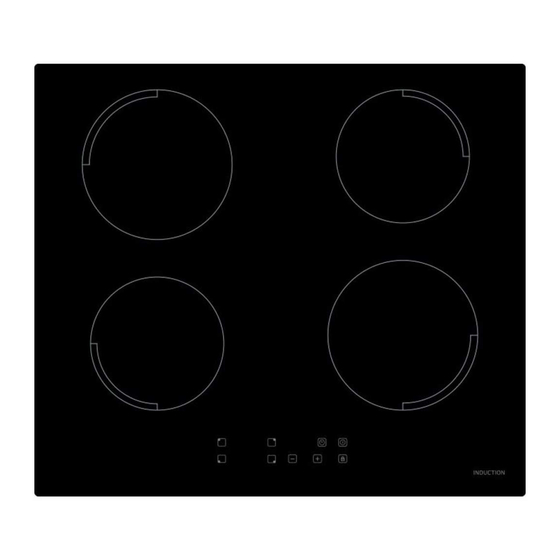
DESCRIPTION DE L’APPAREIL 1. Foyer 1400W max 2. Foyer 1800W max 3. Foyer 1400W max 4. Foyer 1800W max 5. Plaque en verre 6. Bandeau de commande 7. Touche « MARCHE/ARRÊT » BANDEAU DE COMMANDE 1. Touches de sélection de zone 2. -
Page 40: Instructions D'installation
INSTRUCTIONS D’INSTALLATION Sélection des équipements de l'installation Découpez la surface de travail selon les dimensions indiquées dans le schéma. Un espace minimum de 5 cm (50 mm) doit être laissé autour du trou pour l'installation et l'utilisation. Le plan de travail doit être d’une épaisseur d’au moins 3 cm (30 mm) et composé d’un maté... - Page 41 A(mm) B(mm) C(mm) mini 50 mini 20 Entrée d’air Sortie d’air 5mm Avant d’installer votre table de cuisson, assurez-vous que: La surface de travail est carrée et de niveau, et ne posez aucun d’obstacle autour de votre table de cuisson. ...
- Page 42 Avant de fixer les supports Cet appareil doit ê tre placé sur une surface stable et lisse (utilisez l’emballage).N’appuyez pas forcé ment sur les touches de commande. Réglage de la position du support Fixez la table de cuisson à induction au plan de travail en vissant les 2 supports situé s sous la table de cuisson (vois le schéma) après l’installation.
- Page 43 Branchement électrique Le branchement électrique de votre appareil ne doit être qu’effectué par un professionnel qualifié. La connexion au système de câblage de terre est essentielle et obligatoire. Avant le raccordement électrique, vérifiez que : L’installation électrique à votre domicile est suffisante pour alimenter votre table de cuisson de cette puissance.
-
Page 44: A Propos De La Cuisson Par Induction
1. Si le cordon d’alimentation est endommagé ou doit être remplacé, il ne doit être remplacé que par un personnel d’après-vente disposant des outils adaptés afin d’éviter les accidents. 2. Si l’installation est directement raccordée au circuit principal, installez un coupe -circuit unipolaire avec une ouverture de contact d’au moins 3mm. - Page 45 A chaque pression, un « bip » est émis pour indiquer la prise en compte de l’action demandée. Assurez-vous que les touches de contrôle soient propres et sèches tout le temps et qu’aucun objet ne perturbe leur fonctionnement. Sélection de la bonne batterie de cuisine N'utilisez que des ustensiles de cuisine adaptés pour l'induction.
-
Page 46: Utilisation De L'appareil
Pour déplacer le récipient, ne glissez pas le récipient sur la zone de travail mais soulevez- le. Sinon, il peut rayer le verre. UTILISATION DE L’APPAREIL Départ de la cuisson 1. Appuyez sur la touche « MARCHE/ARRÊT» pendant trois secondes. Aprè s la mise sous tension, il retentit un «... - Page 47 Si le signe « » clignote alternativement avec la puissance sur la zone d’affichage Cela signifie que: vous n’avez pas placé la casserole sur la bonne zone de cuisson ou, la casserole utilisée n’est pas adaptée à la cuisson par induction ou, ...
- Page 48 Verrouillage des touches Cette table de cuisson à induction permet de bloquer l’utilisation des touches sensitives pour éviter des modifications involontaires. Par exemple, les enfants peuvent allumer l’appareil par hasard. Lorsque le verrouillage est enclenché, toutes les touches sont inopérantes, à l’exception ...
- Page 49 Utilisation de la minuterie La minuterie peut ê tre utilisée de 2 manières différentes : Minuteur simple de rappel. Dans ce cas, à la fin du décompte, la minuterie émettra une sonnerie mais n’arrêtera pas le fonctionnement de la table de cuisson. Minuteur avec arrêt d’un foyer de cuisson.
- Page 50 5. Lorsque la valeur est dé finie, le compte à rebours débute immédiatement. L’indicateur lumineux de la minuterie va clignoter pendant 5 secondes et le temps restant va afficher sur la zone d’affichage. 6. A la fin du décompte, la table de cuisson é met une alarme (bip) pendant 30 secondes, et «...
- Page 51 A tout moment, il est possible d’annuler la minuterie. Pour cela: il faut appuyer sur les touches simultané ment « » et « », et « 00 » va afficher sur la zone d’affichage. 5. Lorsque la valeur est dé finie, le compte à rebours débute immédiatement.
-
Page 52: Conseils De Cuisson
CONSEILS DE CUISSON AVERTISSEMENT : Soyez prudent lors de la friture, car l'huile et la graisse s’échauffent très rapidement. L'huile et la graisse peuvent s'enflammer spontané ment à une température extrê mement élevée, ce qui conduira à un risque d'incendie sérieux. Conseils utiles ... - Page 53 Cuire les sautés 1. Choisissez une poêle à induction compatible avec une base plate ou une grande poêle à frire. 2. Préparez bien tous les ingrédients et les outils. Si vous faites cuire de grandes quantités, Il est mieux de les cuire en plusieurs petits lots. 3.
-
Page 54: Entretien Et Nettoyage
ENTRETIEN ET NETTOYAGE Quoi Comment Important ! Les saletés Débranchez la table de cuisson Lorsque la table de cuisson est quotidiennes sur de l'alimentation électrique. éteinte, il n'y aura pas d'indication le verre (les Utilisez un nettoyeur de cuisson «surface chaude», mais la zone ... -
Page 55: Depannage
DEPANNAGE PROBLEMES CAUSES POSSIBLES SOLUTIONS La table de cuisson ne Pas d’alimentation. Assurez-vous que la table de s’allume pas. cuisson soit bien branché e et alimenté e. Vérifiez que l’alimentation électrique de votre logement est bien en fonctionnement. Si le problè... - Page 56 Un bruit de ventilation Un ventilateur est installé Ce bruit est normal et ne débranchez vient de la table de dans la table à induction pour pas la table de cuisson de la prise de cuisson à induction. évacuer la chaleur due aux courant lorsque le ventilateur est en champs magnétiques.
- Page 57 Affichage d’erreur et inspection Si un problème se produit, la table de cuisson à induction se mettra automatiquement en mode protection et affichera l’un des codes : CODE ERREUR CAUSES POSSIBLES SOLUTIONS F3 - F8 Panne du capteur de température Contactez le service aprè...
-
Page 58: Specifications Techniques
SPECIFICATIONS TECHNIQUES Modèle : EKI1.5 Zones de cuisson : 4 Zones Alimentation électrique : 220-240V~/380-415V 3N~ 50Hz ou 60Hz Puissance installée: 6400W Dimension du produit L×L×H (mm) 590X520X60 Dimension d’encastrement A×B (mm) 560X490 Remarque: Le poids et les dimensions sont approximatifs. Nous nous efforç ons continuellement d'améliorer nos produits, nous pouvons modifier les spécifications et... - Page 59 Content 1. Foreword ..................3 1.1 Safety Warnings ................. 3 1.2 Installation ................3 1.2.1 Electrical Shock Hazard ..........3 1.2.2 Cut Hazard ..............3 1.2.3 Important safety instructions .......... 4 1.3 Operation and maintenance ............4 1.3.1 Electrical Shock Hazard ..........4 1.3.2 Health Hazard ..............
-
Page 60: Foreword
1. Foreword 1.1 Safety Warnings Your safety is important to us. Please read this information before using your cooktop. 1.2 Installation 1.2.1 Electrical Shock Hazard Disconnect the appliance from the mains electricity supply before carrying out any work or maintenance on it. ... -
Page 61: Operation And Maintenance
This appliance should be connected to a circuit which incorporates an isolating switch providing full disconnection from the power supply. Failure to install the appliance correctly could invalidate any warranty or liability claims. 1.3 Operation and maintenance 1.3.1 Electrical Shock Hazard ... -
Page 62: Cut Hazard
1.3.4 Cut Hazard The razor-sharp blade of a cooktop scraper is exposed when the safety cover is retracted. Use with extreme care and always store safely and out of reach of children. Failure to use caution could result in injury or cuts. 1.3.5 Important safety instructions ... - Page 63 Induction glass surface as this can scratch the glass. Do not use scourers or any other harsh abrasive cleaning agents to clean your cooktop, as these can scratch the Induction glass. If the supply cord is damaged, it must be replaced by the manufacturer, its service agent or similarly qualified persons in order to avoid a hazard.
-
Page 64: Product Induction
Congratulations on the purchase of your new Induction Hob. We recommend that you spend some time to read this Instruction / Installation Manual in order to fully understand how to install correctly and operate it. For installation, please read the installation section. Read all the safety instructions carefully before use and keep this Instruction / Installation Manual for future reference. -
Page 65: Before Using Your New Induction Hob
Read this guide, taking special note of the ‗Safety Warnings‘ section. Remove any protective film that may still be on your Induction hob. 2.5 Technical Specification Cooking Hob EKI1.5 Cooking Zones 4 Zones Supply Voltage 220-240V~/380-415V 3N~ 50Hz or 60Hz... -
Page 66: Choosing The Right Cookware
3.2 Choosing the right Cookware Only use cookware with a base suitable for induction cooking. • Look for the induction symbol on the packaging or on the bottom of the pan. • You can check whether your cookware is suitable by carrying out a magnet test. Move a magnet towards the base of the pan. -
Page 67: How To Use
3.3 How to use 3.3.1 Start cooking Touch the ON/OFF control for three seconds. After power on, the buzzer beeps once, all displays show ― – ― or ― – – ―, indicating that the induction hob has entered the state of standby mode. -
Page 68: Finish Cooking
3.3.2 Finish cooking Touching the heating zone selection control that you wish to switch off Turn the cooking zone off by scrolling down to“0” or touching ―-‖ and ―+‖ control together. Make sure the display shows“0” Turn the whole cooktop off by touching the ON/OFF control. - Page 69 a) Using the Timer as a Minute Minder If you are not selecting any cooking zone Make sure the cooktop is turned on. Note: you can use the minute minder even if you‘re not selecting any cooking zone. Touch‖+‖ the controls of the timer. The minder indicator will start flashing and ―10‖...
-
Page 70: Default Working Times
Touching the ‖-― and ―+‖ together, the timer is cancelled, and the ‖00‖ will show in the minute display. When the time is set, it will begin to count down immediately. The display will show the remaining time and the timer indicator flash for 5 seconds. -
Page 71: Simmering, Cooking Rice
4.1.1 Simmering, cooking rice Simmering occurs below boiling point, at around 85˚C, when bubbles are just rising occasionally to the surface of the cooking liquid. It is the key to delicious soups and tender stews because the flavours develop without overcooking the food. You should also cook egg-based and flour thickened sauces below boiling point. -
Page 72: Care And Cleaning
• reheating 3 - 4 • rapid simmering • cooking rice • pancakes 5 - 6 • sautéing 7 - 8 • cooking pasta • stir-frying • searing • bringing soup to the boil • boiling water 6. Care and Cleaning What? How? Important! -
Page 73: Hints And Tips
7. Hints and Tips Problem Possible causes What to do The induction hob No power. Make sure the induction hob is cannot be turned on. connected to the power supply and that it is switched on. Check whether there is a power outage in your home or area. -
Page 74: Failure Display And Inspection
The induction hob or a Technical fault. Please note down the error cooking zone has turned letters and numbers, switch itself off the power to the induction hob unexpectedly, a tone off at the wall, and contact a sounds and an error qualified technician. - Page 75 2) Specific Failure & Solution Failure Problem Solution A Solution B The LED does not No power supplied. Check to see if plug is come on when unit is secured tightly in outlet plugged in. and that outlet is working. The accessorial power Check the connection.
-
Page 76: Installation
9. Installation 9.1 Selection of installation equipment Cut out the work surface according to the sizes shown in the drawing. For the purpose of installation and use, a minimum of 5 cm space shall be preserved around the hole. Be sure the thickness of the work surface is at least 30mm. Please select heat-resistant work surface material to avoid larger deformation caused by the heat radiation from the hotplate. -
Page 77: Before Installing The Hob, Make Sure That
9.2 Before installing the hob, make sure that The work surface is square and level, and no structural members interfere with space requirements. The work surface is made of a heat-resistant material.. If the hob is installed above an oven, the oven has a built-in cooling fan. ... -
Page 78: Cautions
9.6 Cautions 1. The induction hotplate must be installed by qualified personnel or technicians. We have professionals at your service. Please never conduct the operation by yourself. 2. The hob will not be installed directly above a dishwasher, fridge, freezer, washing machine or clothes dryer, as the humidity may damage the hob electronics 3. - Page 79 If the cable is damaged or to be replaced, the operation must be carried out the by after-sale agent with dedicated tools to avoid any accidents. If the appliance is being connected directly to the mains an omnipolar circuit-breaker must be installed with a minimum opening of 3mm between contacts.
Need help?
Do you have a question about the EKI1.5 and is the answer not in the manual?
Questions and answers