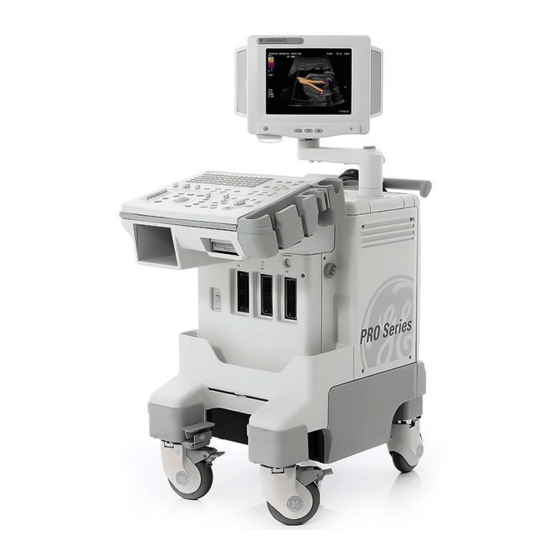
Summary of Contents for GE LOGIQ 400
- Page 1 GE Medical Systems Technical Publications 2227892 Revision 1 LOGIQ 400/500 Unpacking Instructions Copyright© 1999, 2000 by General Electric Company Operating Documentation...
- Page 2 GE Medical Systems GE Medical Systems: Telex: 3797371 P.O. Box 414, Milwaukee, Wisconsin 53201 U.S.A. (Asia, Pacific, Latin America, North America) GE Medical Systems—Europe: Telex: 695277 283 rue de la Miniére BP34 78533 BUC Cedex...
-
Page 3: Revision History
GE MEDICAL SYSTEMS LOGIQ 400/500 UNPACKING INSTRUCTIONS REV 1 2227892 REVISION HISTORY DATE REASON FOR CHANGE October 21, 1999 Initial Release June 13, 2000 Added LOGIQ 500 to procedure LIST OF EFFECTIVE PAGES PAGE REVISION PAGE REVISION PAGE REVISION NUMBER... - Page 4 GE MEDICAL SYSTEMS LOGIQ 400/500 UNPACKING INSTRUCTIONS REV 1 2227892 This page intentionally left blank...
- Page 5 GE MEDICAL SYSTEMS LOGIQ 400/500 UNPACKING INSTRUCTIONS REV 1 2227892 LOGIQ 400/500 UNPACKING INSTRUCTIONS Uncrating Inspect the crate for any damage. Check shock indicator and tip watch (see Image 1). Cut Metal Bands Image 1 Report any damage or sign of tipping to dispatcher.
- Page 6 GE MEDICAL SYSTEMS LOGIQ 400/500 UNPACKING INSTRUCTIONS REV 1 2227892 Uncrating (cont'd) Pull the handle of the quick disconnects so that the insert is removed (see Image 2). Quick Disconnects Image 2 Repeat this procedure for all quick disconnects. Pull the corner of the box, where you removed the quick disconnects, towards you.
- Page 7 Cut the tape at the corners of the top of the shipping crate. With the styrofoam wedges closest to the palette, place the top of the crate like a ramp in front of the LOGIQ 400. The ramp for the LOGIQ 500 is packed behind the unit. Remove...
- Page 8 LOGIQ 400/500 UNPACKING INSTRUCTIONS REV 1 2227892 Uncrating (cont'd) Unlock the LOGIQ 400 front wheels. Carefully roll the system off of the pallette, down the ramp and onto the floor (see Image 5). Image 5 Accessories Below the keyboard you will find an accessory package.
- Page 9 GE MEDICAL SYSTEMS LOGIQ 400/500 UNPACKING INSTRUCTIONS REV 1 2227892 Accessories (cont'd) Find the probe hanger arm (see Image 7). Probe Hanger Image 7 Plug the probe hanger arm into the console (see Image 8). Well Cover Probe Hanger Image 8...
- Page 10 Image 9 Plug probe into 2nd probe port (Port #1 is normally INACTIVE in the LOGIQ 400.) If there is a second probe, plug it into the 3rd probe port. NOTE: Use caution when handling probes. They are fragile and can be easily damaged.
-
Page 11: Accessories Package
GE MEDICAL SYSTEMS LOGIQ 400/500 UNPACKING INSTRUCTIONS REV 1 2227892 Accessories (cont'd) Lock the probe in the probe port by turning the locking handle 1/4 turn clockwise (see Image 11). Accessories Package Locking Handle Points Down (Locked) Image 11 See Image 12 and route the cable as shown. -
Page 12: System Verification
GE MEDICAL SYSTEMS LOGIQ 400/500 UNPACKING INSTRUCTIONS REV 1 2227892 Accessories (cont'd) Software Disk Service Manual Image 13 Unwrap the Service and Operator/Users Manuals. Give the Service and User manuals to the customer and place the software package with the system. -
Page 13: Site Clean-Up
GE MEDICAL SYSTEMS LOGIQ 400/500 UNPACKING INSTRUCTIONS REV 1 2227892 Site Clean-up Remove all packing material skids, foam and paper from the delivery site. Ensure that the system is clean and free of smudges, smears and handprints. DO NOT take the probe box(es). These MUST remain with the customer. - Page 14 GE MEDICAL SYSTEMS LOGIQ 400/500 UNPACKING INSTRUCTIONS REV 1 2227892 This Page Intentionally Left Blank -10-...


Need help?
Do you have a question about the LOGIQ 400 and is the answer not in the manual?
Questions and answers