BIXOLON XQ-840 Series User Manual
Thermal label printer
Hide thumbs
Also See for XQ-840 Series:
- Quick start manual (2 pages) ,
- How to mount (2 pages) ,
- How to replace (2 pages)

Subscribe to Our Youtube Channel
Related Manuals for BIXOLON XQ-840 Series


Summary of Contents for BIXOLON XQ-840 Series
- Page 1 User’s Manual XQ-840 Series THERMAL LABEL PRINTER Ver. 1.00 http://www.bixolon.com...
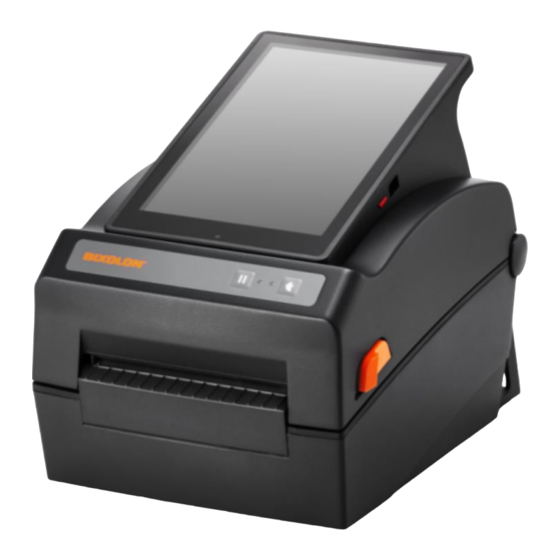
- Page 2 XQ-840 Series Introduction The XQ-840 series printer is an All-in-One printing solution which offers various printing applications and can be customized to meet the customer's requirements. ※ The main features of the printer are as follows 1. XQ-840 : Maximum 152mm/s(Max 6ips) printing speed XQ-843 : Maximum 100mm/s(Max 4ips) printing speed 2.
- Page 3 XQ-840 Series Safety Information Warning: Warnings must be heeded carefully in order to prevent serious physical harm. Caution: Cautions must be heeded in order to prevent minor injuries, equipment damage, or data loss. Symbol Information DC (Direct current) Warning, Caution...
-
Page 4: Table Of Contents
XQ-840 Series Table of Contents 1. Content Confirmation ......................9 2. Product Part Names ......................10 3. Installation & Usage ......................12 3-1 Printer Installation Placings ..................... 12 3-2 Power Connection ......................13 3-3 Interface .......................... 15 3-4 Interface Setting ......................17 3-4-1 Ethernet ...................... - Page 5 XQ-840 Series 7. Appendix ..........................40 7-1 Specifications ........................40 7-2 Label Types ........................40 - 5 - Ver. 1.00...
- Page 6 XQ-840 Series Manual Information This user’s guide contains basic information for product usage as well as for emergency measures that may be required. ※ The following separate manuals provide more detailed content on various technological issues and areas. 1. Programming (SLCS) Manual This manual provides information on label printer commands.
- Page 7 XQ-840 Series Safety Precautions In using the present appliance, please keep the following safety regulations in order to prevent any hazard or material damage. WARNING Warnings must be heeded carefully in order to prevent serious physical harm. Do not plug several products in one multi-outlet.
- Page 8 XQ-840 Series CAUTION Cautions must be heeded in order to prevent minor injuries, equipment damage, or data loss. If you observe a strange smoke, odor or noise from Keep the desiccant out of children’s reach. the printer, unplug it before taking following measures.
-
Page 9: Content Confirmation
XQ-840 Series 1. Content Confirmation The following items should all be contained in the printer package. Contact the dealer from which the purchase was made if any item is damaged and/or missing. XQ-840 Series Power Cord AC/DC Adapter Quick Manual - 9 - Ver. -
Page 10: Product Part Names
XQ-840 Series 2. Product Part Names Micro USB Pause Button Tablet Power Button Cover Lever Feed Button Printer Head Media Cover Sensor Media Holder Media Guide Cover STD - 10 - Ver. 1.00... - Page 11 XQ-840 Series Power Switch Fan-Fold Media Cover Power Jack USB A-Type (Ethernet) - 11 - Ver. 1.00...
-
Page 12: Installation & Usage
XQ-840 Series 3. Installation & Usage 3-1 Printer Installation Placings • Install the printer in a location that meets the following conditions. - Allow sufficient space around the printer for proper ventilation. - Install the printer on a flat and level surface. -
Page 13: Power Connection
XQ-840 Series 3-2 Power Connection • Connect power to the printer as shown below. Tablet Power Button Power Switch OFF AC/DC Adapter Power Cord 1) Turn off the printer power switch. 2) Check to see that the AC/DC adapter voltage matches that of the power source. - Page 14 XQ-840 Series - Only use a power supply provided by BIXOLON. BIXOLON shall bear no responsibility for damage caused by using a third-party power supply. - Check the power supply’s label to check its electronic specs. - For the safety of people and equipment, please use the appropriate power cord for your country or region.
-
Page 15: Interface
XQ-840 Series 3-3 Interface Shielded cables must be used to prevent radiation and reception of electrical noise. Use the shortest possible communication cable to minimize the detection of electrical noise in the cable. Note - LAN(Ethernet) Cable (3m or less, CAT-5 or higher UTP Cable) - Connecting unshielded communication cables is in violation of EMC standards. - Page 16 XQ-840 Series Connect the interface cable as shown below. This printer supports the following communications interface standards. - LAN (Ethernet) Cable - USB A-Type (USB HOST, Mouse, Keyboard, Bar Cord Scanner, etc.) - Micro USB (For development purposes) - Bluetooth, Wi-Fi...
-
Page 17: Interface Setting
XQ-840 Series 3-4 Interface Setting • Configure the communication settings on your tablet device. 3-4-1 Ethernet 1) Open the settings app and go to the Settings. 2) Select Ethernet and switch it on. 3) Select Ethernet configuration to configure the settings. -
Page 18: Bluetooth
XQ-840 Series 3-4-2 Bluetooth 1) Open the settings app and go to the settings. 2) Select Bluetooth and switch it on. 3) Select the device you wish to pair with. 4) After authentication process, check that the device is connected. -
Page 19: Wi-Fi
XQ-840 Series 3-4-3 Wi-Fi 1) Open the settings app and go to the settings. 2) Select Wi-Fi and switch it on. 3) Select a device to connect. 4) After authentication process, check whether the device is connected. Wi-Fi Off / On... -
Page 20: Media Installation
XQ-840 Series 3-5 Media Installation 1) Pull the cover levers on both sides 2) Spread the media holder and insert of the media cover and open media as shown. the media cover. Media Cover Cover Lever Media Holder 3) Feed the paper between the Media Guide and Media Holder Guide on both side. - Page 21 XQ-840 Series 4) After Installation the paper, lift the media and manually set the sensor(Black-Mark & Notch Sensor) to the correct position Black Mark & Notch Sensor - When opening or closing the cover, be careful not to pinch your fingers.
-
Page 22: Button & Led
XQ-840 Series 3-6 Button & LED LED 1 LED 2 Feed/Cancel Button Pause Button 3-6-1 Button Operations Printer Button state Operation procedure Printer operation mode Feed/ before Pause Cancel operation • Apply power while pressing the button Power Press (Hold the button until the Self-test Printing Mode. -
Page 23: Led Indicator For Various Printer Statuses
XQ-840 Series 3-6-2 LED Indicator For Various Printer Statuses LED 1 LED 2 Printer Operation Status Color Status Color Color Green Print Standby Mode Print Standby Mode Green Blink Print Cancel Mode Wait For Button Input Print Is Paused Green... -
Page 24: Self-Test
XQ-840 Series 4. Self-test The self-test checks whether the printer has any problems. (Remove the printed label from peeler before using the self-test if using the printer’s label peeler option.) The self-test checks the following; 1) Make sure that the media roll has been installed properly. -
Page 25: Detailed Features
XQ-840 Series 5. Detailed Features 5-1 Stand-alone Configuration Mode • Various modes can be executed using buttons and LED only. 5-1-1 Start Stand-alone Configuration Mode and execute each function 1) The printer mode is set to Printer Setting Mode when the Pause button is pressed for two seconds while in Print Standby Mode. -
Page 26: Pause/Cancel
XQ-840 Series 5-2 Pause/Cancel During multiple-page print jobs, the Pause and Cancel button can be used to temporarily • cease printing and cancel the print job altogether, respectively. LED 1 LED 2 Pause Button Feed/Cancel Button 5-2-1 Pause/Resume Function 1) When printing labels, pressing the Pause button 2) The printer will pause after finishing the current label printing and the status of LED will be as follows. -
Page 27: Media Calibration
In this case, run Auto Calibration function so that the printer can recognize the gap. BIXOLON printer provides various media calibration methods in order to accommodate various special paper types. -
Page 28: Smart Media Detection
XQ-840 Series 5-4 Smart Media Detection • Printer executes this function when necessary without user input and media configuration can be completed with Smart Media Detection function for most print papers. Papers with gap and black mark can be identified without separate settings. -
Page 29: B/M Sensor Auto Calibration Mode
XQ-840 Series 5-6 B/M Sensor Auto Calibration Mode • Black mark sensor auto calibration mode is used when the printer does not detect a black mark on the label media correctly. Generally a printer is set to detect most types of black mark but sometimes it fails to detect and keep feeding the media without a stop when special media used. -
Page 30: Data Dump Mode
XQ-840 Series 5-8 Data Dump Mode • This function can be used to diagnose the communication issues when the printer does not work correctly. In this mode, the received data will be printed in hex format. Use stand-alone configuration mode, sequence number 6(refer to 5-1) to start data dump mode. -
Page 31: Media Installation Method Of Peeler(Option) Model
XQ-840 Series 5-10 Media Installation Method of Peeler(Option) Model • Use a peeler to automatically separate the printed media from the liner. For peeler model, install media in the following ways: 1) Open the media cover. 2) Open the peeler cover. - Page 32 XQ-840 Series 4) Remove the media and insert the media through the slot. Remove 5) Close the peeler cover. ( X ) ( O ) 6) Close the media cover until a click sound is heard. - 32 - Ver. 1.00...
- Page 33 XQ-840 Series - When opening or closing the cover, be careful not to pinch your fingers. - Do not open the print head levers while the printer is printing. The printer may be damaged. - Change the media when the printer is not receiving data, or data may Caution be lost.
-
Page 34: Using Fan-Fold
XQ-840 Series 5-11 Using Fan-fold • Supplying media to the printer externally is done as follows. 5-11-1 Printer Preparation Remove the rear media supply cover on the back side of the printer with a knife or other cutting instrument. Remove... -
Page 35: When Using Fan-Fold Media
XQ-840 Series 5-11-2 When Using Fan-fold Media 1) Insert the media at the rear of the printer as shown below and open the media cover. 2) Adjust media holders to the media width by using the fix tool. Media Holder... -
Page 36: Auto Cutter (Option)
XQ-840 Series 5-12 Auto Cutter (Option) • For auto paper cutting, products equipped with auto cutter are available. Auto-Cutter can be controlled by command. ※ The paper installation method is the same as paper with no auto cutter. - 36 -... -
Page 37: Cleaning Printer
XQ-840 Series 6. Cleaning Printer Printing quality might be degraded by dust, foreign substance, adhesive substance, or other pollution materials stuck in the printer head or inside the printer. When dirty, clean the print head as follows 6-1 Cleaning Head 1) Open the media cover and then use the cleaning pen to clean the head in the direction from the center of the head to the edges. -
Page 38: Replacing Roller
XQ-840 Series 6-2 Replacing Roller 1) Open the media cover and remove the media. 2) Pull the roller holders and separate the roller assembly. Roller Holder Roller Assembly 3) Assemble new roller assembly in reverse order. Make sure to turn the printer power off prior to cleaning. -
Page 39: Cleaning Sensors, Roller Or/And Media Path
XQ-840 Series 6-3 Cleaning Sensors, Roller or/and media Path 1) Open the media cover and remove the media. 2) Remove any dust or foreign substance using dry cloth or cotton swab. 3) Soak the cloth or cotton swab in alcohol for medical use and use it to remove adhesive foreign substances or other pollution materials. - Page 40 XQ-840 Series 7. Appendix 7-1 Specifications Item Description Printing Method Direct Thermal Printing XQ-840 : 203 dpi (8 dot/mm) Dot Density XQ-843 : 300 dpi (11.8 dot/mm) Printer XQ-840 : Max. 108 mm (Max. 4.25”) Printing Width XQ-843 : Max. 105.7 mm(Max. 4.16”) XQ-840 : Max.
- Page 41 BIXOLON Co., Ltd. The information contained herein is designed only for use with this BIXOLON product. BIXOLON is not responsible for any direct or indirect damages, arising from or related to use of this information.
- Page 42 XQ-840 Series Mise en garde Les appareils électroniques, tels que les imprimantes, risquent d'être endommagés par l'électricité statique. Par conséquent, pour protéger l’imprimante de l’électricité statique, veillez à l’éteindre avant de connecter ou de déconnecter le câble situé à l’arrière de celle-ci.
- Page 43 XQ-840 Series Compliance information This device complies with Part 15 of the FCC Rules. Operation is subject to the following two conditions: (1) This device may not cause harmful interference, and (2) This device must accept any interference received, including interference that may cause undesired operation.
- Page 44 XQ-840 Series Waste Electrical and Electric Equipment (WEEE) This marking shown on the product or its literature, indicates that is should not be disposed with other household wastes at the end of its working life, To prevent possible harm to the environment or human health from uncontrolled waste disposal, please separate this from other types of wastes and recycle it responsibly to promote the sustainable reuse of material resources.
Need help?
Do you have a question about the XQ-840 Series and is the answer not in the manual?
Questions and answers