Advertisement
Table of Contents
CAUTION
1) Do NOT over tighten the screws. Doing so may damage the unit.
2) Do NOT place the unit in high temperature area or near appliances that emit large
amount of heat.
ASSEMBLY INSTRUCTIONS
3) Do NOT place the unit in direct sunlight as it may cause the color to fade.
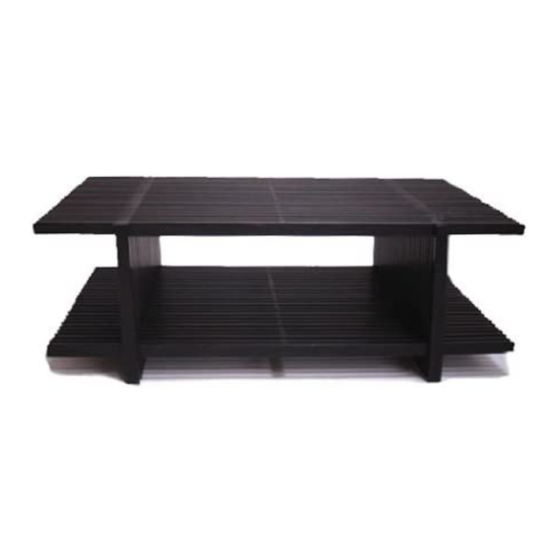
Classic Lines Media Center
4) Do NOT place the unit on uneven surfaces. Doing so may cause the unit to tip over.
34 in × 20.5 in × 12 in
5) Examine the screws periodically and tighten them if they are loose.
6) Top shelf holds most 40 inch flat panel TVs up to 80 lb. Bottom shelf holds
(86.4 cm × 52.1 cm × 30.5 cm)
up to 25 lb.
7) Check unit to ensure that it is level before use.
PARTS LIST
Please check all the parts you received according to the parts list below.
(A)
(B)
(A) Long Screw (10 pcs)
Folded Media Center (1 pc)
pre-inserted in the unit
(B) Short Screw (4 pcs)
(C)
(D)
Patents Pending
Bracket (4 pcs)
Bracket Screw (8 pcs)
*Tools needed: Phillips Screwdriver and Level
1
2
Advertisement
Table of Contents

Related Manuals for Seville Classics Classic Lines


Summary of Contents for Seville Classics Classic Lines
- Page 1 ASSEMBLY INSTRUCTIONS 3) Do NOT place the unit in direct sunlight as it may cause the color to fade. Classic Lines Media Center 4) Do NOT place the unit on uneven surfaces. Doing so may cause the unit to tip over.
- Page 2 Please Note: Step 2: Refer to the picture below. First, tighten the 4 pre-inserted Long Screws (marked “A” in the picture). Next, screw in and tighten the 4 Short Screws (B) into the 1) Do NOT place the unit vertically when unfolding as this may result in the unit 4 screw holes on the unit (these screw holes are marked “B”...
Need help?
Do you have a question about the Classic Lines and is the answer not in the manual?
Questions and answers