
Related Manuals for Contex IQ FLEX


Summary of Contents for Contex IQ FLEX
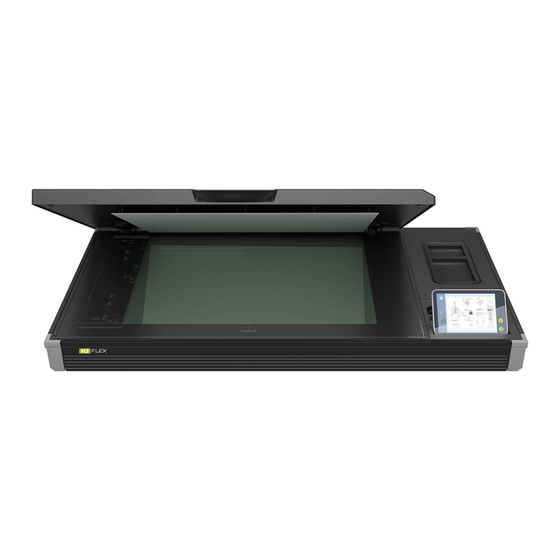
- Page 1 User Guide Wide Format Flatbed Scanner Model: IQ FLEX UG13523-2 EN IQFLEX MAR 2021...
-
Page 2: Table Of Contents
Turning on the power ................15 Book positioning ..................43 Startup Wizard ..................16 Book scanning without software ............44 IQ FLEX touch screen interface ............17 Book scanning using Nextimage ............45 Running the Wizard ................18 Further notes about input size ............... 46 Wi-Fi ...................... - Page 3 Calibrating the scanner ................. 72 Scanning to the cloud ................59 Updating your scanner software ............74 Updating the Contex LINK client software ..........75 Copying ..................... 60 The basic steps of copying ..............60 Troubleshooting your scanner ..............76 Copy settings ..................
-
Page 4: About This Guide
Overview About this Guide This user guide applies to the following model(s): Scanner Model Description IQ FLEX 18” / A2 flatbed color scanner ® ENERGY STAR compliant This guide explains how to operate and maintain your wide format flatbed scanner. -
Page 5: Main Specification
Main Specification The IQ FLEX is an A2 flatbed scanner with integrated touch screen controller designed to capture images from flat documents which are either too fragile, irregularly shaped or too thick to be scanned by other scanners. The scanner will allow oversize scans up to A1 to be made. Connecting to Ethernet networks allows convenient scan to cloud operation while the onboard USB socket permits the operator to save any scan direct to portable memory. -
Page 6: Installation
Firm, flat surface or table at least 75cm x 135cm with an area at least 80cm of free space above the surface. Grounded power outlet. Network connected pc to run Contex Link software (supplied). Gigabit Ethernet wall socket. ... -
Page 7: Unpacking
Scanner Setup Unpacking Packaging Packaging observations Be sure to retain the packing material if you intend to move the scanner to another site. Do not leave empty packaging blocking a right of way or fire exit Always dispose of the packing material responsibly if you no longer require it. -
Page 8: Placing The Scanner On A Suitable Surface
Scanner Setup Placing the scanner on a suitable surface Important Your wide format flatbed scanner should be placed on a single, stable, level and completely flat (plane) surface like a well-made table. If convenient, you can place the back end of the scanner against a wall leaving space for the cables to be connected at the back. -
Page 9: Lifting The Scanner
Scanner Setup Lifting the scanner Taking care The scanner rests on four rubber feet positioned on the underside of the scanner. 1. CAUTION. The scanner is heavy (35kg/77lbs). Never attempt to lift the scanner on your own. Always seek the help of a second person when lifting the scanner from its packaging material or when you want to move the unit. -
Page 10: Cleaning
Scanner Setup Cleaning Checking the glass area Open the scanner lid The internal scan area (glass plate) should be wiped clean of any dust that may have accumulated from the packaging or during the shipping process. Lift up the scanner lid to expose the glass scan area. -
Page 11: Cleaning The Glass Area
Scanner Setup Cleaning the glass area Clean the internal scan area Lightly wipe the internal scan area’s glass plate free of dust. Use a dry lint-free cloth. If you detect difficult smudges on the glass that cannot be wiped clean with a dry cloth, refer to this guide’s section Cleaning the scan area for instructions on thoroughly cleaning the scan area. -
Page 12: Preparing The Scanner For First Use
Scanner Setup Preparing the scanner for first use Connecting power Connect the power cable to the scanner Locate the power supply which is already wired with a special plug ready to be inserted into the round socket in the panel on the back of the scanner. - Page 13 Scanner Setup Connecting the power supply to the power outlet Connect the female end of the mains cable into the power supply then connect the power plug end to a suitable power outlet. CAUTION: The scanner is equipped with a three-wire (pin) grounding type plug.
-
Page 14: Touch Screen Preparation
Scanner Setup Touch screen preparation Lift up the touch screen Grasp the top edge of the screen and fold it up and into the upright position. NOTE: Avoid using extreme force when raising or lowering the screen. -
Page 15: Connecting To A Local Area Network (Lan)
Scanner Setup Connecting to a local area network (LAN) Connect to the network Connect the scanner to the network. The network socket is on the panel located at the back of the scanner. The USB ports outlined in red are for maintenance and future upgrade purposes only. -
Page 16: Turning On The Power
Scanner Setup Turning on the power Turn ON scanner power Turn ON the scanner power switch on the back of the scanner by moving the switch the left. -
Page 17: Startup Wizard
Turn on the main power switch on the panel at the back of the scanner. NOTE: When the scanner is switched on for the first time the IQ FLEX Wizard will take the user through a series of configuration pages on the touch screen. -
Page 18: Iq Flex Touch Screen Interface
Scanner Setup IQ FLEX touch screen interface Reset To reset from any state and go back to start Go button To start a scan or copy after making any settings changes (if required) Scroll menu Scroll on the touch screen in both... -
Page 19: Running The Wizard
Scanner Setup Running the Wizard The Installation Wizard starts The IQ FLEX welcome screen signals that the scanner installation process has begun. The following screens contain the various installation steps required to set up the scanner. Follow the screens shown in [path] below to return to this area after the wizard has completed. -
Page 20: Configuring For A Local Area Network (Lan)
Scanner Setup Configuring for a local area network (LAN) LAN network settings (DHCP) By default the scanner will automatically try to obtain an IP address using DHCP if cable connected to a local area network (LAN). [Settings > System > Network] Press the Next button >>... -
Page 21: Language
Scanner Setup Language Select your language Select the preferred language for the screen and keyboard. Different languages can be combined as the screen and keyboard languages do not have to be the same. Selecting a new language updates the current setting. -
Page 22: Setting Date And Time
Scanner Setup Setting Date and Time Set your region date and time Set the date. Touch the Date area onscreen to bring up the numerical touch keypad then enter today’s date in dd.MM.yyyy (day.short-month.year) format. Press Enter to store the value. [Settings >... -
Page 23: Configuring The Scan To Email Settings
Scanner Setup Configuring the scan to email settings Entering the email server settings Enter your email server details to have scans sent directly via email: SMTP Server (server name), Port (port number) and Security (type) Account and Password - for the target email account Display Name –... -
Page 24: Setting Up The Printer
Scanner Setup Setting up the printer Setting up the printer Press Setup to select and set up your printer for making copies. Enter the printer IP address (preceding zeros can be ignored, for example 050 can be entered as 50) and allow the scanner to locate it. - Page 25 Scanner Setup Create printer media profiles On the Printer screen (previous page) press Media Profiles then select the current media type loaded in the printer (Plain Paper in this example). Now press the Print button to print the color calibration page. It is important that the printer is working properly for this operation.
-
Page 26: Activating The Scanner (Online Method)
Scanner Setup Activating the scanner (online method) Activating an online scanner You must activate your scanner with its license key before it can be used. The easiest way it do this is by connecting the scanner to the internet through its network connection. Make sure your scanner is connected to the network which can get to the internet. -
Page 27: Activating Your Scanner (Offline Method)
Scanner Setup Activating your scanner (offline method) Activating an offline scanner You can still activate your scanner manually if it is not directly connected to the internet via your network. You will need a separate device or computer with an internet connection. Have your License Key ready before proceeding. - Page 28 Scanner Setup Installation and Activation completed When the scanner has been correctly installed the screen will briefly show the “Scanner is activated” message and then switch to the normal start screen where the full range of scanner options will be displayed.
-
Page 29: Secure Ftp Server Settings
Scanner Setup Secure FTP server settings Entering Secure FTP server settings To setup the Secure FTP server settings click on the Settings icon: [settings > system > Secure FTP] Contact your IT administrator if you don’t know the exact settings. Enter your details to have scans sent directly to a secure FTP server : Host (server name) –... - Page 30 User Interface IQ FLEX functions General Independent User / Personal Computer Email Secure Copy Settings Google DropBox Windows / User Drive OneDrive memory (ContexLINK) Cloud...
-
Page 31: Turning The Scanner On And Off
Scanning Turning the scanner ON and OFF Sleep mode Sleep mode is an energy saving mode. The scanner cannot scan when in Main power switch the Sleep mode. When first powered on the scanner is set to automatically go into Sleep mode after a preset period of inactivity (idle The main power switch is at the back of the scanner. -
Page 32: Scanning
Scanning Basic steps Scanning with IQ FLEX is easy. Scan to USB memory sticks, email accounts, Secure FTP server, to your own PC and even to personal cloud services. Here’s how to set up and send your scans. Load a... -
Page 33: Scan Preparation
Scanning Scan preparation Open the scanner lid Open the lid of the scanner lid to expose the scan area (glass plate). NOTE: Always ensure the glass is clean and protected from metal objects that might scratch it. -
Page 34: Normal Scan Mode
Scanning Normal scan mode Normal Scan Mode NORMAL – For scanning standard and non-standard size documents using automatic document size detection or manually input dimensions. Inputting exact manual paper sizes requires Nextimage software option. When scanning portrait oriented originals place the document on the glass FACE DOWN with the long edge aligned parallel to the long edge of the glass. -
Page 35: Oversize Scan Mode
(See later in this guide for more detailed instructions) IQ FLEX has three open lid positions: angle – for oversize scanning (allowing paper to exit rear) angle – for access during normal and book mode scanning Upright –... -
Page 36: Book Scan Mode
Scanning Book scan mode Book Scan Mode BOOK – For books and catalogues. Select the Book scan option (standalone or using Nextimage software option). Automatic book size detection requires Nextimage software option. For more details see the book positioning section later in this guide. -
Page 37: Adjusting The Lid For Thick Originals
Scanning Adjusting the lid for thick originals Raising the Scanner Lid For thick books and originals it may be necessary to raise the lid to ensure the lid remains level during scanning and prevents unwanted ambient light from entering the scan area. Raise the lid by lifting the lid at the rear corners near to its hinges. -
Page 38: Positioning Originals
Scanning Positioning originals Alignment positions Position A – Oversize scanning (Wizard enabled two-stage scanning). Use this position to scan documents positioned long- edge against the ruler. Accepts documents up to 841mm long by 594mm wide (A1). Requires the Nextimage software option. See separate section for more details. -
Page 39: Paper Sizes And Guides
Scanning Paper sizes and guides Scan Guides Guide markings are read from the left looking up the long axis of the scanner (not from the front of the scanner) The guide icons refer to documents required as portrait scans. Standard size documents A4 to A2 or A to C should be placed on the glass face-down with long-axis left-to-right, centered at the tick mark. - Page 40 Scanning Oversize scanning settings (scanner) Next type in the Width of the oversize document followed by the From Settings select Area then select Manual. Length (length shown). When scanning is started the Wizard will guide the operator through the scanning process. NOTE: Oversize Input size / Paper size requirements ...
- Page 41 Scanning Oversize scanning Wizard (scanner) Now open the scanner lid to 30 and move the document toward the Place the long-edge of the document against the guide edge with hinge of the lid so that the lower-left corner lines up with the long the top corner meeting the lower corner of the hatched area arrow (inset) at the front and the opposite end passes out through the (inset).
-
Page 42: Scanning Oversize Documents
Scanning Scanning oversize documents Oversize scanning settings (Nextimage) The normal load position setting is ignored when scanning in Oversize In the scan input size settings select one of the (L) paper sizes or a manual paper size dimension that is larger than 24” to switch on mode. -
Page 43: Positioning Oversize Documents
Scanning Positioning oversize documents Oversize scanning Wizard (Nextimage) Now open the scanner lid to 30 and move the document toward the Place the long-edge of the document against the guide edge with hinge of the lid so that the lower-left corner lines up with the long the top corner meeting the lower corner of the hatched area arrow (inset) at the front and the opposite end passes out through the (inset). -
Page 44: Book Positioning
Scanning Book positioning Book scanning book positioning Place the book face down on the scanner glass with the spine of the book centered in line with the white pointer and the lower edge in line with the long white arrow on paper size guide. -
Page 45: Book Scanning Without Software
The scan will be saved to the chosen destination e.g. USB stick, network location or cloud (requires use of Contex LINK). Now press the green button to finish the scan... -
Page 46: Book Scanning Using Nextimage
When Nextimage is used with IQ FLEX no user input is required at the scanner display. During Nextimage scanning the scanner... -
Page 47: Further Notes About Input Size
Scanning Closing the lid Carefully close the lid over the document without disturbing its position and alignment. NOTE: Thick documents will probaly require the lid height to be adjusted. See the Lid Adjustment section earlier in this guide. Further notes about input size The Input size defines the scan area. -
Page 48: Using The Usb Socket
Scanning Using the USB socket Scanning to USB memory IQ FLEX will accept any USB memory stick in the size range 4GB to 128 GB formatted for FAT-32. Insert the USB stick into the USB slot on the top of the scanner. -
Page 49: Scanning To Email
Scanning Scanning to email Scanning to email Send the scan to an email address. Press the email option. Enter the target email address using the onscreen keyboard. Choose your settings then press the scan button. NOTE: Set up the scanner outgoing email parameters before using this option. - Page 50 Scanning Scanning to SFTP Send the scan to a Secure FTP server. Choose your settings then press the scan button. NOTE: Set up the Secure FTP parameters before using this option. See section Installation - Entering Secure FTP server settings.
-
Page 51: Scanning Thick Media
Scanning Scanning thick media Thick media You may need to scan documents and drawings printed or pasted on thick media such as cardboard, foamboard, Gatorboard etc. Your flatbed scanner can accommodate originals up to 1.5” (38 mm) thick while still allowing you to close the cover. ... -
Page 52: Scanning To Personal Pc And Cloud Destinations
(LAN) as the scanner. When you have installed and configured the Contex LINK client software on your PC, the scanner will detect your PC on the LAN, and add you to the user list on the scanner. The Contex LINK client facilitates scanning to the PC and to the cloud services that you have connected to through the client. You can also scan to other user’s PCs or their cloud services if you know their PIN codes. -
Page 53: Scan To File Settings
Scanning Scan to file settings Setting What does it mean? Document The type of document you are scanning Full Color Color photos, posters etc. Grayscale Photo or image with gray shades Color CAD/Map Color line drawing or map Grayscale CAD/Map Line drawing or map gray shades Black &... -
Page 54: Color Validation (Draw Line)
Scanning Color Validation (draw line Preview, Adjust, Crop and Annotate Validate opens a preview of the document before it is sent to file. Use this screen to clean up the scanned image by cropping or adjusting the brightness. Also add freehand lines and text annotations to the scanned image if required. Proceed or Save validation changes Zoom the onscreen image Remove image data outside of the crop lines... -
Page 55: Color Validation (Add Text)
Scanning Color Validation (add text) Preview, Adjust, Crop and Annotate Validate opens a preview of the document before it is sent to file. Use this screen to clean up the scanned image by cropping or adjusting the brightness. Also add freehand lines and text annotations to the scanned image if required. -
Page 56: Color Validation (Change Brightness)
Scanning Color Validation (change brightness) Preview, Adjust, Crop and Annotate Validate opens a preview of the document before it is sent to file. Use this screen to clean up the scanned image by cropping or adjusting the brightness. Also add freehand lines and text annotations to the scanned image if required. -
Page 57: Gray Validation (Change Brightness)
Scanning Gray Validation (change brightness) Preview, Adjust, Crop and Annotate Gray level of annotations is not affected. CANCEL brightness adjustment (Above) Adjust Screen showing default brightness setting Moving top slider down CHANGES NEAR-WHITE GRAYS TO WHITE Moving lower slider up CHANGES NEAR-BLACK GRAYS TO BLACK ACCEPT BRIGHTNESS CHANGES and return to Validation screen NOTE: Pressing the green button stores any validation edits permanently into the scan file. -
Page 58: Black And White Validation (Darken Lines)
Scanning Black and White Validation (darken lines) Preview, Adjust, Crop and Annotate Black level of annotations is not affected CANCEL brightness adjustment (Above) Adjust Screen showing weak black line density Moving slider down DISPLAYS MORE BLACK LINES. WHITE areas are not affected ACCEPT BRIGHTNESS CHANGES and return to Validation screen NOTE: Pressing the green button stores any validation edits permanently into the scan file. -
Page 59: Contex Link Scan Client
Scanning Contex LINK scan client The Contex LINK scan client makes it easy to share one scanner in a user group. Users can create personal profiles to store their own file destinations and really personalize their use of the scanner. -
Page 60: Scanning To The Cloud
Scanning Scanning to the cloud Connect scanning to cloud services Start Contex LINK on your PC and press the setup icon Enter your name, email address. Enter a personal PIN code of your choice if you want to enforce authentication at the scanner (optional). -
Page 61: Copying
Copying Copying The basic steps of copying Making copies with the IQ FLEX is easy. Here’s how you make copies: Loading a Select the Copy option Choose your copy settings Press the document button Position the document In order to make copies a printer and media... -
Page 62: Copy Settings
Copying Copy settings Setting What does it mean? Document The type of document you are copying Full Color Color photos, posters etc. Grayscale Photo or image with gray shades Color CAD/Map Color line drawing or map Grayscale CAD/Map Line drawing or map gray shades Black &... - Page 63 Copying Color Validation (add line) Preview, Adjust, Crop and Annotate Validate opens a preview of the document before it is copied. Use this screen to clean up the scanned image by cropping or adjusting the brightness. Also add freehand lines and text annotations to the copy if required. Refer to Scanning section for more details.
-
Page 64: Wi-Fi - Connecting To A Wireless Network
Using the Wi-Fi Connection Wi-Fi – Connecting to a wireless network The scanner will show the wireless networks that are in wireless range of the scanner. Select the wireless network you wish to attach to. Wi-Fi password screen For hidden networks where the SSID (Service Set Identifier) is known but not visible it can be typed in manually using the Manual SSID option. -
Page 65: Settings And Preferences
Settings Settings and preferences The IQ FLEX offers a wide range of setting options to match the scanner to your specific needs. Press the Settings icon to reach the available options. The available settings are grouped under System settings, Scanner settings, Printer settings, and About. -
Page 66: Widesystem
Wizard. When you see your scanner appear in the list click Next. The wizard will now complete and display a message that the scanner IQ FLEX 53Dxxxxxxxxx has been successfully installed. The Status and Info pages will now show information from the scanner. -
Page 67: Administrator Console
Administrator Console Administrator console The IQ FLEX scanner permits remote configuration and access to scanner activity logs through its Administrator console using any web browser with access to the same network as the scanner. Connect by typing the scanner IP address into any web browser address line. -
Page 68: Scanner Maintenance Tasks
Maintenance Scanner maintenance tasks Scanner maintenance will ensure optimal performance of your scanner. There are 2 basic maintenance tasks: Cleaning Keep your scanner clean – the next section describes how to thoroughly clean the internal scan area. How often you need to clean will depend on how often and the types of media you scan. -
Page 69: Cleaning The Scan Area
Maintenance Cleaning the scan area Turn scanner power OFF and disconnect the power supply Press the scanner power switch to OFF ( to the right) Pull out or switch off the external scanner power supply at the socket... -
Page 70: Cleaning The Glass
Maintenance Cleaning the glass Cleaning the scan glass Be sure to clean the scan area when results are not optimal. Even small dust particles in the scan area can cause streaks in your scanned image. To clean the scan area Open the lid then follow the instructions below. -
Page 71: Replacing The White Background Platen
Maintenance Replacing the white background platen Replacing a worn white background platen The white background platen of the scanner can become worn and discolored after long periods or very heavy use. A replacement fresh white background platen can be obtained from your dealer as a purchased consumable item. The background pressure platen is located using 17 key-hole locating pegs. -
Page 72: Preparing To Calibrate The Scanner
Maintenance Preparing to calibrate the scanner Turn ON scanner power Turn ON the scanner power switch on the back of the scanner by moving the switch the left. Launch the scanner calibration wizard Ensure the scanner glass is clean. If it is dirty, clean it now to ensure the calibration process works uniformly across the calibration sheet. -
Page 73: Calibrating The Scanner
Maintenance Calibrating the scanner Insert the calibration sheet During the process, the wizard will ask you to insert the Calibration Sheet that came with your scanner. The printed side of the sheet must be inserted face down onto the scanner glass. Align the sheet midpoint arrow with the scanner midpoint arrow then close the lid of the scanner. - Page 74 Maintenance The program calibrates the scanner The program works to calibrate black and white and color values. The calibration sheet will be rescanned a number of times. The wizard will tell you when the process is finished. Remove the scanner calibration sheet from the scanner. Return the scanner calibration sheet to its protective cover and then place it in the storage folder.
-
Page 75: Updating Your Scanner Software
Maintenance Updating your scanner software Updates for your scanner software will be made available through your internet connection. Updating your software can take place automatically or manually. Automatic updates The first time an update will be made available for your scanner, a notification will appear on your screen asking you to register for updates. ... -
Page 76: Updating The Contex Link Client Software
If the Update button is active, press the button to initate the download and installation wizard. Follow the isntructions on your screen. NOTE: You can also install Contex LINK from: http://www.contex.com/LINK Contex LINK scan client software update: Press the Update button. -
Page 77: Troubleshooting Your Scanner
Write down your firmware and software versions: If your software interface is up and running select: -> About Write down your Contex LINK (client software) version – Open the Contex LINK software on your PC. The version number is displayed at the top. - Page 78 Troubleshooting Now select your method for saving or sending the log files: Select Send info by email to send log files to your service provider. This requires that the outgoing email server settings are applied and your scanning is running. See section Installation for details. ...
-
Page 79: Problems With The Scanner Installation
If you have made the settings, test your login credentials to the cloud service from your PC. Repeat the cloud service setup in Contex LINK. Ensure that you have the latest version of the Contex LINK software on your PC. If not, update Contex LINK and repeat above steps. See: Updating the Contex LINK client software. -
Page 80: Problems Operating The Scanner
Scan to cloud service OneDrive: the Contex Solutions folder in the root Scan to cloud service Dropbox: the Contex Solutions folder in the Apps folder If the file transfer failed you will see the file listed in the Contex LINK error log. Start Contex LINK on the PC to view. -
Page 81: Problems With The Scan Result
Troubleshooting Problems with the scan result Problem Possible Causes and Remedies Scanning: The colors in my scan are not Please carry out a calibration of the scanner. Calibration adjusts the color settings. correct in relation to the original document Thoroughly clean the scanning area. See: Cleaning the scan area for instructions. Run the calibration wizard and follow the steps described in the section Scanner Calibration in this guide Be sure to choose full calibration. -
Page 82: Important Safety Instructions
Appendices IMPORTANT SAFETY INSTRUCTIONS F. Do not allow anything to rest on the power cord. Do not locate the Read all of these instructions and save them for later use. Follow all scanner where persons will walk on the cord. warnings and instructions marked on the scanner. -
Page 83: Regulations
Appendices REGULATIONS Toxic or Hazardous Substances or Elements 称 质 有毒有害物 或元素名 及含量 FCC Regulations Part 质 Toxic or hazardous Substances and Elements 有毒有害物 或元素 Name Lead Mercury Cadmium Hexavalent Polybrominated Polybrominated NOTE: This equipment has been tested and found to comply with the limits 部件名...
Need help?
Do you have a question about the IQ FLEX and is the answer not in the manual?
Questions and answers