Table of Contents
Advertisement
Quick Links
Advertisement
Table of Contents

Subscribe to Our Youtube Channel
Related Manuals for Feathercraft Klondike


Summary of Contents for Feathercraft Klondike
- Page 1 The Legendary Performance of YOUR ADVENTURE UNFOLDS Klondike with built-in coaming Feathercraft Products Ltd. 4-1244 Cartwright Street on Granville Island, Vancouver, British Columbia, Canada V6H 3R8 Telephone: (604) 681-8437 Fax: (604) 681-7282 www.Feathercraft.com info@feathercraft.com...
- Page 2 Contents Klondike Folding Kayak............Page 2 Specifications ................Page 3 Klondike Frame ..............Page 4 Care and Maintenance ............Page 5 Klondike Assembly Instructions ..........Page 7 Disassembly ................Page 37 The Feathercraft Sea Sock............Page 38 Feathercraft Klondike...
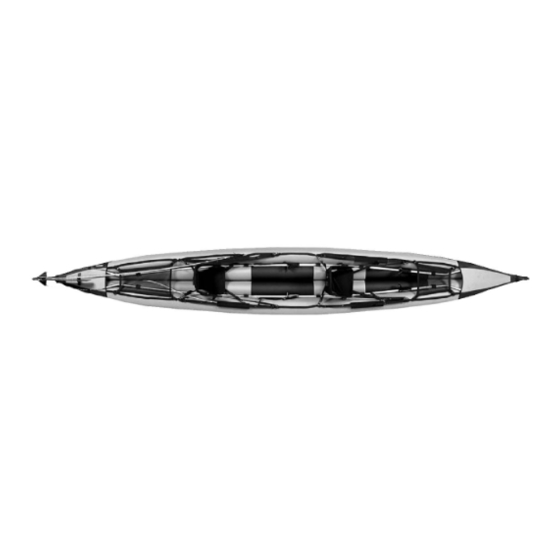
- Page 3 The Klondike The Klondike is our convertible double. With the open-cockpit design, seating can be changed to accommodate two paddlers, a solo paddler, or a small center seat for a child. (Shown with optional solo spray deck.) Feathercraft Klondike...
- Page 4 Solo spray deck seat back with inflatable lumbar support, Triple spray deck inside a 420 denier nylon seat cover. Small child center-seat Small child spray skirt Sponsons: Welded Urethane, with hose and valve Sea Sock(s) Cockpit covers Sail Rig Feathercraft Klondike...
- Page 5 Klondike Frame Chines, gunwales and deckbar permanently attached to keel plate (same for bow and stern) Crossribs are handcrafted from high density polyethlene Stern deck bar/lever bar Bow re-bar Stern re-bar Shockcorded tubing Keel extension bar Mast attachment Adjustable foot braces*...
- Page 6 Apply the Bo-Shield lubricant to frame tube inserts, spring but- tons and sliding pieces prior to assembly. If you should leave your boat assembled for a maximum of two months, this will assist in preventing tubes seizing. Feathercraft Klondike...
- Page 7 Lay crosspieces on top of the seats. on hot days, release air from sponsons. The aluminum frame sections go in next. Tuck remaining small items (ie: hatch rims, rudder) into available space. The skin goes into the black packcloth bag. Feathercraft Klondike...
- Page 8 Storage Once clean and dry, the kayak can be stored assembled or dis- assembled in a shaded, dry place. When storing the kayak dis- assembled, take extension bars apart. Feathercraft Klondike...
- Page 9 Klondike Assembly Instructions • If you have a VCR, and time permits, view the Klondike assembly video in its entirety before beginning assembly. • There may be small details that have changed from when the video was produced, to the production model of the Klondike.
- Page 10 Crossribs Crossribs Seat Slings Hatch Rims Hatch Rims Seats Rudder Stern Foot Slings Feathercraft Klondike...
- Page 11 Bow Section Extension Bars Stern deck bar/vertical bar Single Rebar Tubes Keel Bar with Mast Step Stern Section Stern Keel Bar Bow Keel Bar Rebar System Stern Rim Inserts Bow Foot Braces Bow Rim Inserts Rolled Up Skin Feathercraft Klondike...
- Page 12 ATTACH TWO-SECTION BOW KEEL BAR (single black tape, hole for spring button). • Slide on mid-connector sleeve (with no tape and mast step) • To complete bow keel bar, slide on keel section with mast step. (This bar has a bend.) Feathercraft Klondike...
- Page 13 ATTACH FOOT BRACES TO TRACK ON CHINE BARS • The bow paddler braces against foot vests fastened in position by the thumb screw knob. The foot plates can be reversed if more or less leg extension is required. reversing foot plates Feathercraft Klondike...
- Page 14 • Chine and gunwale tubes are attached similarly, inserting pin into black block; then fastening into position by closing the “twister”. delrin block twister closed delrin block twister open dog point screw to delrin block Feathercraft Klondike...
- Page 15 ATTACH #2 CROSSRIB. • As you did with crossrib #1. Screws are inserted to delrin blocks. Feathercraft Klondike...
- Page 16 Turn bar to secure. • Tubes are shockcorded together.Pull section apart, insert through keyhole in top of #2 crossrib. Reconnect tubes. Turn tube so that spacers lock tube in place. Keel bar with mast step Completed Bow Frame Section Feathercraft Klondike...
- Page 17 ASSEMBLE STERN SECTION. • “Shake out” frame tubes. Attach three section stern keel bar (with double black tape). Three-section stern keel bar Feathercraft Klondike...
- Page 18 ATTACH #6 AND #5 CROSSRIB AS YOU DID THE #1 AND #2 CROSSRIBS. Feathercraft Klondike...
- Page 19 Note: rudder bracket is permanently attached to the stern end of the kayak skin. Stern • The bow end has the Feathercraft logo. • Have the velcro tab closures on the inside of the hull “open” before sliding the frame sections into the skin.
- Page 20 SLIDE BOW AND STERN KEEL BARS TOGETHER. • Extension sleeve has black tape. Open Velcro Tabs. Once frame is centered, close tab. Feathercraft Klondike...
- Page 21 Extend keel bar until spring button appears in first hole. (Keel bar extension shown.) • Extend Gunwale bars to first hole. • Return to Keel. Depress spring button and extend to second hole. • Then extend each Chine and Gunwale bar to second hole. Feathercraft Klondike...
- Page 22 Slide lower flap around chine bar (lower round tube). Connect with last flap, securing with velcro. Buckle/clip: also adjusts seat height. (For single configuration, the bow seat and sling will be positioned between the #3 and #4 crossribs.) Feathercraft Klondike...
- Page 23 For single configuration, crossrib is installed in second set of blocks. Open Twister Delrin Blocks for single configuration. Delrin Blocks for double set-up. Closed Note: When paddling in the solo configuration, a cord exten- sion will be required to add to the rudder cable adjuster line. Feathercraft Klondike...
- Page 24 INSTALL #3 CROSSRIB. Mast bracket • This has mast bracket attached. • Line up crossrib so that pins are positioned to insert into black delrin blocks. • Depress spring buttons; slide crossrib toward block, inserting pin. Mast step Feathercraft Klondike...
- Page 25 INSERT STERN DECK BAR (HORIZONTAL LEVER) THROUGH HATCH • Connect to deck bar tube attached to stern frame section. Feathercraft Klondike...
- Page 26 Go through center of crossrib, having end with stainless steel pin towards stern. Bring small end of deck bar through hole at top of #5 crossrib. • Connect with deck bar/horizontal lever. • Screw down coaming knob; bolt extends through hole in deckbar. Coaming knob Feathercraft Klondike...
- Page 27 SLIDE RIM INSERTS INTO POCKET ON UNDERSIDE OF COAMING RIM • S insert in pocket at stern • B insert in pocket at mid cockpit Rim Insert Stern Slide into pocket on underside of coaming rim Feathercraft Klondike...
- Page 28 The end of the single tube with the smaller tube insert, is inserted into the hole in the #6 crossrib. INSTALL BOW REBAR TUBES. • Install single tubes with two strips of tape between #1 and #2 crossrib. (Step is shown without skin.) Single bow rebar Feathercraft Klondike...
- Page 29 ATTACH THE THREE SECTION REBAR. Square tube • The end with the square tube is towards the stern. Three Section Rebar Round tube Feathercraft Klondike...
- Page 30 • Begin at stern end with square tube. • Rebar connects through the hole in the #5 crossrib to the single tube you installed in Step #22. Note: Rivets on square tube face down. • Fold out rebar. Feathercraft Klondike...
- Page 31 • On each side of the #3and #4 crossribs. (1) Turn flat bar into slot at edge of coaming rim (2) Tighten thumbscrew knob at top edge of crossrib, attaching through rebar (3) Secure web strap around rebar. Feathercraft Klondike...
- Page 32 Loop webbing with buckle around top of crossrib, through divet in crossrib. INSTALL BOW SEAT. Loop webbing around #3 crossrib. Webbing attached to front of the seats is looped around bottom of crossrib in front of the seat. (Same for both bow and stern seat.) Feathercraft Klondike...
- Page 33 #2 crossrib. • To shorten cable length, pull on tab of webbing with loop; to lengthen, lift tab of ladder-lock buckle. Ladder-lock buckle Stainless steel rudder cable red webbing with loop #2 Crossrib Feathercraft Klondike...
- Page 34 INSTALL HATCH RIMS. • Place plastic rim over hatch opening. Wrap fabric sleeve with bungee over rim. • Fold down hatch neck. Close with buckle. • Cover with hatch cover. Secure with toggle. Feathercraft Klondike...
- Page 35 • Insert pin through keyhole in rudder casting. Rotate rudder into position. • Attach stainless steel rudder cable to sister clips on rudder delta. Sister Clips (two of these clips are mounted on each side of the rudder). Feathercraft Klondike...
- Page 36 Connect to plastic hook. and tight. Twist top cap to close. Tuck sponson tubes and valves out of the cockpit area. Avoid stepping on the hose and valve, and try to keep the valve free of sand. Twist valve Feathercraft Klondike...
- Page 37 Loop bow edge of spray deck around bow of coaming lip. • Stretch back to stern. • Tuck shockcord edges under coaming lip matching up velcro sections. • Spray skirts work as usual, fitting around rims sewn into spray deck. Feathercraft Klondike...
- Page 38 • close sponson valves; tuck these into the folded skin • cinch the roll with the webbing ties Feathercraft Klondike...
- Page 39 The top of the sock fits tightly around the cockpit coaming rim. Contoured to fit along the seatback and bottom, • When facing the bow of the kayak, the Feathercraft label the “foot” is loose through the cockpit, creating a “pod”. The should be on the right side.
- Page 40 TO DETACH FOOT SLINGS FOR USE INSIDE OF THE OPTIONAL STERN SEA SOCK • The sea sock for the Klondike can only be used in Stainless steel cable conjunction with the spray deck. • Detach shockcord from #2 crossrib.
- Page 41 Slider buckle forward and wrapped around crossrib #2. • Fit the top of the sock around the coaming rim in the spray deck. Stainless steel Slider buckle rudder cable Red webbing Ladder-lock buckle Brass snap length adjuster Feathercraft Klondike...
- Page 42 © Feathercraft Products Limited 2005 Printed in Canada 6.2005 Recycled paper...
Need help?
Do you have a question about the Klondike and is the answer not in the manual?
Questions and answers