Advertisement
YOUR ADVENTURE UNFOLDS
T
L
P
HE
EGENDARY
ERFORMANCE OF
K1 Expedition
with built-in coaming
TM
FOLDING KAYAKS
Feathercraft Products Ltd. 4-1244 Cartwright Street on Granville Island, Vancouver, British Columbia, Canada V6H 3R8
Telephone: (604) 681-8437 Toll Free: 1-888-681-8437 Fax: (604) 681-7282 www.Feathercraft.com info@feathercraft.com
Advertisement

Related Manuals for Feathercraft K1 Expedition


Summary of Contents for Feathercraft K1 Expedition
- Page 1 YOUR ADVENTURE UNFOLDS EGENDARY ERFORMANCE OF K1 Expedition with built-in coaming FOLDING KAYAKS Feathercraft Products Ltd. 4-1244 Cartwright Street on Granville Island, Vancouver, British Columbia, Canada V6H 3R8 Telephone: (604) 681-8437 Toll Free: 1-888-681-8437 Fax: (604) 681-7282 www.Feathercraft.com info@feathercraft.com...
-
Page 2: Table Of Contents
Contents K1 Expedition Single Folding Kayak ........Page 2 Specifications ................Page 3 K1 Expedition Frame .............Page 4 Care and Maintenance ............Page 5 K1 Expedition Assembly Instructions ........Page 7 Disassembly ................Page 26 The Feathercraft Sea Sock .............Page 27 Feathercraft K1 Expedition... -
Page 3: K1 Expedition Single Folding Kayak
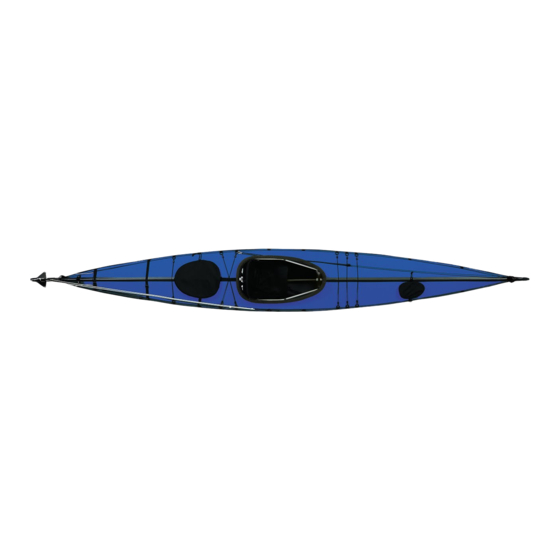
K1 Expedition Feathercraft Folding Kayaks are the culmination of many years of design development and testing. The Feathercraft Single Folding Kayak K1 is a high volume, ocean touring kayak that performs well in rough conditions. Due to its modified ‘V’ cross-section and upswept bow, the kayak tracks well, is stable, responsive and fast. -
Page 4: Specifications
Aluminum and Nylon Adjustable Foot Braces/Rudder Controls Screws and Bolts: Stainless Steel Repair Kit Protective Coating: Clear Anodized Deck: Polytech Travel-style Backpack Hull: Duratek Assembly Video and Written Instructions Flip-Up Surf Rudder Bow-Line Shockcord Cross-deck Tie-downs Perimeter Deck Line Feathercraft K1 Expedition... -
Page 5: K1 Expedition Frame
High Density Polyethylene Stern Deck Bar/Lever Bar Pieces are Colour-coded Tubing is Shockcorded Total of Five Extension Bars: Keel, Chines, Gunwales Chines, Gunwales and Deck Bar permanently attached to Keel Plate (Same for both Bow and Stern.) Feathercraft K1 Expedition... -
Page 6: Care And Maintenance
Apply the Bo-Shield lubricant to frame tube inserts, spring but- tons and sliding pieces prior to assembly. If you should leave your boat assembled for a maximum of two months, this will assist in preventing tubes seizing. Feathercraft K1 Expedition... - Page 7 To reinstall, pull the cord attached to the new sponson back through the chamber. Ensure sponson is not twisted in the chamber. Urethane glue and patches are included in the repair kit. Duct tape works well on the sponsons. Feathercraft K1 Expedition...
-
Page 8: K1 Expedition Assembly Instructions
K1 Expedition Assembly Instructions Bow Frame Section Seat Hatch Rims Extension Bars Stern Frame Section Foot Brace & Bungee Cord Crossribs Seat Sling Skin Rudder Calf-plates Stern Deck Bar i/Vertical Lever (to be attached Stern Deck Bar ii/Horizontal Lever to #3 Crossrib) - Page 9 Stern frame sections have two bands of tape. • There are five extension bars, and six high density polyethylene crossribs. Each one is numbered. Stern Frame Section Feathercraft K1 Expedition...
- Page 10 FOLD OUT BOW FRAME SECTION. • “Shake out” bow section. • Note foot-track on chine tubes. • Shock-corded tubes sections join together. Feathercraft K1 Expedition...
- Page 11 Gunwale tubes are secured with twister block. ATTACH #2 CROSSRIB TO BOW SECTION. Insert pin on bottom of crossrib in plastic block as you did in Step 3. Attach chine and gunwale tubes to crossrib with twisters. Open Twister Closed Feathercraft K1 Expedition...
- Page 12 SLIDE ON FOOT BRACE. Completed Bow Section Telescoping tube. Spring button is engaged only to hold cross bar in widest position, closer to the paddler. Thumb screws secure brace in position. Feathercraft K1 Expedition...
- Page 13 “Shake out” stern frame section as you did with the bow • Follow the same procedue as you did in Step 4. section in Step 2. ATTACH #6 CROSSRIB TO STERN SECTION • Follow the same procedure as you did in Step 3. Completed Stern Section Feathercraft K1 Expedition...
- Page 14 UNFOLD THE SKIN. Note: The rudder bracket is permanently attached to the stern end of the kayak skin. (The bow end has the Feathercraft logo.) There are three Velcro-tab closures on the inside of the hull: • one can be reached through the bow hatch;...
- Page 15 10. Align and centre the frame. Secure Velcro closure around the keel bar. Note: During additional assembly steps, keep re-checking that the frame has remained centered in the skin. Feathercraft K1 Expedition...
- Page 16 As the frame parts are beginning to take the curve of the skin, it may be necessary to pull tubes into alignment so they can slide easily. Pull extension and stern frame tube Keel Extension Bar towards the center of the kayak, lining them up. Feathercraft K1 Expedition...
- Page 17 Extend gunwales to second hole. • The bottom side sections of the seat sling are a (Seat sling installation shown without skin for illustration purposes.) Velcro-Sandwich. Slide and secure bottom section around chine bars. Feathercraft K1 Expedition...
- Page 18 INSTALL RIM INSERTS Rim Insert Stern Slide into pocket on underside of coaming rim. Feathercraft K1 Expedition...
- Page 19 This system is the same for both the #3 and #4 crossribs. Pins insert into delrin blocks Note: (Lever bar can be used to assist in turning tubes into alignment by inserting pin into extension hole and rotating tube slightly.) Feathercraft K1 Expedition...
- Page 20 Connect Stern Deck Bar i/Horizontal Lever to deck bar on stern frame section. • Slide Deck Bar ii/Vertical Lever through hole in top of #4 crossrib, connecting to Horizontal Lever. • Install coaming knob so that screw inserts into deck bar. Feathercraft K1 Expedition...
- Page 21 (a) through hole in large stern crossrib. Insert bow end (b) through hole in large bow crossrib. Slide oversleeve towards stern till spring button appears in 2nd hole. Rebar Gunwale Bar Stern has oversleeve. Rebar pull tightly Web strap goes around gunwale and rebar. Feathercraft K1 Expedition...
- Page 22 Velcro on the web strap adds grip for the buckle. The ergonomics of the pedals allow for a natural pivot action. The ball of the foot rests on the top of the pedal. Leg and ankle bone are in line, supported by the cross-brace. Feathercraft K1 Expedition...
- Page 23 Keep blowing until the skin is nice Twist-top air valve and tight. Twist top cap to close. Tuck sponson tubes and valves out of the cockpit area. Avoid stepping on the hose and valve, and try to keep the valve free of sand. Feathercraft K1 Expedition...
- Page 24 Rotate rudder 180º. • Attach rudder cables with sister clips. White haulcord is attached to clip at the side of the cockpit. Sister Clips (two of these clips are mounted on each side of the rudder). Feathercraft K1 Expedition...
- Page 25 Place hatch cover over rim and secure with B-locks. • During disassembly, don’t forget to take the plastic rims off. Don’t roll the skin up with the rims still in place. ATTACH CALF-PLATES TO #3 CROSSRIB WITH VELCRO Calf plates Feathercraft K1 Expedition...
- Page 26 The long pieces of webbing attached to the front of the seat bottom are looped around the base of the #3 crossrib and secured with buckle. Do not cinch these too tight; allow some slack for shifting the seat. Feathercraft K1 Expedition...
-
Page 27: Disassembly
Fold at middle b) Tuck ends under • close sponson valves; tuck these into the folded skin • cinch the roll with the webbing ties d) Roll up tight Feathercraft K1 Expedition... -
Page 28: The Feathercraft Sea Sock
The top of the sock fits tightly around the cockpit coaming rim. Contoured to fit along the seatback and bottom, • When facing the bow of the kayak, the Feathercraft label the “foot” is loose through the cockpit, creating a “pod”. The should be on the right side. - Page 29 © Feathercraft Products Limited 1998 Printed in Canada, revised 04/2016 Recycled paper...
Need help?
Do you have a question about the K1 Expedition and is the answer not in the manual?
Questions and answers