Table of Contents
Advertisement
Advertisement
Table of Contents
Troubleshooting

Related Manuals for Brother LX-900


Summary of Contents for Brother LX-900
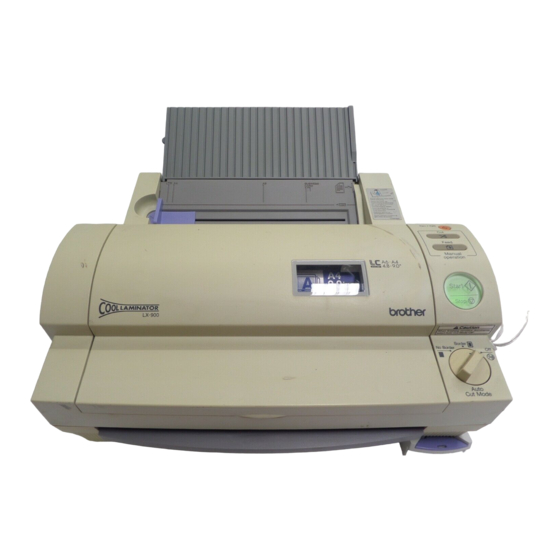
- Page 1 Owner’s Manual ®...
- Page 2 This equipment has been certified to comply with FCC standards, which are applied to the U.S.A. only. Changes or modifications not expressly approved by Brother Industries, Ltd. could void the user’s authority to operate the equipment. Under the terms of an agreement with Xyron, Inc., the purchase or other acquisition of this product confers no right or license to use the product in the Retroreflective Field.
- Page 3 Brother Cool Laminator LX-900/LX-910D Fax-Back System Brother Customer Service has installed an easy-to-use Fax-Back System, so you can get instant answers to common technical questions and product information for all Brother products. This system is available 24 hours a day, 7 days a week. You can use the system to send faxes to any fax machine, not just the one from which you are calling.
-
Page 4: Other Accessories
Visa, MasterCard, Discover, or American Express credit card, you can order accessories directly from Brother. (In the USA, you can visit us online for a complete selection of Brother accessories and supplies available for purchase.) -
Page 5: Table Of Contents
Table of Contents Getting started ... 4 Features... 4 Precautions... 5 Package list... 6 Part names... 7 Outside of the machine... 7 Inside of the machine... 7 Control Panel... 8 Film Cartridge... 8 Setup ... 9 Installing the film cartridge... 9 Turning the machine on/off...10 About film rolls ...12 Film-supply maintenance...12... -
Page 6: Getting Started
Getting started Thank you for purchasing a Brother Cool Laminator. This machine has been designed to be easy to use, but can be utilized to its fullest potential by taking some time to read this owner’s manual. Features Depending upon the type of film used, this machine turns a variety of documents into professional, self- adhesive stickers, dual-sided, coated lamination sheets, magnetic signs etc. -
Page 7: Precautions
The data on the disks or tapes will be damaged. Brother can not be held liable for loses or damage of items used in the laminator machine. Under the terms of an agreement with Xyron, Inc., the purchase or other acquisition of this product confers no right or license to use the product in the Retroreflective Field. -
Page 8: Package List
Package list 1 Machine 2 Film cartridge 3 AC adapter 4 Owner’s manual 5 Compatible accessory list 6 Supplemental PC software (CD-ROM) 1 (Double side laminate type) - 6 -... -
Page 9: Part Names
Part names Outside of the machine DC connector Top cover Viewing window Document tray Document supporter Document guide Control panel Document output Corner cutter slot Corner cutter tray Corner cutter dust box AC adapter Inside of the machine Film cartridge Roller release lever Roller holder lock button Roller holder... -
Page 10: Control Panel
Control Panel POWER SWITCH On/Off (cut button) Feed Start/Stop Auto Cut Mode selector switch - Border - No Border -Off Film Cartridge Cutting line Shutter Shutter button Film slit Cutting line Shutter button Shutter Turns the machine on/off. Cuts the document in the current position. Use to feed the document manually. -
Page 11: Setup
Setup Installing the film cartridge (1) Open the top cover. (2) Push the roller release lever (green color) and lift the roller holder upwards. (3) Carefully install the film cartridge, square end down. Match the arrow symbol to install new cartridge. Note - Make sure that the shutter of the cartridge is closed when installing the cartridge. -
Page 12: Turning The Machine On/Off
(4) Return the roller holder to the original position and press the roller holder lock buttons (purple color) as illustrated. You will hear the roller holder click into place. Press the roller holder further to secure the roller unit. (5) Close the top cover. Turning the machine on/off (1) Connect the plug of the AC adapter into the DC connector. - Page 13 WARNING: Do not plug your machine into an electrical outlet until it has been completely assembled. Do not try to disassemble or repair this equipment yourself. Service should be performed by authorized personnel only. Warranties will be voided if the unit is repaired by unauthorized technicians.
-
Page 14: About Film Rolls
This machine supports 9.0 inch (A4) or 4.8 inch (A6) width cartridges. Use only Brother authorized film cartridges or film refills. The above mark appears on all packages of authorized film cartridges or film refills that are compatible with the machine. Brother cannot be held responsible for any problem arising from the use of unauthorized supplies. -
Page 15: Replacing The Film Cartridge
Replacing the film cartridge WARNING: Never touch the surface of the blades when installing/replacing the film cartridge. (1) Turn the power off and open the top cover. (2) Push the roller release lever (green color) and lift the roller holder upwards. (3) Remove the film cartridge carefully. - Page 16 Note -The condition of the currently installed cartridge can be viewed through the window in the top cover. -Store the film cartridge at below 113°F (45°C). (4) Install the new film cartridge carefully. Note -Make sure that the shutter of the cartridge is completely closed when...
-
Page 17: Installing/Replacing The Film Roll In The Cartridge
Installing/replacing the film roll in the cartridge Cartridges can be recycled by replacing the film roll. Be sure to use Brother-authorized LC film refills only. Refill cartridges using the following instructions: (1) Remove the film cartridge from the machine. Do not grab the shutter when removing the film cartridge from the machine. - Page 18 (4) Take the new roll of film from the sealed package. Holding the yellow colored plastic side holders of the film roll. Set the film into the cartridge as illustrated. The film can only be placed into the cartridge in the proper direction. Note Remove the separator sheet between film rolls before setting the rolls.
- Page 19 (8) Check the position of the top edge of film. It should be aligned with the cutting line of the cartridge. If any film extends beyond the cutting line, cut away the access film as illustrated before installing the cartridge. (9) Install the cartridge into the machine.
- Page 20 CAUTION: To prevent the film from drying out, never open the sealed pack until you are ready to install the cartridge. (12) Turn the power on. Press the Feed button until you can see the edge of the film to remove any slack from the film.
-
Page 21: Document Size
Document Size The size of the document that you wish to laminate should not be larger (or smaller) than the width that your machine can accommodate. The document should be between 2.2 and 8.5 inches (55 and 216mm) wide and between 3.54 and 39.4 inches (90 and 1000mm) long. The paper thickness should be between 10 lbs. and 30lbs. -
Page 22: Operating The Machine
Operating the machine Laminate documents, Create magnetic signs, and laminate with adhesive back: (1) Open the document supporter. (2) Load the document to be laminated onto the document tray. Documents should usually be loaded face up. When using adhesive backed laminating film, documents that are placed face down on the document tray can be made into window stickers. - Page 23 CAUTION: Do not attempt to remove or pull on the document while the machine is operating. Do not turn the machine off during a job except in the event of a malfunction. Do not place the next document on the document tray until the current operation is completed. Note To stop the operation, press Start.
-
Page 24: How To Define The Cutting Position (Creating Borders)
How to define the cutting position (creating borders) The Auto Cross Cutting System automatically detects the size of your document and cuts each edge. The cutting position can be adjusted to create a margin on each edge of the laminated document Auto Cut Mode –... -
Page 25: Manual Feeding And Manual Cutting
Manual feeding and manual cutting You can feed and cut the document manually using the Cool Laminator. (1) Set the document on the document tray. (2) Press “Feed” to feed the document manually. The “Feed” button is a self-repeating key. The document will continue to be fed until the “Feed”... -
Page 26: Corner Cutting
Corner cutting After laminating, you can trim each corner of the document. Note The maximum thickness of the original document (before lamination) that the corner cutter unit can cut is 0.2mm. Do not use the corner cutter to trim the magnet back output. (1) Insert a corner of the document into the corner-cutter slot. -
Page 27: Corner Cutter Dust Box
Corner cutter dust box The trimmings from the corner cutter are collected in the corner cutter dust box located just below the corner cutter slot. Pull the dust box towards you to discard the trimmings and set the box back into its original position. -
Page 28: Regular Maintenance And Troubleshooting
Regular maintenance and troubleshooting You can keep your machine in optimum condition by cleaning it on a regular basis. Regular maintenance Avoid small debris and objects Be careful not to let anything slip into the machine, especially metal objects such as paper clips and staples. For optimum lamination results, do not place the machine and cartridges in a dusty environment. - Page 29 (4) Remove the film cartridge from the machine. Note Use scissors or button to extract the jammed film and remove the film cartridge, if necessary. (5) Remove the document from the film slit of the cartridge. Note Do not pull the document from the opposite side.
- Page 30 CAUTION: Do not touch the surface of the blade when removing a jammed document. This procedure must be done with great care to avoid personal injury. (8) Return the roller holder lock button (purple color) to its original position until it clicks into place.
-
Page 31: Replacing The Side Cutter Units
Replacing the side cutter units Cutter performance will decline as blades are dulled through use or become coated with adhesives. Use the following operation to replace the side cutter units. CAUTION: Do not touch the surface of the blade when replacing the cutter units. Handle the blades with great care to avoid personal injury. - Page 32 (5) Slide the old side cutter to the center. Remove the side cutter. (6) Slide the new side cutter to secure it in the side cutter holder. (7) Lift the tab to lock the side cutter into place. (8) Return the roller holder lock button (purple color) to its original position.
-
Page 33: Replacing The Corner Cutter Tray
Use the following operation to replace the corner cutter tray when necessary. Note Use Brother authorized cutter units (SC-2 or CC-1) only. Other cutter units, (top/bottom cutter unit and the upper blade of the corner cutter) are not replaceable. Please consult your dealer if these cutter units become damaged. -
Page 34: Troubleshooting
Remove the liner. Wipe the surface or try another surface. Install the film cartridge properly. Use Brother authorized film cartridges and film refills only. Use a Brother authorized AC adapter. Install the film cartridge properly. Use Brother authorized film cartridge and film refills only. -
Page 35: Specifications
Cutting system: Life of the cutter: Noise level: Unit dimensions: Unit weight (not including film cartridge and AC adapter) 4.7kg (10.4 lbs.) LX-900/LX-910D Cold pressure method AC adapter (included) 120V±10% (60Hz) Output DC 18V 700mA 2.17” – 8.50” (55mm – 216mm) 3.54”... -
Page 36: Index
Auto Cut Mode No Border ... 22 Auto Cut Mode Off ... 5,22,32 Auto Cut Mode selector switch ... 8,22,32 Border ... 8,22 Brother Sticker Film Roll... 32 Business card-size paper ... 19 Buzzer... 21 Cartridge ... 8,9 Cartridge cover ... 15 Compatible accessory list...6... - Page 37 Setup ...9 Shutter ...8,9,14,15,16,27 Shutter button... 8,16,27 Side cutter ...30 Side cutter arm ...7 Side cutter holder...30 Side cutter unit...7,9,14,28,29,30 Side holder ...16 Start button...11,21,26,32 Start/Stop button...8 Stickers ...32 Supplemental PC software (CD-ROM) ...6 The Auto Cross Cutting System...19 The Auto Sheet Feeder...19 Top cover ...
-
Page 38: Appendix (About Printmaster Gold Software)
IBM is a registered trademark of International Business Machine, Inc. You don’t need a computer to use the Cool Laminator. However, if you have a computer and printer, the bundled PC software, PrintMaster Gold makes it easy to produce beautiful projects you'll love to show around. - Page 39 FRANCE SUPPORT TECHNIQUE EN FRANCE Concours, Astuces, Solutions et Support Technique 24h/24 7J/7 014069670 * 3615 EIDOS * (2F23 la minute) www.eidos-France.fr Logiciel distribué en France par Eidos Interactive, 6 Boulevard du Général Leclerc, 92115 Clichy Cedex Les frais d’appel seront à votre charge. EIDOS Interactive paiera le retour par courrier des programmes que vous lui aurez fait parvenir.
-
Page 40: Getting Started
Getting Started Before installing, check the system requirements listed below to make sure your computer is able to work with PrintMaster Gold. System Requirements PrintMaster Gold performs on any computer with the following features: IBM PC with a 486DX2 66 MHz (or higher) Windows 95, Windows 98, Windows 3.1x/Windows for Workgroups (running in 386 Enhanced Mode) 8Mb or more of RAM (16Mb recommended) 30Mb or more of free hard disk space... - Page 41 Installing PrintMaster Gold 1. Click the Install button or press ENTER to continue the installation. The PrintMaster Gold Installation screen appears with the default drive and directory, which you may change or accept as shown. 2. Click Continue or press ENTER to install PrintMaster Gold into the default directory, C:\PMW. or Click the Custom button to install PrintMaster Gold into the drive and directory of your choice.
-
Page 42: Reinstalling Printmaster Gold
Reinstalling PrintMaster Gold Though unlikely, PrintMaster Gold files may become corrupted and the program may not run properly. If so, you can reinstall PrintMaster Gold, which cleans out all old files and restores original functionality. In Windows 95/98 1. Start Windows 95/98. 2. -
Page 43: Viewing/Printing Printmaster Gold User's Manual
Viewing/Printing PrintMaster Gold user's manual The full contents of user's manual is stored in the PrintMaster Gold CD-ROM. Please install the Adobe Acrobat Reader to see the online manual. How to install the Adobe Acrobat Reader 1. Double click the file Ar32e301 in the Acrobat 3 folder on the CD-ROM. 2. -
Page 44: The World Of Printmaster Gold
The World of PrintMaster Gold This section introduces you to the PrintMaster Gold environment. As soon as you open the program, you'll notice PrintMaster Gold has several interrelated areas, each with it's own individual purpose and look. Each area-including the Hub, Art Gallery, Sentiments Gallery, With Help Designer, and Workspace-offers you different tools to help create a unique card, calendar, or newsletter. -
Page 45: The Workspace
The workspace The Workspace is your own personal drafting board, with all the text, drawing, and editing tools you'll need to make a beautiful project. Here, you can put the finishing touches on your project, add new pictures, type in your personal message, and print. Below, we will introduce you to the main menu bar and the five toolbars in the Workspace. -
Page 46: The Global Toolbar
The Global Toolbar The Global Toolbar, which is displayed across the top of the Workspace, provides quick mouse access to some of the most commonly used PrintMaster Gold actions such as closing the current project, going to the Ready Made Gallery, starting a With Help project, and starting a Brand New project. These buttons are also one-step alternatives to using the menu bar for saving, printing, viewing Print Preview, cutting, Pasting, and others. -
Page 47: Add Toolbar
Add Toolbar The Add toolbar holds all the tools you need to add graphics, sentiments, and your own art to your project. To hide or display the Add toolbar, access the View menu, the Toolbar/Add Bar. Add a picture Click here to go to the PrintMaster Art Gallery. In the Art Gallery, you can choose from thousands of graphics, pictures, photos, and borders for your project. -
Page 48: Modify Toolbar
Modify Toolbar Use the Modify toolbar to make adjustments to your art and text. With these tools, you can easily change the color of text and pictures, change line widths, add shadows, and crop pictures. To hide or display the Modify toolbar, access the View menu, then Toolbars/Modify Bar. Color Use the tool to add color to your pictures and text. -
Page 49: Status Bar
Status bar The Status toolbar is displayed at the bottom of the PrintMaster Gold window. Use this area to change your view of your project or to check the accuracy of your measurements. To hide or display the Status toolbar, access the View menu, then Toolbars/Status Bar. View Side Window Click either the left arrow or the right arrow to see the different sides of your project. - Page 50 LC0074001 Printed in China 9906 ENGLISH...
Need help?
Do you have a question about the LX-900 and is the answer not in the manual?
Questions and answers