Table of Contents
Advertisement
Available languages
Available languages
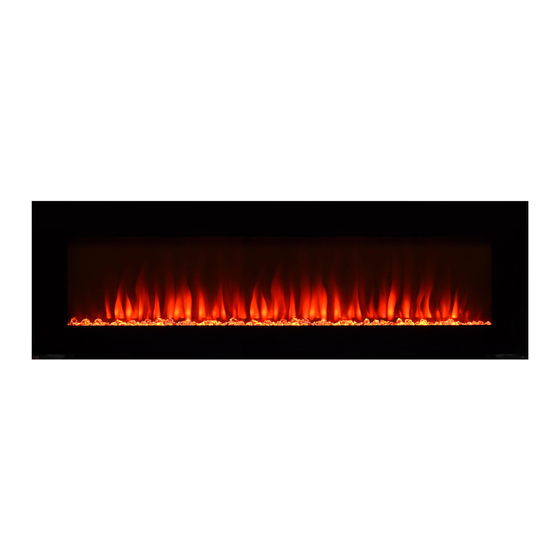
Wall Mount Fireplace
With Adjustable Mounting Bracket
*Patented Flame Technology & Front Venting Design
Model Number
JR42
JR50
JR60
JR72
READ & SAVE THESE INSTRUCTIONS
Carefully read and review before assembling, installing, operating, or maintaining
this product. Observe all safety instructions and information.
FAILURE TO FOLLOW WARNINGS & OPERATIONAL INSTRUCTIONS CONTAINED IN THIS
MANUAL CAN RESULT IN PROPERTY DAMAGE OR PERSONAL INJURY
**IMPORTANT NOTICE**
For customer service & warranty issues, please contact: customercare@jrhome.com
03.16.21
Item Number
EF-WM353 XIN
EF-WM350 XIN
EF-WM349 XIN
EF-WM348 XIN
1
YEAR
limited
WARRANTY
Owner's Manual
Page 1
Advertisement
Table of Contents

Subscribe to Our Youtube Channel
Related Manuals for Paramount Fitness JR42


Summary of Contents for Paramount Fitness JR42
- Page 1 Wall Mount Fireplace YEAR limited With Adjustable Mounting Bracket WARRANTY Owner’s Manual *Patented Flame Technology & Front Venting Design Model Number Item Number JR42 EF-WM353 XIN JR50 EF-WM350 XIN EF-WM349 XIN JR60 EF-WM348 XIN JR72 READ & SAVE THESE INSTRUCTIONS Carefully read and review before assembling, installing, operating, or maintaining this product.
- Page 2 Introduction WARNING THIS APPLIANCE IS HOT WHEN OPERATED AND CAN CAUSE SEVERE BURNS IF CONTACTED. Do not operate appliance before reading and understanding operating instructions. Failure to operate appliance Risk of burns. Power to the appliance should be turned off and the appliance allowed to cool before servicing. To disconnect power to the appliance, turn controls to off, then remove plug from outlet.
-
Page 3: Front View
Dimensions FRONT VIEW SIDE VIEW TOP VIEW Listing Approvals electric room appliances in the United States and Canada. If you need assistance during installation, please contact your local dealer. NOTE: This appliance must be electrically wired and grounded in accordance with local codes or, in the absence of local codes, with National Electric Code ANSI/NFPA 70-latest edition in the United States or the Canadian Electric Code, CSA C22.1 in Canada. -
Page 4: General Instructions
General Instructions WARNING READ THESE INSTRUCTIONS COMPLETELY BEFORE BEGINNING INSTALLATION. FAILURE TO FOLLOW THEM COULD CAUSE AN APPLIANCE MALFUNCTION RESULTING IN SERIOUS INJURY AND/OR PROPERTY DAMAGE. ALL ELECTRIC APPLIANCES HAVE HOT AND ARCING OR SPARKING PARTS INSIDE. DO NOT USE IT IN AREAS WHERE GASOLINE, PAINT OR FLAMMABLE LIQUIDS ARE PRESENT. -
Page 5: Hardware Parts List
Hardware Parts List A- Fireplace B- Side Brackets C1 - Top/Bottom Brackets C2 - Top/Bottom Brackets EF-WM353 XIN (42”) x1 EF-WM353 XIN (42”) x4 EF-WM349 XIN (60”) x6 EF-WM349 XIN (60”) x6 EF-WM350 XIN (50”) x1 EF-WM350 XIN (50”) x4 EF-WM348 XIN (72”) x8 EF-WM348 XIN (72”) x8 EF-WM349 XIN (60”) x1... -
Page 6: Locating Appliance
Locating Appliance WARNING DUE TO HIGH TEMPERATURES, THIS ELECTRIC APPLIANCE SHOULD BE LOCATED OUT OF TRAFFIC. KEEP COMBUSTIBLE MATERIALS SUCH AS FURNITURE, PILLOWS, BEDDING, PAPERS, CLOTHES AND CURTAINS AT LEAST 36” FROM THE FRONT OF THE APPLIANCE. NEVER LOCATE THIS ELECTRIC APPLIANCE WHERE IT MAY FALL INTO A BATHTUB OR OTHER WATER CONTAINER. -
Page 7: Installation
CREATE A FIRE HAZARD. DO NOT RUN THE POWER CORD HORIZONTALLY, DIRECTLY BELOW THE APPLIANCE. Your JR42/50/60/72 unit is a wall-mounted appliance. Select a suitable location that is not susceptible to NOTE: Follow all National and local electrical codes. Minimum Clearance to Combustibles... - Page 8 Adjustable Mounting Brackets and Installation Options avoid exposed insulation or vapour barriers coming in contact with the appliance. This will ensure clearance to combustibles is maintained. FIG. 2 SIDE VIEW VIEW OPTION 1 OPTION 2 OPTION 3 Full Recess: No Recess: Partial Recess: - Flush to wall look - Easy installation...
- Page 9 Option 1: Recessing the Appliance Flush into the Wall builder before you install this appliance in the wall. Select a location that is not prone to moisture and is located at least 36” (914mm) away from combustible materials such as curtain drapes, furniture, bedding, paper etc. 1.
- Page 10 Positioning of Adjustible Builder’s Brackets B: Side brackets C1: Top bracket (Tall) Use for more security & surface area C2: Top bracket (Short) Will stay hidden behind glass. Builder’s bracket positions EF-WM353 XIN, shown in grey for each model EF-WM350 XIN, EF-WM349 XIN EF-WM348 XIN Page 10...
- Page 11 Minimum Clearance to Combustibles Measurements are taken from the glass front Sides, back and top 0” Framing SIDE VIEW TOP VIEW Finishing Material (NON-LOAD BEARING) Recommended Framing Dimensions EF-WM353 19.3” (49cm) 38.60” (98cm) 4.2” 18.8” 36.10” EF-WM350 19.3” (49cm) 46.60” (118.4cm) 4.2”...
- Page 12 Option 2: Hanging the Appliance on the Wall Due to the many different materials used on different walls, it is highly BODY recommended that you consult your local builder before you install this appliance on the wall. FRONT GLASS 1. Select a location that is not prone to moisture and is located at least 36”...
-
Page 13: Hard Wiring Installation
Hard Wiring Installation WARNING TURN OFF THE APPLIANCE COMPLETELY AND LET COOL BEFORE SERVICING. ONLY A QUALIFIED SERVICE PERSON SHOULD SERVICE AND REPAIR THIS ELECTRIC APPLIANCE. HARD WIRING CONNECTION wire the appliance directly to the house hold wiring. This appliance must be electrically connected and grounded in accordance with local codes, if hard wired. In the absence of local codes, use the current CSA C22.1 CANADIAN ELECTRICAL CODE in Canada or the current ANSI/NFPA 70 NATIONAL ELECTRICAL CODE in the United States. - Page 14 Finishing Finishing WARNING POWER SUPPLY SERVICE MUST BE COMPLETED PRIOR TO FINISHING TO AVOID RECONSTRUCTION. HEAT VENTS AND AIR OPENINGS CANNOT BE COVERED IN ANY CIRCUMSTANCES. Front Glass Removal / Installation WARNING BEFORE THE FRONT GLASS IS INSTALLED OR REMOVED, UNPLUG THE APPLIANCE AND WAIT UNTIL APPLIANCE IS COOL TO THE TOUCH.
- Page 15 Crystal embers and Log set Installations The glass front must be removed and the appliance must be secured in its location before the crystal embers are installed. 1.Crystal installation Carefully place crystal embers into the bottom media tray on the front of the appliance as illustrated. Apply an even layer from side to side.
-
Page 16: Main Power Switch
Operating Instructions WARNING WHILE THE APPLIANCE IS OPERATING DO NOT REMOVE THE GLASS PANEL. THIS WILL CAUSE THE REMOTE CONTROL AND TOUCH PANEL TO DISFUNCTION. Once the appliance has been plugged into a grounded electrical outlet, it is ready to operate. NOTE: Ensure the house circuit breakers for the power supply are turned on. -
Page 17: Operating With Touch Panel
Operating with Touch Panel Heater Lock Feature : Press " "button and hold for 5 seconds, the heater and related temperature setting button will be locked. The heater will be in "OFF" mode and heater function is disabled, which means the heater cannot be turned on unless preform "heater unlock"... - Page 18 WiFi APP Installation Procedure Available for Android and iOS, the Smart Flame Connect app can be used to control your 1. Create an Account HOME 2. Fireplace WiFi Setup • • • 3. Check for Firmware Update 4. Controls via 4G/LTE Mobile Networks 5.
- Page 19 Multi-functional Operating with Remote Control Turning ON/OFF the fireplace: 1.Ensure the fireplace is at "power on" status. (refer to " " on page 16). Main Power Switch 2.Press power on/off button to turn on the fireplace. LED displays " ". 3.Initial setting: Heater is off.
- Page 20 Multi-functional Operating with Remote Control 4. Ember bed color options: Press button multiple times to cycle through the ember bed color from red(E1), pink(E2),snow white(E3), cool blue(E4), dark blue(E5), green(E6), lake green(E7), auto rotating(EE), off(EO): Icon Ember bed light setting Display Pink Snow white...
-
Page 21: Storage Instructions
Remote: 11 key remote Item No.: EF-WM353 XIN,EF-WM350 XIN, EF-WM349 XIN, EF-WM348 XIN NOTE: Make sure your “AA” batteries (x2) are fully charged and installed correctly in your remote control before operating. The remote control must remain within 5 meters or 17 feet of the appliance to be effective, this range may be reduced when battery power is depleted. -
Page 22: Wiring Diagram
Wiring Diagram WARNING TURN OFF THE APPLIANCE COMPLETELY AND LET COOL BEFORE SERVICING. ONLY A QUALIFIED SERVICE PERSON SHOULD SERVICE AND REPAIR THIS ELECTRIC APPLIANCE. FLAME LIGHT 2018/07/21 FR-4 SHENGYI LED4-M23 ER1 27 YR1 27 EMBER LIGHT Page 22 03.16.21... -
Page 23: Replacement Parts
Remote Control DHSJ-LCR29-01-02 DHSJ-LCR29-01-02 Circuit Board DHSJ-LCR29-01-02 DHSJ-LCR29-01-02 LED Backlights HWK42 HWK50 HWK50 HWK72 Hardware Kit CP42 CP42 CP42 CP42 Control Panel JR42 JR50 JR60 JR72 Wire Harness TH42 TH42 TH42 TH42 Thermostat WIFI WIFI WIFI WIFI WIFI WCKIT WCKIT... -
Page 24: Replacement Parts Diagram
Replacement Parts Diagram WARNING FAILURE TO POSITION THE PARTS IN ACCORDANCE WITH THIS MANUAL OR FAILURE TO USE ONLY PARTS SPECIFICALLY APPROVED WITH THIS APPLIANCE MAY RESULT IN PROPERTY DAMAGE OR PERSONAL INJURY. NOTE: Care must be taken when removing and disposing of any broken glass or damaged components. Be sure to vacuum up any broken glass from inside the appliance before operation. -
Page 25: Troubleshooting
Troubleshooting WARNING TURN OFF THE APPLIANCE COMPLETELY AND LET COOL BEFORE SERVICING. ONLY A QUALIFIED SERVICE PERSON SHOULD SERVICE AND REPAIR THIS ELECTRIC APPLIANCE. LED’s are burnt out or Inspect the LED’s and replace them if necessary Ember bed is not glowing or malfunctioning dimming No warm air coming out of... -
Page 26: Warranty
IMPORTANT Warranty For questions, concerns or problems with our product please Si vous éprouvez si vous avez des questions ou des email our customer service department: préoccupations, prière de faire parvenir un courriel à notre service à la clientèle customercare@jrhome.com customercare@jrhome.com DATED PROOF OF PURCHASE REQUIRED FOR WARRANTY SERVICE UNE PREUVE D’ACHAT DATÉE EST REQUISE POUR SE PRÉVALOIR DE LA GARANTIE. - Page 27 YEAR limited WARRANTY Manuel de l’utilisateur Numéro de modèle Numéro d’article JR42 EF-WM353 XIN JR50 EF-WM350 XIN EF-WM349 XIN JR60 EF-WM348 XIN JR72 LISEZ & CONSERVEZ CES INSTRUCTIONS Lisez attentivement et consultez avant d’assembler, d’installer, d’utiliser ou de réparer ce produit. Respectez toutes les consignes de sécurité et d’information.
- Page 28 Introduction AVERTISSEMENT CET APPAREIL EST BRULANT LORSQU’IL EST UTILISÉ ET PEUT CAUSER DE GRAVES BRÛLURES EN CAS DE CONTACT. N’utilisez pas l’appareil avant d’avoir lu et compris les consignes d’utilisation. L’incapacité à utiliser l’appareil conformément aux instructions d’utilisation pourrait provoquer un incendie ou des blessures. Risque de brûlures.
-
Page 29: Vue De Face
Dimensions VUE DE FACE VUE LATERALE VUE DE DESSUS Liste des autorisaions Cet appareil a été testé selon les normes CSA pour les appareils électrique à l’intérieur des pièces à usage lors de l’installation, veuillez contacter votre revendeur local. REMARQUE : Cet appareil doit être électriquement câblé et relié à la terre conformément aux codes locaux ou, en l’absence de codes locaux, conforme au Code National Électrique ANSI/NFPA 70-dernière édition aux États-Unis ou le Code canadien d’électricité, CSA C22.1 au Canada. -
Page 30: Instructions Générales
Instructions générales AVERTISSEMENT LISEZ CES INSTRUCTIONS AVANT DE COMMENCER L’INSTALLATION. LEURS NON-RESPECT PEUVENT CAUSER LE DYSFONCTIONNEMENT DE L’APPAREIL, CE QUI PEUT ENTRAÎNER DES BLESSURES TROUVENT DE L’ESSENCE, PEINTURE OU D’AUTRES LIQUIDES INFLAMMABLES. CIRCUIT D’ALIMENTATION. 1. Avant de brancher votre appareil sur une prise électrique, assurez-vous que les disjoncteurs de la maison pour la prise soient enclenchés. - Page 31 Liste des pièces du matériel A-Cheminée B-Supports latéraux C1 - Supports du Dessus/ C2 -Supports du Dessus/ dessous dessous EF-WM353 XIN (42”) x1 EF-WM353 XIN (42”) x4 EF-WM349 XIN (60”) x6 EF-WM349 XIN (60”) x6 EF-WM350 XIN (50”) x1 EF-WM350 XIN (50”) x4 EF-WM348 XIN (72”) x8 EF-WM348 XIN (72”) x8 EF-WM349 XIN (60”) x1...
-
Page 32: Emplacement De L'appareil
Emplacement de l’appareil AVERTISSEMENT L’AVANT DE L’APPAREIL. OU AUTRE CONTENANT D’EAU. L’INSTALLATION ET L’ENTRETIEN. Mise à la terre de l’appareil Cet appareil fonctionne sur 120 Volts. Le cordon MÉTHODES DE MISE À LA TERRE possède une prise comme indiqué au ( A). Pour déconnecter l’appareil, tournez l’interrupteur sur arrêt, puis retirez la prise. - Page 33 NE PLACEZ PAS LE CORDON D’ALIMENTATION HORIZONTALEMENT, DIRECTEMENT SOUS L’APPAREIL. Votre appareil JR42/50/60/72 est un appareil à montage mural. Choisissez un emplacement approprié qui n’est pas sensible à l’humidité et loin des rideaux, des meubles et des endroits à forte circulation de gens.
- Page 34 Options Supports de montage réglable et Options d’Installation REMARQUE : Il est recommandé que les murs de l’enceinte de l’appareil soient terminés (ie. cloison sèche) pour éviter que l’isolation soit exposée ou que des pare-vapeur entrent en contact avec l’appareil. Ceci assurera que l’éloignement des matériaux combustibles soit maintenu. FIG.
- Page 35 Option 1 : Encastrement au même niveau que l’appareil dans le mur En raison des nombreux matériaux de différentes utilisées sur les murs, il est fortement recommandé que vous consultiez votre constructeur local avant d’installer cet appareil dans le mur. Sélectionnez un emplacement qui n’est pas sujette à...
- Page 36 Positionnement des supports du constructeur réglable B: Supports latéraux C1: Support supérieur (grand) Utilisation pour plus de zone de sécurité et de surface C2: Support supérieur (petit) Sera caché derrière une vitre. EF-WM353 XIN, Pose du support du constructeur EF-WM350 XIN, EF-WM349 XIN EF-WM348 XIN Page 36...
- Page 37 Distance minimale aux matériaux combustibles Mesures depuis la façade en verre Côtés, arrière et dessus 0” Encadrement VUE LATERALE VUE DE DESSUS Matériaux de (NON PORTEURS) Recommended Framing Dimensions 19.3” (49cm) 38.60” (98cm) 4.2” 18.8” 36.10” EF-WM353 19.3” (49cm) 46.60” (118.4cm) 4.2”...
- Page 38 Option 2 : Accrocher l’appareil au mur En raison des nombreux différents matériaux utilisés sur différents murs, CORPS il est fortement recommandé que vous consultiez votre constructeur local avant d’installer cet appareil au mur. VITRE EN VERRE 1. Sélectionnez un emplacement qui n’est pas sujette à l’humidité et est situé...
- Page 39 AVERTISSEMENT BRANCHEMENT PAR RACCORDEMENT FIXE raccorder l’appareil directement au câblage de la maison. Cet appareil doit être connecté électriquement et relié à la terre conformément aux codes locaux, si le COUVERCLE Figure 1 1. Retirez le couvercle du côté droit de l’appareil en retirant les 4 vis, comme illustré ci-dessus. 2.
- Page 40 Finition AVERTISSEMENT LE REPARATION DE L’ALIMENTATION SECTION DOIT ÊTRE TERMINÉ AVANT LA FIN POUR ÉVITER LA RECONSTRUCTION. LES BOUCHES DE CHAUFFAGE ET D’AÉRATION NE PEUVENT ÊTRE COUVERTES EN TOUTES CIRCONSTANCES. Suppression de la vitre avant / Installation AVERTISSEMENT AVANT QUE LA VITRE AVANT EST INSTALLÉE OU SUPPRIMÉE, DÉBRANCHEZ L’APPAREIL ET ATTENDEZ JUSQU’À...
- Page 41 Installation des braises de cristal et des bûches La vitre avant doit être enlevée et l’appareil doit être sur son emplacement avant que les braises de cristal ne soient installées. 1. Installation des braises de cristal Placez prudemment les braises de cristal dans le fond du bac sur le devant de l’appareil, tel qu’illustré. Appliquez une couche uniforme d’un côté...
-
Page 42: Instructions De Fonctionnement
Instructions de fonctionnement AVERTISSMENT Une fois que l’appareil a été branché dans une prise électrique reliée à la terre, il est prêt à fonctionner. REMARQUE : Assurez-vous que les disjoncteurs de la maison pour l’alimentation soient allumés. Dans le cas d’une panne de courant, l’appareil va perdre sa fonction de mémoire et rétablira le mode usine lorsque le courant est rétabli. - Page 43 Fonctionnement avec écran tactile 5.) Fonction de verrouillage du chauffage: Appuyez sur le bouton « » pendant 5 secondes pour verrouiller le chauffage et le réglage de la température. Le chauffage sera éteint, la fonction de chauffage désactivée et le chauffage ne pourra pas être rallumé...
- Page 44 Procédure d’installation de l’application Wi-Fi JR Home Téléchargement de l’application JR Home Smart Flame Connect Disponible sur les plateformes Android et iOS, l’application JR Home Smart Flame Conenct peut être utilisée pour contrôler les foyers avec la fonction Wi-Fi. Scannez le code QR ci-dessous pour HOME le lien de téléchargement.
- Page 45 Utilisation multifonctionnel avec la télécommande Tournez sur ON/OFF l’appareil : 1. S’assurer que le foyer est au statut «mis sous tension». (Se référer à «Interrupteur principal» à la page 42). 2. Appuyez sur le bouton “ ”pour allumer le foyer.L’affichage DEL est allumé. 3.
- Page 46 Utilisation multifonctionnel avec la télécommande 4. Options de la couleur du lit de braise: Appuyer plusieurs fois sur le bouton « » pour faire défiler les choix de couleur du lit de braise de rouge (E1), rose (E2), blanc(E3), bleu pâle(E4), bleu foncé(E5), vert (E6), vert foncé(E7), alternance automatique (EE), éteint (EO): Icône Réglage du lit de braise...
-
Page 47: Entretien
Télécommande : télécommande à 11 touches Article No. : EF-WM353 XIN,EF-WM350 XIN, EF-WM349 XIN, EF-WM348 XIN REMARQUE : Assurez-vous que vos piles « AA » (x2) sont entièrement chargées et installées correctement dans votre télécommande avant de l’utiliser. La télécommande doit rester dans un rayon de 5 mètres ou 17 pieds de l’appareil pour être batterie est épuisée. - Page 48 Schéma du câblage AVERTISSEMENT ÉTEIGNEZ L’APPAREIL COMPLÈTEMENT ET LAISSEZ REFROIDIR AVANT L’ENTRETIEN. SEUL UN TECHNICIEN QUALIFIÉ DOIT ENTRETENIR ET RÉPARER CET APPAREIL ÉLECTRIQUE. ÉLÉMENT DE FEU 2018/07/21 FR-4 SHENGYI LED4-M23 ER1 27 YR1 27 LUMIÉRE DE BRAISES 03.16.21 Page 48...
-
Page 49: Pièces De Rechange
DHSJ-LCR29-01-02 DHSJ-LCR29-01-02 Carte de circuit imprimé LED de Rétro-éclairage HWK42 HWK50 HWK50 HWK72 Kit de matériel CP42 CP42 CP42 CP42 Panneau de commande JR42 JR50 JR60 JR72 Faisceau de câbles TH42 TH42 TH42 TH42 Thermostat RMOTER RMOTER RMOTER RMOTER Récepteur de la télécommande... -
Page 50: Schéma Des Pièces De Rechange
Schéma des pièces de rechange AVERTISSEMENT ENTRAÎNER DES DOMMAGES OU DES BLESSURES. REMARQUE : Des soins doivent être pris lors du démontage et l’élimination de n’importe quel verre brisé ou composants endommagés. N’oubliez pas de passer l’aspirateur sur n’importe quel verre brisé de l’intérieur de l’appareil avant l’utilisation. -
Page 51: Dépannage
Dépannage AVERTISSEMENT Symptôme Problème Solution à tester Les LED sont brûlées ou Inspectez les LED et remplacez-les si défaillantes nécessaire allumé ou s’affaiblit La température ambiante Réinitialisez le réglage de la température de l’appareil est supérieure au réglage de l’appareil (s’elle est réglée à la température ambiante) L’appareil de chauffage est Inspectez l’ensemble brûleur et le chauffage et... -
Page 52: Garantie
IMPORTANT Garantie For questions, concerns or problems with our product please Si vous éprouvez si vous avez des questions ou des email our customer service department: préoccupations, prière de faire parvenir un courriel à notre service à la clientèle customercare@jrhome.com customercare@jrhome.com DATED PROOF OF PURCHASE REQUIRED FOR WARRANTY SERVICE UNE PREUVE D’ACHAT DATÉE EST REQUISE POUR SE PRÉVALOIR DE LA GARANTIE.
Need help?
Do you have a question about the JR42 and is the answer not in the manual?
Questions and answers