Table of Contents
Advertisement
Quick Links
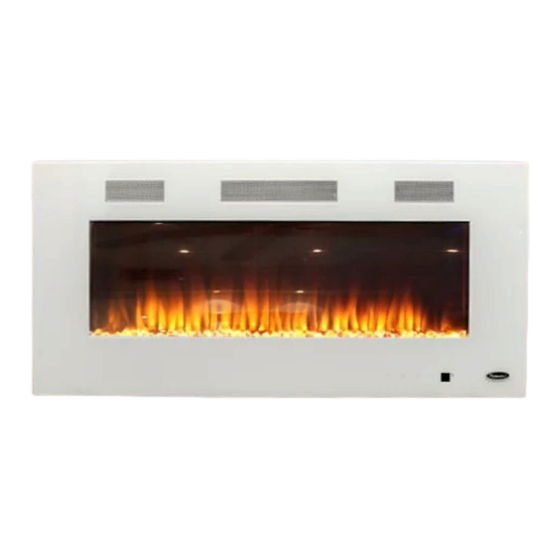
Wall Mount Fireplace
With Adjustable Mounting Bracket
*Patented Flame Technology & Front Venting Design
Model Number
JR42
JR42 WHITE
JR50
JR50 WHITE
JR60
JR72
READ & SAVE THESE INSTRUCTIONS
Carefully read and review before assembling, installing, operating, or maintaining
this product. Observe all safety instructions and information.
FAILURE TO FOLLOW WARNINGS & OPERATIONAL INSTRUCTIONS CONTAINED IN THIS
MANUAL CAN RESULT IN PROPERTY DAMAGE OR PERSONAL INJURY
**IMPORTANT NOTICE**
For customer service & warranty issues, please contact: customercare@jrhome.com
01.18.19
Item Number
EF-WM353 MO (42")
EF-WM373 MO (42")
EF-WM350 MO (50")
EF-WM391 MO (50")
EF-WM349 MO (60")
EF-WM348 (72")
1
YEAR
limited
WARRANTY
Owner's Manual
Page 1
Advertisement
Table of Contents

Related Manuals for Paramount Fitness EF-WM353 MO


Summary of Contents for Paramount Fitness EF-WM353 MO
- Page 1 With Adjustable Mounting Bracket limited WARRANTY Owner’s Manual *Patented Flame Technology & Front Venting Design Model Number Item Number JR42 EF-WM353 MO (42”) JR42 WHITE EF-WM373 MO (42”) JR50 EF-WM350 MO (50”) JR50 WHITE EF-WM391 MO (50”) JR60 EF-WM349 MO (60”) JR72 EF-WM348 (72”)
- Page 2 Introduction WARNING • THIS APPLIANCE IS HOT WHEN OPERATED AND CAN CAUSE SEVERE BURNS IF CONTACTED. • Do not operate appliance before reading and understanding operating instructions. Failure to operate appliance according to operating instructions could cause fire or injury. • Risk of burns. Power to the appliance should be turned off and the appliance allowed to cool before servicing. To disconnect power to the appliance, turn controls to off, then remove plug from outlet.
-
Page 3: Listing Approvals
National Electric Code ANSI/NFPA 70-latest edition in the United States or the Canadian Electric Code, CSA C22.1 in Canada. PRODUCT DIMENSIONS CARTON DIMENSIONS Item No. Width x Depth x Height EF-WM353 MO 42” 20” 4.2” 18.8” 36.10”... -
Page 4: General Instructions
General Instructions WARNING READ THESE INSTRUCTIONS COMPLETELY BEFORE BEGINNING INSTALLATION. FAILURE TO FOLLOW THEM COULD CAUSE AN APPLIANCE MALFUNCTION RESULTING IN SERIOUS INJURY AND/OR PROPERTY DAMAGE. ALL ELECTRIC APPLIANCES HAVE HOT AND ARCING OR SPARKING PARTS INSIDE. DO NOT USE IT IN AREAS WHERE GASOLINE, PAINT OR FLAMMABLE LIQUIDS ARE PRESENT. -
Page 5: Hardware Parts List
Hardware Parts List A- Fireplace B- Side Brackets C1 - Top/Bottom Brackets C2 - Top/Bottom Brackets EF-WM353 MO (42”) x1 EF-WM353 MO (42”) x4 EF-WM349 MO (60”) x6 EF-WM349 MO (60”) x6 EF-WM373 MO (42”) x1 EF-WM373 MO (42”) x4 EF-WM348 (72”) x8... -
Page 6: Locating Appliance
Locating Appliance WARNING DUE TO HIGH TEMPERATURES, THIS ELECTRIC APPLIANCE SHOULD BE LOCATED OUT OF TRAFFIC. KEEP COMBUSTIBLE MATERIALS SUCH AS FURNITURE, PILLOWS, BEDDING, PAPERS, CLOTHES AND CURTAINS AT LEAST 36” FROM THE FRONT OF THE APPLIANCE. NEVER LOCATE THIS ELECTRIC APPLIANCE WHERE IT MAY FALL INTO A BATHTUB OR OTHER WATER CONTAINER. -
Page 7: Installation
Installation WARNING RISK OF FIRE! THE POWER CORD MUST NOT BE PINCHED AGAINST A SHARP EDGE. SECURE CORD TO AVOID TRIPPING OR SNAGGING TO REDUCE THE RISK OF FIRE, ELECTRIC SHOCK OR PERSONAL INJURY. DO NOT RUN CORD UNDER CARPETING. DO NOT COVER CORD WITH THROW RUGS, RUNNERS OR THE LIKE. - Page 8 Adjustable Mounting Brackets and Installation Options NOTE: It is recommended that the walls for the appliance enclosure be finished (ie. drywall) to avoid exposed insulation or vapour barriers coming in contact with the appliance. This will ensure clearance to combustibles is maintained. FIG. 2 FIG. 3 FIG. 4 SIDE VIEW VIEW OPTION 1 OPTION 2 OPTION 3 Full Recess: No Recess:...
-
Page 9: Front View
Option 1: Recessing the Appliance Flush into the Wall Due to the many different finish materials used on walls, it is highly recommended that you consult your local builder before you install this appliance in the wall. Select a location that is not prone to moisture and is located at least 36” (914mm) away from combustible materials such as curtain drapes, furniture, bedding, paper etc. 1. - Page 10 B: Side brackets C1: Top bracket (Tall) Use for more security & surface area C2: Top bracket (Short) Used when no wall finish is applied. Will stay hidden behind glass. EF-WM353 MO, Builder’s bracket positions EF-WM373 MO, shown in grey for each model EF-WM350 MO, EF-WM391 MO...
- Page 11 Measurements are taken from the glass front Sides, back and top 0” Framing SIDE VIEW TOP VIEW Finishing Material (NON-LOAD BEARING) Recommended Framing Dimensions Item No. EF-WM353 MO 19.3” (49cm) 38.60” (98cm) 4.2” 18.8” 36.10” EF-WM373 MO 19.3” (49cm) 4.2” 18.8” 38.60” (98cm) 36.10”...
- Page 12 Option 2: Hanging the Appliance on the Wall Due to the many different materials used on different walls, it is highly BODY recommended that you consult your local builder before you install this appliance on the wall. FRONT GLASS 1. Select a location that is not prone to moisture and is located at least 36”...
-
Page 13: Hard Wiring Installation
Hard Wiring Installation WARNING TURN OFF THE APPLIANCE COMPLETELY AND LET COOL BEFORE SERVICING. ONLY A QUALIFIED SERVICE PERSON SHOULD SERVICE AND REPAIR THIS ELECTRIC APPLIANCE. HARD WIRING CONNECTION If it is necessary to hard wire this appliance, a qualified electrician must remove the cord connection, and wire the appliance directly to the house hold wiring. This appliance must be electrically connected and grounded in accordance with local codes, if hard wired. In the absence of local codes, use the current CSA C22.1 CANADIAN ELECTRICAL CODE in Canada or the current ANSI/NFPA 70 NATIONAL ELECTRICAL CODE in the United States. -
Page 14: Wall Thermostat Installation
Wall Thermostat Installation WARNING TURN OFF THE APPLIANCE COMPLETELY AND LET COOL BEFORE SERVICING. ONLY A QUALIFIED SERVICE PERSON SHOULD SERVICE AND REPAIR THIS ELECTRIC APPLIANCE. WALL THERMOSTAT INSIDE OUTSIDE BLACK BLACK THERMOSTAT BLACK BLACK NOTE: Wire the wall thermostat prior to installing the fireplace. WALL THERMOSTAT WIRING (24AWG) 1. - Page 15 Finishing Finishing WARNING POWER SUPPLY SERVICE MUST BE COMPLETED PRIOR TO FINISHING TO AVOID RECONSTRUCTION. HEAT VENTS AND AIR OPENINGS CANNOT BE COVERED IN ANY CIRCUMSTANCES. Front Glass Removal / Installation WARNING BEFORE THE FRONT GLASS IS INSTALLED OR REMOVED, UNPLUG THE APPLIANCE AND WAIT UNTIL APPLIANCE IS COOL TO THE TOUCH.
- Page 16 Crystal Embers Installation The glass front must be removed and the appliance must be secured in its location before the crystal embers are installed. 1. Carefully place crystal embers into the bottom media tray on the front of the appliance as illustrated. Apply an even layer from side to side.
-
Page 17: Main Power Switch
Operating Instructions WARNING WHILE THE APPLIANCE IS OPERATING DO NOT REMOVE THE GLASS PANEL. THIS WILL CAUSE THE REMOTE CONTROL AND TOUCH PANEL TO DISFUNCTION. Once the appliance has been plugged into a grounded electrical outlet, it is ready to operate. NOTE: Ensure the house circuit breakers for the power supply are turned on. - Page 18 Multi-functional Operating with Remote Control Turning ON/OFF the appliance: 1. Ensure steps 1-3 in the “Main Power Switch” procedure are first followed. 2. Press the “ ” remote button to turn on both flame and ember bed LEDs. 3. Press the “ ” button again to turn off both flame and ember bed LEDS. 4. Verify the lights are shut off. 5. Turn off the main power switch. 6. Unplug the power cord. Note: The LEDs are at the brightest when the heating element is shut off. The power swtich on the appliance must be turned on for the remote control to operate.
-
Page 19: Remote Control Specifications
1. MCU Chips: SN8P2722 Chip 2. Software: LRC 12-02 3. Remote: 10 key remote 4. Item No.: EF-WM353 MO, EF-WM373 MO,EF-WM350 MO, EF-WM391 MO,EF-WM349 MO, EF-WM348 NOTE: Make sure your “AA” batteries (x2) are fully charged and installed correctly in your remote control before operating. -
Page 20: Wiring Diagram
Wiring Diagram WARNING TURN OFF THE APPLIANCE COMPLETELY AND LET COOL BEFORE SERVICING. ONLY A QUALIFIED SERVICE PERSON SHOULD SERVICE AND REPAIR THIS ELECTRIC APPLIANCE. FIRE ELEMENT C N2 C N1 EMBER SHENGYI LRC16 FR-4 2014/09/18 POWER G C E BUTTON CORD BACKLIGHT 1... -
Page 21: Replacement Parts
REQUIRED TO HONOUR THE CLAIM. When ordering replacement parts always give the following information: • Model and serial number of appliance • Installation date of appliance • Part number • Description of part • Finish FOR FURTHER INFORMATION, CONTACT YOUR AUTHORIZED DEALER. COMPONENTS REF. EF-WM353 MO EF-WM350 MO EF-WM349 MO EF-WM348 DESCRIPTION EF-WM391 MO EF-WM373 MO BFT42 BFT50 BFT60... -
Page 22: Replacement Parts Diagram
Replacement Parts Diagram WARNING FAILURE TO POSITION THE PARTS IN ACCORDANCE WITH THIS MANUAL OR FAILURE TO USE ONLY PARTS SPECIFICALLY APPROVED WITH THIS APPLIANCE MAY RESULT IN PROPERTY DAMAGE OR PERSONAL INJURY. NOTE: Care must be taken when removing and disposing of any broken glass or damaged components. Be sure to vacuum up any broken glass from inside the appliance before operation. -
Page 23: Troubleshooting
Troubleshooting WARNING TURN OFF THE APPLIANCE COMPLETELY AND LET COOL BEFORE SERVICING. ONLY A QUALIFIED SERVICE PERSON SHOULD SERVICE AND REPAIR THIS ELECTRIC APPLIANCE. Symptom Problem Test Solution Dim or no flame/ LED’s are burnt out or Inspect the LED’s and replace them if necessary Ember bed is not glowing or malfunctioning dimming... -
Page 24: Warranty
Warranty IMPORTANT For questions, concerns or problems with our product please Si vous éprouvez des dicultés, ou si vous avez des questions ou des email our customer service department: préoccupations, prière de faire parvenir un courriel à notre Service à la clientèle customercare@jrhome.com customercare@jrhome.com DATED PROOF OF PURCHASE REQUIRED FOR WARRANTY SERVICE...
Need help?
Do you have a question about the EF-WM353 MO and is the answer not in the manual?
Questions and answers