Advertisement
Item #W914-36F &
W914-48FT
Model # EF-WM407 &
EF-WM395
USE AND CARE GUIDE
ELECTRIC FIREPLACE INSTRUCTION MANUAL
Questions, problems, missing parts? Before returning to the store, please contact customer service at
customercare@jrhome.com or call 1-800-561-5550 7 a.m. - 4 p.m., PST, Monday – Friday
1-800-561-5550
WWW.PARAMOUNTATHOME.COM
THANK YOU
We appreciate the trust and confidence you have placed in Paramount through the purchase of this Outdoor Heater. We strive to continually create
quality products designed to enhance your home. Visit us online to see our full line of products available for your home improvement needs. Thank
you for choosing Paramount!
Advertisement
Table of Contents

Related Manuals for Paramount Fitness EF-WM407


Summary of Contents for Paramount Fitness EF-WM407
- Page 1 Item #W914-36F & W914-48FT Model # EF-WM407 & EF-WM395 USE AND CARE GUIDE ELECTRIC FIREPLACE INSTRUCTION MANUAL Questions, problems, missing parts? Before returning to the store, please contact customer service at customercare@jrhome.com or call 1-800-561-5550 7 a.m. - 4 p.m., PST, Monday – Friday 1-800-561-5550 WWW.PARAMOUNTATHOME.COM...
-
Page 2: Table Of Contents
Table of Contents Table of Contents . . . . . . . . . . . . . . . . . . . . . . . . . . . . . . . . . . . 2 Installation . -
Page 3: Pre-Installation
Pre-Installation-Package and Hardware Contents PLANNING INSTALLATION Before beginning assembly, be sure to empty contents of carton and make sure all parts are present. Place all parts on a soft, level surface for assembly. If any parts are missing, please contact Customer Service between 8 a.m. - 7 p.m., EST, Monday – Friday, 9 a.m. – 6 p.m., EST, Saturday. Estimated Assembly Time: Varies depending upon type . - Page 4 Installation- Recessed CLEARANCE: PLEASE ALLOW A MINIMUM OF 1/2” SPACE FROM THE REAR OF THE UNIT TO A WALL. Wall opening dimensions: NOTE: Before installing the fireplace, please confirm the opeing size of the wall. Model Unit Overall Cutout Dimensions(inches) Dimensions(inches) W914-36 W:35.98 H:17.72 D:6.22...
-
Page 5: Installation
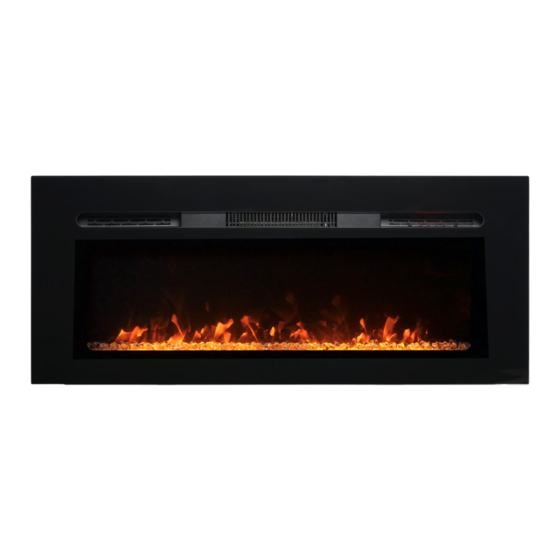
Installation- Recessed (continued) Remove the front cover Mounting Screws □ Remove the two mounting screws. □ Remove the front cover by pulling it upward (See Figure A) Figure A Securing the fireplace □ Secure the unit to the back wall using 4 screws (A) as shown in Figure B. - Page 6 Installation- Recessed (continued) Place Decorative Media □ Put the decorative log, stones & crystals into the heater. (Figure 1) □ Media may be combined or displayed individually. FIGURE C NOTE: This Step applies for all installations. ________ ________ ________ Replace Front Cover □...
-
Page 7: Wall Mount
Installation- Wall Mount Wall location preparation Anchor/Screw locations □ Select the wall location where you want to hang your fireplace. □ Draw a horizontal line using a level (Figure F) □ Using the mounting bracket as a guide, mark 4 drill holes for the 4 anchors (for drywall) or 4 screws (for wood studs). - Page 8 Installation- Wall Mount (continued) Attach the bracket □ Secure the mounting bracket to the wall anchors using the 4 anchor screws and 4 washers as shown in Figure H A X 4 ________ D X 4 ________ Figure H Mounting the fireplace □...
- Page 9 Installation- Wall Mount (continued) Secure mounting bracket □ Secure the mounting bracket to the heater using 2 mounting screws. See Figure J. ________ NOTE: Place decorative media and relacing the front cover to complete the Wall Mount Installation. See “Installaltion- Recessed”...
-
Page 10: Operation
Operation Pre-Operation Operation By Remote Control CAUTION: Do not attempt to operate this appliance until you have read and understand all Safety Information in this manual □ and all assembly is complete and leak tests have been performed. Press this button to turn ON the fireplace and the fan will After reading all the instructions, make sure that all the fireplace continue to work for 60 seconds... -
Page 11: Maintenance, Care & Cleaning
Operation - (continued) Operation with The DEMO Switch Press the I /O switch to turn on/turn off the power for heating system.When the switch is turned off, you still can control the flame and background light, but the power for heating system. -
Page 12: Troubleshooting
Troubleshooting PROBLEM POSSIBLE CAUSE CORRECTIVE ACTION Fireplace doesn’t work. Fireplace inner components are overheating or the Reset switch by turning master switch off and home circuit breaker has tripped. waiting for 5mins, then turning it back on. Flame is not moving. Wiring may be loose or the flame motor may be Call customer service for instructions. -
Page 13: Warranty
IMPORTANT Warranty For questions, concerns or problems with our product please Si vous éprouvez si vous avez des questions ou des email our customer service department: préoccupations, prière de faire parvenir un courriel à notre service à la clientèle customercare@jrhome.com customercare@jrhome.com DATED PROOF OF PURCHASE REQUIRED FOR WARRANTY SERVICE UNE PREUVE D’ACHAT DATÉE EST REQUISE POUR SE PRÉVALOIR DE LA GARANTIE. - Page 14 Questions, problems, missing parts? Before returning to the store, please contact customer service at customercare@jrhome.com or call 1-800-561-5550 7 a.m. - 4 p.m., PST, Monday – Friday JRHOME.COM Retain this manual for future use.
Need help?
Do you have a question about the EF-WM407 and is the answer not in the manual?
Questions and answers
Where is the demo switch located