Table of Contents
Advertisement
Advertisement
Table of Contents
Troubleshooting

Subscribe to Our Youtube Channel
Related Manuals for Bomag BPR 50


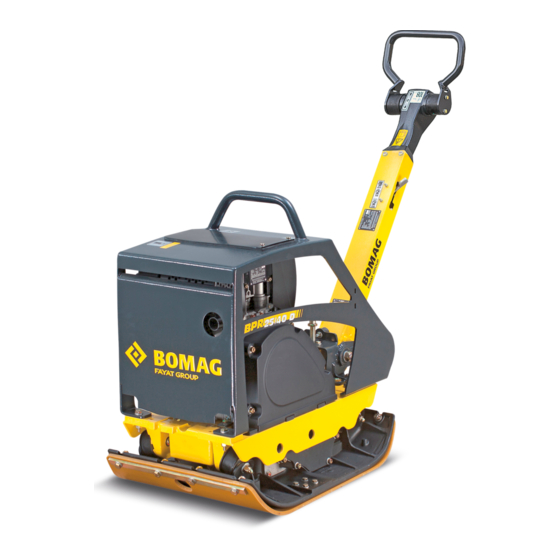
Summary of Contents for Bomag BPR 50
- Page 1 Operating Instruction Maintenance Instruction Original Operating Instructions BPR 50/55 D / BPR 60/65 D S/N 101 692 82 1001> / S/N 101 692 83 1001> / S/N 101 692 91 1001> / S/N 101 692 92 1001> Reversible Vibrating Plate www.discount-equipment.com...
- Page 2 Lull, Skytrak, Tsurumi, Husquvarna Target, Stow, Wacker, Sakai, Mi-T-M, Sullair, Basic, Dynapac, MBW, Weber, Bartell, Bennar Newman, Haulotte, Ditch Runner, Menegotti, Morrison, Contec, Buddy, Crown, Edco, Wyco, Bomag, Laymor, EZ Trench, Bil-Jax, F.S. Curtis, Gehl Pavers, Heli, Honda, ICS/PowerGrit, IHI, Partner, Imer, Clipper, MMD, Koshin, Rice, CH&E, General Equipment ,Amida, Coleman, NAC, Gradall, Square Shooter, Kent,...
-
Page 3: Table Of Contents
Table of contents Table of contents Foreword..............................5 Technical data............................9 2.1 Technical data BPR 50/55 D....................... 10 2.1.1 Noise and vibration data......................12 2.2 Technical data BPR 60/65 D....................... 13 2.2.1 Noise and vibration data......................15 Safety regulations..........................17 Display and control elements...................... - Page 4 Trouble shooting..........................79 7.1 General notes..........................80 7.2 Starting with jump wires......................81 7.3 Fuses............................82 7.4 Engine problems......................... 83 7.5 Trouble shooting Economizer....................85 Disposal............................... 87 8.1 Final shut-down of machine....................... 88 BPR 50/55 D / BPR 60/65 D...
-
Page 5: Foreword
Foreword Foreword BPR 50/55 D / BPR 60/65 D... - Page 6 BOMAG will not assume liability for the function of the machine if it is handled in a way not complying with the usual modes of use, if it is used for purposes other than those mentioned in these instructions.
- Page 7 Apart from that, the spare parts catalogue is available from your BOMAG dealer against the serial number of your machine. Your BOMAG dealer will also supply you with information about the correct use of our machines in soil and asphalt construction.
- Page 8 Foreword Fig. 2 Fig. 3 BPR 50/55 D / BPR 60/65 D...
-
Page 9: Technical Data
Technical data Technical data BPR 50/55 D / BPR 60/65 D... -
Page 10: Technical Data Bpr 50/55 D
Technical data – Technical data BPR 50/55 D 2.1 Technical data BPR 50/55 D Dimensions Fig. 4 1350 1700 (31.1) (38.6) (53.2) (66.9) (35.4) (17.7) (21.7) (29.5) Dimensions in millimetre (Dimensions in inch) Weights Operating weight (CECE) (W) (849) (lbs) - Page 11 Technical data – Technical data BPR 50/55 D Weights "STONEGUARD" (special base plate for paving stones) (optional + 27 equipment) (+ 60) (lbs) ECONOMIZER (optional equipment) (+ 11) (lbs) Travel characteristics Max. working speed m/min (92) (ft/min) Max. gradability (depending on soil)
-
Page 12: Noise And Vibration Data
Technical data – Technical data BPR 50/55 D 2.1.1 Noise and vibration data The following noise and vibration data were determined in accord- ance with the following guidelines under equipment specific condi- tions and by using harmonized standards: EC Machine Directive edition 2006/42/EC... -
Page 13: Technical Data Bpr 60/65 D
(35.4) (17.7) (25.6) (29.5) Dimensions in millimetre (Dimensions in inch) Weights Operating weight (CECE) (W) (959) (lbs) Operating weight (CECE) (W (1003) (lbs) Operating weight (CECE) (W (1027) (lbs) Basic weight (992) (lbs) BPR 50/55 D / BPR 60/65 D... - Page 14 Number of cylinders Rated power ISO 3046 (9.0) (hp) Rated speed 3000 Drive system mechanical Exciter system Frequency (3960) (vpm) Centrifugal force (13489) (lbf) Amplitude 1.96 (0,077) (in) Filling capacities Fuel (diesel) (1.3) (gal us) BPR 50/55 D / BPR 60/65 D...
-
Page 15: Noise And Vibration Data
Vector total of the weighted effective acceleration in three orthog- onal directions: Weighted total vibration value = 8.7 m/s on crushed rock determined acc. to ISO 5349 and EN 500. Observe the daily vibration load (Industrial safety acc. to 2002/44/ EEC). BPR 50/55 D / BPR 60/65 D... - Page 16 Technical data – Technical data BPR 60/65 D BPR 50/55 D / BPR 60/65 D...
-
Page 17: Safety Regulations
Safety regulations Safety regulations BPR 50/55 D / BPR 60/65 D... - Page 18 Safety regulations General This BOMAG machine has been built in compliance with the latest technical standard and complies with the applicable regulations and technical rules. However, dangers for persons and property may arise from this machine, if: it is used for purposes other than the ones it is intended for,...
- Page 19 Machines which are not safe to operate must be immediately taken safety installations out of service and shall not be used, until these deficiencies have been properly rectified. Safety installations and switches must neither be removed nor must they be made ineffective. BPR 50/55 D / BPR 60/65 D...
- Page 20 Lash the machine down, so that it is secured against rolling, sliding and turning over. Starting the machine Before starting Become acquainted with the equipment, the control elements, the working principle of the machine and the working area. BPR 50/55 D / BPR 60/65 D...
- Page 21 Mark machines, which could be in the way, with a clearly visible sign. Refuelling Do not inhale any fuel fumes. Refuel only with the engine shut down. Do not refuel in closed rooms. No open fire, do not smoke. BPR 50/55 D / BPR 60/65 D...
- Page 22 Switch off the charging current before removing the charging clamps. Ensure sufficient ventilation, especially if the battery is to be charged in a closed room. Dispose of old batteries according to regulations. Working on the fuel system BPR 50/55 D / BPR 60/65 D...
- Page 23 Before starting welding work on the machine disconnect the battery and cover the fuel tank with insulating material. Safety stickers on the machine Keep safety stickers in good condition and legible and follow their meaning. Replace damaged and illegible safety stickers. BPR 50/55 D / BPR 60/65 D...
- Page 24 Fig. 6: Stickers and decals Information sticker - Lashing point Information sticker - Lifting point Information sticker - Throttle lever Information sticker - Travel lever Information sticker - Guaranteed sound capacity level Brief operating instructions Maintenance sticker BPR 50/55 D / BPR 60/65 D...
-
Page 25: Display And Control Elements
Display and control elements Display and control elements BPR 50/55 D / BPR 60/65 D... -
Page 26: General Notes
Here all functions are described in detail. The section "Operation" contains only brief descriptions of the indi- vidual control steps. BPR 50/55 D / BPR 60/65 D... -
Page 27: Description Of Indicators And Control Elements
5 - Throttle lever Fig. 8 Recoil starter Fig. 9 Start switch Position "0" Ignition off, warning buzzer off Position "I" Ignition on, warning buzzer on Position "II" Engine starts, warning buzzer off Fig. 10 BPR 50/55 D / BPR 60/65 D... - Page 28 Display and control elements – Description of indicators and control elements Operating hour meter Fig. 11 Optional equipment Economizer display Fig. 12 BPR 50/55 D / BPR 60/65 D...
-
Page 29: Function Of The Economizer
Actual sensor, housing, cable and plug-in connector come as a unit, which cannot be repaired on its own. The unit is mounted to the base plate of the machine. BPR 50/55 D / BPR 60/65 D... - Page 30 Vibrating plates of the same type show identical meas- uring values when used on the same soil. The measuring values achieved with different vibratory plates with Economizer from BOMAG can be made comparable by calibration to a reference value. BPR 50/55 D / BPR 60/65 D...
-
Page 31: Operation
Operation Operation BPR 50/55 D / BPR 60/65 D... -
Page 32: General
If you are not yet acquainted with the controls and indicating elements on this machine you should thoroughly read chapter "Indicators and control elements" before starting work. All indicators and control elements are described in detail in this chapter. BPR 50/55 D / BPR 60/65 D... -
Page 33: Tests Before Taking Into Operation
For a description of the following tasks refer to the chapter "Daily maintenance". engine oil level, top up if necessary. fuel level, top up if necessary. BPR 50/55 D / BPR 60/65 D... -
Page 34: Folding Down The Steering Rod
Pull the locking pawl lever (2) Ä Fig. 15 and lower the steering rod, so that it can swing freely. Adjust the steering rod with the height adjustment (1) to the height of your body. Fig. 15 BPR 50/55 D / BPR 60/65 D... -
Page 35: Starting The Engine Electrically
3 times 10 seconds. After this time allow the starter to cool down to ambient temperature. If the engine has not started after these attempts, determine the cause. Fig. 17 BPR 50/55 D / BPR 60/65 D... - Page 36 Operation of the vibratory plate can be started as soon as the engine responds to short throttle commands. Fig. 19 NOTICE! When the engine is running leave the ignition key in position "I". BPR 50/55 D / BPR 60/65 D...
-
Page 37: Starting With Recoil Starter
Always keep an eye on a running machine. WARNING! Loss of hearing! Wear your personal noise protection means (ear defenders) before starting operation. Set the throttle lever Ä Fig. 20 to position "MAX". Fig. 20 BPR 50/55 D / BPR 60/65 D... - Page 38 Pull the starter handle Ä Fig. 23 quickly and powerful as far out as possible. NOTICE! Do not let the starter handle hit back, but guide it back. Fig. 23 If the engine does not start during the first attempt, repeat the starting process. BPR 50/55 D / BPR 60/65 D...
- Page 39 Run the engine warm for approx. 1 to 2 minutes in idle speed. Operation of the vibratory plate can be started as soon as the engine responds to short throttle commands. Fig. 24 BPR 50/55 D / BPR 60/65 D...
-
Page 40: Operation Of Economizer
The displayed value rises when changing the travel direction: The effective force applied to the soil by the vibratory plate rises when reversing the travel direction. Correct measuring values can only be achieved in forward and reverse travel with maximum speed. BPR 50/55 D / BPR 60/65 D... - Page 41 Influence of extension bars on the measuring value: Assem- bling or removing extension bars changes the contact area and the vibration amplitude. A generally valid statement about the influence on the measuring result cannot be made. BPR 50/55 D / BPR 60/65 D...
-
Page 42: Work/Operation
The machines drives with a speed which corresponds with the travel lever position. If the machine moves forward with considerably reduced speed, pull the travel lever completely back and shift it forward again. Fig. 28 BPR 50/55 D / BPR 60/65 D... - Page 43 Keep shifting the throttle lever Ä Fig. 31 between "MIN" and "MAX" positions. At the same time pull the vibratory plate by the steering rod to the right and left, until it comes free. Fig. 31 BPR 50/55 D / BPR 60/65 D...
-
Page 44: Shutting Down The Engine
Set the throttle lever Ä Fig. 33 to position "STOP". The warning buzzer sounds. Fig. 33 Turn the ignition key Ä Fig. 34 to position "0" and pull it out. The warning buzzer no longer sounds. Fig. 34 BPR 50/55 D / BPR 60/65 D... -
Page 45: Loading/Transport
Lash the machine down, so that it is secured against rolling, sliding and turning over. Adjust the steering rod upright and engage the locking lever Ä Fig. 35. Fig. 35 BPR 50/55 D / BPR 60/65 D... - Page 46 Ä Fig. 37 on a transport vehicle. Lash the vibratory plate down to the transport vehicle, so that it is secured against rolling, sliding and turning over. Fasten the lashing tackle at the marked lashing points. Fig. 37 BPR 50/55 D / BPR 60/65 D...
-
Page 47: Maintenance
Maintenance Maintenance BPR 50/55 D / BPR 60/65 D... -
Page 48: General Notes On Maintenance
The lifetime of the diesel engine depends to a great extent on the cleanliness of the fuel. Keep fuel free of contaminants and water, since this will damage the injection elements of the engine. Drums with inside zinc lining are not suitable to store fuel. BPR 50/55 D / BPR 60/65 D... - Page 49 Frequent causes of faults Operating errors Incorrect, inadequate maintenance If you cannot locate the cause of a fault or rectify it yourself by fol- lowing the trouble shooting chart, you should contact our customer service department. BPR 50/55 D / BPR 60/65 D...
-
Page 50: Fuels And Lubricants
(SAE-class). Optimal operating conditions can be achieved by using the oil vis- cosity chart as a reference. Fig. 39 6.2.1.4 Oil change intervals Annually or every 250 operating hours. BPR 50/55 D / BPR 60/65 D... -
Page 51: Fuel
Zinc and lead coatings in refuelling systems and fuel lines are not permitted. Copper containing materials (copper lines, brass items) should be avoided, because they can cause catalytic reactions in the fuel with subsequent depositing in the injection system. BPR 50/55 D / BPR 60/65 D... -
Page 52: Mineral Oil Based Hydraulic Oil
For topping up or for oil changes use only high-quality hydraulic oil, type HVLP according to DIN 51524, part 3, or hydraulic oils type HV according to ISO 6743/3. The viscosity index (VI) should be at least 150 (observe informa- tion of manufacturer). BPR 50/55 D / BPR 60/65 D... -
Page 53: Table Of Fuels And Lubricants
Vibrator shaft housing as engine oil 0.4 l (0.11 gal us) Steering rod Hydraulic oil (ISO), HV 32 0.4 l Specification: Ä Chapter 6.2.3 ‘Mineral oil based (0.11 gal us) hydraulic oil’ on page 52 BPR 50/55 D / BPR 60/65 D... -
Page 54: Running-In Instructions
Check the V-belt Ä Chapter 6.8.2 ‘Servicing the V-belt’ on page 63. Ä Chapter 6.8.1 Check the oil level in the vibrator housing ‘Checking the oil level in the exciter housing’ on page 63. BPR 50/55 D / BPR 60/65 D... -
Page 55: Maintenance Table
6.9.3 Replacing the starter rope 6.9.4 Changing the oil in the exciter housing 6.9.5 Check the hydraulic oil level 6.9.6 Check the rubber buffers As required 6.10.1 Tightening the screws 6.10.2 Engine conservation BPR 50/55 D / BPR 60/65 D... -
Page 56: Daily Maintenance
– +Use only oil of the permitted specifica- tion Ä Chapter 6.2.1 ‘Engine oil’ on page 50. Protective equipment: Protective gloves Park the machine on level and firm ground. Shut down the engine. BPR 50/55 D / BPR 60/65 D... -
Page 57: Check The Fuel Level
Clean the area around the filler cap Ä Fig. 42, unscrew the filler cap. NOTICE! Contaminated fuel can cause malfunction or even damage of the engine. For quality and quantity of fuel refer to the "table of fuels and lubricants". Fig. 42 BPR 50/55 D / BPR 60/65 D... -
Page 58: Check, Clean The Water Separator
Since water is heavier than diesel fuel, water will run out before the fuel. This can be noticed by a clearly visible parting line. Fig. 43 When only fuel comes running out, tighten the drain plug again. BPR 50/55 D / BPR 60/65 D... -
Page 59: Monthly Maintenance
12.25 V or less is reached. Do not perform quick charging. The open-circuit voltage of the battery occurs approx. 10 hours after the last charging process or one hour after the last discharge. BPR 50/55 D / BPR 60/65 D... -
Page 60: Air Filter Maintenance
Install battery (3) and the vibration damping mat (2). Fasten the bracket (1) again. 6.7.2 Air filter maintenance Contamination of the air filter depends mainly on the proportion of dust in the intake air, if necessary clean several times a day. BPR 50/55 D / BPR 60/65 D... - Page 61 (73 psi)) from inside to outside by moving the gun up and down inside the element, until it if free of dust. Fig. 46 Examine the air filter with a torch for cracks and holes. Replace the air filter if it is damaged. BPR 50/55 D / BPR 60/65 D...
-
Page 62: Cleaning The Cooling Fins And The Cooling Air Intake Openings
(safety gloves, protective working clothes, goggles). Fig. 48 Blow cooling fins and cooling air intake openings out with compressed air. In case of damp or oily contamination you should consult our customer service department. BPR 50/55 D / BPR 60/65 D... -
Page 63: Half-Annual Maintenance
Clean the oil level inspection plug and screw in with sealing agent (e.g. BOMAG 009 700 16). Screw the bleeding screw back in. 6.8.2 Servicing the V-belt Checking the V-belt Remove the V-belt guard Ä Fig. 50. Fig. 50 BPR 50/55 D / BPR 60/65 D... -
Page 64: Checking, Adjusting The Valve Clearance
– After a short test run check the engine for leaks. Preparations Protective equipment: Working clothes Protective gloves Park the machine in secured condition. Allow the engine to cool down to ambient temperature. BPR 50/55 D / BPR 60/65 D... - Page 65 Check the valve clearance on the intake valve (IN) with a feeler gauges (1), adjust if necessary. Crank the engine further, until the intake valve is fully open. Check the valve clearance on the exhaust valve, adjust if necessary. Fig. 55 BPR 50/55 D / BPR 60/65 D...
-
Page 66: Checking The Screw Joints On The Diesel Engine
After a short test run check the valve cover for leaks. Fig. 58 6.8.4 Checking the screw joints on the diesel engine Park the machine in secured condition. Allow the engine to cool down. BPR 50/55 D / BPR 60/65 D... - Page 67 Do not retighten the cylinder head fastening screws. – Do not retighten or adjust the setscrews on throttle control and injection system. Check all screw joints on the diesel engine for condition and tight fit, retighten if necessary. BPR 50/55 D / BPR 60/65 D...
-
Page 68: Annual Maintenance
Unscrew the oil drain plug (2) and catch any oil running out. Fig. 59 Clean the drain plug and screw it back in. Assemble the drain hose with the hose clamp. BPR 50/55 D / BPR 60/65 D... - Page 69 Fill in fresh engine oil up to the bottom edge of the filling opening. After a short test run check the oil level on the dipstick, if nec- essary top up to the top dipstick mark. Fig. 63 BPR 50/55 D / BPR 60/65 D...
-
Page 70: Replace The Fuel Filter
ENVIRONMENT! Catch running out fuel, do not let it seep into the ground. Dispose of the used fuel filter environmentally. Open the quick lock on the tank. Fig. 64 BPR 50/55 D / BPR 60/65 D... -
Page 71: Replacing The Starter Rope
The fuel system is self bleeding. 6.9.3 Replacing the starter rope Unscrew the fastening screws (1) Ä Fig. 65 and pull the recoil starter (2) from the engine housing. Fig. 65 BPR 50/55 D / BPR 60/65 D... - Page 72 Ä Fig. 69. The rope is thereby wound on the coil. Test function and light movement of the recoil starter by pulling the starter handle. Mount the recoil starter to the engine housing. Fig. 69 BPR 50/55 D / BPR 60/65 D...
-
Page 73: Changing The Oil In The Exciter Housing
Fig. 70 Unscrew the filling/drain plug and catch any oil running out. Tilt the machine to the opposite side and secure it properly. Fill in new oil. Fig. 71 BPR 50/55 D / BPR 60/65 D... -
Page 74: Check The Hydraulic Oil Level
Adjust the steering rod with height adjustment Ä Fig. 73 so that the area with the level inspection plugs is horizontal. Unscrew the plug. Fig. 73 Hold the travel lever in forward position Ä Fig. 74. Fig. 74 BPR 50/55 D / BPR 60/65 D... - Page 75 Shift the travel lever forward against the stop Ä Fig. 76. Fig. 76 Lay a cloth down before loosening the venting screw. Fig. 77 Slacken the bleeding screw Ä Fig. 77. Wait until all air has escaped, then tighten the bleeding screw. BPR 50/55 D / BPR 60/65 D...
-
Page 76: Check The Rubber Buffers
Screw in and tighten the plug Ä Fig. 79. Fig. 79 6.9.6 Check the rubber buffers Check all rubber buffers Ä Fig. 80 for tight fit, cracks and damage and replace immediately if damaged. Fig. 80 BPR 50/55 D / BPR 60/65 D... -
Page 77: As Required
Take the V-belt off and spray the grooves in the V-belt pul- leys with anti-corrosion oil. Remove the anti-corrosion oil before taking the machine back into operation. Close the air intake opening on the air filter and the exhaust tube. BPR 50/55 D / BPR 60/65 D... - Page 78 Anti-corrosion oils are those that comply with the MIL- L-21260 or TL 9150-037/2 resp. Nato Code C 640/642. Mark a machine with a conserved engine by attaching a clearly visible warning tag. BPR 50/55 D / BPR 60/65 D...
-
Page 79: Trouble Shooting
Trouble shooting Trouble shooting BPR 50/55 D / BPR 60/65 D... -
Page 80: General Notes
If you cannot locate the cause of a fault or rectify it yourself by fol- lowing the trouble shooting chart, you should contact our customer service department. BPR 50/55 D / BPR 60/65 D... -
Page 81: Starting With Jump Wires
Fig. 83 This work sequence is necessary to avoid short circuit caused by contact between positive and negative cables. Close the hood again and ´fasten it with bolts. BPR 50/55 D / BPR 60/65 D... -
Page 82: Fuses
NOTICE! Always cover the fuse with the protective cover. Fuse (25 A) Ä Fig. 84. NOTICE! Machines with Economizer are protected by an addi- tional fuse (5 A). Optional equipment Fig. 84 BPR 50/55 D / BPR 60/65 D... -
Page 83: Engine Problems
Incorrect valve clearance Have examined by a specialist Injection nozzle defective Have examined by a specialist Too much oil in crankcase Drain the oil down to the MAX-mark on the dipstick BPR 50/55 D / BPR 60/65 D... - Page 84 Air in the fuel system Check the fuel system for air Check the bleeding valve Engine runs with high speed, but Centrifugal clutch defective Change the centrifugal clutch no vibration V-belt Check tension, replace if neces- sary BPR 50/55 D / BPR 60/65 D...
-
Page 85: Trouble Shooting Economizer
Engine not running Plug-in connector defective Sensor/cable defective Status-LED flashing Frequency detected, but outside Engine speed too low permissible range Vibration frequency too low Sensor defective atypical soil V-belt slipping incorrect V-belt installed BPR 50/55 D / BPR 60/65 D... - Page 86 Trouble shooting – Trouble shooting Economizer BPR 50/55 D / BPR 60/65 D...
-
Page 87: Disposal
Disposal Disposal BPR 50/55 D / BPR 60/65 D... -
Page 88: Final Shut-Down Of Machine
Empty the fuel tank. Drain lubrication oil from engine and exciter housing. Drain off hydraulic oil. WARNING! Danger of explosion! Parts that previously contained combustible fluids must not be cut with a cutting torch. BPR 50/55 D / BPR 60/65 D... - Page 89 Lull, Skytrak, Tsurumi, Husquvarna Target, Stow, Wacker, Sakai, Mi-T-M, Sullair, Basic, Dynapac, MBW, Weber, Bartell, Bennar Newman, Haulotte, Ditch Runner, Menegotti, Morrison, Contec, Buddy, Crown, Edco, Wyco, Bomag, Laymor, EZ Trench, Bil-Jax, F.S. Curtis, Gehl Pavers, Heli, Honda, ICS/PowerGrit, IHI, Partner, Imer, Clipper, MMD, Koshin, Rice, CH&E, General Equipment ,Amida, Coleman, NAC, Gradall, Square Shooter, Kent,...
Need help?
Do you have a question about the BPR 50 and is the answer not in the manual?
Questions and answers