Table of Contents
Advertisement
Available languages
Available languages
Advertisement
Table of Contents

Related Manuals for Rational TC 61/101 E


Summary of Contents for Rational TC 61/101 E
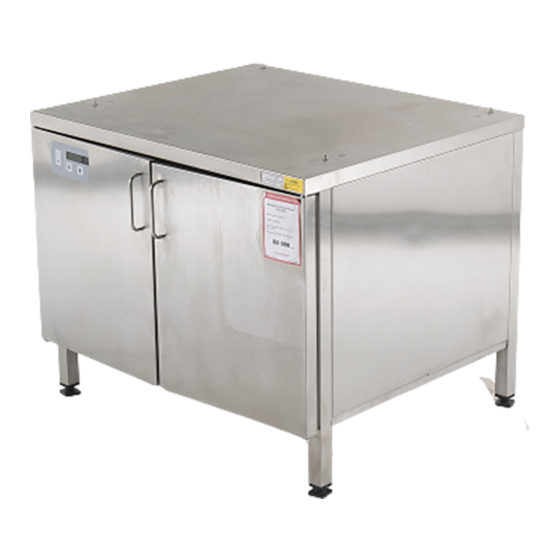
- Page 1 Thermo cabinet TC 61/101 E TC 62/102 E Bedienungs- und Installations-Handbuch Operator- and Installation-Manual Operator- and Installation-Manual (plate warmer) Istruzioni per l’installazione e per l’uso generali Руководство по эксплуатации и подключению...
-
Page 2: Schaltplan/Wiring Diagram
Schaltplan/wiring diagram 100-127V 30°C PT500 200-240V 30°C PT500 30°C PT500 - 2 -... - Page 3 Masszeichnung/schematic drawing 330-2 808.4 128.7 845.8 711 ± 0.5 6x1/1GN/10x1/1GN Legs/Füße 420.4 128.7 1030 1067.8 893 ± 0.5 6x2/1GN/10x2/1GN 420.4 Legs/Füße - 3 -...
- Page 4 Masszeichnung/schematic drawing 128.7 808.4 845.8 711± 0.5 6x1/1GN/10x1/1GN Casters/Rollen 128.7 1030 1067.8 893±0.5 6x2/1GN/10x2/1GN Casters/Rollen 420.4 - 4 -...
- Page 5 Masszeichnung/schematic drawing 128.7 808.4 ) 90 Ø 898.4 845.8 711 ± 0.5 6x1/1GN/10x1/1GN Ship/Schiff 420.4 128.7 1030 (Ø ) 90 1067.8 893 ± 0.5 6x2/1GN/10x2/1GN 420.4 Ship/Schiff - 5 -...
-
Page 6: Allgemeine Hinweise / Zu Ihrer Sicherheit
Allgemeine Hinweise / Zu Ihrer Sicherheit • Eine regelmäßige Sicherheitsunterweisung des Haustechnik Bedienpersonals durch den Betreiber ist drin- • Inspektionsarbeiten-, Wartungs- und gend erforderlich. Reparaturarbeiten dürfen nur von aus gebildeten • Um Unfallgefahren oder Beschädigungen am Fachkräften durchgeführt werden. Gerät zu vermeiden, empfehlen wir regelmäßige •... -
Page 7: Installation
Installation Installation Thermo Cabinet auf Füßen: Bild 1 A 6x1/1 /10x1/1 GN: 745,5mm (29 3/8") 6x2/1 10x2/1 GN: 965,5mm (38") Thermo Cabinet am Installationsort mit den höhenverstellbaren Füßen waagerecht ausrichten Wird ein Gasgerät auf dem Thermo Cabinet aufge- stellt, muss das Untergestell mit dem Befestigungs- set ET-Nr.: 8700.0317 (nicht im Lieferumfang der 64,5mm 64,5mm... -
Page 8: Elektrischer Anschluss
Elektrischer Anschluss Elektrischer Anschluss • Geräteanschluß nur entsprechend der Installa- tionshinweise und den Angaben auf dem Typenschild durchführen • Die Geräte müssen an ein genormtes Versor- gungsnetz gemäß den gültigen Vorschriften angeschlossen sein • VDE Vorschriften bzw. Vorschriften der örtlichen Energie-Versorgungs-Unternehmen beachten! •... -
Page 9: Fehlerbehebung
Serviceteile / Fehlerbehebung Serviceteile: Fehlerbehebung - Gerät zeigt E1: Nummer: Beschreibung Wird angezeigt, wenn die Temperatur kleiner 60.30.139 Einsteckfuß für Untergestell -10°C ist. - Gerät zeigt E2: TC für 6X1/1GN und 10X1/1GN Geräte Wird angezeigt, wenn die Temperatur größer 2x 60.30.255 Türdichtung 114°C ist. - Page 10 Reinigung Reinigen Achtung: • Stellen Sie sicher, dass vor Beginn der Reinigungs arbeiten das Gerät von der Energieversorgung getrennt und ausreichend abgekühlt ist. • Gerät nicht mit Hochdruckreiniger säubern. • Gerät nicht mit Säuren behandeln oder Säure dämpfen aussetzen, da sonst die Passivschicht des Chromnickelstahls verletzt wird und die Geräte sich eventuell verfärben können.
-
Page 11: Allgemeine Bedienungshinweise
Allgemeine Bedienungshinweise Temperatur-Anzeige Ein-/Ausschalter Tasten für Temperatureinstellung Bedienung: Umschaltung von Temperaturanzeige °C / °F Temperatur-Einstellung Wenn Sie beide Durch Drücken auf die Pfeil-Taste nach "Pfeil-Tasten" oben oder gleichzeitig länger als 10 Sekunden gedrückt hal- nach unten, ten, wechselt die Temperaturanzeige automatisch von °C auf °F oder umgekehrt. -
Page 12: Maintenance
General instruction / For your safety • It is vital that operatives be given regular safety Maintenance instruction. • Inspection, maintenance and repair work must • We recommend that the operator gives your staff only be carried out by trained technicians. regular training to avoid the risk of accident or •... - Page 13 Installation Installation A 6x1/1 /10x1/1 GN: 745,5mm (29 3/8") Thermo Cabinet on legs: pic. 1 6x2/1 10x2/1 GN: 965,5mm (38") Put the thermo cabinet to the installation site and level it with the height adjustable legs If gas appliances are installed on the thermo cabinet, then the cabinet must be fixed to the 64,5mm 64,5mm...
-
Page 14: Electrical Connection
Electrical connection Electrical connection • Follow the installation instructions and the infor- mation on the rating plate when connecting the unit • The units must be connected to a standard supply line in conformity with your local regulations. • Comply with all local regulations and standards! •... -
Page 15: Troubleshooting
Service parts / trouble shooting Service parts: Trouble shooting Failure codes: Part number description E1: Will be indicated, if temperature inside cabinet 60.30.139 Leg for stand is below -10°C (14°F) TC for 6X1/1GN and 10X1/1GN units E2: Will be indicated, if temperature inside cabinet 2x 60.30.255 Door gasket is above 114°C (237°F) - Page 16 Cleaning Cleaning • Before starting the cleaning process, make sure, that the TC is disconnect from the power line and has cooled down. • Do not clean unit with high pressure cleaner. • Do not treat unit with acids or expose to acid fumes – this will damage the protective layer of stainless steel and units might discolour.
-
Page 17: Temperature Display
Operation instructions Temperature-display ON/OFF switch Arrow keys for temperature setting Operation: Changing temperature indication °C / °F Temperature setting Press and hold down both By pressing arrow key "arrow keys" up or simultaneously, longer than 10 seconds, until the indication changes from °C to °F or vice versa. down, the preselected cabinet temperature can be changed. - Page 18 Consigli generali per la vostra sicurezza Norme impiantistiche • Per evitare incidenti o danni all’apparecchio, il gestore deve sottoporre il personale a corsi di • Gli interventi di ispezione, manutenzione e ripa- formazione regolari. razione possono essere effettuati solo da perso- nale specializzato e adeguatamente addestrato.
-
Page 19: Installazione
Installazione Installazione Thermo Cabinet su piedini: Fig. 1 A 6x1/1 /10x1/1 GN: 745,5mm (29 3/8") 6x2/1 10x2/1 GN: 965,5mm (38") Disporre orizzontalmente il Thermo Cabinet sul luogo d’installazione usando i piedini regolabili Se sopra il Thermo Cabinet viene collocato un apparecchio a gas, il sottotelaio deve essere fissato al suolo con il kit di fissaggio ET-Nr.: 8700.0317 (non compreso nel complessivo di fornitura degli... -
Page 20: Collegamento Elettrico
Collegamento elettrico Collegamento elettrico • Effettuare il collegamento elettrico solo in con- formità delle istruzioni d’installazione e delle indicazioni della targhetta • Gli apparecchi devono essere collegati ad una rete d’alimentazione a norma, conformemente alle disposizioni vigenti • Attenersi alle disposizioni VDE o comunque a quelle delle aziende di distribuzione di energia locali! •... - Page 21 Ricambi / Eliminazione degli errori Ricambi Eliminazione degli errori Numero Descrizione - L’apparecchio visualizza E1: Viene visualizzato quando la temperatura è infe- 60.30.139 Piedino inseribile per sottotelaio riore a -10°C. - L’apparecchio visualizza E2: TC per apparecchi 6X1/1GN e 10X1/1GN Viene visualizzato quando la temperatura è...
- Page 22 Pulizia Pulizia Attenzione! • Prima di eseguire la pulizia assicurarsi che l’apparecchio sia stato staccato dall’alimentazione elettrica e che si sia sufficientemente raffreddato. • Non pulite l’apparecchio con un pulitore ad alta pressione. • Non trattate l’apparecchio con acidi e non esponetelo a vapori acidi per evitare che lo strato passivante dell’acciaio al nickel-cromo si danneggi e che l’apparecchio possa eventualmente scolorirsi.
- Page 23 Istruzioni per l’uso generali Indicatore della Interruttore di accen- temperatura sione/spegnimento Tasti per la regolazione della temperatura Funzionamento: Commutazione dell’indicazione della temperatura °C - °F Regolazione della temperatura Tenendo premuti contemporaneamente entrambi i Premendo sul tasto freccia verso l’alto o "tasti freccia"...
- Page 24 Общие указания / для Вашей безопасности Технические работы • Эксплуатировать аппарат разрешается только обученным пользователям. • Производить контроль, работы по техоб- служиванию и ремонту разрешается только • Владелец аппарата обязан регулярно прово- обученным профессионалам. дить инструктаж по технике безопасности для обслуживающего...
- Page 25 Установка и подключение аппарата Установка и подключение аппарата A 6x1/1 /10x1/1 GN: 745,5mm (29 3/8") Thermo Cabinet на ножках: илл. 1 6x2/1 10x2/1 GN: 965,5mm (38") Выровнять Thermo Cabinet с помощью регули- руемых по высоте ножек на месте установки Если на Thermo Cabinet устанавливается газо- вый...
-
Page 26: Подключение К Электросети
Подключение к электросети Подключение к электросети • Производить подключение аппарата допу- скается только в соответствии с указания- ми по установке и данными, приведёнными на заводской табличке • Аппараты следует подключать к стандарт- ной сети электроснабжения в соответствии с действующими правилами •... - Page 27 Сервисные детали / устранение неисправностей Сервисные детали: Устранение неисправностей - На аппарате индикация E1: Номер: Описание отображается, когда температура ниже -10°C. 60.30.139 штепсельная ножка для подставки - На аппарате индикация E2: отображается, когда температура выше 114°C. Возможная причина неисправности: Тепловой шкаф для аппаратов 6X1/1GN и неисправен...
- Page 28 Очистка Очистка Внимание: • Перед началом работ по очистке убедитесь, что аппарат отсоединён от электросети и достаточ- но охлаждён. • Запрещается использовать оборудование для очистки под высоким давлением. • Запрещается обрабатывать аппарат кислотами или подвергать воздействию кислотных паров, в противном случае будет повреждён пассивный слой хромоникелевой стали, и аппараты могут изменить...
-
Page 29: Индикатор Температуры
Общие указания по обслуживанию Индикатор температуры Выключатель Кнопки настройки температуры Управление: Переключение индикации температуры между °C и °F Если удерживать Установка температуры обе кнопки со стрелками Нажимая кнопку со стрелкой нажатыми одновременно более 10 секунд, вверху или индикация температуры автоматически пере- ключится... - Page 30 Rational declara que estos productos son conformes con las siguientes Directivas Europeas: EE Rational kinnitab, et antud tooted vastavad järgmistele EU normidele: Rational déclare que ces produits sont en conformité avec les directives de l’Union Européenne suivantes: FIN Rational vakuuttaa, että nämä tuotteet täyttävät seuraavien EU direktiivien vaalimukset: GB Rational declares that these products are in conformity with the following EU directives: GR Rational δηλώνει...
Need help?
Do you have a question about the TC 61/101 E and is the answer not in the manual?
Questions and answers