Mattel Monster Maker Manual
Hide thumbs
Also See for Monster Maker:
- Owner's manual (15 pages) ,
- Instructions (2 pages) ,
- Instructions (4 pages)
Table of Contents
Advertisement
Quick Links
Advertisement
Table of Contents

Related Manuals for Mattel Monster Maker


Summary of Contents for Mattel Monster Maker
- Page 1 MONSTER MAKER Manual ©2014 Mattel. All Rights Reserved.
- Page 2 01628 500303. Mattel Australia Pty., Ltd., Richmond, Victoria. 3121.Consumer Advisory Need Assistance? Visit service.mattel.com or call 1-800-524-8697 Service - 1300 135 312. Mattel East Asia Ltd., Room 503-09, North Tower, World Finance (US and Canada only). Centre, Harbour City, Tsimshatsui, HK, China. Diimport & Diedarkan Oleh: Mattel Southeast SERVICE.MATTEL.COM...
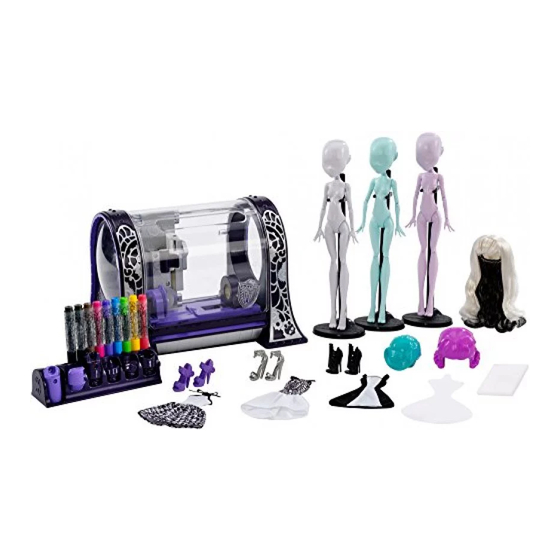
- Page 3 Chip insert x 1 Doll x 3 Battery installation Your Monster Maker comes with 6 AA batteries. Use only new AA alkaline (LR6) batteries. 1. Open battery drawer on the side of the Monster Maker with a Phillips head screwdriver (not included).
- Page 4 Touch “App Store” and you will be taken to the App Store page where you can download the free Monster High Monster Maker app. Monster Maker prompts you to download the app only the first time you pair with your iPad. If you touch “Ignore” at that time, you will need to go to the App Store on your own, search for Monster High Monster Maker and download the free app.
- Page 5 Move slide to the left until the arrow is pointing at a. Press and hold the release button on the front of the carriage. b. Slide the carriage out of the Monster Maker. the torso icon. Connect the torso to the carriage.
- Page 6 Upper leg Upper arm Upper arms are marked with one dot for doll's left arm and two dots for right. Upper legs are marked with one dot for doll's left leg and two dots for right. a. Rotate connector as shown. d.
- Page 7 Slide the carriage into the Monster Maker until you hear a click. Close the door. The Monster Maker will not print if the door is open. Close the latch. If your design includes more than one color, change markers when prompted by the design software. Replace the marker cap and put it back in the tool holder, cap side down.
- Page 8 (not included) and rub with the sponge until the ink is removed. Dry the doll part thoroughly before putting it back in the After 15 minutes of inactivity, the Monster Maker will power down. To resume play, press the action button or cycle the power Monster Maker.
Need help?
Do you have a question about the Monster Maker and is the answer not in the manual?
Questions and answers