
Related Manuals for Sentec LuMon


Summary of Contents for Sentec LuMon
- Page 1 Service Manual For the LuMon™ System GUI software 1.0.x.x/TIC software 1.6.x.xxx LuMon™ Belts sizes 47 and smaller / SensorBelts Service Manual for the LuMon™ System 2ST200-199 Rev002 │04 2021...
- Page 2 SenTec AG are used, if the warranty seal on the lower side of the monitor is broken, or if SenTec Authorized LuMon™...
-
Page 3: Table Of Contents
™ M ................................13 ONITOR TROUBLESHOOTING ........................18 ........................18 OW TO USE THE TROUBLESHOOTING LIST ..............................19 ROUBLESHOOTING LIST REPAIRS OF THE LUMON™ MONITOR ..................24 ................................... 24 RIOR TO REPAIR – ............................24 EPLACEMENT SUPPORT FOOT – ............................25... -
Page 4: Introduction
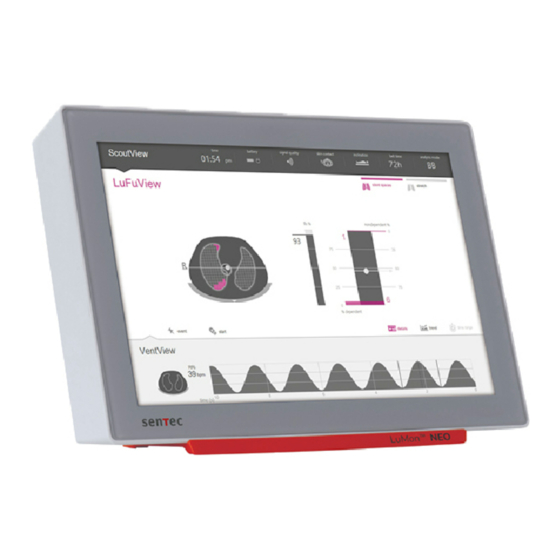
“x” can be any number. The software versions of the LuMon™ Monitor – GUI and TIC – are displayed in the ‘system settings’ area of ScoutView [1]. If your LuMon™ Monitor has other software versions than those indicated on the cover page, please refer to the corresponding version of the Service Manual. -
Page 5: Terminology
Introduction [10] The Instruction to update the LuMon™ Monitor software provides instruction how to update the software. A PDF-copy of this document and instruction to download the software PDF-copy of this form is available from SenTec AG upon request (info-eit@sentec.com). -
Page 6: System Overview
The LuMon™ System comprises LuMon™ Monitors (2.1), belt connectors (2.3) to link SenTec’s textile EIT belts being available in various sizes to the LuMon™ Monitor, as well as SenTec’s contact agents serving as a medium for impedance coupling between a belt and the patient’s skin. Measuring tapes permit the user to determine the recommended belt size, i.e. -
Page 7: Lumon™ Monitor
LuMon™ NEO identifies the LuMon™ Monitor – Neo. NOTE The LuMon™ Monitor performs a calibration of its touch screen after it is switched on. To not disturb the calibration of the touch screen, do not touch the screen the first few seconds after startup. -
Page 8: Belt Connectors
Belt connector socket Belt connectors The belt connectors are designed to link belts to LuMon™ Monitors. Belt connectors control the injection of very weak alternating currents into the patient’s thorax and the measurement of the voltages (electrical potentials) resulting at the skin of the patient’s thorax. -
Page 9: Eit Advanced Interface Set
EIT 1 Fault Interface) EIT 7 Fault Too many failing electrodes – SensorBeltConnector only Modes Switch Manual breathing control (RL – Right lung / LL – Left lung) Matchbox for SensorBeltConnector Service Manual for the LuMon™ System 9 of 33... -
Page 10: Maintenance/Safety And Functionality Tests
3.1.2 Visual Inspection Visually inspect the belt connector body, cable and plug for damage. If any of the components of the belt connector is damaged, replace the belt connector with a new LuMon™ Connector or SensorBeltConnector (8.1). 10 of 33... - Page 11 If the label is not present/legible then contact 3.1.4 Status indicator LEDs - SensorBeltConnector Connect the SensorBeltConnector to the LuMon™ Monitor and switch on the monitor. During the power-up verify, that the Status LEDs in the ControlBox and MatchBox show the following sequence: MatchBox (Figure 2-3) LED blue ...
- Page 12 3-1) on ‘patient & belt’ area on ScoutView is displayed: e.g. ‘ETAV50200311-000129’, numbers may vary). Rotate the MatchBox part of the belt connector – LuMon™ Advanced Interface Adapter – left or right and verify on ScoutView that the displayed rotation changes accordingly. 12 of 33...
-
Page 13: Lumon™ Monitor
Maintenance/Safety and Functionality Tests LuMon™ Monitor 3.2.1 Cleaning and Disinfection For cleaning and disinfection procedures for the LuMon™ Monitor refer to section ‘cleaning and disinfection’ of the User’s Guide [1]. 3.2.2 Visual Inspection Visually check the entire LuMon™ Monitor for possible damages. - Page 14 The belt and the belt connector are an applied part of Type BF. The interface ports of the LuMon™ Monitor are isolated with 2 MOPP to the belt connector socket and 1 MOPP to the mains input. There is no isolation between the individual interface ports.
- Page 15 Figure 3-3: Connections for safety test, protective earth resistance and leakage current Figure 3-4: Connections for safety tests, insulation resistance If the above described tests do not met the corresponding acceptance criteria, the LuMon™ Monitor needs to be repaired. Refer to section 4.2.4...
- Page 16 Maintenance/Safety and Functionality Tests NOTE The LuMon™ Monitor performs a calibration of its touch screen after it is switched on. To not disturb the calibration of the touch screen, do not touch the screen the first few seconds after startup.
- Page 17 Time2 - Time1. The quality of the rechargeable Lithium Ion battery is still acceptable if the LuMon™ Monitor runs for at least 1 hour before the battery management switches off the monitor automatically or the last entry of the QCount value is less than 26000 or the built in battery not older than 5 years (see the manufacturing date on the rear panel of the LuMon™...
-
Page 18: Troubleshooting
ROUBLESHOOTING This section describes problems, possible causes and recommended corrective actions. Repairs (without having to open the housing of the LuMon™ Monitor) are described in section 5. Repairs that require opening SenTec Authorized LuMon™ Technicians the housing of the LuMon™ Monitor are to be performed by only and are described in details within the Repair Manual for the LuMon™... -
Page 19: Troubleshooting List
4.2.1 Troubleshooting EIT monitoring If you suspect a problem with any individual measurement, read the User’s Guide for the LuMon™ System and double-check Analysis that you or the operator have set up the system correctly. In particular, verify proper setup and adequacy of the selected Mode . - Page 20 To identify the defective part, exchange the belt connector and try again – if necessary, permute and try on a different monitor. In case of damage of the belt replace it (8). 20 of 33 Service Manual for the LuMon™ System...
- Page 21 Battery completely depleted since the Connect the monitor to the mains. Allow battery to charge for AC Power/Battery status icon last charge at least 6 hours. If problem persists contact SenTec Authorized displays an unknown battery LuMon™ Technicians. Service Manual for the LuMon™ System...
- Page 22 AC power inlet defective Replace AC Power Connector according to the Repair Manual [3]. SenTec Authorized LuMon™ To be performed by technicians only. SenTec Authorized LuMon™ Technicians EIT0411 LMM defective Contact 22 of 33 Service Manual for the LuMon™ System...
- Page 23 In case of damage of the belt replace it (8). SenTec Authorized LuMon™ Technicians LMM defective Contact SenTec Authorized LuMon™ Technicians EIT0414 LMM defective Contact Message ‘Tech Error 0002’ SenTec Authorized LuMon™ Technicians EIT0415 LMM defective Contact Message ‘monitor fault’ Service Manual for the LuMon™ System 23 of 33...
-
Page 24: Repairs Of The Lumon™ Monitor
LuMon™ System. This means, if you replace parts of the LuMon™ System or if you perform a software update you must report the serial number of the respective LuMon™ Monitor and the serial and LOT numbers of the replaced parts to your local distributor using the ‘Technical Service Report Form’... -
Page 25: Replacement - Main Fuses
Replacement – main fuses Follow the procedure described in section 5.1. Before replacing the fuses of the LuMon™ Monitor, switch the LuMon™ Monitor off and disconnect the LuMon™ Monitor from AC mains power. To replace the fuses, open the fuse holder (Figure 5-2.) with a screwdriver and replace the fuses with specified fuses only (8.1). -
Page 26: Software Updates/Upgrades
The TIC and GUI software can be updated over the USB port using an installer software. Detailed instructions are included in separate documents [10]. Software updates must be reported to SenTec AG by using the ‘Technical Service Report Form’ to ensure traceability. -
Page 27: Disposal
Incorrect disposal may lead to serious environmental pollution. SenTec is dedicated to helping protect the natural environment and to helping ensure the continued safe and effective use of this product through proper support, maintenance, and training. Therefore, SenTec’s products are designed and manufactured to comply with relevant guidelines for environmental protection. -
Page 28: Spare Parts And Maintenance Tools
(for the applied part, the belt) and the interface connectors. The interface connectors (serial ports, USB ports, Ethernet port) of the LuMon™ Monitor are not separated from each other. If at a time accessory equipment is connected to only one of the interface connectors no additional safety measures are necessary to comply with the requirements of IEC 60601-1. - Page 29 The USB port is a standard USB 2.0 Type A port supporting USB-IF BC1.2 downstream charging with 1A current limit. The USB ports of the LuMon™ Monitor is designed to be used with memory devices without external power supply. For service use also keyboard/mouse can be connected.
-
Page 30: Technical Specification
The LAN port of the LuMon™ Monitor is designed to communicate with external computer-based data collection systems. The LAN port is located on the rear panel of the LuMon™ Monitor. The LAN port is a standard 100Base-TX Ethernet connector. Use Category 5 (Cat5) Ethernet cables for connection of the monitor to a network hub or switch. -
Page 31: Appendix Ii - Protocol For Safety & Functionality Test
Appendix II - Protocol for Safety & Functionality Test II - P & F PPENDIX ROTOCOL FOR AFETY UNCTIONALITY See next page. Service Manual for the LuMon™ System 31 of 33... -
Page 32: Test Summary
The LuMon™ System has been designed to comply with the IEC 60601-1 standard. For safety reasons it is recommended that the LuMon™ System undergoes a technical safety check once a year (but every two years the latest) and after repair. Please fill in this form (one form per monitor). -
Page 33: Belt Connector
Test Results Passed ☐ Visual inspection ☐ Labeling ☐ Safety test according to IEC 62353: According to Service Manual for the LuMon™ System. ☐ Touchscreen ☐ Clock settings ☐ Display and AC Power/Battery indicator ☐ ☐ Capacity of rechargeable Lithium Ion battery...
Need help?
Do you have a question about the LuMon and is the answer not in the manual?
Questions and answers