Sign In
Upload
Download
Table of Contents
Contents
Add to my manuals
Delete from my manuals
Share
URL of this page:
HTML Link:
Bookmark this page
Add
Manual will be automatically added to "My Manuals"
Print this page
×
Bookmark added
×
Added to my manuals
Manuals
Brands
Sentec Manuals
Medical Equipment
tcPCO2
Instruction manual
Sentec tcPCO2 Instruction Manual
Digital monitoring system, noninvasive ventilation and oxygenation monitoring
Hide thumbs
1
2
3
4
Table Of Contents
5
6
7
8
9
10
11
12
13
14
15
16
17
18
19
20
21
22
23
24
25
26
27
28
29
30
31
32
33
34
35
36
37
38
39
40
41
42
43
44
45
46
47
48
49
50
51
52
53
54
55
56
57
58
59
60
page
of
60
Go
/
60
Contents
Table of Contents
Bookmarks
Table of Contents
Table of Contents
Intended Use, Principles of Operation and Limitations
Intended Use of the Sentec Digital Monitoring System (SDMS)
Transcutaneous PCO and PO
Pulse Oximetry
Sentec TC Sensors
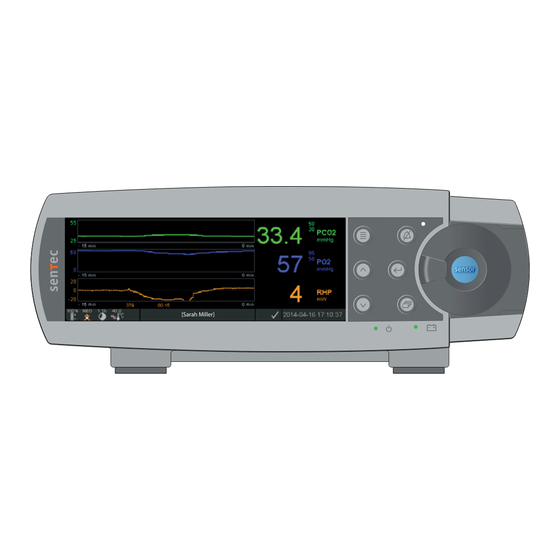
The Sentec Digital Monitoring System (SDMS)
Setting up the SDMS
Connect SDM to AC Power
Battery Operation of the SDM
Turning on the SDM
Installation of the Gas Bottle (Service Gas-0812)
Connection/Disconnection of Digital Sensor Adapter Cable
Connection of a Sentec TC Sensor
Sensor Check, Sensor Calibration/Storage and Membrane Change
Checking a Sentec TC Sensor
Sensor Calibration and Storage
Changing the Sensor Membrane
Patient Monitoring with the SDMS
Selection of Patient Type, Measurement Site, and Sensor Attachment Accessory
Check SDM Settings and System Readiness
Sensor Application Using a Multi-Site Attachment Ring/Easy
Sensor Application Using an Ear Clip
Patient Monitoring
Sensor Removal with Multi-Site Attachment Ring/Easy
Sensor Removal with Ear Clip
Controls, Indicators and Alarms
Controls (Buttons)
LED Indicators
Auditory Indicators/Signals
Alarms
Status Bar with Status Icons and Status Messages
Maintenance of the SDMS
Routine Checks
Service
Specifications of Tcpco
And Pulse Oximetry
Specifications of Tcpco and Tcpo
Specifications of Pulse Oximetry
Glossary of Symbols
Advertisement
Quick Links
1
Transcutaneous Pco and Po
2
Sensor Check, Sensor Calibration/Storage and Membrane Change
3
Sensor Calibration and Storage
4
Selection of Patient Type, Measurement Site, and Sensor Attachment Accessory
5
Patient Monitoring
6
Routine Checks
Download this manual
Instruction Manual
For the
Digital Monitoring System
(Software version SMB SW-V08.02; MPB SW-V06.02)
Table of
Contents
Previous
Page
Next
Page
1
2
3
4
5
Advertisement
Table of Contents
Need help?
Do you have a question about the tcPCO2 and is the answer not in the manual?
Ask a question
Questions and answers
Related Manuals for Sentec tcPCO2
Medical Equipment Sentec tcPO2 Instruction Manual
Digital monitoring system, noninvasive ventilation and oxygenation monitoring (60 pages)
Medical Equipment Sentec tCOM+ Instruction Manual
Transcutaneous monitor & sensors (124 pages)
Medical Equipment Sentec SpO2 Instruction Manual
Digital monitoring system, noninvasive ventilation and oxygenation monitoring (60 pages)
Medical Equipment Sentec LuMon Service Manual
(33 pages)
Medical Equipment Sentec LuMon System User Manual
(93 pages)
Medical Equipment Sentec IPV 1 Instruction Manual
System (44 pages)
Medical Equipment Sentec IPV 1 Instruction Manual
(46 pages)
Medical Equipment Sentec IPV-2C Quick Reference Manual
(4 pages)
Medical Equipment Sentec IPV 1 Quick Reference Manual
(4 pages)
Medical Equipment Sentec IPV-1C Quick Reference Manual
(4 pages)
This manual is also suitable for:
Tcpo2
Spo2
Table of Contents
Save PDF
Print
Rename the bookmark
Delete bookmark?
Delete from my manuals?
Login
Sign In
OR
Sign in with Facebook
Sign in with Google
Upload manual
Upload from disk
Upload from URL


Need help?
Do you have a question about the tcPCO2 and is the answer not in the manual?
Questions and answers