Table of Contents
Advertisement
Available languages
Available languages
Quick Links
Advertisement
Table of Contents

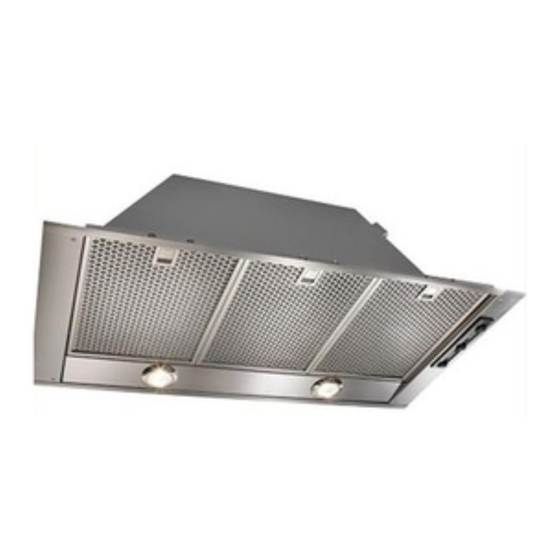
Related Manuals for NuTone PK22


Summary of Contents for NuTone PK22
- Page 1 Model PK22 ® BEST BY BROAN P.O. Box 140 Hartford, WI 53027 USA 550 Lemire Blvd., Drummondville , Québec J2C 7W9 CANADA ENGLISH...2 FRANÇAIS...11 ESPAÑOL...20 - 1 -...
- Page 2 READ AND SAVE THESE INSTRUCTIONS INTENDED FOR DOMESTIC COOKING ONLY WARNING TO REDUCE THE RISK OF FIRE, ELECTRIC SHOCK, OR INJURY TO PERSONS, OBSERVE THE FOLLOWING: 1. Use this unit only in the manner intended by the manufacturer. If you have questions, contact the manufacturer at the address or telephone number listed in the warranty.
- Page 3 CAUTION 1. To reduce risk of fire and to properly exhaust air, be sure to duct air outside. Do not vent exhaust air into spaces within walls or ceilings or into attics, crawl spaces, or garages. 2. Take care when using cleaning agents or detergents. 3.
-
Page 4: Prepare The Hood
PREPARE THE HOOD Unpack hood and check contents. You should receive: 1 - Hood 1 - Parts Bag (B080810265) containing: 1 - Discharge Collar + Non Return Flap 4 - Mounting Screws (3.9 x 9.5mm Pan Head) 1 - Parts Bag (B080810511) containing: 4 - Mounting Screws (4.2 x 15mm Pan Head) 2 - Mounting Screws (M4 x 30mm Pan... -
Page 5: Install The Ductwork
INSTALL THE DUCTWORK NOTE: To reduce the risk of fire, use only metal ductwork. 1. Decide where the ductwork will run between the hood and the outside. 2. A straight, short duct run will allow the hood to perform most efficiently. 3. -
Page 6: Install The Hood
INSTALL THE HOOD 1. Cut a hole in the bottom of the cabinet in order to settle the hood. 2. Insert (2) mounting screws (M4x30mm Pan Head) through side of hood behind filters with bushing so they do not protrude externally. 3. -
Page 7: Connect Ductwork
WIRING Note: This range hood must be properly grounded. The unit should be installed by a qualified electrician in accordance with all applicable national and local electrical codes. 1. Remove the wiring box cover. Remove a knockout from the wiring box. 2. -
Page 8: Maintenance
MAINTENANCE Grease Filters The grease filters should be cleaned frequently (approximately every two (2) months). Use a warm detergent solution. Grease filters are dishwasher safe. To take off the grease filters: at the handle, push the stop inwards and pull the filters downwards. Hood Cleaning Stainless steel is one of the easiest materials to keep clean. -
Page 9: Operation
OPERATION Controls The light switch turns the halogen lights on and off. The blower on / off switch turns the blower on to the running speed set by the blower speed control. The blower must be turned on and off using this switch. -
Page 10: Warranty
WARRANTY BROAN ONE YEAR LIMITED WARRANTY Broan warrants to the original consumer purchaser of its products that such products will be free from defects in materials or workmanship for a period of one year from the date of original purchase. THERE ARE NO OTHER WARRANTIES, EXPRESS OR IMPLIED, INCLUDING, BUT NOT LIMITED TO, IMPLIED WARRANTIES OR MERCHANT ABILITY OR FITNESS FOR A PARTICULAR PURPOSE. - Page 11 LISEZ ET CONSERVEZ CES INSTRUCTIONS POUR USAGE DOMESTIQUE SEULEMENT AVERTISSEMENT AFIN DE RÉDUIRE LES RISQUES D’INCENDIE, D’ÉLECTROCUTION OU DE BLESSURES CORPORELLES, SUIVEZ LES INSTRUCTIONS SUIVANTES : 1. N’utilisez cet appareil que de la façon prévue par le fabricant. Pour d’autres renseignements, contactez le fabricant à...
- Page 12 AVERTISSEMENT AFIN D’ÉVITER TOUS RISQUES DE BLESSURE LORS D’UN FEU DE CUISINIÈRE, OBSERVEZ LES INSTRUCTIONS SUIVANTES* : 1. ÉTOUFFEZ LES FLAMMES à l’aide d’un couvercle hermétique, une plaque à biscuits ou un plateau en métal, puis éteignez le brûleur. ATTENTION DE NE PAS VOUS BRÛLER.
-
Page 13: Préparation De La Hotte
PRÉPARATION DE LA HOTTE Retirer la hotte de l’emballage, puis vérifier le contenu. Les éléments suivants doivent être inclus : 1 - Hotte 1 - Sachet (B080810265) avec : 1 - Raccord de conduit + clapet antirefoulement 4 - Vis d’assemblage (3,9 mm x 9,5 mm à... - Page 14 POSE DU CONDUIT NOTE : Pour réduire le risque d’incendie, n’utiliser que des conduits en métal. 1. Planifier la pose du conduit en déterminant son tracé entre la hotte et l'extérieur la maison. 2. Un tracé droit et court permet à la hotte d'être plus efficace.
-
Page 15: Installation De La Hotte
INSTALLATION DE LA HOTTE 1. Découper un trou dans le fond de l’armoire pour y insérer la hotte. 2. Insérer(2) vis de montage (M4 x 30 mm à tête plate) dans le côté de la hotte derrière les filtres avec des douilles pour qu’elles ne dépassent pas à... -
Page 16: Installation Électrique
INSTALLATION ÉLECTRIQUE NOTE : Cette hotte de cuisinière doit être correctement mise à la terre. Les travaux d’électricité doivent être effectués par un électricien qualifié en vertu des normes et des codes nationaux et locaux en vigueur. 1. Retirer le couvercle de la boîte de connexion électrique. -
Page 17: Entretien
ENTRETIEN Filtres à graisses Les filtres à graisses doivent être nettoyés fréquemment (environ tous les deux (2) mois). Utiliser une solution d’eau chaude additionnée de détergent. Les filtres à graisses peuvent être lavés au lave-vaisselle. Pour retier les filtres à graisses, pousser l’arrêt vers l’intérieur à... - Page 18 FONCTIONNEMENT Commandes La commande d’éclairage allume et éteint les lampes halogènes. La commande Marche/Arrêt du ventilateur active le ventilateur à la vitesse réglée par la commande de vitesse. Le ventilateur doit être mis en marche et arrêté au moyen de cette commande.
-
Page 19: Garantie
GARANTIE GARANTIE LIMITÉE DE UN AN DE BROAN Broan garantit à l'acheteur original que les produits vendus en vertu de la présente sont libres de tout vice de matériau ou de fabrication pour une période de un an à compter de la date d'achat originale. CETTE GARANTIE NE COMPORTE AUCUNE AUTRE GARANTIE, EXPRESSE OU TACITE, Y COMPRIS, MAIS SANS S'Y LIMITER, LES GARANTIES TACITES DE VALEUR MARCHANDE OU D'ADAPTATION À... - Page 20 LEA Y CONSERVE ESTAS INSTRUCCIONES INDICADO PARA EL USO EN COCINAS DOMESTICAS ADVERTENCIA PARA EVITAR EL RIESGO DE INCENDIO, CORTOCIRCUITO O DAÑO PARA LAS PERSONAS, OBSERVE ATENTAMENTE LAS SIGUIENTES NORMAS: 1. Use esta unidad solamente de la manera indicada por el fabricante; si tiene dudas, póngase en contacto con éste a la dirección o teléfono indicados en la garantía.
- Page 21 ADVERTENCIA 1. Para reducir el riesgo de incendios y para evacuar correctamente los humos, asegurarse de haber realizado una conducción del aire hasta el exterior. No expulsar los humos en espacios cerrados por paredes o techos, áticos, espacios angostos o garajes. 2.
-
Page 22: Prepare La Campana
PREPARE LA CAMPANA Sacar la campana de l’embalaje y controlar el contenido. Recivireis: 1 - Campana 1 - Bolsita (B080810265) con: 1 - Casquillo + Válvula de no ritorno 4 - Tornillos de montaje (3.9 x 9.5mm cabeza redonda) 1 - Bolsita (B080810511) con: 4 - Tornillos de montaje (4.2 x 15mm cabeza redonda) 2 - Tornillos de montaje (M4 x 30mm... - Page 23 INSTALACION DEL TUBO DE EXTRACCION NOTA: para evitar el riesgo de incendio, use solamente material de metal. 1. Decida donde va a colocar el tubo de extracción entre la campana y la parte exterior. 2. Un recorrido de tubo corto y recto permitirá a la campana funcionar de manera más eficaz.
- Page 24 INSTALACION DE LA CAM- PANA 1. Hacer en la base del armario la abertura necesaria para acoger la campana. 2. Introducir los (2) tornillos (M4x30mm cabeza redonda) para el montaje a través de la campana, detrás de los filtros, tenga cuidado sobresalgan al exterior.
-
Page 25: Instalacion Electrica
INSTALACION ELECTRICA Nota: Este tipo de campana tiene que ser conectada a tierra cuidadosamente. La unidad debe instalarla un técnico electri-cista siguiendo las normas nacionales y locales. 1. Quite la tapa de la caja de conexión eléctrica y saque un cable. 2. -
Page 26: Mantenimiento
MANTENIMIENTO Filtros anti-grasa Los filtros anti-grasa deben limpiarse con frecuencia (aproximadamente cada dos (2) meses). Use un detergente que no sea fuerte. Los filtros antigrasa se pueden meter en el lavavajillas. Para extraer los filtros antigrasa, empuje de las manillas hacia dentro y tire de los filtros hacia abajo. - Page 27 FUNCIONAMIENTO Mandos La campana se pone en funcionamiento usando los mandos situados abajo de la parte frontal de la campana. El interruptor sa luz enciende y apaga las lámparas halógenas. El mando de encendido y apagado del aspirador pone éste en posición de encendido junto con el control de la velocidad.
- Page 28 GARANTIA Broan garantiza al consumidor-comprador de sus productos que dichos productos no tendrán defectos en los materiales o fabricación, durante un periodo de un año a partir de la fecha de la compra. NO HAY OTRO TIPO DE GARANTIAS QUE INCLUYAN O SE LIMITEN EXCLUSIVAMENTE A GARANTIAS IMPLICITAS O DE CAPACIDAD COMERCIAL O CONVE- NIENCIA PARA UN PROPOSITO ESPECIFICO.
-
Page 29: Service Parts
SERVICE PARTS MODEL PK22 KEY NO. PART NO. B08087189 B02300233 B02300899 B02300787 B03294033 B03295001 B02310201 B03295071 B03202007 B03292465 B02011004 B02011064 B02011063 BE3334250 BE3334252 B03292287 BR2300135 B03294781 B03295008 B08086668 BE3404074 BE3404076 B03292937 BE3341636 B02009102 B080810511 B06108800 B06002008 B06107567 B08085018 * Not shown assembled. -
Page 30: Liste Des Pièces De Rechange
LISTE DES PIÈCES DE RECHANGE MODELE PK22 PART N. B08087189 B02300233 B02300899 B02300787 B03294033 B03295001 B02310201 B03295071 B03202007 B03292465 B02011004 B02011064 B02011063 BE3334250 BE3334252 B03292287 BR2300135 B03294781 B03295008 B08086668 BE3404074 BE3404076 B03292937 BE3341636 B02009102 B080810511 B06108800 B06002008 B06107567 B08085018 * Illustrés non assemblés. -
Page 31: Lista De Piezas De Recambio
LISTA DE PIEZAS DE RECAMBIO MODELO PK22 CÓD. N. PIEZA N. B08087189 B02300233 B02300899 B02300787 B03294033 B03295001 B02310201 B03295071 B03202007 B03292465 B02011004 B02011064 B02011063 BE3334250 BE3334252 B03292287 BR2300135 B03294781 B03295008 B08086668 BE3404074 BE3404076 B03292937 BE3341636 B02009102 B080810511 B06108800 B06002008 B06107567 B08085018 * Se encuentran por separado. - Page 32 SERVICE PARTS - LISTE PIECES DE RECHANGE - LISTA DE PIEZAS DE RECAMBIO MODEL PK22 04306932/8S...
Need help?
Do you have a question about the PK22 and is the answer not in the manual?
Questions and answers