Table of Contents
Advertisement
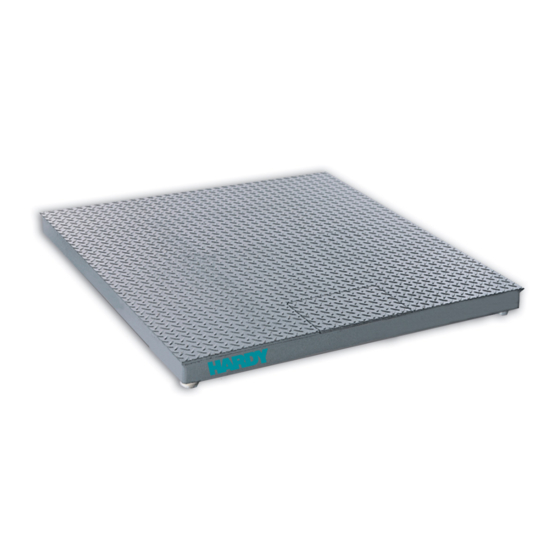
HARDY
FLOOR SCALES
OPERATION AND INSTALLATION
MANUAL
Corporate Headquarters
9440 Carroll Park Drive
San Diego, CA 92121
Phone: (858) 278-2900
FAX: (858) 278-6700
Email: hardyinfo@hardysolutions.com
Web-Site: https://www.hardysolutions.com
Hardy Process Solutions Doc. Number: 0596-0335-01 Rev D
Copyright 2014-2020 Hardy Process Solutions.All Rights Reserved. Printed in the U.S.A.
Advertisement
Table of Contents

Related Manuals for Hardy Process Solutions HIFS-3030-01-PS-T


Summary of Contents for Hardy Process Solutions HIFS-3030-01-PS-T
- Page 1 MANUAL Corporate Headquarters 9440 Carroll Park Drive San Diego, CA 92121 Phone: (858) 278-2900 FAX: (858) 278-6700 Email: hardyinfo@hardysolutions.com Web-Site: https://www.hardysolutions.com Hardy Process Solutions Doc. Number: 0596-0335-01 Rev D Copyright 2014-2020 Hardy Process Solutions.All Rights Reserved. Printed in the U.S.A.
- Page 2 5:30 PM Pacific Standard Time) and weekends. Outside the U.S Hardy Process Solutions has built a network of support throughout the globe. For specific field service options available in your area please contact your local sales agent or our U.S. factory at +1 858-292-2710.
- Page 3 DOCUMENTS. IF ANYTHING IS UNSATISFACTORY, PLEASE NOTIFY HARDY PRO- CESS SOLUTIONS IMMEDIATELY BY CALLING, FAXING OR E-MAILING US AT: Hardy Service Center Hardy Process Solutions 9440 Carroll Park Drive San Diego, California 92121 Phone: (800) 821-5831 (858) 278-2900 FAX:(858) 278-6700 E-mail: hardysupport@hardysolutions.com...
-
Page 5: Table Of Contents
Table of Contents Table of Contents Table of Contents - - - - - - - - - - - - - - - - - - - - - - - - - - i INTRODUCTION - - - - - - - - - - - - - - - - - - - - - - - - - - - 1 SPECIFICATIONS - - - - - - - - - - - - - - - - - - - - - - - - - - 1 Platform Material - - - - - - - - - - - - - - - - - - - - - - - - - 1 Platform Height1... - Page 6 Hardy Floor Scales Pre-Calibration Procedures - - - - - - - - - - - - - - - - - - - -11 C2® Second Generation Calibration - - - - - - - - - - - - - - -12 Test Weight Calibration (Hard Cal) - - - - - - - - - - - - - - - -12 Requirements: - - - - - - - - - - - - - - - - - - - - - - - -12 Material Substitution: - - - - - - - - - - - - - - - - - - - - -13...
-
Page 7: Table Of Contents
Table of Contents Remedy #2: - - - - - - - - - - - - - - - - - - - - - - - - - 37 Problem: - - - - - - - - - - - - - - - - - - - - - - - - - - - 37 Cause #1: - - - - - - - - - - - - - - - - - - - - - - - - - - 37 Remedy #1: - - - - - - - - - - - - - - - - - - - - - - - - - 37 Cause#2:- - - - - - - - - - - - - - - - - - - - - - - - - - - 37... - Page 8 Hardy Floor Scales...
- Page 9 Table of Illustrations TABLE OF CONTENTS - - - - - - - - - - - - - - - - - - - - - - - I INSTALLING THE CLOSED EYEBOLTS INTO THE TOP PLATE - - - 5 HI 6011 SUMMING JUNCTION CARD - - - - - - - - - - - - - - - - 6 WHEN DRIVING HEAVY EQUIPMENT ON AND OFF SCALE - - - - - 8 MAXIMUM HEIGHT - - - - - - - - - - - - - - - - - - - - - - - - - 8...
- Page 10 Hardy Floor Scales...
-
Page 11: Introduction
Hardy Floor Scales INTRODUCTION Hardy Floor Scales are designed for applications that require a low profile weighing surface with high com- mercial accuracy and reliability. These durable wash- down scales can be used in hazardous areas with the appropriate barriers. The Hardy Floor Scales can be configured with a complete range of accessories. -
Page 12: Excitation
Hardy Floor Scales Excitation Recommended 5 Volts DC • Maximum 5 Volts DC WARNING FOR SCALES FITTED WITH AN INTEGRATED TECHNICIAN SUMMING CARD, DO NOT EXCEED 5 VDC EXCITATION. DOING SO MAY CAUSE PROPERTY DAMAGE. DO NOT USE WITH ANY INSTRUMENT WITH AN EXCI- TATION VOLTAGE ABOVE 5 VDC. -
Page 13: Temperature Range
• On Zero - 0.0011% of FSO/Deg C Cable Length 20 feet C2 Cable (6.096 meters) NOTE: To purchase additional C2 Cable, contact our local Hardy Process Solutions Representative or Hardy Service Center. Materials of Construction Steel • Carbon Steel: Type A36 carbon plate steel (slip resistance - tread or smooth surface) •... -
Page 14: Test Criteria
Hardy Floor Scales Test Criteria Must exclude at least 65 GPM of water from 1” inch nozzle delivered from a distance not less than 10 ft for 5 minutes. UNPACKING Hardy Floor Scales are shipped fully assembled and wired. Inspect the container for any signs of damage that might occur during shipment. -
Page 15: Component Descriptions
Hardy Floor Scales Closed Eye Bolts for Lifting the Platfor m Scale FIG. 1 INSTALLING THE CLOSED EYE- BOLTS INTO THE TOP PLATE COMPONENT Steel Plate Platform - The platform material is DESCRIPTIONS either painted carbon steel or 304 stainless steel. The carbon steel platform cover is made from a single piece of 1/4"... -
Page 16: Site Preparation
Hardy Floor Scales drawing 0594-0010. (Available for download on the Hardy Floor Scales webpage under Docs & Programs). FIG. 2 HI 6011 SUMMING JUNCTION CARD Load Sensors - The Hardy series scales use four ® (4) steel Advantage load sensors with hermetic seals. -
Page 17: Precautions
(Available for download on the Hardy Floor Scales webpage under Docs & Programs). • Before welding anything on the floor scale, contact Hardy Process Solutions Service Center for instructions and precautions. • Proper drainage must be provided to prevent the load sensors from standing in water. -
Page 18: Floor Scale Installation
Hardy Floor Scales the direction indicated in Figure 3. Also See Access Ramp Installation Section. Load and unload heavy equipment in this direction only! FIG. 3 DIRECTION WHEN DRIVING HEAVY EQUIPMENT ON AND OFF THE SCALE FLOOR SCALE Step 1. Place the platform scale on the operating INSTALLATION location. -
Page 19: Spirit Level
Hardy Floor Scales Step 2. Make sure that the platform mounting sur- face is level to 1/8”. Step 3. Use a level (Spirit level, Bullseye level or similiar) to check if the platform is level, side to side, corner to corner and diago- nally. - Page 20 Hardy Floor Scales FIG. 7 CHECKING PLATFORM LEVEL/COR- NER TO CORNER FIG. 8 CHECKING PLATFORM LEVEL/DIAG- ONALLY Step 4. Adjust each of the leveling feet in the direction (either up or down), indicated by the level readings. (See Fig. 9) •...
-
Page 21: Calibration
Hardy Floor Scales Foot FIG. 9 ADJUSTING THE FEET FOR LEVEL Step 5. Place the spirit level on the platform sur- face again to check the adjustment for level. Keep adjusting the legs until the platform is level and all four leveling feet are firmly on the floor surface. -
Page 22: C2® Second Generation Calibration
Step 4. Use the weight instrument/indicator man- ual for calibration instructions. ® NOTE: To purchase C2 certified cable, contact your local Hardy Representative or the Hardy Process Solutions Service Center. ® ® Second Definition - C2 electronically calibrates a scale sys- Generation tem without the need for test weights. -
Page 23: Material Substitution
Hardy Floor Scales Material • When certified test weights are not available Substitution: you can use an accurately weighed material instead. • The material must be weighed on a second- ary, calibrated scale and delivered to the site of the primary floor scale for calibration. •... -
Page 24: Model Code Breakdown
Deck, Painted Tread Plate Deck Smooth Plate Deck Ship CAPACITY Overall Size Painted Painted Wght MODEL MODEL Feet (KGS) HIFS-3030-01-PS-T HIFS-3030-01-PS-S 1000 30” x 30” 76 x 76 (91) HIFS-3030-02-PS-T HIFS-3030-02-PS-S 2500 1000 30” x 30” 76 x 76 (91) -
Page 25: Stainless Steel Deck (304
Hardy Floor Scales Tread Plate Deck Smooth Plate Deck Ship CAPACITY Overall Size Painted Painted Wght MODEL MODEL Feet (KGS) HIFS-6060-10-PS-T HIFS-6060-10-PS-S 10000 4536 5’ x 5’ 152 x 152 (295) HIFS-6084-05-PS-T HIFS-6084-05-PS-S 5000 2268 5’ x 7’ 152 x 213 (408) HIFS-6084-10-PS-T HIFS-6084-10-PS-S... - Page 26 Hardy Floor Scales Tread Plate Smooth Stainless Ship Stainless Steel CAPACITY Overall Size Steel Deck Wght Deck MODEL MODEL Feet (KGS) HIFS-4860-05-SS-T HIFS-4860-05-SS-S 5000 2268 4’ x 4’ 122 x 152 (227 HIFS-4860-10-SS-T HIFS-4860-10-SS-S 10000 4536 4’ x 5’ 122 x 152 (227) HIFS-4872-05-SS-T HIFS-4872-05-SS-S...
-
Page 27: Removing Summing Box Cover
Hardy Floor Scales REMOVING SUMMING Step 1. Use a Phillips screwdriver to remove the BOX COVER two flat head machine screws that fasten the summing box cover to the floor scale frame. (See Fig. 11) FIG. 11 REMOVING THE SUMMING BOX COVER Step 2. -
Page 28: Removing The Summing Box Lid
Hardy Floor Scales FIG. 12 REMOVING THE SUMMING BOX LID Step 4. After removing the 8 hex bolts, carefully set them aside for reassembly (Step 17). You may now remove the lid from the junction box chassis so that you can see all the wiring from the load sensors and to the instrument/indicator. -
Page 29: Installing The Leveling Feet
Hardy Floor Scales Installing the Step 1. Remove the lock bolt and nut from the lev- Leveling Feet eling foot. Step 2. With the scale raised and securely blocked, insert the leveling foot into the load sensor. Make sure the through hole in the foot is aligned with the bottom through hole on the load sensor. -
Page 30: Inside View
Hardy Floor Scales the load sensors when installing the lock bolt. Step 4. Screw the nut onto the lock bolt until it is tight. The feet should look like the follow- ing: (See Figs. 15 & 16) FIG. 15 INSIDE VIEW FIG. -
Page 31: Installing A Load Sensor
Hardy Floor Scales Step 5. Install all four (4) feet. (See Fig. 17) FIG. 17 ALL FOUR FEET INSTALLED INSTALLING A LOAD Step 1. Shut all power off to the floor scale. SENSOR Step 2. To gain access to the Summing Card fol- low the instructions above (Steps 3-4 on pages 17 and 18). - Page 32 Hardy Floor Scales Load Sensor # Connector Load Sensor #1 Load Sensor #2 Load Sensor #3 Load Sensor #4 To Instrument Table 3: Summing Card Load Sensor Connectors Step 3. Use a small slotted head screw driver and disconnect the Load Sensor cable. It is a good idea to mark the wires if the wire markers have been removed.
-
Page 33: Cable Gland
Hardy Floor Scales Step 4. Loosen the cable gland nut for the load sensor cable you want to remove. (See Fig. FIG. 19 CABLE GLAND Step 5. From the load sensor pull the cable out of the junction box and through the channel until all the cable has been removed. - Page 34 Hardy Floor Scales Load Cell Bolts FIG. 20 REMOVING LOAD SENSOR BOLTS AND FEET Step 12. Place the new load sensor so that the through bolt holes are aligned with the threaded mounting holes and in the same direction as the old load sensor. DO NOT CUT OR REUSE THE OLD CABLE ON THE NEW LOAD SENSOR.
-
Page 35: Optional Pit Frames
Hardy Floor Scales Step 15. Run the load sensor cable through the channel to the summing box. Bundle up any excess cable and store it in the chan- nel. DO NOT CUT THE CABLE TO MAKE IT FIT BETTER. If you cut the cable, you will not get correct readings from the load sensors and it will void your warranty. - Page 36 Hardy Floor Scales • A soil bearing pressure of at least 1,000 lbs per square foot is required. The corner pier should be designed to support at least two thirds of the total capacity of the scale. • A 3/4” diameter conduit for the scale inter- face cable is recommended.
- Page 37 Hardy Floor Scales 8” Typ 8” Typ FIG. 22 PIT FRAME DIMENSIONS Platform Size Model Number Platform Size CM Material Feet HIFSPF-3030-SS 30in x 30in 76cm x76cm Stainless Steel HIFSPF-3636-SS 36n x 36in 91cm x 91cm Stainless Steel HIFSPF-4848-SS 48in x 48in 122cm x 122cm Stainless Steel HIFSPF-4860-SS...
- Page 38 Hardy Floor Scales Size Model Number Platform Size Material HIFSPF-3030-PS 30in x 30in 76m x 76cm Painted Carbon Steel HIFSPF-3636-PS 36in x 36in 91cm x 91cm Painted Carbon Steel HIFSPF-4848-PS 48in x 48in 122cm x 122cm Painted Carbon Steel HIFSPF-4860-PS 48in x 60in 122cm x 152cm Painted Carbon Steel...
- Page 39 Hardy Floor Scales Wire 2 x 4 Frame Assembly FIG. 24 EXCAVATED PIT AND SUPPORT FOR THE PIT FRAME Step 5. Set the frame in the hole supported at about the correct height. Step 6. Set two 2 x 4 's on edge (longer than the width of the hole) across the opening.
-
Page 40: Optional Portability Kit
Hardy Floor Scales • Cure to a minimum of 2000 psi before pull- ing the interface cable through the conduit. Step 10. Pull the interface cable through the con- duit. OPTIONAL A portability kit is designed to convert a Hardy Floor PORTABILITY KIT Scale from a stationary scale to a mobile weighing system for pallets, drums and other large items. - Page 41 Hardy Floor Scales FIG. 25 RAMP WITH RETAINER PLATES Step 3.Dri wo (2) outer holes using a hammer drill. (See Specifications/Anchor Bolt Holds above for hole dimensions) Step 4. Insert the anchor bolts with the nut and washer already ON. (See Fig. 26)
- Page 42 Hardy Floor Scales FIG. 26 INSTALLING ANCHORS FOR RAMP Step 5. Tap the anchor bolt into the hole then tighten the nuts securely. Step 6. Lift the Platform out and away form the foot retainer plate. Step 7. Drill the two (2) inner holes using a ham- mer drill.
-
Page 43: Optional Foot Retainer
Hardy Floor Scales OPTIONAL FOOT Foot retaining plates are used to keep the scale from RETAINER sliding or moving when loads are applied. The plates are bolted via anchors at each of the scales feet. (See Fig. 27) FIG. 27 FOOT RETAINER PLATES INSTALLATION NOTE: The platform has been removed for clarity purposes. -
Page 44: Optional Bumper Guards
Hardy Floor Scales above for hole dimensions) Insert anchor bolts with the nut and washer already attached. Step 4. Tap the anchor bolts into the hole then tighten the nuts securely. Step 5. Repeat this process for each plate used in your installation. - Page 45 Hardy Floor Scales FIG. 28 BUMPER GUARD/GAP REQUIRE- MENT FIG. 29 BUMPER GUARD/INSTALLATION Step 2. Drill the holes using a hammer drill. (See Specifications/Anchor Bolt Holds above for hole dimensions) Step 3. Insert the anchor bolts with the nut and washer already installed.
-
Page 46: Optional Indicator Column
NOTE: To purchase optional equipment for the Hardy Floor Scales, contact your local Hardy Representative or Hardy Process Solutions Service Center. TROUBLESHOOTING Check all cables to be sure that they have no cracks, cuts or crimps. Check for broken cables. -
Page 47: Problem
Hardy Floor Scales wired correctly change the wiring until it is correct. • Check the Weighing Instrument Manual for trouble shooting instructions. Problem: Scale indication is not linear. Cause #1: Packing material or debris wedged or built up under- neath the platform Remedy #1: •... - Page 48 Hardy Floor Scales Cause #3: Instrument or floor scale improperly grounded (i.e. one or both not connected to earth ground). Remedy #3: Make sure that the weigh instrument and the floor scale platform cover are both connected to earth ground. Cause #4: High static electricity present.
- Page 49 Index Numerics 304 stainless steel platform 1-5 About Pit Frames 1-25 acceptable tolerance 1-14 Access Ramp Installation 1-30 Accessories 1-3 active elements 1-1 Allen Bradley module manual 1-12 Attach a chain 1-4 Blind Hole Load Introduction technology 1-1 Block the floor scale 1-23 Bolt-Down Plates Installation 1-33 Bundle 1-25 C2 Certified Summing Card Interface Cable 1-12...
- Page 50 Hardy Floor Scales direct hits 1-34 end to end 1-6 Endloading 1-2 Excitation 1-2 eyebolts 1-4 flat head machine screws 1-17 FLOOR SCALE INSTALLATION 1-8 Foot Elastomer 1-3 forklift 1-4 forklift traffic 1-34 Grade Level 1-3 hammer drill 1-31 Hardy Floor Scales 1-1 Hardy Instruments Service Center 1-7 Hardy weight or rate controller manuals 1-12 hostile applications 1-29...
- Page 51 Index load forces 1-1 load sensor bolts 1-24 Load Sensors 1-6 loops 1-29 Material Substitution 1-13 Maximum Overload 1-2 Mild Steel Deck, Painted 1-14 mild steel ramp 1-30 MODEL CODE BREAKDOWN 1-14 Natural Rubber 1-3 NEMA 4X 1-3 NEMA Rating 1-3 Non-Hostile applications 1-29 non-level floor 1-1 non-scale traffic 1-34...
- Page 52 Hardy Floor Scales Position #1 1-13 position #2 1-13 position #3 1-13 position #4 1-13 Pre-Calibration Procedures 1-11 Precautions 1-7 Proper drainage 1-7 rated lifting capacity 1-4 repeatable weighments 1-1 Requirements 1-12 safety precautions 1-4 scale platform 1-25 SCALE VERIFICATION 1-13 SITE PREPARATION 1-6 Skid Resistant 1-30 slotted head screw driver 1-22...
- Page 53 Index Total Error 1-2 TROUBLESHOOTING 1-36 UNPACKING 1-4 welding 1-7...
- Page 54 Hardy Floor Scales...
Need help?
Do you have a question about the HIFS-3030-01-PS-T and is the answer not in the manual?
Questions and answers