
Related Manuals for YEONHWA M TECH XRadio XR Series


Summary of Contents for YEONHWA M TECH XRadio XR Series
- Page 1 XR SERIES USER MANUAL VHF Transceiver XR-150 XR-150R UHF Transceiver XR-450 XR-450R Version #1 (2019-02-27) Yeonhwa M Tech Co., Ltd. 36 Jeonpa-Ro, 44Beon-Gil, Manan-Gu, Anyang-City, Gyeongg-Do, Korea Tel: 82-31-444-7270...
- Page 2 XR Series Main Features The XR Series Radio is developed to be user-friendly and compact design, to have various features and to use at the construction / industrial / public areas for the safety & convenience of users. The followings are the main features of the XR Series Radio. ...
-
Page 3: Specification
2. Specification 2.1 XR-150/450 General Frequency Range XR-150/XR-150R : 138 ~ 174 MHz XR-450/XR-450R : 400~470MHz Frequency Stability ±2.5ppm (-30 to +60℃) Programmable Channels 1024 Channels/32 Group Channel Spacing Dual Channel Spacing 12.5KHz Dimensions 111mm (H)×54mm (W)×37mm (D) Weight 250g Power Source DC +7.4V Li-ion 2600mAH Battery Current Drain (maximum) - Page 4 3. XR Series with Accessories Components could be changed by buyer request. Radio Battery Pack Dual slot Charger Antenna Leather Case Belt Clip Hand Strap User Manual Figure 3-1) XR Series Main Components XC-100 : Single slot charger XC-200 : Dual slot Charger Battery (XB-2400) : 2200mAH Li-ion battery pack...
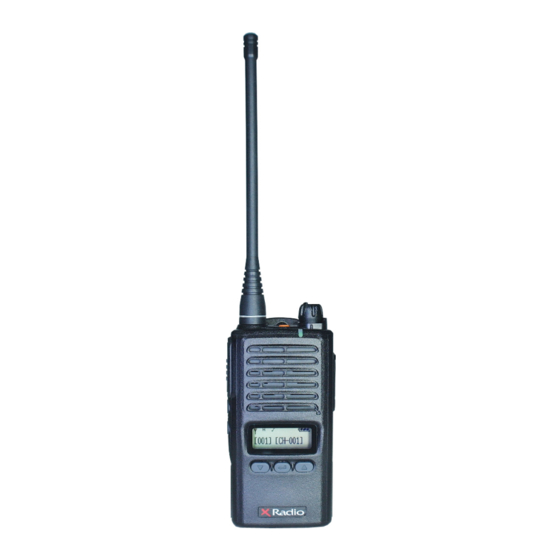
- Page 5 4. Controls & LCD Display Figure 4-1) Appearance of XR Series Radio...
- Page 6 Figure 4-2) LCD Indication of XR Series Radio. 4.1 Basic Button Operation Description. Button Operation Functions PTT Button + Power ON After cloning cable connection, wait cloning transmission. Menu button + Power ON Program mode Monitor button + Power ON Frequency search function (required at the time of frequency copy) Menu button + UP button +...
-
Page 7: Basic Operation
5. Basic operation Please fully read the instruction manual before use. This manual provides important information related to radio operation. 2.1 Installation and Removing the Antenna To install the antenna, insert the antenna into antenna connector and screw the antenna clockwise. To remove the antenna, screw the antenna counter clockwise. -
Page 8: Accessory Connector
Figure 5-2) Installation and Removing the Battery 5.3 Installation and Removing the Belt Clip - To attach belt clip to radio, align belt clip rails with the grooves in radio and slide the belt clip onto the mounting rails until it latches into place. - To remove belt clip from radio, push up on tab of belt clip with flat bladed screw driver and at the same time, slide the belt clip towards the top of Radio figure 5-3). -
Page 9: Ptt Button
Figure 4-4) Accessory connector 6. Operation of the XR Series Radio 6.1 Power On/Off, Volume Control Switch Turning the volume switch knob clockwise to power on and turning the knob counterclockwise to power off. And when set an audio volume level, please refer with the index on the side of the volume knob. -
Page 10: Channel Buttons
6.4 Monitor Button The monitor mode is enabled and disabled by pressing the Monitor button (M) on the side. Normal Mode : During pressing the Monitor button(M) for about 2 seconds, it is possible to check the receiving status. Continuous Mode : During pressing the Monitor button(M) for more than 2 seconds, the Radio will make a “Beep”... -
Page 11: How To Charge
The charging of the enclosed Radio on the other maker’s charger will cause damage on the battery and also, will cause a trouble on the Radio. 2) Please charge the battery before using the radio for best performance and safety. 3) When you charge the battery that is installed in the Radio, please turn off the radio first to charge the battery. - Page 12 Status LED indication Status LED indication Charging Red LED lights. Detecting error Red LED is flicker Complete charging Green LED lights. Keep charging Yellow LED lights 7.4 Charger (XC-100/XC-200) The XC-100/XC-200 charger is designed to charge only the Li-ion battery enclosed in this Radio. Adaptor input voltage: AC85~250V 8.
-
Page 13: Changing Channels
Figure 8-2) Reception Figure 8-3) Transmission 8.3 Receiving Method If you do not press the PTT button, it will operate in receive mode. The user can adjust the volume by Volume switch, and during reception, the green LED will be turned on. 8.4 Changing Channels Channel buttons (▼, ▲) are to change channels. -
Page 14: Priority Scan
8.6.2 Priority Scan At the Scan mode, the LCD displays “○ ” icon. The Radio scans the channel in the sequence of P, S1, P, S2, P, S3,..at the priority scan mode. During receiving signal through the common channel, the Radio scans the priority channel periodically and if the Radio detects the Priority channel, it starts receiving the channel. -
Page 15: Stun Function
8.10 STUN function If a lost the radio or you do not want someone use your radio, it can be disable the radio through receiving of STUN ID stored in the radio. (The Stun ID can be set up by PC Program.) If the STUN ID is saved at the Radio, the Radio can’t be used even though the power on/off. - Page 16 " Program Mode " message.. ④ Connect the Cloning cable to the Ear/Mic Jack of the two Radios. ⑤ If pressing the Enter button of the original Radio, the copy is made and after completing, please disconnect the cable and turn off & on the power of the two Radios. Finally please use the Radio after checking if the copy is made without problem.
-
Page 17: Menu Description
⑤ When the reception is successfully completed, display the " Done " message and will be a restart. Figure 8-11) RX Wireless cloning 8.14 Frequency Copy Function . This function is to copy the Frequency/Tone without use PC program. (including third-party radios) Figure 8-12) Frequency COPY * Frequency COPY method ①... -
Page 18: Setting Group
② By using the channel buttons (▼, ▲), choose the “ Compander” and press the Enter button. ③ By using the channel buttons (▼,▲) choose the ON( “y” ) or the OFF( “n” ) and press the, Enter button to store. ④... - Page 19 ④ To out of the Menu mode, press the Menu button (P). 4) Setting ID This is for transmission of your ID and reception of your party’s ID. ID is divided by DTMF and Call ID. Especially the Call ID transmits your ID to the party and also, the party’s ID is displayed on your Radio to use your Radio in convenience and efficiently.
- Page 20 ③ Using the channel buttons (▼,▲), choose the S.Q Sensibility and press the Enter button to store. ④ To out of the Menu mode, press the Menu button (P). 6) Setting Button Sound (Alert) Button sound is available to set to 3 steps ( High, Low, OFF). By PC Program and menu, it could be set.
- Page 21 ③ After the “VOX MODE” message comes out, choose the ON (“y”)/OFF (“n”) by the channel buttons (▼,▲) and press the Enter button. ④ Select on. Then, the VOX ICON symbols will appear on the LCD and displayed “ VOX Sensibility 5”...
-
Page 22: Setting Lcd Contrast
④ To out of the Menu mode, press the Menu button (P). 9) Setting LCD Contrast ① Enter into the menu setting mode. ② Select “LCD CONTRAST” by Channel buttons (▼,▲) and press Enter button. ③ ④ Select the Level (10~30) of LCD CONTRAST by pressing Channel buttons (▼,▲) and save the selected status by pressing Enter button. - Page 23 11) Setting ID Sound ID Sound settings feature allows selecting the volume of the DTMF tone ① Enter into the menu setting mode. ② Select “ID Sound setting” by Channel buttons (▼,▲) and press Enter button. ③ Select LOW/HIGH by pressing Channel buttons (▲,▼) and save the selected status by pressing Enter button.
- Page 24 ④ Exit menu mode by pressing menu Button (P) button. Repeater is displayed on the LCD. 13) Setting LCD Font This is a function to set the LCD font size. ① Enter into the menu setting mode. ② Select “ LCD Font ” by Channel buttons (▼,▲) and press Enter button. ③...
- Page 25 By PC program and menu, it could be set. ① Enter into the menu setting mode. ② Select “ E.Q Setting ” by Channel buttons (▼,▲) and press Enter button. ③ Select E.Q step by pressing Channel buttons (▲,▼) and save the selected status by pressing Enter button.
- Page 26 save the selected status by pressing Enter button. ④ If choose “Y”, select the ID of other party. Relative ID can be selected up to 255 people maximum. ⑤ Exit menu mode by pressing menu Button (P) button. 16) Setting Impress Regardless of the voice volume size, direction or the distance from the microphone, it is the ability to use for clear communication.
- Page 27 9. Precautions 9.1 When using the XR Series Radios Don’t remove the antenna from the Radio or don’t transform the antenna or don’t make any change on the antenna. The strong electronic wave to be emitted from the Radio can have an effect on the performance of the Radio and can cause the Radio to have a defect.
- Page 28 9.2 Influences to the operations of Radio or other Equipments The Radio emits a strong electronic wave, which may have an effect on the operation of other equipments and also, can be influenced by the other devices. Please turn off the Radio before boarding on airplane. When you want to use the Radio in the airplane, please follow the rules in the airplane or the instructions by crew.
-
Page 29: Safety Notes
10. Safety Notes Please make sure to read the followings for safe and effective use of the Radio. • Please keep the Radio away at least 1inch from the body. • If the outside surface of antenna gets stripped out, it can make a burn on the skin. -
Page 30: Warranty Card
2. Warranty is one year from the day the factory. • Failure of the product under normal operating conditions, during the warranty period may be repaired by Yeonhwa M Tech Co., Ltd. or our authorized service organization free of charge. - Page 31 Transient Frequency Behavior (12.5KHz) 1. 136.025MHz TX Start 2. 136.025MHz TX End...
- Page 32 3. 155.025MHz TX Start 4. 155.025MHz TX End...
- Page 33 5. 173.975MHz TX Start 6. 173.975MHz TX End...
Need help?
Do you have a question about the XRadio XR Series and is the answer not in the manual?
Questions and answers