Table of Contents
Advertisement
Quick Links
Advertisement
Table of Contents

Related Manuals for barclaycard takepayments A920


Summary of Contents for barclaycard takepayments A920
- Page 1 Your A920 installation and user guide. We make it easy.
-
Page 2: Table Of Contents
Contents. Welcome ..........Terminal overview ...... Icon overview ......... Installing receipt roll ....A920 Launcher ......Completing set up ....... Using cellular connection (SIM) 1. Access point Name (APN) set up 2. Selecting the cellular network Using WiFi Login on .......... -
Page 3: Welcome
A920 Welcome. • Ability to breakdown transactions at employee level. Thank you for choosing your A920 terminal, designed to process transactions as quickly as possible • Multi Pay arrives preconfigured for up to six utilising a WiFi or cellular connection. This user employees. -
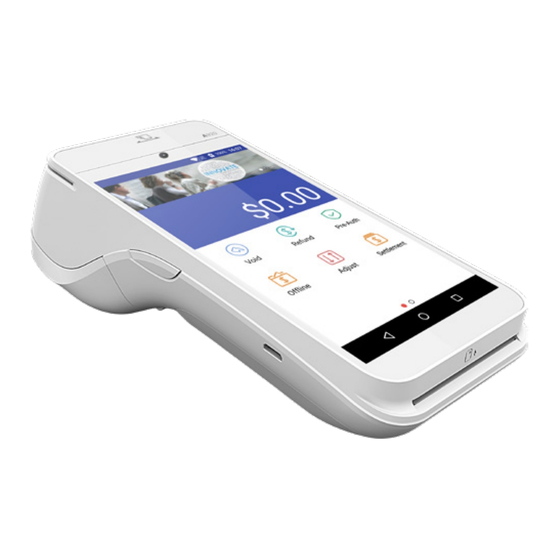
Page 4: Terminal Overview
Step 1. A920 Terminal overview. Here is a quick overview of the A920 terminal's external features. Contactless reader Card swipe Forward facing camera/scaner Volume down Volume up Power button Charging port Chip (ICC) card reader... - Page 5 Step 1. A920 Camera/scanner Serial number Receipt release catch Battery compartment Battery compartment release Volume down Battery Charge point SIM slot...
-
Page 6: Icon Overview
Step 2. A920 Icon overview. Below is a quick overview of the A920 terminal's icon symbols Battery fully charged No cellular connection present Battery charging Contactless reader Battery issue - contact support Insert card WiFi connection present (example shows 75% signal strength) Card inserted Cellular connection present (example shows 75% signal strength) Number of stored transactions... -
Page 7: Installing Receipt Roll
Step 3. A920 Installing receipt roll. Installing the receipt roll in the terminal is a simple process. Firstly, open the terminal’s receipt compartment by carefully lifting the release catch. Once open, place the receipt roll provided into the open compartment with the receipt paper extending from underneath the roll leaving at least 1cm exposed and close the cover. -
Page 8: A920 Launcher
Step 4. A920 A920 Launcher. WiFi When A920 completes the start-up process the connection ‘Launcher’ will be displayed. The Launcher allows the user to configure items such as the Wi-Fi or cellular Cellular settings before loading the main application. connection Battery charge Time... -
Page 9: Completing Set Up
Step 5. A920 Completing set up. Using cellular connection (SIM) The following steps are required to complete the setup of your A920 terminal. The A920 supports The SIM setup process is made up of two main connections via WiFi and/or cellular (via a SIM). stages - the first the configuration of the Access Point Name(s) (APN) used by the SIM and the second If your terminal is utilising a cellular connection,... - Page 10 Step 5. A920 Access Point Name (APN) set up (continued) Set the configuration Once all details have items as per the advice been added click the from your SIM provider. button to return to the A920 Launcher.
-
Page 11: Selecting The Cellular Network
Step 5. A920 2. Selecting the cellular network Select the menu icon on Cellular Network the main A920 Launcher Settings menu will screen and choose then load. Now select Cellular Settings. Network Operators. The terminal will then Once complete the scan for available terminal will display the networks, this process... - Page 12 Step 5. A920 Selecting the cellular network (continued) The connection will be Once connected, press attempted. If successful the left arrow at the Cellular Network bottom of the screen menu will to return to the A920 Settings be displayed and the Launcher.
-
Page 13: Using Wifi
Step 5. A920 Using WiFi Your A920 supports connections to both 2.4Ghz and 5Ghz Wi-Fi networks and can be programmed with multiple network configurations for devices that are used in more than one location. The A920 will always treats WiFi as the primary connection type where present, with the cellular connection used as backup. - Page 14 Step 5. A920 Using Wifi (continued) The terminal will scan Choose the network for available networks required and enter and after a moment a the password when list will be displayed. prompted. When complete press Connect. The connection process After a moment, the will then start.
- Page 15 Step 5. A920 Using Wifi (continued) Press the left arrow at the bottom of the screen to return to the A920 Launcher. The A920 also allows the use of static IP details, if this is required please refer to the full The A920 User Guide for more information.
-
Page 16: Login On
Step 6. A920 Logging on. Press the button to The login screen will be load the application. displayed. Enter the User ID Password supplied via email. Select Save Credentials to store login details and the A920 will use them automatically in future. After a moment, the If the details entered main A920 screen will... -
Page 17: Processing Transactions
Step 7. A920 Processing transactions. Chip and PIN sale Enter the amount of the Press the Sale button to sale using the onscreen start the transaction. keypad. The A920 Alternatively, a automatically adds the transaction can be decimal point for you. initiated by the insertion Press the Done... - Page 18 Step 7. A920 Chip and PIN sale (continued) If configured to do so, If the cardholder’s card the A920 will prompt for has previously been the optional provision inserted, skip to step 05. of a reference for the Otherwise the A920 will transaction.
- Page 19 Step 7. A920 Chip and PIN sale (continued) was pressed, On the Enter PIN screen enter the amount of pass the terminal to the cashback required. cardholder and ask them to enter their PIN. Press the Done button to continue. Once the PIN has been entered the Back Arrow...
- Page 20 Step 7. A920 Chip and PIN sale (continued) The A920 will then print The A920 then prompts the cardholder copy of the merchant to remove the receipt. the cardholder copy of the receipt. Press to continue. The A920 then prints The A920 then asks for the merchant copy.
- Page 21 Step 7. A920 A920 Chip and PIN sale (continued) The A920 then returns to the main menu, ready for the next transaction.
-
Page 22: Contactless Sale
Step 7. A920 Contactless sale Press the Sale button to Enter the amount of the start the transaction. sale using the onscreen keypad. axept® GO automatically adds the decimal point for you. Press the Done button to continue. If required and The A920 will prompt for configured to be the card to be presented. - Page 23 Step 7. A920 Contactless sale (continued) The A920 then The A920 will then begins processing the confirm the result of the transaction. transaction. The A920 then prompts The merchant copy the merchant to confirm of the receipt is then whether a cardholder printed.
- Page 24 Step 7. A920 Contactless sale (continued) The A920 returns to the main menu, ready for the next transaction.
- Page 25 We’re here to help make things easy. For any installation questions, give our team a call on: 01606 566 600 Monday-Friday, 9am-5pm takepayments.com In association with takepayments Limited. Registered in England and Wales under company number 3102137. 4th Floor, Highbank House, Exchange Street, Stockport SK3 0ET.
Need help?
Do you have a question about the takepayments A920 and is the answer not in the manual?
Questions and answers