Table of Contents
Advertisement
Available languages
Available languages
Quick Links
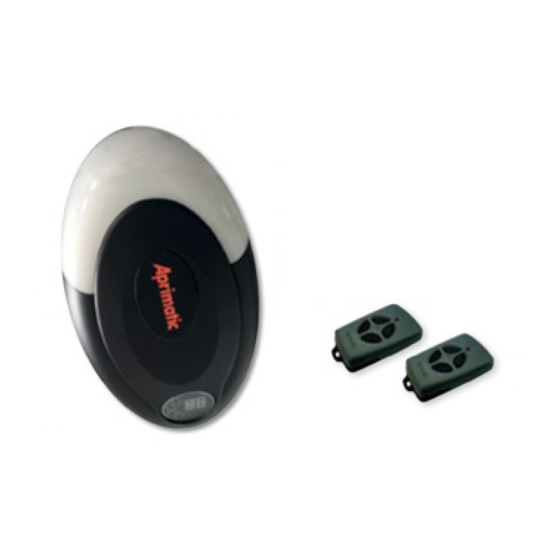
APRIBOX 600
APRIBOX 800
Attuatore elettromeccanico a 230V per porte sezionali e basculanti
230 V electro-mechanical operator for up-and-over and roller shutter doors
Opérateur électromécanique à 230V pour portes basculantes et à sections.
Elektromechanischer 230V-Antrieb für Sektionaltore und Kipptore
Actuador electromecánico de 230 voltios para puertas seccionales y basculantes
SCOPO DEL MANUALE
Questo manuale è stato redatto dal costruttore ed è parte integrante del prodotto.
Le informazioni in esso contenute sono dirette agli operatori esperti che eseguono l'installazione e la manutenzione
straordinaria. Essi devono possedere competenze specifi che e particolari capacità per eseguire correttamente
ed in sicurezza gli interventi di loro competenza. La costante osservanza delle informazioni garantisce la
sicurezza dell'uomo, l'economia di esercizio ed una piú lunga durata di funzionamento del prodotto. Al fi ne di
evitare manovre errate con il rischio di incidenti, è importante leggere attentamente questo manuale, rispettando
scrupolosamente le informazioni fornite. L'operatore esperto, dopo aver effettuato l'intervento dovrá constatarne
la corretta installazione ed il regolare funzionamento. Successivamente dovrá istruire l'utente sull'uso corretto
del prodotto rilasciando tutta la documentazione prevista dal costruttore.
Le istruzioni, i disegni, le fotografi e e la documentazione contenuti nel presente manuale sono di proprietà
APRIMATIC S.p.a. e non possono essere riprodotti in alcun modo, né integralmente, né parzialmente.
Il logo "APRIMATIC" è un marchio registrato di APRIMATIC S.p.a.
PURPOSE OF THE MANUAL
This manual was drawn up by the manufacturer and is integral part of the product.
The information it contains is addressed to expert operators that carry out the installation and maintenance
operations. They must have the specifi c qualifi cations and training to carry out this work correctly and under
the maximum safety conditions. Strict observance of the instructions contained in the manual will ensure safety,
optimum operation and prolonged functioning of the product. To avoid incorrect manoeuvres and therefore the
risk of accidents, it is essential to read this manual with care and strictly follow all the instructions given. The
expert installer, after completing installation must verify that this has been performed correctly and that the product
functions smoothly. Subsequently, it is necessary to instruct the user on the correct use of the product providing
all the documentation envisaged by the manufacturer.
Instructions, drawings, photos and literature contained herein are exclusive property of APRIMATIC S.p.a. and
cannot be reproduced by any means. The "APRIMATIC" logo is a registered mark of APRIMATIC S.p.a.
BUT DE LA NOTICE
Cette notice a étée réalisée par le constructeur et fait partie intégrante du produit.
Les informations qui y sont contenues s'adressent aux opérateurs spécialisés qui effectuent les opérations
d'installation et d'entretien extraordinaire. Ceux-ci doivent posséder les compétences et les qualités requises pour
effectuer de façon correcte et en toute sécurité les interventions dont ils sont chargés. La constante observation
de ces informations garantit la sécurité des personnes, une économie d'utilisation et une plus longue durée de
vie du produit. Lire attentivement cette notice et en respecter scrupuleusement les informations pour éviter toute
fausse manoeuvre qui pourrait entraîner des accidents. Après en avoir effectué la pose, l'opérateur devra en
vérifi er la bonne installation et le bon fonctionnement .
Il devra ensuite informer l'utilisateur de l'emploi correct du produit et lui remettre toute la documentation prévue
par le fabricant.
Les instructions, les dessins, les photos et la documentation contenus dans ce manuel sont la propriété de la
société APRIMATIC S.p.a et ne peuvent être reproduits sous aucune forme, ni intégralement, ni partiellement.
Le logo "APRIMATIC" est une marque enregistrée de APRIMATIC S.p.a.
ZWECK DES HANDBUCHS
Dieses Handbuch wurde vom Hersteller verfasst und ist wesentlicher Bestandteil des Produkts. Die darin
enthaltenen Informationen richten sich an erfahrenes Personal, das sowohl für die Montage als auch die
außerordentlichen Wartungen zuständig ist. Dieses Personal muss über die erforderlichen Fähigkeiten
und Fachkenntnisse verfügen, um die Arbeit korrekt und unter sicheren Bedingungen durchführen zu
können. Die strikte Beachtung der Anweisungen gewährleistet Sicherheit, einen wirtschaftlichen Betrieb
und eine längere Lebensdauer der Anlage. Zur Vermeidung von Fehlern, die zu Unfällen führen können,
muss das vorliegende Handbuch aufmerksam durchgelesen werden, wobei die darin enthaltenen
Anweisungen genau zu befolgen sind. Nach dem Aufbau der Schranke muss erfahrenes Fachpersonal
die korrekte Montage und den störungsfreien Betrieb sicherstellen, den Benutzer einweisen und ihm die
Dokumentation des Herstellers aushändigen.
Die in diesem Handbuch enthaltenen Anleitungen, Zeichnungen, Fotos und Dokumentationen sind Eigentum von
APRIMATIC S.p.a. und dürfen auf keine Art ganz oder teilweise reproduziert werden. Das Logo "APRIMATIC"
ist ein eingetragenes Warenzeichen von APRIMATIC S.p.a.
OBJETO DEL MANUAL
Este manual ha sido redactado por el constructor y forma parte integrante del producto.
Las informaciones que contiene van dirigidas a los operadores especializados encargados de las operaciones
de instalación y mantenimiento extraordinario. Dichos operadores deberán poseer la competencia especifi ca y
las capacidades necesarias para llevar a efecto correctamente y en condiciones de seguridad las operaciones de
las que están encargados. El cumplimiento constante de estas instrucciones garantiza seguridad del personal,
economía de uso y un funcionamento más duradero del producto. A fi n de evitar maniobras incorrectas con
el consiguiente riesgo de accidentes cabe leer con atención este manual y respetar escrupulosamente las
instrucciones. El operador especializado, después de realizar la instalación, deberá comprobar la correcta
ejecución de la misma y el buen funciomento del producto. También deberá enseñar al cliente cómo utilizar
correctamente el producto, entregando toda la documentación facilitada por el constructor.
Las instrucciones, los dibujos, las fotografías y la documentación que contiene este manual son propiedad de
APRIMATIC S.p.a. y no pueden ser reproducidas en ninguna manera, ni integral ni parcialmente. El logotipo
"APRIMATIC" es una marca registrada de APRIMATIC S.p.a.
Istruzioni per Installazione,
Uso e Manutenzione
Installation, use and maintenance
Notice d'installation
Anleitung für Montage, Gebrauch
Instrucciones para la instalación
uso y mantenimiento
instructions
et d'entretien
und Wartung
Advertisement
Chapters
Table of Contents

Subscribe to Our Youtube Channel
Related Manuals for Aprimatic APRIBOX 600


Summary of Contents for Aprimatic APRIBOX 600
- Page 1 Instructions, drawings, photos and literature contained herein are exclusive property of APRIMATIC S.p.a. and cannot be reproduced by any means. The “APRIMATIC” logo is a registered mark of APRIMATIC S.p.a. BUT DE LA NOTICE Cette notice a étée réalisée par le constructeur et fait partie intégrante du produit.
-
Page 2: Table Of Contents
Indice / Norme di sicurezza e avvertenze per installatore Norme di sicurezza e obblighi dell’installatore ..............2-3 Avvertenze per l’utilizzatore ......................3 Terminologia e simboli adottati nel manuale ................3 Caratteristiche dell’attuatore Uso previsto e campo d’impiego ..................... 4 Dati tecnici delle versioni disponibili ....................4 Componenti dell’installazione ...................... -
Page 3: Avvertenze Per L'utilizzatore
Norme di sicurezza e avvertenze per installatore e utilizzatore • Una non corretta installazione può essere fonte di pericoli. • Gli imballi non devono essere abbandonati nell’ambiente, ma devono essere smaltiti secondo le leggi ed i regolamenti in vigore. • Prima di iniziare l’installazione verifi care che il prodotto e l’imballo non siano danneggiati. •... -
Page 4: Caratteristiche Dell'attuatore
• È vietato manomettere o modifi care il prodotto. • Il prodotto deve essere installato solo con accessori APRIMATIC. • L’attuatore non può essere considerato parte di sostegno o sicurezza della porta; questa deve essere provvista di adeguati sistemi per il sostegno e la sicurezza. -
Page 5: Installazione
Operazioni preliminari / Installazione 2. INSTALLAZIONE CONTROLLI PRELIMINARI Prima di procedere all’installazione accertare i seguenti requisiti: • La porta deve essere bilanciata correttamente e la struttura deve essere idonea per l’impiego dell’automazione, considerando i dati tecnici indicati in tab.1; • Non ci devono essere punti di frizione durante il movimento della porta in apertura e in chiusura; •... - Page 6 Installazione bero al supporto portacarrello (fi g.5-rif.1) e far scorrere tutta fig.5 la catena nella guida. • Inserire il carrello (fig.6-rif.1) nella guida portacatena agganciandolo al supporto portacarrello. • Assemblare il blocco motore (fig.7-rif.1) alla guida portacatena (fi g.7-rif.2) mediante gli appositi ancoraggi (fi g.7- rif.3).
- Page 7 Installazione • Fissare la guida alle staffe mediante le viti precedentemente fig.11 fig.12 inserite nei binari esterni (fi g.11-rif.1). • Fissare l’attacco all’estremità superiore della porta in corrispondenza della mezzeria, utilizzando le 4 apposite viti (fi g.12-rif.1). • Togliere il coperchio del carrello come indicato in fi g.13. •...
-
Page 8: Installazione Elettrica E Dei Dispositivi Accessori
Installazione elettrica 3. INSTALLAZIONE ELETTRICA fig.17 Terminata l’installazione meccanica, effettuare i collegamenti elettrici rispettando tutte le indicazioni di seguito fornite. PREDISPOSIZIONE IMPIANTO ELETTRICO La predisposizione dei collegamenti elettrici dei dispositivi di controllo e sicurezza del proprio sistema deve essere effettuata prima di iniziare l’installazione dei componenti, attenendosi allo schema di fig.17, alle avvertenze fornite in questo manuale e alle istruzioni allegate ai componenti installati. -
Page 9: Installazione Del Fi Necorsa Magnetico
Installazione elettrica e dispositivi accessori / Messa in esercizio INSTALLAZIONE FINECORSA MAGNETICO fig.19 • Applicare il fi necorsa magnetico alla guida (fi g.20-rif.1). • Ruotare di 90° il fi necorsa per bloccarlo stabilmente sulla guida, orientando il connettore (fi g.20-rif.2) in direzione del gruppo motore. -
Page 10: Programmazioni E Settaggi
Programmazioni e settaggi 5. PROGRAMMAZIONI E SETTAGGI Logica di funzionamento fig.22 PROGRAMMAZIONE DEL FUNZIONAMENTO (fig.22) Sono disponibili 2 logiche di funzionamento settabili sull’apparecchiatura mediante il jumper JP1: • Funzionamento passo passo (JP1 aperto). • Funzionamento automatico (JP1 chiuso). PASSO-PASSO: AUTOMATICA: 5.1.A LOGICA PASSO PASSO (JP1 aperto) START Apre... -
Page 11: Programmazione Tempo Di Pausa/Tempo Di Pausa In Modo Condominiale
Programmazioni / Azionamento a uomo presente PROGRAMMAZIONE DEL TELECOMANDO Programmazione fig.26 5.4 .1 COMANDO START VIA RADIO (fig.26) telecomando: START • Togliere il jumper JP1. • Premere brevemente il tasto P1. La spia DL1 si accende un istante, poi si spegne 1 sec. e si riaccende: ha inizio la programmazione. -
Page 12: Note Per L'utente E Il Manutentore
SI PREGA DI CONSEGNARE COPIA DI QUESTA PAGINA ALL’UTENTE Aprimatic S.p.A. via Leonardo da Vinci, 414 40059 Villa Fontana di Medicina - Bologna - Italia Tel. +39 051 6960711 - fax +39 051 6960722 info@aprimatic.com - www.aprimatic.com - 12 -... -
Page 13: Safety Standards And Installer Obligations
Contents / Safety standards and warnings for the installer Safety Standards and Installer Obligations ................13-14 Warnings for the user ....................... 14 Terminology and symbols used in this manual................ 14 Features of the operator Envisaged use and Field of application ..................15 Technical specifi... -
Page 14: Warnings For The User
Safety standards and warnings for the installer and user • Carefully read the instruction manual before installation. • Incorrect installation may be a source of hazards. • Packaging must be disposed of in accordance with current legislation. Do NOT litter the environment. •... -
Page 15: Features Of The Operator
• Do not tamper with or modify the product. • The product must only be installed using APRIMATIC accessories. • The operator does not form part of the support or safety system of the door. The door should already have adequate safety and support features. -
Page 16: Installation
Preparatory steps / Installation 2. INSTALLATION PRELIMINARY CHECKS Check the following before performing installation: • The door must be balanced correctly and the structure must be able to support use of the operator given the technical specifi cations in tab.1; •... - Page 17 Installation the carriage holder supports (fi g.5-ref.1) and run the whole fig.5 chain through the guide. • Insert the carriage (fi g.6-ref.1) in the chain holder guide and secure it on the carriage holder support. • Assemble the motor block (fi g.7-ref.1) on the chain holder guide (fi...
- Page 18 Installation • Secure the guide to the brackets using the screws inserted fig.11 fig.12 in the external tracks earlier (fi g.11-ref.1). • Secure the coupling to the middle of the top part of the door using the 4 special screws (fi g.12-ref.1). •...
-
Page 19: Installation Of Electrical And Accessory Devices
Electrical installation 3. ELECTRICAL INSTALLATION fig.17 When mechanical installation is complete make the electrical connections by following the instructions given below. ELECTRIC SYSTEM SET-UP Before you install components you should prepare the electrical connections of the control and safety devices of the system. Follow the instructions given in fi... -
Page 20: Installation Of Magnetic Limit Switch
Electrical installation and installation of accessory devices / Operation INSTALLATION OF MAGNETIC LIMIT SWITCH fig.19 • Place the magnetic limit switch in the guide (fi g.20-ref.1). • Rotate the limit switch through 90° to secure it on the guide with the connector (fi g.20-ref.2) positioned in the direction of the motor unit. -
Page 21: Programming And Settings
Programming and settings 5. PROGRAMMING AND SETTINGS Operating mode fig.22 O P E R A T I N G P R O G R A M M I N G ( f i g . 2 2 ) Two types of functioning logic are available. These are set on the unit using jumper JP1: •... -
Page 22: Programming Pause Time/Pause Time In Condominium Mode
Programming / Manned operation PROGRAMMING THE REMOTE CONTROL Remote control fig.26 5.4 .1 RADIO START COMMAND (fig.26) programming: START • Remove jumper JP1. • Briefl y press button P1. Warning light DL1 is switched ON for a moment then switched OFF for 1 second and then ON again: programming can begin. -
Page 23: Notes For Users And Maintenance Technicians
PLEASE GIVE A COPY OF THIS PAGE TO THE USER Aprimatic S.p.A. via Leonardo da Vinci, 414 40059 Villa Fontana di Medicina - Bologna - Italia Tel. +39 051 6960711 - fax +39 051 6960722 info@aprimatic.com - www.aprimatic.com - 23 -... -
Page 24: Normes De Sécurité Et Obligations De L'installateur
Table des matières / Normes de sécurité et mises en garde pour l’installateur Normes de sécurité et obligations de l’installateur .............24-25 Mises en garde pour l’utilisateur....................25 Terminologie et symboles utilisés dans le manuel ..............25 Caractéristiques de l’opérateur Utilisation prévue et domaine d’application ................... 26 Caractéristiques techniques des versions disponibles .............. -
Page 25: Mises En Garde Pour L'utilisateur
Normes de sécurité et mises en garde pour l’installateur et l’utilisateur • Une installation incorrecte peut constituer un danger. • Les emballages ne doivent pas être abandonnés dans la nature, mais doivent être éliminés en conformité avec les lois et les réglementations en vigueur. •... -
Page 26: Caractéristiques De L'opérateur
Il est interdit d’altérer ou de modifi er le produit. • Le produit doit être monté uniquement avec des accessoires APRIMATIC. • L’opérateur ne peut pas être considéré comme faisant partie du système de support ou de sécurité de la porte ;... -
Page 27: Montage
Opérations préliminaires / Installation 2. MONTAGE CONTRÔLES PRÉLIMINAIRES Avant de procéder au montage, s’assurer que les conditions suivantes sont remplies : • La porte doit être équilibrée correctement et la structure doit être adaptée à l’utilisation d’un automatisme compte tenu des caractéristiques techniques indiquées dans le tab.1. - Page 28 Montage du chariot (fi g.5-réf.1), puis faire coulisser toute la chaîne fig. 5 dans son guide. • Insérer le chariot (fi g.6-réf.1) dans le guide porte-chaîne en le fi xant au support de chariot. • Assembler le groupe moteur (fi g.7-réf.1) et le guide porte- chaîne (fi...
- Page 29 Montage • Fixer le guide aux brides à l’aide des vis insérées fig.11 fig.12 précédemment dans les rainures externes (fi g.11-réf.1). • À l’aide des 4 vis prévues à cet effet, attacher la fi xation à l’extrémité supérieure de la porte en position centrale (fi...
-
Page 30: Montage Électrique Et Application Des Dispositifs Accessoires
Montage électrique 3. MONTAGE ÉLECTRIQUE fig. 17 Après avoir terminé le montage mécanique, effectuer les raccordements électriques en respectant toutes les indications fournies ci-après. PRÉPARATION SYSTÈME ÉLECTRIQUE La préparation des branchements électriques des dispositifs de contrôle et de sécurité de votre système doit être effectuée avant le montage des composants, en respectant le schéma de la fi... -
Page 31: Montage Du Fin De Course Magnétique
Montage électrique et application des dispositifs accessoires / Mise en service MONTAGE DU FIN DE COURSE MAGNÉTIQUE fig. 19 • Appliquer le fi n de course magnétique sur le guide (fi g.20-réf.1). • Tourner de 90° le fi n de course pour le bloquer de façon stable sur le guide avec le connecteur (fi... -
Page 32: Programmations Et Paramétrages
Programmations et paramétrages 5. PROGRAMMATIONS ET PARAMÉTRAGES Mode de fonctionnement fig. 22 PROGRAMMATION DU FONCTIONNEMENT (fig. 22) 2 modes de fonctionnement sont disponibles, paramétrables sur la platine à l’aide du cavalier JP1 : • Fonctionnement pas à pas (JP1 ouvert). •... -
Page 33: Programmation Du Temps De Pause/Temps De Pause Pour Usage En Copropriété
Programmations / Actionnement homme présent PROGRAMMATION DE LA TÉLÉCOMMANDE Programmation de fig. 26 5.4 .1 COMMANDE DE MARCHE VIA RADIO (fig. 26) la télécommande : • Enlever le cavalier JP1. MARCHE • Presser brièvement le bouton P1. Le voyant DL1 s’allume un instant, s’éteint 1 s puis se rallume : la programmation commence. -
Page 34: Notes Pour L'utilisateur Et Le Responsable De L'entretien
VEUILLEZ REMETTRE UNE COPIE DE CETTE PAGE À L’UTILISATEUR Aprimatic S.p.A. via Leonardo da Vinci, 414 40059 Villa Fontana di Medicina - Bologna - Italia Tel. +39 051 6960711 - fax +39 051 6960722 info@aprimatic.com - www.aprimatic.com - 34 -... -
Page 35: Sicherheitsvorschriften Und Pfl Ichten Des Installateurs
Inhaltsverzeichnis/Sicherheitsvorschriften und Hinweise für den Installateur Sicherheitsvorschriften und Pfl ichten des Installateurs.............35-36 Hinweise für den Benutzer ....................... 36 Im Text verwendete Begriffe und Symbole ................36 Eigenschaften des Antriebs Vorgesehene Verwendung und Einsatzbereich ................37 Technische Daten der verfügbaren Versionen ................37 Bestandteile der Installation ...................... -
Page 36: Hinweise Für Den Benutzer
Sicherheitsvorschriften und Hinweise für den Installateur und den Benutzer • Die Verpackungen dürfen nicht einfach weggeworfen, sondern müssen gemäß den geltenden Gesetzen und Vorschriften entsorgt werden. • Bevor mit der Installation begonnen wird, den einwandfreien Zustand des Produkts und der Verpackung überprüfen. •... -
Page 37: Eigenschaften Des Antriebs
• Am Produkt dürfen keine Änderungen vorgenommen werden. • Das Produkt darf nur mit Zubehör von APRIMATIC installiert werden. • Der Antrieb kann nicht als Stütz- oder Sicherungselement für das Tor angesehen werden; das Tor muss mit geeigneten Stütz- oder Sicherungssystemen versehen sein. -
Page 38: Installation
Vorbereitung / Installation 2. INSTALLATION KONTROLLEN VOR DER MONTAGE Überprüfen Sie vor der Montage des Antriebs, ob die folgenden Voraussetzungen erfüllt werden: • Das Tor muss korrekt ausgewuchtet und die Konstruktion für den Einsatz des Antriebs geeignet sein. Siehe dazu die technischen Daten in Tab.1. - Page 39 Installation der Wagenhalterung verbinden (Abb. 5-Pos. 1) und die Kette Abb. 5 vollständig durch die Führung ziehen. • Den Wagen (Abb. 6-Pos. 1) in der Kettenführung anbringen. Dazu in der Wagenhalterung einsetzen. • Den Motorblock (Abb. 7-Pos. 1) an der Kettenführung (Abb.
- Page 40 Installation • Die Führung an den Bügeln mit den zuvor in den Abb. 11 Abb. 12 Außenschienen eingesetzten Schrauben befestigen (Abb. 11 - Pos. 1). • Die Befestigung oben am Tor in Übereinstimmung mit der Mittellinie befestigen. Dazu die 4 dafür vorgesehenen Schrauben verwenden (Abb.
-
Page 41: Elektrische Installation Und Installation Der Zusatzvorrichtungen
Elektrische Installation 3. ELEKTRISCHE INSTALLATION Abb. 17 Nach der mechanischen Installation müssen die elektrischen Anschlüsse gemäß den folgenden Anweisungen ausgeführt werden. VORBEREITUNG DER ELEKTROAUSRÜSTUNG Die Vorbereitung der Elektroanschlüsse der Steuer- und Sicherheitsvorrichtungen der Anlage muss vor der Installation der Bauteile gemäß dem Plan in Abb. 17 und unter Beachtung der Hinweise in diesem Handbuch und in der Anleitung der installierten Bauteile ausgeführt werden. -
Page 42: Installation Des Magnetischen Endschalters
Elektrische Installation und Zusatzvorrichtungen / Inbetriebnahme I N S T A L L A T I O N D E S M A G N E T I S C H E N Abb. 19 ENDSCHALTERS • Den magnetischen Endschalter an der Führung anbringen (Abb. -
Page 43: Programmierung Und Einrichten
Programmierung und Einrichten 5. PROGRAMMIERUNG UND EINRICHTEN Totmannschaltung Abb. 22 PROGRAMMIERUNG DES BETRIEBS (Abb. 22) Es sind 2 Betriebsarten verfügbar, die an der Steuerung über Jumper JP1 eingestellt werden können: • Schaltbetrieb (JP1 offen). • Automatikbetrieb (JP1 geschlossen). 5.1.A SCHALTBETRIEB (JP1 offen) SCHALTBETRIEB AUTOMATIK START... -
Page 44: Programmierung Der Pausenzeit/Pausenzeit Im Wohnanlagenbetrieb
Programmierung / Totmannschaltung PROGRAMMIERUNG DES HANDSENDERS Programmierung des Abb. 26 5.4 .1 START-BEFEHL ÜBER FUNK (Abb. 26) Handsender: START • Den Jumper JP1 entfernen. • Die Taste P1 kurz drücken. Die Kontrollleuchte DL1 leuchtet einen Augenblick auf, erlischt für 1 Sekunde und leuchtet erneut auf: Die Programmierung startet. -
Page 45: Hinweise Für Den Benutzer Und Für Den Wartungstechniker
BITTE ÜBERGEBEN SIE DEM BENUTZER EINE KOPIE DIESER SEITE. Aprimatic S.p.A. via Leonardo da Vinci, 414 40059 Villa Fontana di Medicina - Bologna - Italia Tel. +39 051 6960711 - fax +39 051 6960722 info@aprimatic.com - www.aprimatic.com - 45 -... -
Page 46: Normas De Seguridad Y Obligaciones Del Instalador
Índice / Normas de seguridad y advertencias para el instalador Normas de seguridad y obligaciones del instalador ............46-47 Advertencias para el usuario ....................47 Términos y símbolos utilizados en el manual ................47 Características del actuador Uso previsto y campo de aplicación ....................48 Datos técnicos de las versiones disponibles ................. -
Page 47: Advertencias Para El Usuario
Normas de seguridad y advertencias para el instalador y el usuario • No abandonar los embalajes en el ambiente, eliminarlos según las leyes y los reglamentos en vigor. • Antes de iniciar la instalación comprobar que el producto y el embalaje no están dañados. •... -
Page 48: Características Del Actuador
• Está prohibido abrir o modifi car el producto. • El producto debe ser instalado sólo con accesorios APRIMATIC. • El actuador no debe considerarse una pieza de soporte o de seguridad de la puerta; ésta debe estar provista de adecuados sistemas para el soporte y la seguridad. -
Page 49: Instalación
Operaciones previas / Instalación 2. INSTALACIÓN CONTROLES PREVIOS Antes de realizar la instalación comprobar que se respeten los siguientes requisitos: • La puerta ha de estar correctamente equilibrada y la estructura debe ser adecuada para el uso de la automatización, considerando los datos técnicos indicados en la tab.1. - Page 50 Instalación al soporte portacarro (fi g.5-ref.1) y hacer que la cadena se fig.5 deslice completamente por la guía. • Introducir el carro (fi g.6-ref.1) en la guía portacadena y engancharlo al soporte portacarro. • Ensamblar el bloque motor (fig.7-ref.1) a la guía portacadena (fi...
- Page 51 Instalación • Fijar la guía a los estribos por medio de los tornillos que fig.11 fig.12 anteriormente se habían insertado en los rieles externos (fi g.11-ref.1). • Fijar el enganche al extremo superior de la puerta en coincidencia con la línea central, para ello utilizar los 4 tornillos a tal fi...
-
Page 52: Instalación Eléctrica Y De Los Dispositivos Accesorios
Instalación eléctrica 3. INSTALACIÓN ELÉCTRICA fig.17 Una vez fi nalizada la instalación mecánica, hay que realizar las conexiones eléctricas respetando todas las indicaciones que se proporcionan a continuación. PREPARACIÓN DE LA INSTALACIÓN ELÉCTRICA La preparación de las conexiones eléctricas de los dispositivos de control y seguridad del sistema debe realizarse antes de empezar la instalación de los componentes, observando el... -
Page 53: Instalación Del Final De Carrera Magnético
Instalación eléctrica y dispositivos accesorios / Puesta en funcionamiento INSTALACIÓN DEL FINAL DE CARRERA MAGNÉTICO fig.19 • Aplicar el fi nal de carrera magnético a la guía (fi g.20- ref.1). • Girar 90° el fi nal de carrera para bloquearlo de modo estable en la guía, orientando el conector (fi... -
Page 54: Programaciones Y Confi Guraciones
Programaciones y confi guraciones 5. PROGRAMACIONES Y CONFIGURACIONES Lógica de funcionamiento fig.22 PROGRAMACIÓN DEL FUNCIONAMIENTO (fig.22) Están disponibles 2 lógicas de funcionamiento que pueden confi gurarse en el equipo mediante el jumper JP1: • Funcionamiento paso paso (JP1 abierto). • Funcionamiento automático (JP1 cerrado). PASO-PASO: AUTOMÁTICA: START... -
Page 55: Programación Tiempo De Pausa/Tiempo De Pausa En Modo Comunidades De Vecinos
Programaciones / Accionamiento con presencia operador PROGRAMACIÓN DEL MANDO A DISTANCIA Programación del mando fig.26 5.4 .1 MANDO DE START VÍA RADIO (fig.26) a distancia: START • Quitar el jumper JP1. • Pulsar brevemente la tecla P1. La luz testigo DL1 se enciende un instante, luego se apaga durante 1 segundo para luego volverse a encender: empieza la programación. -
Page 56: Notas Para El Usuario Y Para El Mantenedor
SE RUEGA ENTREGAR UNA COPIA DE ESTA PÁGINA AL USUARIO Aprimatic S.p.A. via Leonardo da Vinci, 414 40059 Villa Fontana di Medicina - Bologna - Italia Tel. +39 051 6960711 - fax +39 051 6960722 info@aprimatic.com - www.aprimatic.com - 56 -...
Need help?
Do you have a question about the APRIBOX 600 and is the answer not in the manual?
Questions and answers