Table of Contents
Advertisement
Index / Characteristics
1
Characteristics
1.1
Technical data ........................................................................................................................................................................................... 14
1.2
Choosing the type of automation .............................................................................................................................................................. 15
1.3
General characteristics ............................................................................................................................................................................. 15
2
Preliminary operations
2.1
Preliminary checks.................................................................................................................................................................................... 15
2.2
Checking the operator components .......................................................................................................................................................... 16
2.2.1 List of components (B4) ............................................................................................................................................................................ 16
2.3
Preparing the mounting............................................................................................................................................................................. 16
2.4
Components layout (B2) ........................................................................................................................................................................... 17
2.5
Electrical connections ............................................................................................................................................................................... 17
3
3.1
Positioning of mountings ........................................................................................................................................................................... 18
3.2
Preparing the rear mounting ..................................................................................................................................................................... 18
3.2.1 Preparations for rear operator mounting on iron posts ............................................................................................................................. 18
3.2.2 Preparations for rear operator mountings on masonry posts.................................................................................................................... 19
3.2.3 Preparations for rear operator mounting on masonry posts with inset...................................................................................................... 19
3.3
Fitting the rear anchorage plates .............................................................................................................................................................. 20
3.4
Fitting the rear operator mounting............................................................................................................................................................. 20
3.5
Positioning the front mounting................................................................................................................................................................... 20
3.6
Temporary rear fi tting of the operator........................................................................................................................................................ 21
3.7
Frontal positioning of the operator ............................................................................................................................................................ 21
3.8
Final fi tting of the operator ........................................................................................................................................................................ 22
3.9
Final assembly .......................................................................................................................................................................................... 22
3.9.1 Bleeding .................................................................................................................................................................................................... 22
3.9.2 Adjusting the brake in close position......................................................................................................................................................... 22
3.9.3 Slowing down the operator opening (C29)................................................................................................................................................ 23
3.9.4 Final assembly .......................................................................................................................................................................................... 23
4
4.1
Checks and setting.................................................................................................................................................................................... 24
5
5.1
Emergency operation - useof manual release .......................................................................................................................................... 25
5.2
Notes for the installer ................................................................................................................................................................................ 25
5.2.1 Maintenance ............................................................................................................................................................................................. 25
5.2.2 Trouble-shooting guide.............................................................................................................................................................................. 25
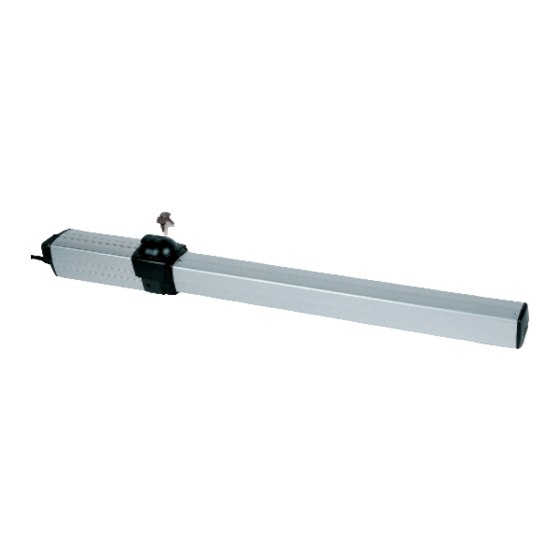
1.1 TECHNICAL DATA
CHARACTERISTICS
Single-phase system voltage
Power absorption
Mean pressure
Thrust force at 10 bar
Traction force at 15 bar
Rod return time (complete stroke)
Rod advance time
Max leaf length
Min leaf length
Operating temperature range
Max distance between centres for mounting holes
with fully extended rod
Max stroke - standard arm
Weight with oil
Oil quantity
Oil type
Protection degree
!
Warning
The noise level of the above models, with reference to the working of the operator independently of the gate leaf and the gate post,
falls within the maximum limits set by EEC standards.
ZT42 (B-SR)
ZT44 ABC
230 V±10% 50 Hz
230 V±10% 50 Hz
250W
250W
30 bar
30 bar
962 N
962 N
1140 N
1140 N
12,5 sec
17,5 sec
15,5 sec
21,5 sec
1,2 m
1,8 m
0,8 m
1,2 m
-20˚ / + 70˚C
-20˚ / + 70˚C
1002 mm ± 5
1002 mm ± 5
190 mm
270 mm
8 Kg
8 Kg
0,6 lt.
0,6 lt.
Aprimatic Oil HC13
Aprimatic Oil HC13
IP 55
IP 55
- 14 -
ZT44 SF DS
230 V±10% 50 Hz
250W
30 bar
962 N
1140 N
17,5 sec
21,5 sec
4 m
1,2 m
-20˚ / + 70˚C
1002 mm ± 5
270 mm
8 Kg
0,6 lt.
Aprimatic Oil HC13
IP 55
R
Advertisement
Table of Contents

Related Manuals for Aprimatic ZT42 (B-SR)


Summary of Contents for Aprimatic ZT42 (B-SR)
-
Page 1: Table Of Contents
8 Kg 8 Kg 8 Kg Oil quantity 0,6 lt. 0,6 lt. 0,6 lt. Oil type Aprimatic Oil HC13 Aprimatic Oil HC13 Aprimatic Oil HC13 Protection degree IP 55 IP 55 IP 55 Warning The noise level of the above models, with reference to the working of the operator independently of the gate leaf and the gate post, falls within the maximum limits set by EEC standards. - Page 2 GB - FLOW ADJUSTMENT VALVES - ref. A and B (RF model) IT - VALVOLE DI REGOLAZIONE FLUSSO - rif. A e B (modello RF) The flow adjustment is used for the important function of balancing and regulating the irregular speed of La regolazione di flusso svolge l’importante compito di equilibrare e regolare la velocità...
-
Page 3: Technical Data
DE - DURCHFLUSSREGELVENTIL - Pos. A und B (Modell RF) FR - SOUPAPES DE RÉGLAGE DÉBIT - réf. A et B (modèle RF) ES - VÁLVULAS DE AJUSTE DEL FLUJO - ref. A y B (modelo RF) Le réglage du débit a pour fonction importante d'équilibrer et de régler les irrégularités de vitesse du Die Durchflussregulierung hat die wichtige Funktion, die unregelmäßige Geschwindigkeit des Flügels aufgrund der Veränderlichkeit der aufgebrachten Last (nicht lotrechte Flügel, reibungsfreie Bänder, vantail provoquées par les variations de la charge appliquée (condition en porte-à-faux, charnières... -
Page 4: Choosing The Type Of Automation
Characteristics / Preliminary operations CHOOSING THE TYPE OF AUTOMATION Before mounting, the type of automation must be decided on, on the basis of the characteristics and dimensions of the element to be operated. The ZT 44 hydraulic operator, with its range of different versions, is compatible with the elements listed below. Caution •... -
Page 5: Checking The Operator Components
Suitably powered electric drill - 230 V Spirit level (3-D) Drill bits Graphitized grease Oil -AprimOil HC 13 (specially formulated for Aprimatic) Hollow cutter Ø 67 for photocell and control panel mounting holes Extension lead for welder Zincospray cylinder Electric cable, cross-section 1.5 mm... -
Page 6: Components Layout (B2)
B - Aprimatic safety photocell C - Manual key-operated control unit (magnetic, digital, keyboard combination lock, mechanical, etc.) D - Aprimatic microprocessor control unit in watertight container (if possible, to be fitted in a position that is sheltered from atmospheric agents) E - Aprimatic remote control radio receiver (can be fi... -
Page 7: Installation
Installation 3.1 POSITIONING OF MOUNTINGS The following table (C1) gives the recommended data for fi xing the position of the operator mountings in relation to the center of rotation of the gate leaf. The distances A and B will give: •... -
Page 8: Preparations For Rear Operator Mountings On Masonry Posts
(not supplied by Aprimatic) Caution • The size of the plates, apart from standard APRIMATIC plates, must be proportional to the size of the columns. • If the A-type plate is used and has to be positioned in line with the operator axis, the hook fi ttings must be modifi... -
Page 9: Fitting The Rear Anchorage Plates
Installation FITTING THE REAR ANCHORAGE PLATES PRESSURE FITTING Clean out any traces of cement or sand in the inset. Drill 4 holes in the inset (C8 pos. 1),after marking the position of the holes, using the anchorage plate itself as a drilling template. -
Page 10: Temporary Rear Fi Tting Of The Operator
Installation TEMPORARY REAR FITTING OF THE OPERATOR Fit the two vibration damper bushings (C13 pos. 4) to above and below the mounting. Fit the operator to the mounting with the vertical pin (C14 pos. 5), after greasing abundantly. Warning Handle the operator with care during assembly. FRONTAL POSITIONING OF THE OPERATOR If it has been decided to use the maximum useful length of the rod (distance A+B = useful piston stroke length) then the supplied... -
Page 11: Final Fi Tting Of The Operator
Installation After cooling, apply a coat of rustproof paint to the welded zone (C21). FINAL FITTING OF THE OPERATOR Spread graphitized-type grease on to the frontal anchorage pin of the ball joint (C22 pos. 1). Spread graphitized-type grease on to the ball joint (C23 pos. 2). Fit the jointed head to the pin (C24 pos. -
Page 12: Slowing Down The Operator Opening (C29)
Installation 3.9.3 Slowing down the operator opening (C29) To use the opening slowing-down (only for ZT44 SF DS version), it is indispensable to use the entire stroke length of the rod. In the ZT44 SF DS version, with the rod fully withdrawn, 12 mm will protrude. -
Page 13: Finals Operations
Finals operations 4.1 CHECKS AND SETTINGS With the gate leaf moving, measure the thrust force at the end of the gate leaf, using a dynamometer (D2 pos. 1). The thrust force must never exceed 15 kg (147 N). If necessary, adjust the working pressure of the operator. -
Page 14: Notes For The User
Notes for the user MANOVRA DI EMERGENZA - USO DELLO SBLOCCO MANUALE To gain access to the release key, it is enough to slide back the hatch (F01 pos. 1); after locking and releasing operations, remember to close the hatch again. Information Periodically check the proper functioning of the operator.
Need help?
Do you have a question about the ZT42 (B-SR) and is the answer not in the manual?
Questions and answers