Table of Contents
Advertisement
Quick Links
Advertisement
Table of Contents

Subscribe to Our Youtube Channel
Summary of Contents for Fortis FS20FDMTBBA
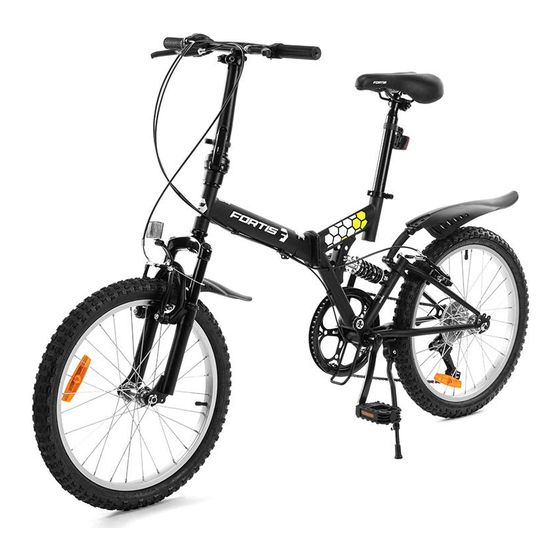
- Page 1 20" FOLDING MOUNTAIN BIKE FS20FDMTBBA...
-
Page 3: Safety And Warnings
SAFETY & WARNINGS Read all of the instructions in this guide before using this product. Retain this guide for future reference. Do not skip, substitute or modify any steps or procedures in this guide, as doing so could result in personal injury or product damage. Before First Ride •... - Page 4 • Adjust the seat height and handlebar height, rider must be able to straddle bicycle with at least 1-inch (2.54cm) clearance above the horizontal bar when standing. • Check tyre pressure. The tyre pressure range of this bike is 40psi as shown on the tyre. Ensure that the tyre pressure is within the range to avoid accidents.
- Page 5 OVERVIEW Gear lever Brake lever Handlebar Seat Folding Seat post clamp Bicycle frame Rear Front fender brakes Front fender Rear brakes Fork Crank Freewheel wheel Crank Chain Rear wheel Front wheel Rear Pedal derailleur Tools: M5 Allen key & M6 Allen key M8/M10 spanner M13/M15 spanner screwdriver...
- Page 6 ASSEMBLY Remove the bike from the packaging. DO NOT dispose of the original packaging until assembly is complete. Check all packaging to ensure all necessary components are found before beginning assembly. Step 1: Front wheel Turn the fork until the fork plates are facing the front of the bicycle. Insert the wheel into the fork.
- Page 7 Step 2: Front and rear fenders Attach the front fender hanger and the front reflector to the fork crown. Attach the rear fender hanger to the mid tube of the frame. Make any necessary adjustments to the fenders and front reflector, then tighten the screws to secure them in place.
- Page 8 Replacing brake pads: When the brake pad wear grove is no longer visible, the brake pads will need to be replaced. Use the M6 Allen key to release the brake mounting bolt on the brake pad. Replace the brake pads and ensuring they are properly adjusted to fit the rim perfectly.
- Page 9 Step 4: Handlebar & stem Insert the stem into the fork tube to the minimum insertion line, as indicated on the stem pillar. Face the handlebar stem forward directly in line with the front wheel. Torque the handlebar stem pillar bolt to 12-15 ft. lb. or 17-19 N m. Use the stem quick release to lock the stem in place.
- Page 10 Gear adjustment: The right shifter controls the 7 speeds (freewheel) of the bicycle. Turn the shifter to switch between different gear ratios in order to change pedal speed. Pedal lighter Pedal heavier...
- Page 11 Step 5: Seat post The seat has been pre-assembled to the seat post by the factory. Insert the seat post into the bicycle frame. Ensure that seat post minimum insertion mark is completely inserted into the frame and not visible. Adjust the seat position and tighten the quick release clamp at the desired height.
- Page 12 Step 6: Attaching the pedals Attach the pedal marked “R” onto the crank arm on the “chain side” of the bike. Securely tighten the pedal in a clockwise direction. Attach the pedal marked “L” onto the crank on the left side of the bike. Securely tighten the pedal in a counter-clockwise direction.
- Page 13 Step 7: Rear reflector Loosen the screws on the rear reflector bracket and attach the rear reflector to the seat post. Note: It is important to check and adjust the position of the reflector. The reflector must always be vertical (perpendicular to the ground) and pointed toward the rear of the bike.
-
Page 14: Folding The Bike
FOLDING THE BIKE Release the clamp and open the frame quick release. Release and open the handlebar stem quick release. Push the pedals in and then fold them down. The bike can now be folded. -
Page 15: Tyre Pressure
TYRE PRESSURE Tyres must be properly inflated before riding. Never exceed the maximum pressure (PSI) that is listed on the side of the tire. Your tyres will state a recommended tyre pressure. Use the below as a general guide: BMX bikes 35 - 50 PSI Mountain bikes 40 - 65 PSI... -
Page 16: Cleaning And Care
CLEANING & CARE • After each ride, wash your bike with soapy water (liquid dish soap is recommended for its ability to remove grease without damaging the bike). • Avoid using high-pressure washers. • Dry your bike with a soft cloth in order to avoid rust and corrosion. While carefully drying your entire bike, you will also be able to inspect all the different parts and detect any potential problems. -
Page 17: Troubleshooting
TROUBLESHOOTING PROBLEM POSSIBLE CAUSE SOLUTION Inner tube old or faulty Replace inner tube Tyre tread / casing is worn Replace tyre Tyre unsuited to rim Replace with correct tyre Frequent punctures Tyre not checked after previous Remove sharp object puncture embedded in tyre Tyre pressure too low Inflate tyres to correct pressure... - Page 18 NOTES...
- Page 20 Need more information? We hope that this user guide has given you the assistance needed for a simple set-up. For the most up-to-date guide for your product, as well as any additional assistance you may require, head online to help.kogan.com.


Need help?
Do you have a question about the FS20FDMTBBA and is the answer not in the manual?
Questions and answers