Table of Contents
Advertisement
Available languages
Available languages
Quick Links
BP7312-4 CF700.qxp_ BP7312 2/27/15 5:13 PM Page 1
READ AND SAVE THESE INSTRUCTIONS
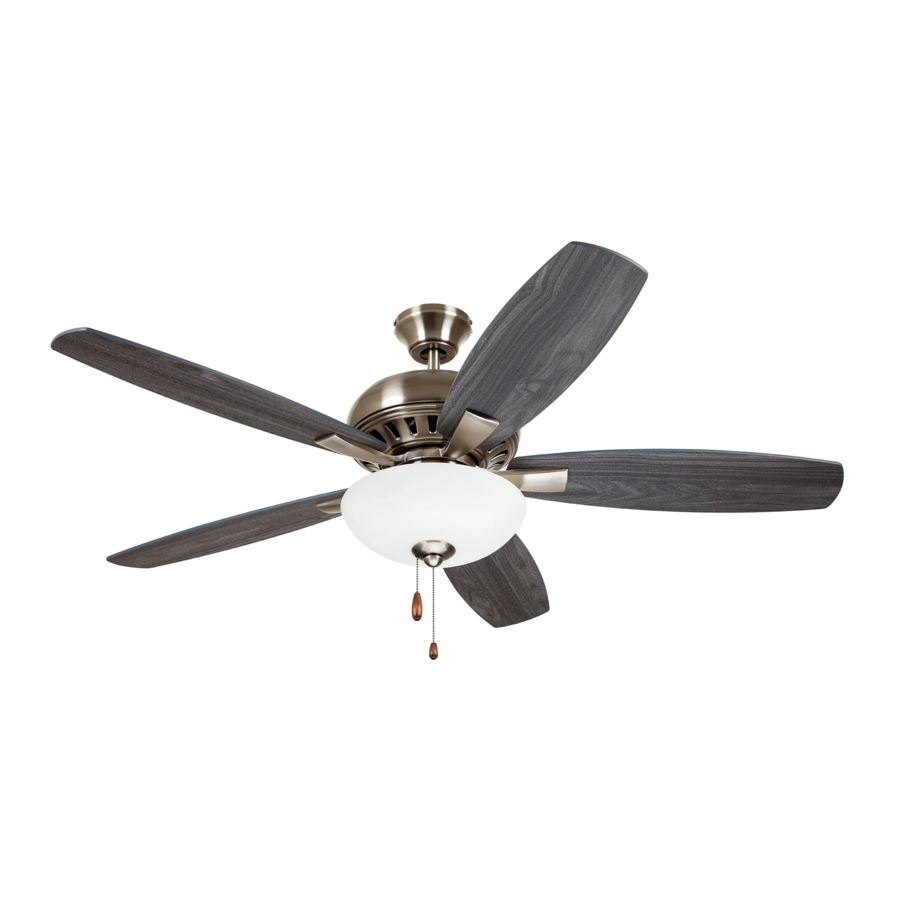
52" Ceiling Fan Owner's Manual
CF700BS09
CF700ORB09
CF700WW09
Part No. F40BP73120004
Revision: 150226
BUILDER Series
Model Numbers
Net Weight:
Questions, problems, missing parts: Before returning to the store call
Emerson Electric Customer Service
8 a.m. - 6 p.m., Eastern, Monday-Friday
1-800-654-3545
www.emersonfans.com
- Brushed Steel
- Oil Rubbed Bronze
- Appliance White
14.4
Lbs.
• Español - página 25
• Français - page 49
Form No. BP7312-4
U.L. Model No.: 52-ANT
Advertisement
Chapters
Table of Contents

Related Manuals for Emerson BUILDER Series


Summary of Contents for Emerson BUILDER Series
- Page 1 - Appliance White 14.4 Net Weight: Lbs. Questions, problems, missing parts: Before returning to the store call Emerson Electric Customer Service 8 a.m. - 6 p.m., Eastern, Monday-Friday • Español - página 25 1-800-654-3545 • Français - page 49 www.emersonfans.com Part No.
-
Page 2: Table Of Contents
3. Do not put anything into the fan blades while they are WARNING: To avoid fire, shock or injury, do not use an turning. Emerson or any other brand of control not specifically approved for this fan. 4. Do not operate reversing switch until fan blades have come to a complete stop. -
Page 3: Unpacking Instructions
Emerson Electric Co. Substitution of parts or accessories not designated for use with this product Fan Blade Flanges by Emerson Electric Co. could result in personal injury or property damage. Fan Blades NOTE: If you are uncertain of part description, refer Check to see that you have received the following parts: to exploded view illustration below. -
Page 4: Electrical Requirements
52” Builder Series Up to 50 ft. Ceiling Fan. Controls are recommended for indoor use 50-100 ft. only. This 52” Builder Series Ceiling Fan is light fixture adaptable (sold separately). 2. Electrical Requirements Your new ceiling fan will require a grounded electrical The outlet box must be securely anchored and capable supply line of 120 volts AC, 60 Hz, 15 amp circuit. -
Page 5: Ceiling Fan Assembly
BP7312-4 CF700.qxp_ BP7312 2/27/15 5:13 PM Page 5 3. Ceiling Fan Assembly WARNING Turning off wall switch is not sufficient. To avoid Disconnect electrical power to the branch circuit at the possible electrical shock, be sure electricity is turned circuit breaker or fuse box before attempting to install off at the main fuse box before wiring. - Page 6 BP7312-4 CF700.qxp_ BP7312 2/27/15 5:13 PM Page 6 3. Ceiling Fan Assembly (Continued) DOWNROD HAIRPIN CLIP Loosen the two setscrews in the motor coupling. CLEVIS Place the hanger ball/4.5” downrod assembly into the motor coupling, aligning the clevis pin holes in the CLEVIS downrod with the holes in the motor coupling (Figure 3).
- Page 7 BP7312-4 CF700.qxp_ BP7312 2/27/15 5:13 PM Page 7 3. Ceiling Fan Assembly (Continued) The fan comes with blue, black and white leads that are 6 to 9 42” long. INCHES Measure up approximately 6 to 9-inches above top of hanger ball/4.5” downrod assembly (Figure 5). HANGER BALL/ Cut off excess leads and strip back insulation 1/2-inch DOWNROD...
- Page 8 BP7312-4 CF700.qxp_ BP7312 2/27/15 5:13 PM Page 8 3. Ceiling Fan Assembly (Continued) M5 x 6mm WASHER HEAD Mount the blade flange to the fan blade using three BLADE SCREW (3) M5 x 6mm washer head screws (supplied) (Figure 8). Repeat this procedure for other four fan blades and blade flanges.
- Page 9 Remove the three switch housing mounting screws MOUNTING PLATE (Figure 10) from the switch housing plate. NOTE: If you are using an Emerson light fixture Retain the screws for future use in Step 3.13. with your fan. Remove the screw plug from the...
- Page 10 BP7312-4 CF700.qxp_ BP7312 2/27/15 5:14 PM Page 10 3. Ceiling Fan Assembly (Continued) 3.13 Position the switch housing assembly on the switch housing plate and align the holes in the switch housing SWITCH HOUSING assembly with the holes in the plate. ASSEMBLY Secure the switch housing assembly by reinstalling the three mounting screws (previously removed)
-
Page 11: How To Hang Your Ceiling Fan
BP7312-4 CF700.qxp_ BP7312 2/27/15 5:14 PM Page 11 4. How to Hang Your Ceiling Fan WARNING CEILING The fan must be hung with at least 7' of clearance from floor to blades (Figure 12). AT LEAST FLOOR Figure 13 WARNING The outlet box and joist must be securely mounted and capable of supporting at least 50 lbs. - Page 12 BP7312-4 CF700.qxp_ BP7312 2/27/15 5:14 PM Page 12 4. How to Hang Your Ceiling Fan (Continued) NOTE: SUPPLY WIRES AND FAN WIRES OMITTED FOR CLARITY. Carefully lift the fan and seat the hanger ball/ downrod assembly on the hanger bracket that was just attached to the outlet box (Figure 15).
-
Page 13: How To Wire Your Ceiling Fan
Emerson Electric Co. Substitution of parts or accessories not designated for use with this product by Emerson Electric Co. could result in personal injury or property damage. Securely connect the fan motor white wire to the supply... - Page 14 BP7312-4 CF700.qxp_ BP7312 2/27/15 5:14 PM Page 14 5. How to Wire Your Ceiling Fan (Continued) Securely connect the fan motor black wire and blue wires to the supply black (hot) wire using wire FAN MOTOR connector (supplied) (Figure 18). BLACK WIRE SUPPLY BLACK...
- Page 15 BP7312-4 CF700.qxp_ BP7312 2/27/15 5:14 PM Page 15 5. How to Wire Your Ceiling Fan (Continued) Screw the two threaded studs (supplied) into the tapped holes in the hanger bracket (Figure 20). THREADED STUDS (2) Figure 20 Lift the ceiling cover up to the threaded studs and turn until studs protrude through the holes in the ceiling CEILING COVER cover (Figure 21).
-
Page 16: Using Your Ceiling Fan
BP7312-4 CF700.qxp_ BP7312 2/27/15 5:14 PM Page 16 6. Using Your Ceiling Fan Restore electrical power to the outlet box by turning the electricity on at the main fuse box. Check the operation of the fan by gently pulling on the pull chain switch. -
Page 17: Maintenance
WARNING Emerson Electric Co. Substitution of parts or accessories not designated for use with this product by Emerson Electric Co. could result in personal injury The use of any other control not specifically approved or property damage. for this fan could result in fire, shock and personal injury. -
Page 18: Repair Parts
BP7312-4 CF700.qxp_ BP7312 2/27/15 5:14 PM Page 18 9. Repair Parts PARTS BAG U.L. Model No.: 52-ANT... - Page 19 BP7312-4 CF700.qxp_ BP7312 2/27/15 5:14 PM Page 19 9. Repair Parts Listing Model Numbers Description CF700BS09 CF700ORB09 CF700WW09 Hanger Ball Assembly, Consisting of: 760750-24 760750-48 760750-3 Hanger Bracket (1) — — — Hanger Ball (1) — — — 4.5” Downrod (1) —...
-
Page 20: Trouble Shooting
BP7312-4 CF700.qxp_ BP7312 2/27/15 5:14 PM Page 20 10. Trouble Shooting WARNING: FOR YOUR OWN SAFETY TURN OFF POWER AT FUSE BOX OR CIRCUIT BREAKER BEFORE TROUBLE SHOOTING YOUR FAN. TROUBLE PROBABLE CAUSE SUGGESTED REMEDY 1. Fan will not start. 1. -
Page 21: Energy Efficient Use Of Ceiling Fans
8 - 9 feet above the floor for optimal occupied space. Remember to adjust your thermostat airflow. Consult your Emerson Retailer for optional when using your ceiling fan - additional energy and mounting accessories. - Page 22 BP7312-4 CF700.qxp_ BP7312 2/27/15 5:14 PM Page 22 Notes U.L. Model No.: 52-ANT...
-
Page 23: Ceiling Fan Limited Warranty
What We Will Do To Correct Problems: If during the one (1) year warranty period the motor or any component or accessory of your Emerson Ceiling Fan is defective in materials or workmanship, or if during the expected lifetime of the Emerson Ceiling Fan (when used in accordance with the User Manual or other instructions) the motor is defective in materials or workmanship, you must contact Emerson during the applicable warranty period. - Page 24 BP7312-4 CF700.qxp_ BP7312 2/27/15 5:14 PM Page 24 Air Comfort Products DIVISION OF EmErSON ElEctrIc cO. 8100 W. Florissant • St. louis, mO 63136 Questions, problems, missing parts: Before returning to the store call Emerson Electric Customer Service 8 a.m. - 6 p.m., Eastern, Monday-Friday 1-800-654-3545 www.emersonfans.com...
-
Page 25: Spanish
14,4 Peso neto: Preguntas, problemas, piezas faltantes: Antes de devolver el producto a la tienda, llame a Servicio al Cliente de Emerson Electric 8 a.m. a 6 p.m., Hora del Este, lunes a viernes 1-800-654-3545 • Français - page 49 www.emersonfans.com... - Page 26 ADVERTENCIA: Para evitar incendios, descargas eléctricas o lesiones, 3. No ponga nada en las paletas del ventilador mientras estén girando. no utilice un control Emerson o de cualquier otra marca que no esté 4. No opere el interruptor de inversión hasta que las paletas del ADVERTENCIA: Este producto está...
- Page 27 Emerson Electric Co. para utilizarse con Pestañas para paleta de ventilador este producto. La sustitución con piezas o accesorios no diseñados por Emerson Electric Co. para utilizarse con este Paletas del ventilador producto podría causar lesiones corporales o daños materiales.
- Page 28 Si tiene dudas, consulte a un electricista calificado. licencia. ADVERTENCIA Sírvase llamar a asistencia técnica de Emerson al 1-800-654-3545 si tiene alguna pregunta sobre la instalación y No basta con poner el interruptor de pared en la posición de utilización de este ventilador de techo.
- Page 29 BP7312-4 CF700.qxp_ BP7312 2/27/15 5:14 PM Page 29 3. Ensamblaje del ventilador de techo ADVERTENCIA Desconecte el suministro eléctrico al circuito derivado en la caja No basta con poner el interruptor de pared en la posición de de cortacircuitos o de fusibles antes de intentar instalar el plato apagado.
- Page 30 BP7312-4 CF700.qxp_ BP7312 2/27/15 5:14 PM Page 30 3. Ensamblaje del ventilador de techo (continuación) VARILLA DOWNROD HAIRPIN CLIP DE DESCENDENTE Afloje los dos tornillos de ajuste ubicados en el acoplamiento del HORQUILLA CLIP PASADOR DE CLEVIS motor. HORQUILLA Coloque el ensamblaje de esfera de suspensión/varilla descen - dente de 4,5 pulgadas en el interior del acoplamiento del motor, PASADOR DE CLEVIS...
- Page 31 BP7312-4 CF700.qxp_ BP7312 2/27/15 5:14 PM Page 31 3. Ensamblaje del ventilador de techo (continuación) El ventilador viene con cables de conexión de color azul, negro y 6 to 9 blanco que tienen 42 pulgadas de longitud. INCHES 6 a 9 PULG. Mida hacia arriba aproximadamente de 6 a 9 pulgadas por encima de la parte superior del ensamblaje de esfera de suspensión/varilla descendente de 4,5 pulgadas (Figura 5).
- Page 32 BP7312-4 CF700.qxp_ BP7312 2/27/15 5:14 PM Page 32 3. Ensamblaje del ventilador de techo (continuación) TORNILLO PARA PALETA CON CABEZA M5 x 6mm WASHER HEAD Monte la pestaña para paleta en la paleta del ventilador BLADE SCREW (3) DE ARANDELA M5 x 6 mm (3) utilizando tres tornillos con cabeza de arandela M5 x 6 mm (suministrados) (Figura 8).
- Page 33 (Figura 10) del plato de la carcasa del interruptor. Retenga los tornillos para uso futuro en el Paso 3.13. NOTA: Si está usando un accesorio de iluminación Emerson con su ventilador, retire el tapón roscado de la parte inferior de la cubierta de la carcasa del interruptor e instale la luz de acuerdo con el manual del usuario del kit de luz.
- Page 34 BP7312-4 CF700.qxp_ BP7312 2/27/15 5:14 PM Page 34 3. Ensamblaje del ventilador de techo (continuación) 3.13 Posicione el ensamblaje de la carcasa del interruptor sobre el ENSAMBLAJE plato de cubierta de la carcasa del interruptor y alinee los agujeros SWITCH DE LA CARCASA ubicados en el ensamblaje de la carcasa del interruptor con los HOUSING...
- Page 35 BP7312-4 CF700.qxp_ BP7312 2/27/15 5:14 PM Page 35 4. Cómo colgar su ventilador de techo ADVERTENCIA TECHO CEILING El ventilador se debe colgar con por lo menos 7 pies de holgura desde el piso hasta las paletas (Figura 13). POR LO AT LEAST MENOS 7 PIES FLOOR...
- Page 36 BP7312-4 CF700.qxp_ BP7312 2/27/15 5:14 PM Page 36 4. Cómo colgar su ventilador de techo (continuación) NOTA: LOS CABLES DE SUMINISTRO Y LOS CABLES DEL VENTILADOR NOTE: SUPPLY WIRES AND FAN WIRES OMITTED FOR CLARITY. SE HAN OMITIDO PARA MAYOR CLARIDAD. Levante cuidadosamente el ventilador y asiente el ensamblaje de esfera de suspensión/varilla descendente en el interior del soporte de suspensión que se acaba de acoplar a la caja de...
- Page 37 Emerson Electric Co. para utilizarse con este producto. La sustitución con piezas o accesorios no diseñados por Emerson Electric Co. para utilizarse con este producto podría causar lesiones corporales o daños materiales. Conecte de manera segura el cable blanco del motor del...
- Page 38 BP7312-4 CF700.qxp_ BP7312 2/27/15 5:14 PM Page 38 5.Cómo colgar su ventilador de techo (continuación) Conecte de manera segura el cable negro y los cables azules del motor del ventilador al cable negro de suministro (con corriente) CABLE NEGRO DEL MOTOR DEL FAN MOTOR utilizando el conector de cables suministrado (Figura 18).
- Page 39 BP7312-4 CF700.qxp_ BP7312 2/27/15 5:14 PM Page 39 5.Cómo colgar su ventilador de techo (continuación) Enrosque los dos espárragos roscados (suministrados) en los agujeros roscados del soporte de suspensión (Figura 20). ESPÁRRAGOS THREADED ROSCADOS (2) STUDS (2) Figura 20 Levante la cubierta del techo hasta los espárragos roscados y gírela hasta que dichos espárragos sobresalgan a través de los CEILING COVER agujeros ubicados en la cubierta del techo (Figura 21).
- Page 40 BP7312-4 CF700.qxp_ BP7312 2/27/15 5:14 PM Page 40 6. Utilización del ventilador de techo Restablezca el suministro eléctrico a la caja de tomacorriente encendiendo la electricidad en la caja de fusibles principal. Compruebe el funcionamiento del ventilador jalando suavemente el interruptor de la cadena de tiro. Todos los ventiladores se envían de la fábrica con el interruptor de inversión posicionado hacia la “izquierda”...
- Page 41 Emerson Electric Co. para utilizarse con Kits de extensión de varilla descendente (visite la tienda o este producto. La sustitución con piezas o accesorios no diseñados por Emerson Electric Co. para utilizarse con este consulte el catálogo). producto podría causar lesiones corporales o daños materiales.
- Page 42 BP7312-4 CF700.qxp_ BP7312 2/27/15 5:14 PM Page 42 9. Piezas de repuesto PARTS BAG BOLSA DE PIEZAS No. de modelo : 52-ANT...
- Page 43 BP7312-4 CF700.qxp_ BP7312 2/27/15 5:14 PM Page 43 9. Lista de piezas de repuesto Números de modelo de clave Descripción CF700BS09 CF700ORB09 CF700WW09 Ensamblaje de la esfera 760750-24 760750-48 760750-3 de suspensión, que consiste en: Soporte de suspensión (1) — —...
- Page 44 BP7312-4 CF700.qxp_ BP7312 2/27/15 5:14 PM Page 44 10. Resolución de problemas ADVERTENCIA: PARA SU PROPIA SEGURIDAD, DESCONECTE LA ALIMENTACIÓN ELÉCTRICA EN LA CAJA DE FUSIBLES O EL CORTACIRCUITO ANTES DE RESOLVER PROBLEMAS EN SU VENTILADOR PROBLEMA CAUSA PROBABLE REMEDIO SUGERIDO 1.
- Page 45 8 a 9 pies por encima del piso para lograr una produce una suave corriente ascendente, que fuerza el aire circulación de aire óptima. Consulte a su minorista Emerson caliente que está cerca del techo a bajar al espacio ocupado.
- Page 46 BP7312-4 CF700.qxp_ BP7312 2/27/15 5:14 PM Page 46 Notas No. de modelo : 52-ANT...
- Page 47 • Usted deja de poseer el producto consistente en un Ventilador de Techo Emerson o • El Ventilador de Techo Emerson es trasladado de su punto de instalación original. Esta garantía limitada es válida fuera de los 50 estados de los Estados Unidos, el Distrito de Columbia y Canadá.
- Page 48 DIVISION OF EmErSON ElEctrIc cO. 8100 W. Florissant • St. louis, mO 63136 Preguntas, problemas, piezas faltantes: Antes de devolver el producto a la tienda, llame a Servicio al Cliente de Emerson Electric 8 a.m. a 6 p.m., Hora del Este, lunes a viernes 1-800-654-3545 www.emersonfans.com...
-
Page 49: French
- Blanc électroménager 14,4 Poids net : Questions, problèmes, pièces manquantes : Avant de retourner un produit au magasin, veuillez téléphoner au Emerson Electric Customer Service 8h00 – 18h00 (HNE) du lundi au vendredi 1-800-654-3545 • Español - página 25 www.emersonfans.com... -
Page 50: Consignes De Sécurité
3. N’insérez rien entre les pales du ventilateur pendant qu’elles sont en train de tourner. électrique ou de blessure, n’utilisez pas de commande d’Emerson ou de toute autre marque qui n’a pas été approuvée spécifiquement 4. Ne mettez pas le ventilateur en marche arrière avant que les AVERTISSEMENT : Ce produit est conçu pour n’être utilisé... -
Page 51: Instructions Pour Le Déballage
Ce produit est conçu pour n’être utilisé qu’avec les pièces fournies avec celui-ci et/ou les accessoires conçus spécifiquement pour Ensemble de tige de suspension emploi avec ce produit par Emerson Electric Co. Toute substitution descendante de 4,5 po avec rotule de pièces ou d’accessoires non conçus pour emploi avec ce Brides de fixation des pales du ventilateur produit par Emerson risquerait d’entraîner des blessures ou des... -
Page 52: Alimentation Électrique
être remplacés. Consultez un électricien agréé en cas de doute. AVERTISSEMENT Veuillez contacter le support technique d’Emerson au 1-800- Éteindre l’interrupteur mural ne suffit pas. Pour éviter tout choc 654-3545 si vous avez des questions concernant l’installation électrique éventuel, assurez-vous que l’alimentation électrique et le fonction nement de ce ventilateur de plafond. -
Page 53: Assemblage Du Ventilateur De Plafond
BP7312-4 CF700.qxp_ BP7312 2/27/15 5:14 PM Page 53 3. Assemblage du ventilateur de plafond AVERTISSEMENT Coupez l’alimentation électrique du circuit de dérivation au niveau du Éteindre l’interrupteur mural ne suffit pas. Pour éviter tout choc disjoncteur ou du boîtier de fusibles avant de tenter d’installer la plaque électrique éventuel, assurez-vous que l’alimentation électrique de montage du ventilateur de plafond sur le boîtier de prises de courant. - Page 54 BP7312-4 CF700.qxp_ BP7312 2/27/15 5:14 PM Page 54 3. Assemblage du ventilateur de plafond (suite) TIGE DE DOWNROD HAIRPIN SUSPENSION PINCE DE CLIP RETENUE Desserrez les deux vis de pression dans le dispositif de couplage DESCENDANTE AXE À CLEVIS du moteur. ÉPAULEMENT Placez l’ensemble de tige descendante/rotule de la tige de sus - AXE À...
- Page 55 BP7312-4 CF700.qxp_ BP7312 2/27/15 5:14 PM Page 55 3. Assemblage du ventilateur de plafond (suite) Le ventilateur est fourni avec des fils bleu, noir et blanc mesurant 6 to 9 42 po de long. INCHES DE 6 À 9 po (DE 15 À...
- Page 56 BP7312-4 CF700.qxp_ BP7312 2/27/15 5:14 PM Page 56 3. Assemblage du ventilateur de plafond (suite) VIS À TÊTE À EMBASE M5 x 6 mm M5 x 6mm WASHER HEAD Montez une bride de fixation de pale sur une pale du BLADE SCREW (3) POUR PALE (3) ventilateur en utilisant trois vis à...
- Page 57 Mettez les vis de côté pour pouvoir vous en servir à nouveau ultérieurement, à l’étape 3.13. REMARQUE : Si vous utilisez un luminaire Emerson avec votre ventilateur, retirez la fiche de vissage du fond du cache du boîtier de l’interrupteur, et installez le luminaire conformément au Mode d’emploi du luminaire.
- Page 58 BP7312-4 CF700.qxp_ BP7312 2/27/15 5:14 PM Page 58 3. Assemblage du ventilateur de plafond (suite) 3.13 Positionnez l’ensemble de boîtier de l’interrupteur sur la plaque ENSEMBLE DE de recouvrement du boîtier de l’interrupteur et alignez les trous SWITCH BOÎTIER DE de l’ensemble de boîtier de l’interrupteur sur les trous de la HOUSING L’INTERRUPTEUR...
-
Page 59: Comment Suspendre Votre Ventilateur De Plafond
BP7312-4 CF700.qxp_ BP7312 2/27/15 5:14 PM Page 59 4. Comment suspendre votre ventilateur de plafond AVERTISSEMENT PLAFOND CEILING Le ventilateur doit être suspendu de telle sorte que les pales se trouvent à au moins 7 pi (2 m) du sol (Figure 12). AU MOINS AT LEAST 7 pi (2 m) - Page 60 BP7312-4 CF700.qxp_ BP7312 2/27/15 5:14 PM Page 60 4. Comment suspendre votre ventilateur de plafond (suite) REMARQUE : LES FILS D’ALIMENTATION ÉLECTRIQUE ET LES FILS DU NOTE: SUPPLY WIRES AND FAN WIRES OMITTED FOR CLARITY. VENTILATEUR ONT ÉTÉ OMIS POUR PLUS DE CLARTÉ. Soulevez le ventilateur avec précaution et logez l’ensemble de rotule/tige de suspension descendante sur le support de BOÎTIER DE...
-
Page 61: Comment Effectuer Le Câblage Pour Raccorder Votre Ventilateur De Plafond
Emerson Electric Co. Toute substitution de pièces ou d’accessoires non désignés comme pouvant être utilisé avec ce produit par Emerson Electric Co. peut entraîner une blessure ou un dommage matériel. Connectez solidement le fil blanc provenant du moteur du ventilateur au fil blanc (neutre) e l’alimentation en utilisant un... - Page 62 BP7312-4 CF700.qxp_ BP7312 2/27/15 5:14 PM Page 62 5.Comment effectuer le câblage pour raccorder votre ventilateur de plafond (suite) Connectez solidement le fil noir et le fil bleu provenant du moteur du ventilateur au fil noir (sous tension) de l’alimentation en FIL NOIR DU MOTEUR DU FAN MOTOR...
- Page 63 BP7312-4 CF700.qxp_ BP7312 2/27/15 5:14 PM Page 63 5.Comment effectuer le câblage pour raccorder votre ventilateur de plafond (suite) Vissez les deux goujons filetés (fournis) dans les trous taraudés du support de suspension (Figure 20). THREADED GOUJON STUDS (2) FILETÉ (2) Figure 20 Soulevez la monture de plafond jusqu’au niveau des goujons filetés et faites la tourner jusqu’à...
-
Page 64: Utilisation De Votre Ventilateur De Plafond
BP7312-4 CF700.qxp_ BP7312 2/27/15 5:14 PM Page 64 6. Utilisation de votre ventilateur de plafond Réalimentez le boîtier de prises de courant en rétablissant l’électricité au niveau du coffret à fusibles principal. Assurez-vous que le ventilateur fonctionne correctement en tirant doucement sur l’interrupteur à chaînette. Tous les ventilateurs sont expédiés depuis l’usine avec le commu tateur de sens de rotation positionné... -
Page 65: Maintenance
Emerson Electric Co. Toute substitution de pièces ou d’accessoires non désignés comme pouvant être utilisé avec ce magasin ou catalogue). produit par Emerson Electric Co. peut entraîner une blessure ou un dommage matériel. AVERTISSEMENT L’utilisation de toute autre commande qui ne serait pas spécifique ment approuvée pour ce ventilateur pourrait entraîner... -
Page 66: Pièces De Rechange
BP7312-4 CF700.qxp_ BP7312 2/27/15 5:14 PM Page 66 9. Pièces de rechange PARTS BAG SAC DE PIÈCES Modèle U.L. N° : 52-ANT... - Page 67 BP7312-4 CF700.qxp_ BP7312 2/27/15 5:14 PM Page 67 9. Nomenclature des pièces de rechange Numéros de modèles Réf. Description CF700BS09 CF700ORB09 CF700WW09 Ensemble rotule de la tige de suspension 760750-24 760750-48 760750-3 consistant en les éléments suivants : Support de suspension (1) —...
-
Page 68: Identification Des Causes Des Problèmes
BP7312-4 CF700.qxp_ BP7312 2/27/15 5:14 PM Page 68 10. Identification des causes des problèmes AVERTISSEMENT : POUR VOTRE SÉCURITÉ, METTEZ LE COFFRET À FUSIBLES OU LE DISJONCTEUR HORS TENSION AVANT DE TENTER D’IDENTIFIER LES PROBLÈMES POUVANT AFFECTER VOTRE VENTILATEUR. PROBLÈME CAUSE PROBABLE SOLUTION PROPOSÉE 1. -
Page 69: Utilisation Éco-Énergétique Des Ventilateurs De Plafond
à 8 ou 9 pi (2,50 ou 2,70 m) du sol pour une d’air ascendant doux, qui oriente l’air chaud du plafond vers le circulation de l’air optimale. Consultez votre revendeur Emerson bas pour le répartir dans l’espace occupé. N’oubliez pas de pour obtenir des accessoires de montage optionnels. - Page 70 BP7312-4 CF700.qxp_ BP7312 2/27/15 5:14 PM Page 70 Remarques Modèle U.L. N° : 52-ANT...
-
Page 71: Garantie Limitée Relative Aux Ventilateurs De Plafond
Ce qui est couvert par la présente garantie limitée : La présente garantie limitée est offerte par la division Air Comfort Products d’Emerson Electric Co. (« Emerson », « nous » ou « notre »), située à l’adresse indiquée ci-dessous, à... - Page 72 DIVISION OF EmErSON ElEctrIc cO. 8100 W. Florissant • St. louis, mO 63136 Questions, problèmes, pièces manquantes : Avant de retourner un produit au magasin, veuillez téléphoner au Service à la clientèle d’Emerson Electric 8h00 – 18h00 (HNE) du lundi au vendredi + 1-800-654-3545 www.emersonfans.com Conservez ce mode d’emploi pour toute utilisation future...
Need help?
Do you have a question about the BUILDER Series and is the answer not in the manual?
Questions and answers