
Related Manuals for MicaSense RedEdge-MX DJI Inspire 2 Quick Mount


Summary of Contents for MicaSense RedEdge-MX DJI Inspire 2 Quick Mount
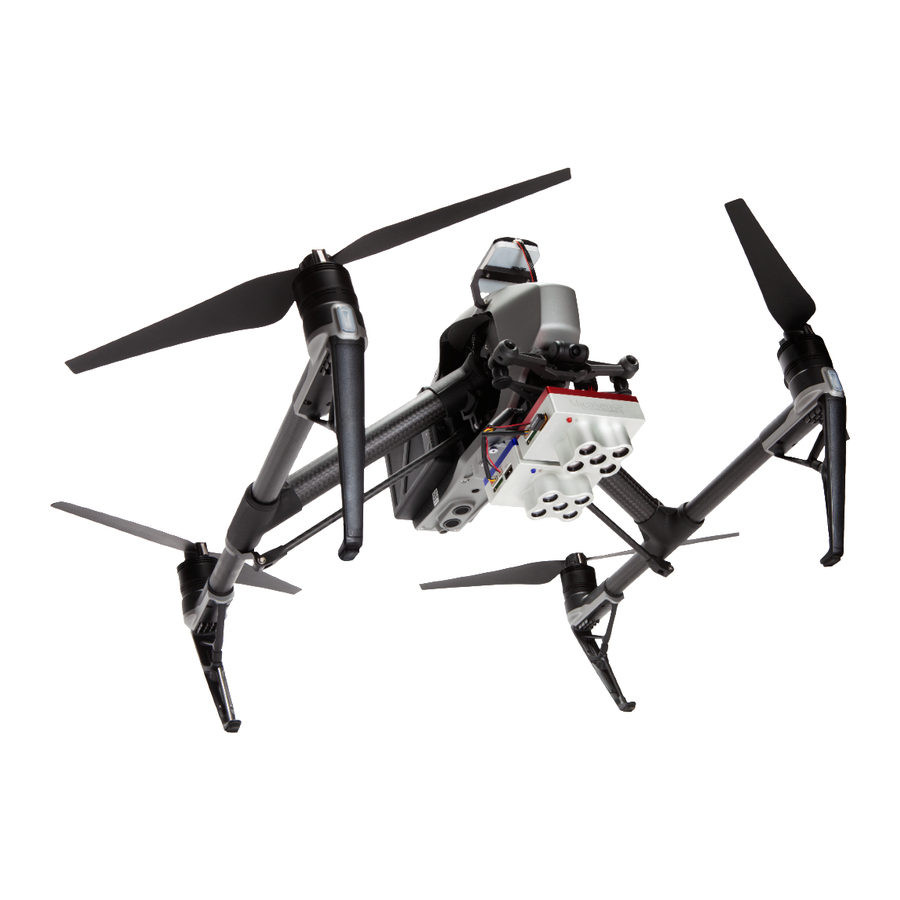
- Page 1 RedEdge-MX™ & Altum™ DJI Inspire 2 Quick Mount INTEGRATION GUIDE Rev 02 - July 2019 P/N: 805-00044 ...
-
Page 2: Table Of Contents
Table of Contents Thank you for your purchase! 2 What’s inside? 2 What’s Required? 3 Let’s get started! 3 Attaching DLS 2 mast assembly 3 RedEdge-MX Instructions 4 Attaching the RedEdge-MX and the Mount 4 Attaching the RedEdge-MX and DLS 2 to the Inspire 5 ... -
Page 3: Thank You For Your Purchase
Thank you for your purchase! These instructions show how to integrate the MicaSense RedEdge-MX and/or Altum with a DJI Inspire 2. It covers attaching mounting brackets included in the kit, powering the camera from the host system, and placement of the Downwelling Light Sensor (DLS 2) unit. ... -
Page 4: What's Required
What’s Required? ● #1 Phillips Screwdriver ● Cutting tool - such as scissors or diagonal cutter ● 1.5 mm hex wrench ● 2 mm hex wrench Let’s get started! Warning: Installation of this kit into a drone should be done by an experienced person, in adherence with all recommendations and guidelines of the Inspire ... -
Page 5: Rededge-Mx Instructions
Showing DLS2 mast mounted on Inspire 2 with DLS 2 connector facing forward Warning: Failure to properly secure loose wires may lead to interference with the aircraft propellers. This may damage the Inspire, RedEdge-MX/Altum, or both. RedEdge-MX Instructions ... -
Page 6: Attaching The Rededge-Mx And Dls 2 To The Inspire
4. Locate the two M2 x 8 mm screws and the Go-Pro mount adapter. 5. Attach the Go-Pro mount adapter to the sensor mounting plate. 6. Locate the Quick Mount adapter and remove the thumbscrew. 7. Attach the Go-Pro mount adapter of the assembled sensor mounting plate to the Quick mount adapter and secure it with the thumbscrew. ... - Page 7 2. Plug the DLS 2 cable from the DLS 2 port to the connector board. 3. Using the provided shorter 6-pin cable, connect the RedEdge-MX “DLS” port to the connector board. Diagram: RedEdge-MX to Connector Board to DLS 2 4.
-
Page 8: Altum Instructions
7. Attach the Go-Pro mount adapter of the assembled sensor mounting plate to the Quick mount adapter and secure it with the thumbscrew. 8. Connect the Quick Mount cable to the Altum wire harness. MicaSense Altum connected to Quick Mount Rev 02 - July 2019 ... -
Page 9: Attaching The Altum And Dls 2 To The Inspire
Attaching the Altum and DLS 2 to the Inspire Once assembled, the Quick Mount can quickly and easily be installed or removed from the Inspire. Power is provided by the Inspire via the Quick Mount. 1. Attach the assembled Quick Mount (with connected Altum) to the Inspire using the DJI lock mechanism on the Inspire. ... -
Page 10: Support
The contents of this manual are subject to change without notice. MicaSense, Inc. assumes no liability for incidental or consequential damages arising from the use of this product, and any claims by a third party. Copying of the contents of this manual, in whole or in part, as well as the scanner applications ... - Page 11 PROCESS With MicaSense sensors, you own your data. You’re not limited to a particular processing platform. You can choose whichever platform is best for you, your customer, or your project. ...
- Page 12 Located in Seattle, Washington, MicaSense delivers integrated solutions for data gathering, processing, and analytics across the global agriculture market. With decades of expertise in widely varied UAV applications, the MicaSense team is redefining remote sensing technology and pioneering new ways to collect and analyze information. ...
- Page 13 Revision History Revision Description Date 01 Initial Release 07 Dec 2018 02 DLS 2 mounting plate and kit 29 July 2019 content updated Rev 02 - July 2019 PAGE 12 ...
Need help?
Do you have a question about the RedEdge-MX DJI Inspire 2 Quick Mount and is the answer not in the manual?
Questions and answers