
Related Manuals for MicaSense RedEdge


Summary of Contents for MicaSense RedEdge
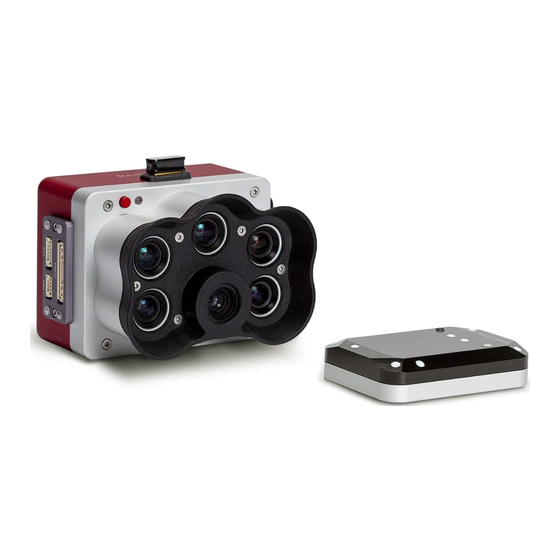
- Page 1 RedEdge/3DR Solo I N T E G R A T I O N G U I D E P/N: 900-00008 Rev 01 – May 2017...
-
Page 2: Table Of Contents
Table of Contents Thank you for your purchase! What’s inside? What’s required Let’s get started! Attaching the power board Attaching the power board Attaching the DLS-GPS mast assembly... -
Page 3: Thank You For Your Purchase
Thank you for your purchase! These instructions show how to integrate the MicaSense RedEdge with a 3DR Solo. This will cover powering the camera from the host system, attaching mounting brackets included in the kit, and placement of the Downwelling Light Sensor (DLS) and GPS. -
Page 4: What's Required
Solo is not powered, has the battery removed, and the rotor blades removed. Failure to follow these instructions can result in injury and/or damage to the Solo or RedEdge. Attaching the power board 1. Remove the three screws on the 3DR Solo gimbal bay cover. - Page 5 4. Remove the adhesive cover from the power board. 5. Thread the RedEdge connector through the hole in the cover as shown. Peeling back the red adhesive lining, adhere the board to the cover in the position indicated below.
-
Page 6: Attaching The Power Board
Attaching the power board 1. Remove the GoPro mount pin. GoPro mount pin removed. 2. Using the three 4-40 screws, attach the RedEdge/GoPro adapter assembly to the RedEdge with a #1 drive phillips screwdriver. Three flat head screws tightened to the RedEdge. -
Page 7: Attaching The Dls-Gps Mast Assembly
4. Flipping the Solo mount side up, insert and tighten the GoPro mount pin. NOTE: While tightening, make sure to slightly tilt the camera to compensate for the tilt of the aircraft while flying. Camera loosely screwed in. Camera tilted to compensate for tilt during flight. Attaching the DLS-GPS mast assembly 1. - Page 8 3. Flip the Solo over, so that the camera is now facing downwards and the mast is facing upwards (once unfolded and locked into place). The locking mechanism on the mast will need to be tightened. 4. Using the included alcohol wipe, clean all surfaces where the VHB tape will be applied. NOTE: This is a critical step in promoting adhesion between surfaces.
- Page 9 8. Connect the GPS unit to the DLS unit. NOTE: See the RedEdge Integration Guide for more details. 9. Connect the long 6pin connector from the DLS “CAM” connector to the matching connector on the RedEdge camera.
- Page 10 LOST PROFITS, OR REPLACEMENT PRODUCT COSTS ARISING OUT OF THE PURCHASE, USE, OR PERFORMANCE OF THE MICASENSE ACCESSORIES, UNDER ANY THEORY OF LIABILITY, EVEN IF MICASENSE HAS BEEN ADVISED OF THE POSSIBILITY OF SUCH DAMAGES. MICASENSE DISCLAIMS ANY IMPLIED WARRANTY...
- Page 11 Start processing your images Transform your raw data using MicaSense Atlas Upload your data to the Atlas cloud Use the MicaSense Uploader, found under ‘Downloads’ in your ATLAS account. Create your farms and fields Draw your field boundary to easily organize and store your data.
- Page 12 With decades of expertise in widely varied UAV applications, the MicaSense team is redefining remote sensing technology and pioneering new ways to collect and analyze information. MicaSense RedEdgeTM Multispectral Camera 3DR Solo Integration Guide Rev 01 –...
Need help?
Do you have a question about the RedEdge and is the answer not in the manual?
Questions and answers