Table of Contents
Advertisement
Quick Links
Advertisement
Table of Contents

Related Manuals for Blodgett SC-10GH


Summary of Contents for Blodgett SC-10GH
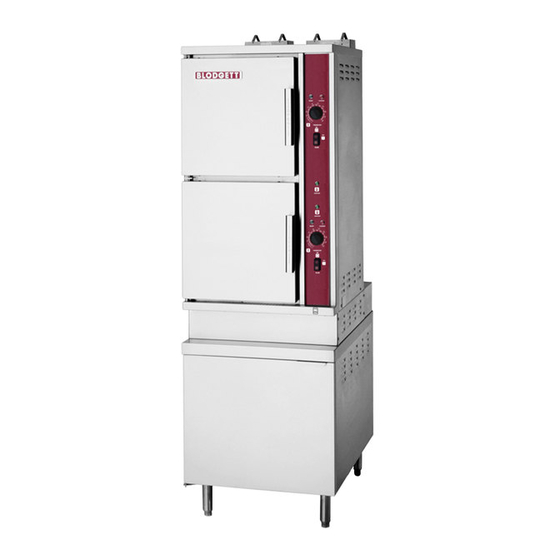
- Page 1 SC-GH SERIES HIGH EFFICIENCY GAS FIRED CONVECTION STEAMER INSTALLATION – OPERATION – MAINTENANCE BLODGETT OVEN COMPANY www.blodgett.com 44 Lakeside Avenue, Burlington, Vermont 05401 USA Telephone (800) 331-5842, (802) 860-3700 Fax: (802) 864-0183 S00061 Rev B (2/05)
- Page 2 IMPORTANT NOTES FOR INSTALLATION AND OPERATION This is the safety alert symbol. It is used to alert you to potential personal injury hazards. Obey all safety messages that follow this symbol to avoid possible injury or death. WARNING: Improper installation, operation, adjustment, alteration, service or maintenance can cause property damage, injury or death.
-
Page 3: Table Of Contents
TABLE OF CONTENTS DESCRIPTION PAGE 1.0 Service Connections ...4 2.0 Installation ...5 3.0 Performance Check ...11 4.0 Operation Instructions ...12 5.0 Maintenance...14 6.0 Deliming Procedure...19 7.0 Troubleshooting ...20... -
Page 4: Service Connections
FAILURE OR MALFUNCTION OF THIS APPLIANCE DUE TO POOR WATER QUALITY IS NOT COVERED UNDER WARRANTY. MODEL BTU/HR. kW/HR. 95,000 SC-5GH 140,000 SC-7GH SC-10GH 190,000 SC-16GH 24 [610] 36 [914] SC-16GH ONLY DIMENSIONS ARE IN INCHES [MM] Total dissolved solids... -
Page 5: Installation
2.0 INSTALLATION WARNING: Do not connect the appliance to the electrical supply until after the gas connection has been made. Installation must conform to local codes, or in absence of local codes, with the National Fuel Gas Code - ANSI Z223.1/NFPA 54, or the Natural Gas and Propane Installation Code, CSA B149.1, as applicable. -
Page 6: Exhaust Fans And Canopies
2.0 INSTALLATION (Continued) 2.1 EXHAUST FANS AND CANOPIES: Canopies are set over ranges, ovens, kettles, etc., for ventilation purposes. It is recommended that a canopy extend 6" past the appliance and be located 6' 6" from the floor. Filters should be installed at an angle of 45 degrees or more with the horizontal. This position prevents dripping of grease and facilitates collecting the run-off grease in a drip pan, usually installed with the filter. -
Page 7: Gas Connection
2.0 INSTALLATION (Continued) To Install: 1. Uncrate carefully. Report any freight damage to the freight company immediately. 2. Set the unit in place. Be certain to maintain the minimum clearances from combustibles and non-combustibles. 3. For an appliance supplied with legs, level the appliance using a spirit level. Should flanged adjustable feet be provided, anchor to floor using proper anchoring devices. -
Page 8: Electrical Connection
(Continued) 2.0 INSTALLATION 1.0 The Serial and Rating Plate on the unit indicates the type of gas your unit is equipped to burn. DO NOT connect to any other gas type. 2.0 A ¾” NPT line is provided at rear for the connection. Each compartment is equipped with an internal pressure regulator set at 3.5"... -
Page 9: Plumbing Connections
2.0 INSTALLATION (Continued) PLUMBING CONNECTIONS: NOTICE: Plumbing connections must comply with applicable sanitary, safety and plumbing codes. Two water lines are provided. Connect water supply lines to the 3/8" copper tubes at the rear of the steamer. One line is for supply of water to the generator and one for cold condensate water to condense live steam entering the drain line. -
Page 10: Water Conditioning
INSTALLATION (Continued) WATER CONDITIONING: It is important that the water supplied to the generator be softened to no more than 2.0 grains of hardness and have a pH of 6 to 7.5. This degree of hardness can be easily obtained with the use of a properly maintained water softener. The use of a water meter will determine the water consumption and when the water softener needs regeneration or recharging. -
Page 11: Performance Check
3.0 PERFORMANCE CHECK CAUTION: The appliance and its parts are hot. Use care when operating, cleaning and servicing the appliance. Once the steamer is installed and all mechanical connections have been made, thoroughly test the steamer before operation. 1. Check that proper water, drain and electrical and gas connections have been made. 2. -
Page 12: Operation Instructions
4.0 OPERATION INSTRUCTIONS CAUTION: If you smell gas during the lighting procedure, immediately shut off the gas supply until the leak has been corrected. LIGHTING Do not attempt to operate this unit in the event of a power failure. 1. Ensure power, gas and water supply is on. 2. - Page 13 4.0 OPERATION INSTRUCTIONS (Continued) WARNING: In the event you smell gas, shut down equipment at the main shut off valve and contact the local gas company or gas supplier for service. WARNING: When this appliance is installed with casters and is connected to the supply piping by means of a connector for moveable appliances, a restraint to prevent damage to the connector or quick disconnect device should have been...
-
Page 14: Complete Shutdown
Ignition Light When lit, indicates burners have been ignited and are heating the steam generator tank. NOTE: Each cooking compartment has its own steam generator and controls and can be operated independently. SHUTDOWN STAND BY 1. Set Timer to “OFF” position and leave door slightly open. COMPLETE SHUTDOWN 1. - Page 15 4.0 OPERATION INSTRUCTIONS (Continued) PREPARATION Prepare vegetables, fruits, meats, seafood and poultry normally by cleaning, separating, cutting, removing stems, etc. Cook root vegetables in a perforated pan unless juices are being saved. Liquids can be collected in a solid 12" x 20" pan placed under a perforated pan.
-
Page 16: Maintenance
5.0 MAINTENANCE NOTICE: Contact the factory, the factory representative or local service company to perform maintenance and repairs. WARNING: Disconnect the power supply to the appliance before cleaning or servicing. CAUTION: The appliance and its parts are hot. Use care when operating, cleaning and servicing the appliance. -
Page 17: Stainless Steel
5.0 MAINTENANCE (Continued) WEEKLY (or more often if necessary): 1. Clean exterior with a damp cloth and polish with a soft dry cloth. 2. Use a non-abrasive cleaner to remove discolorations. 3. Clean around burner air mixer and orifice if lint has accumulated. It is NOT RECOMMENDED to use cleaning agents that are corrosive. - Page 18 5.0 MAINTENANCE (Continued) Soil and burnt deposits which do not respond to the above procedure can usually be removed by rubbing the surface with SCOTCH-BRITE scouring pads or STAINLESS scouring pads. DO NOT USE ORDINARY STEEL WOOL as any particles left on the surface will rust and further spoil the appearance of the finish.
-
Page 19: Deliming Procedure
6.0 DELIMING PROCEDURE CAUTION: Read and follow instructions on the CLR bottle. Use plastic or rubber gloves to avoid skin contact. If CLR comes in contact with skin, rinse with clean water. 1. Completely drain steam generator by setting on/off switch to “OFF”. Set cooking timer to 2. -
Page 20: Troubleshooting
7.0 TROUBLESHOOTING Burners do not come on: 1. Gas supply to unit is “OFF”. 2. Power Switch is not turned “ON”. 3. Steam generator probe not sensing the water level, will not call for ignition. 4. Ignitor not functioning. 5. Gas combination supply valve not “Opening”. Burners produce carbon deposits: 1. - Page 21 7.0 TROUBLESHOOTING (Continued) Water accumulates in the compartment: 1. Compartment drain clogged. Water flows into drain during shut down: 1. Condensate valve does not close. Check thermostatic cooling valve body for foreign particles or damage. Water not being supplied to steam generator: 1.
Need help?
Do you have a question about the SC-10GH and is the answer not in the manual?
Questions and answers