Table of Contents
Advertisement
Advertisement
Table of Contents

Related Manuals for Woodpecker U600 LED


Summary of Contents for Woodpecker U600 LED
- Page 1 U600 LED ULTRASONIC SCALER INSTRUCTION MANUAL...
-
Page 2: Table Of Contents
Contents 1. The installation and components of equipment ..........1 2. Installation and adjustment ................3 3. Maintenance .......................4 4. Cleaning, Disinfection and Sterilization ............8 5. Precaution ......................14 6. After service .....................16 7. Symbol instruction ...................16 8. Environmental protection .................16 9. Manufacturer’s right ..................17 10. -
Page 3: The Installation And Components Of Equipment
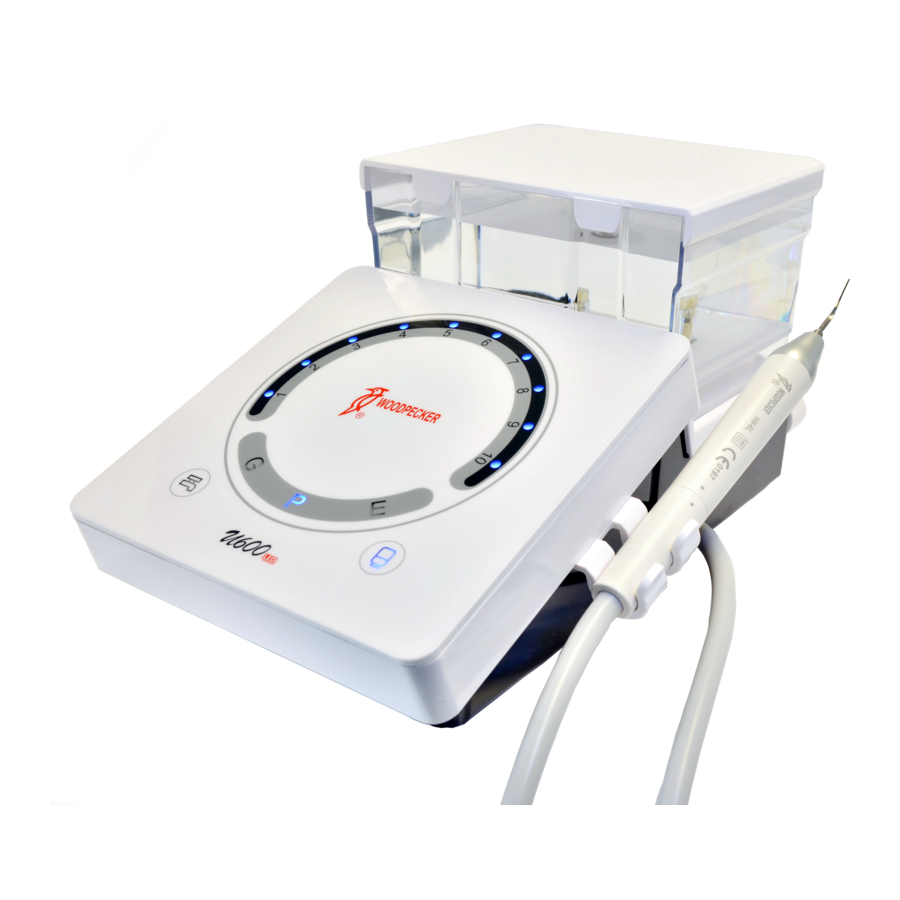
Ultrasonic scaler U600 LED is composed of electrocircuit, water way and ultrasonic transducer. 1.2.3 Scope of application Ultrasonic scaler U600 LED is used for the dental calculus elimination and root canal treatment. 1.3 The main technical specifications 1.3.1 Technical specifications of ultrasonic scaler a) Main unit input: 220-240V~ 50Hz/60Hz 150mA b) Output primary tip vibration excursion: ≤... - Page 4 in the presence of a flammable anesthetic mixture with air, oxygen or nitrous oxide. 1.4 Instruction of the main components Instruction and component sketch map 1.4.1 Front of the main unit sketch map Picture 1 1.4.2 Back of the main unit sketch map Picture 2 1.4.3 Instruction of using wrench...
-
Page 5: Installation And Adjustment
Picture 3 Picture 4 2. Installation and adjustment 2.1 Operation 2.1.1 Open the packing box, make sure that all the parts and accessories are complete according to the packing list, take the main unit out of the box, and put it on the the stable plane facing to the operator. -
Page 6: Maintenance
direction, Do not screw it over tight in case of damage. [ note 1] 2.1.3 Insert the plug of the foot switch to its socket. (see picture 2) 2.1.4 Connect one end of the water pipe to the water entrance, and the other end to the clean water sourse. - Page 7 Fault Possible cause Solutions The power plug is in loose Make the plug insert to The scaling tip doesn't contact. the socket well. vibrate and there is no The foot switch is in loose Insert the foot switch to water flowing out when contact.
- Page 8 Fault Possible cause Solutions There is water flow C o n t a c t w i t h t h e There is impurity in the out when turn off the l o c a l d i s t r i b u t o r o r solenoid valve.
- Page 9 picture 5 a) Snip the water pipe at a distance of 10cm to 20cm from the water entrance. b) Turn on the power switch, get through to the power. c) Connect the multi-function syringe of the dental unit to the water pipe. d) Screw off the scaling tip or pull out the handpiece.
-
Page 10: Cleaning, Disinfection And Sterilization
4. Cleaning, Disinfection and Sterilization The cleaning, disinfection and sterilization of handpiece, tip, and wrench (include torque wrench and Endo wrench) are as follow. Unless otherwise stated, they will be hereinafter referred to as “products”. Warnings The use of strong detergent and disinfectant (alkaline pH>9 or acid pH <5) will reduce the life span of products. - Page 11 Tools: Torque wrench, tray, soft brush, clean and dry soft cloth. 1. Remove the tip from product with torque wrench provided by Guilin Woodpecker Medical Instrument Co., Ltd, and then put the tip and wrench into a clean tray. 2. Unscrew the nipple of product counterclockwise, remove the sealing ring, light pipe, and LED lamp(if any), and put them in the tray.
- Page 12 It is recommended to use a washer-disinfector in accordance with EN ISO 15883. For the specific procedure, please refer to the automated disinfection section in the next section “Disinfection”. Notes a) The cleaning agent does not have to be pure water. It can be distilled water, deionized water or multi-enzyme.
- Page 13 c) Cleaning: (c1) The cleaning procedure should be suitable for the product to be treated. The flushing period should be sufficient (5-10 minutes). Pre-wash for 3 minutes, wash for another 5 minutes, and rinse it for twice with each rinse lasting for 1 minute. (c2) In the washing stage, the water temperature should not exceed 45 °C, otherwise the protein will solidify and it is difficult to remove.
- Page 14 b) The drying temperature should not exceed 138 °C; c) The equipment used should be inspected and maintained regularly. 4.6 Inspection and maintenance In this chapter, we only check the appearance of the product. After inspection, if there is no problem, the handpiece should be immediately reassembled, installing the sealing ring, LED, light guide, and cone head in sequence to the handpiece, and then tighten the cone head clockwise.
- Page 15 132℃/134℃ and a pressure of 2.0 bar ~ 2.3 bars. • Allow a maximum sterilization time of 20 minutes at 134 °C. Verification of the fundamental suitability of the products for effective steam sterilization was provided by a verified testing laboratory. Notes a) Only products that have been effectively cleaned and disinfected are allowed to be sterilized;...
-
Page 16: Precaution
2. It should not be mixed with dangerous goods during transportation. 3. Avoid exposure to sun or rain or snow during transportation. The cleaning and disinfection of main unit are as follows. • Before each use, wipe the surface of the connector of cable and cable with a soft cloth or paper towel soaked in 75% medical alcohol. - Page 17 Ⅰ. The maintenance, repair and modification are made by the manufacturer or the authorized dealer. Ⅱ . The changed components are original of "WOODPECKER" and operated correctly according to instruction manual. 5.1.16 The screw thread of the scaling tips produced by other manufacturers maybe coarse, rusty and collapsed, which will damage the screw thread of the handpiece irretrievably.
-
Page 18: After Service
6. After service We offer one year free repair to the equipment according to the warranty card. The repair of the equipment should be carried out by professional technician. We are not responsible for any irretrievable damage caused by the not professional person. -
Page 19: Manufacturer's Right
9. Manufacturer’s right We reserve the rights to change the design of the equipment, the technique, fittings, the instruction manual and the content of the original packing list at any time without notice. If there are some differences between blueprint and real equipment, take the real equipment as the norm. -
Page 22: Statement
The pictures are only for reference. The final interpretation rights belong to GUILIN WOODPECKER MEDICAL INSTRUMENT CO., LTD. The industrial design, inner structure, etc, have claimed for several patents by WOODPECKER, any copy or fake product must take legal responsibilities. -
Page 23: Table Of Operating Power Of The Tips
TABLE OF OPERATING POWER OF THE TIPS Scaling Endodontics Tip Model Power Tip Model Power 1-10(G) 1-6(E) 1-10(G) 1-3(E) 1-10(G) 1-6(E) 1-10(G) 1-3(E) 1-10(G) 1-6(E) 1-10(G) 1-3(E) 1-10(G) 1-10(E) G 10 1-10(G) 1-10(E) G 11 1-10(G) 1-6(E) E10D 1-6(E) Periodontics 1-6(E) Tip Model Power... - Page 24 ZMN-SM-059 V1.9-20201124...
Need help?
Do you have a question about the U600 LED and is the answer not in the manual?
Questions and answers