
Related Manuals for Makita AN613


Summary of Contents for Makita AN613
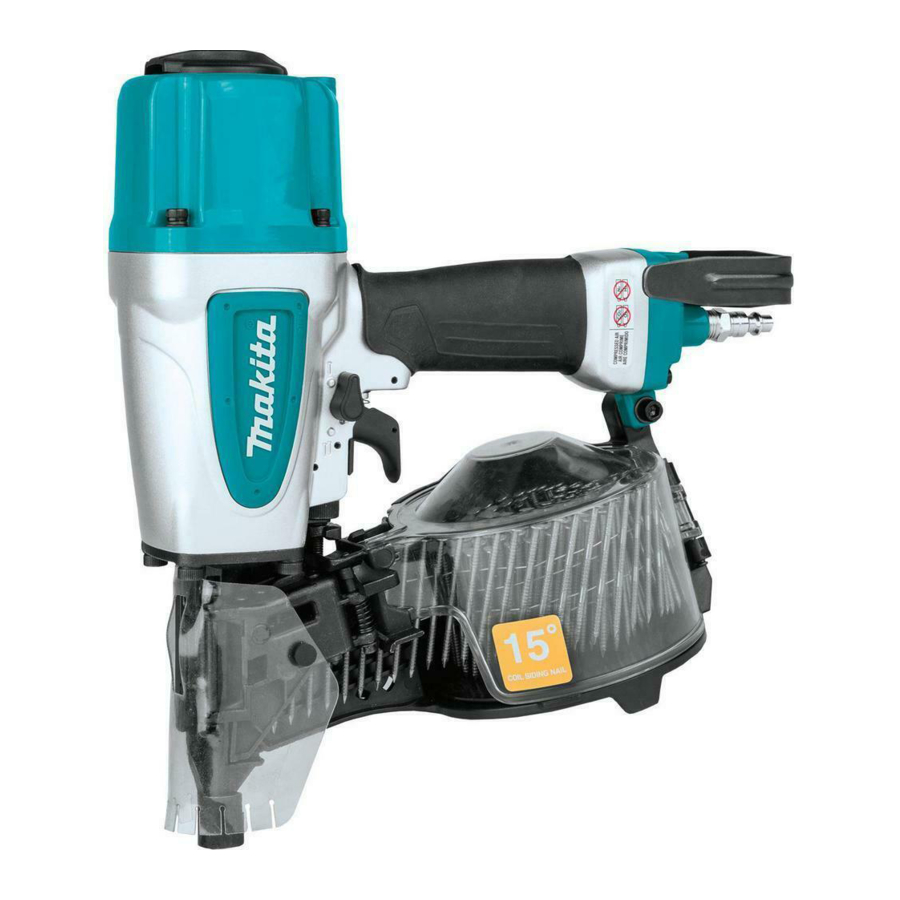
- Page 1 Pneumatic Coil Nailer INSTRUCTION AN613 IMPORTANT: Read Before Using. ENGLISH (Original instructions)
-
Page 2: Specifications
SPECIFICATIONS Model: AN613 Air pressure 0.49 - 0.83 MPa (70 - 120 PSIG) Wire-collated coil nails (collation angle 15°) Applicable nails Sheet-collated coil nails (collation angle 15°) Nail length (L) x Shank diameter (D) L: 38 mm - 65 mm x D: 2.3 mm - 2.5 mm (L: 1-1/2″... - Page 3 accidentally if the safety mechanism is not or ricochet of fasteners, which may cause working correctly. injury. Operating controls Keep hands and body away from fastener discharge area of tool. Do not use a tool with missing or damaged safety warning label(s.) Do not load tool with fasteners when any one of the operating controls is activated.
-
Page 4: Parts Description
An unexpected driving will tool, failure to do so will cause serious injury. cause serious injury when the air hose is Ask Makita's Authorized service centers for connected. periodical inspection of the tool. When you drop or strike the tool, check the... -
Page 5: Installation
Use an air hose as large and as short as possible to INSTALLATION assure continuous, efficient nailing operation. With an air pressure of 0.49 MPa (70 PSIG), an air hose Selecting compressor with an internal diameter of over 6.5 mm (1/4″) and a length of less than 20 m (66 ft.) is recommended when the interval between each nailing is 0.5 seconds. - Page 6 Adjusting depth of nailing CAUTION: Always release the trigger and disconnect the hose before adjusting the depth of nailing. ► 1. Adjuster To adjust the depth of nailing, turn the adjuster. The depth of nailing is the deepest when the adjuster is turned fully in the A direction shown in the figure.
- Page 7 ASSEMBLY CAUTION: Before carrying out any work on the tool, always release the trigger and disconnect the air hose from the tool. CAUTION: Load the same type, size and uniform length of nails when loading nails in the magazine. Loading nailer CAUTION: Be careful not to injure yourself with the fasteners when loading and unloading.
-
Page 8: Operation
Lift and turn the coil support plate according to the nail length to be used. ► 1. Air fitting 2. Air socket Slip the air socket of the air hose onto the air fitting on ► 1. Coil support plate 2. Graduation the tool. - Page 9 To maintain product SAFETY and RELIABILITY, repairs, any other maintenance or adjustment should be performed by Makita Authorized or Factory Service Centers, always using Makita replacement parts. Nails Handle nail coils and their box carefully. If the nail coils have been handled roughly, they may be out of shape, causing poor nail feed.
-
Page 10: Optional Accessories
OPTIONAL ACCESSORIES CAUTION: These accessories or attachments are recommended for use with your Makita tool specified in this manual. The use of any other accessories or attachments might present a risk of injury to persons. Only use accessory or attachment for its stated purpose. - Page 11 To reduce your exposure to these chemicals: work in a well ventilated area, and work with approved safety equipment, such as those dust masks that are specially designed to filter out microscopic particles. Makita Corporation 3-11-8, Sumiyoshi-cho, Anjo, Aichi 446-8502 Japan...
Need help?
Do you have a question about the AN613 and is the answer not in the manual?
Questions and answers