Table of Contents
Advertisement
Available languages
Available languages
Quick Links
Advertisement
Table of Contents

Related Manuals for CTC Union Clatronic AR 737 USB/TFT


Summary of Contents for CTC Union Clatronic AR 737 USB/TFT
- Page 1 Bedienungsanleitung/Garantie Instruction Manual/Guarantee Autoradio mit USB & TFT-Monitor Stereo Car Radio with USB & TFT Monitor AR 737 USB/TFT AR 737 USB/TFT AR 737 USB/TFT 05-AR 737 DVD_D 1 21.08.2006, 11:50:58 Uhr...
-
Page 2: Table Of Contents
DEUTSCH DEUTSCH Inhalt Übersicht der Bedienelemente ........Seite Bedienungsanleitung ..........Seite Technische Daten ............Seite 15 Garantie............... Seite 17 Stichwortverzeichnis – Index ........Seite 18 Menü-Übersicht............Seite 19 ENGLISH ENGLISH Contents Overview of the Components ........Page Instruction Manual............Page 20 Technical Data ............ -
Page 3: Übersicht Der Bedienelemente
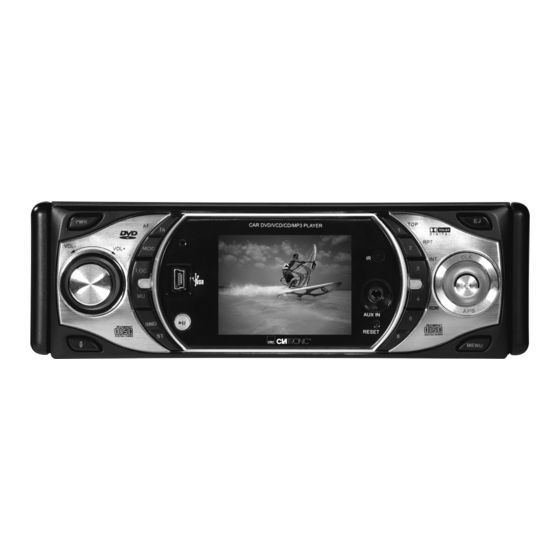
Übersicht der Bedienelemente Overview of the Components Abbildung 1: Fernbedienung; Illustration 1: Remote Control Abbildung 2: Bedienfeld; Illustration 2: Control Panel 05-AR 737 DVD_D 3 21.08.2006, 11:51:00 Uhr... - Page 4 Abbildung 1: Fernbedienung 16 EQ: Radio Modus: 1 POWER: Standby-Modus aktivieren. Kurz drücken: 2 VOL +/-: Lautstärke erhöhen/vermindern. Equalizereinstellungen wählen. Lang drücken: 3 SEL: Ein- und Ausschalten der LOUDNESS-Funktion. Radio Modus: Kurz drücken: 17 STOP: Wiedergabe stoppen. Auswahl des Klang-/ Bildmodus. 18 PLAY/PAUSE: Lang drücken: a) Radio Modus:...
- Page 5 Verkehrssicherheit Sicherheitshinweise • Die Verkehrssicherheit ist oberstes Gebot. Benutzen Sie daher Ihre Autoradioanlage immer so, dass Sie stets der Lesen Sie vor Inbetriebnahme dieses Gerätes die Bedienungs- aktuellen Verkehrssituation gewachsen sind. anleitung sehr sorgfältig durch und bewahren Sie diese inkl. •...
- Page 6 Installation Montieren Sie das Radiogerät gemäß folgender Darstellungen. a Mutter b Federscheibe c Unterlegscheibe d Schraube e Montagewinkel Einschubgehäuse g Gewindebolzen Achtung! h Schrauben der Transportsicherung (Bitte vor der Montage entnehmen) Ausziehwerkzeug (Schlüssel für die Demontage) Blendabdeckung ACHTUNG: Lüfter nicht verdecken! k Lüfter USA/EURO Schalter (Radiofrequenz-Umschalter, dient zur Auswahl zwischen dem USA und EUROPA...
- Page 7 Anschluss Stellen Sie die Anschlüsse gemäß des Schaubildes her. Achtung: • Schalten Sie das Gerät erst nach dem Anschluss sämtlicher • Sie haben die Möglichkeit den eingebauten TFT Bildschirm Kabel ein. als Monitor für eine optionale Rückfahrkamera (nicht im • Verwenden Sie Lautsprecher mit einer Impedanz von 4 Lieferumfang enthalten) zu verwenden.
- Page 8 Wichtige Zusatzinformation 2. Wenn das Fahrzeuginnere extrem heiß ist, z.B. nach einer längeren Parkdauer in praller Sonne, den Player nicht zum Einbau Ihres Autoradios! einschalten, bis das Fahrzeug nach einer kurzen Fahrzeit im 1. Die Schrauben (h) der Transportsicherung bitte vor der Inneren etwas abgekühlt ist.
- Page 9 REG OFF: Die Programmkennung (PI) des Regionalsen- HINWEIS: deprogramms wird bei der Suche nach einer Alternativfre- • Nicht mit den Fingern hinter das Bedienteil fassen. quenz (AF) oder einer Programmkennung (PI) ignoriert. Es besteht Verletzungsgefahr, wenn was Bedienteil • PI MUTE/PI SOUND (nur für Radiobetrieb) wieder in die Normalposition fährt.
- Page 10 gramms. Diese Informationen können von Ihrem Autoradio b) Anspielfunktion: angezeigt werden. Bewegen Sie die SEL Taste kurz in Richtung APS, spielt das Radio alle voreingestellten Sender des Solche Programmtypen können z.B. sein: Frequenzbandes an. SPORT NEWS CLASSICS HINWEIS: Mit der PTY-Funktion können Sie gezielt Sender eines be- Die Anspielfunktion endet automatisch beim ersten stimmten Programmtyps auswählen.
-
Page 11: Bedienungsanleitung
21. ST-Taste 25. USB-Anschluss Radio-Betrieb: Dieses Gerät ist nach den letzten Stand der technischen STEREO/MONO Umschaltung Entwicklungen im USB Bereich entwickelt worden. Die große Anzahl von verschiedenen USB Speichermedien DVD-Betrieb: jeglicher Art die heute angeboten werden, erlauben es leider Zum Auswählen der Audiosprachen, sofern auf der DVD nicht, eine volle Kompatibilität mit allen USB Speicher- verschiedene Audiosprachen vorhanden sind. - Page 12 Menü verwenden HINWEIS: Sie können mit dem DVD-Player nur solche DVDs abspielen, Navigation und Auswahl die mit dem Regionalcode 2 gekennzeichnet sind. Es gibt sowohl eine Vielzahl von Brenn- und Komprimierungsverfah- ren als auch große Qualitätsunterschiede bei (gebrannten) CDs/DVDs. Darüber hinaus hält die Musikindustrie keine festen Standards beim Kopierschutz ein.
- Page 13 Zum Hintergrund: Sofern Sie keinen Wide-Screen-Fernseher • SPDIF OFF: Es wird ein analoges und kein digitales Audio- haben, weist Ihr Fernsehbild ein Seitenverhältnis von 4:3 auf. Signal ausgegeben. Die meisten Spielfi lme weisen jedoch ein Seitenverhältnis von • SPDIF/RAW: Es wird ein digitales Audiosignal ausgegeben. 16:9 auf, deren Bild ist also zu breit für einen Fernseher.
- Page 14 • Aus: Wird das Abspielen einer DVD, CD oder VCD ange- • PAL: In Europa verbreitetes System. halten und danach wieder gestartet, beginnt das Abspielen • AUTO: Wählen Sie diese Einstellung, wenn es sich bei wieder am Anfang des Medium. Ihrem Wiedergabegerät um ein Multisystemgerät handelt.
-
Page 15: Technische Daten
• PG 13: Eine elterliche Begleitung wird dringend empfohlen. Technische Daten Manche Passagen können für Kinder unter 13 Jahren Allgemeines unangemessen sein. • PGR: Eine elterliche Begleitung ist notwendig. Netzspannung ............DC 13,8 V • R: Jugendliche unter 17 Jahren dürfen den Film nur in Stromverbrauch ............10 A Max. - Page 16 Störungsbehebung Fehlersymptom Grund Lösung Gerät lässt sich nicht Fehlanschluss Bitte setzen Sie sich Bevor Sie die Checkliste durchgehen, bitte zunächst den über die Zündung „Ein“ (jeder KFZ Hersteller mit Ihrer KFZ Werkstatt Anschluss fertig stellen. Wenn nach erfolgtem Durchprüfen der bzw.
-
Page 17: Garantie
Anfassen der CD Kostenlose Hotline Haben Sie Fragen zu Ihrem neuen Gerät? Unser Serviceteam steht gerne für Sie bereit. Kleinere Probleme lassen sich oft schon telefonisch lösen. Die CD stets am Rand Rufen Sie deshalb bitte zunächst die untenstehende Hotline an. anfassen. -
Page 18: Stichwortverzeichnis - Index
Stichwortverzeichnis – Index AF....................10 PI (Programm Information) ............9 Play / Pause ( II)..............10 Anschluss..................7 APS Taste ..................9 PTY Taste...................10 Ausschalten..................8 PWR Taste ...................8 Auswurftaste ................9 AUX IN ..................11 RANDOM (4RTM) (Zufallswiedergabe)........10 REG (Regional)................8 Bedienhinweise................8 REPEAT (2RPT) (Wiederholen) ..........10 Bedienung..................8 RESET Knopf................11 BND Taste ..................9 SEL Taste..................8 CD auswerfen ................9... -
Page 19: Menü-Übersicht
Menü-Übersicht Seite Allgemeine Einstellung Seite Bevorzugte Einst. TV-Monitor Norm/PS TV Modell Norm/LB Auto Breit NTSC Winkelzeichen Audio Sprachen Englisch Französisch OSD-Sprache Englisch Spanisch Französisch Deutsch Deutsch Italienisch Spanisch Portugiesisch Italien. Untertitel Sprachen Englisch Portug. Spanisch SPDIF-Ausgabe SPDIF Off Deutsch SPDIF/RAW Itanienisch SPDIF/PCM Portugiesisch... -
Page 20: Instruction Manual
Illustration 1: Remote Control 16 EQ: Radio Mode: 1 POWER: To activate standby mode. Press briefl y: 2 VOL +/-: To increase/reduce the volume. Selecting equaliser settings. Press longer: 3 SEL: Switching the LOUDNESS function on and off. Radio Mode: Press briefl... - Page 21 Road Safety Safety Information • Road safety is of paramount importance. You should therefore use your car radio at all times in such a way that Read the operating instructions carefully before putting the you are able to cope with the current traffi c situation. appliance into operation and keep the instructions including the •...
- Page 22 Installation Please install the car radio as shown below. a Nut b Spring washer c Plain washer d Screw e Mounting bracket Slide-in housing g Threaded bolt Note: h Retaining screws during transport (please remove before installation) Extraction tool (spanner for dismantling) Screen cover k Fan CAUTION: Do not cover the fan.
- Page 23 Connection Connect the device as shown in the diagram. (B+) 12 V White ISO connection Camera rear Green (B-) Hand brake Yellow Camera input rear AUX (optional) Video input rear Antenna connection Audio input R (red) Audio input L (white) RCA cable Subwoofer (grey) Video output 2 (yellow)
- Page 24 Important Information 2. If the interior of the vehicle becomes very hot, for example after standing in direct sunlight for a prolonged period, do for installing your carradio! not switch on the player until the inside of the vehicle has 1.
- Page 25 REG OFF: The programme identifi cation (PI) of the regional NOTE: programme is ignored during the search for an alternative • Do not place your fi ngers behind the operating unit. frequency (AF) or a programme identifi cation (PI). There is a danger of injury when the operating unit •...
- Page 26 When PTY has been selected the radio starts searching for NOTE: corresponding PTY information and stops when the PTY The scan function ends automatically at the fi rst information has been found. If the programme type being storage location of frequency band FM1. searched for is not found, „NO PTY“...
- Page 27 22. LOC button 26. AUX IN socket LOCAL/DX (EON) (only available during radio operation) To connect analogue replay devices. Use this jack to replay Your radio can receive RDS EON data. The term „EON“ sound of other replay equipment such as DVD players, signifi...
- Page 28 Changing the default settings Overview of the main menu A large number of default settings can be comfortably changed via the screen menu. Press the SETUP-button (Fig. 1/25) on the remote control to • General Settings (1) start the menu for changing the default settings (only in DVD •...
- Page 29 OSD language The following options are available: • On: The screen saver is activated (default setting). • Off: The screen saver is deactivated. Last Memory Here you can select the language of the on-screen displays. Audio output Here you can defi ne how the DVD player should behave if the user presses the STOP button (illustration 1/17) during playback.
- Page 30 • FULL -2/8: The dynamic range is compressed slightly (2/8) Some DVD contain information concerning the target group. to full (FULL). This method is comparable with the rating of cinema fi lms • OFF: The dynamic range is not compressed at all (default). („Suitable only for persons of 12 years and over“...
-
Page 31: Technical Data
Default Technical data General Supply voltage ............DC 13,8 V Power consumption ............10 A max. Power ................4 x 10 W Monitor................2,5“ TFT Select the command „Default/Reset“ if you want to reset the Number of pixels............480 x 234 player to the factory implemented default settings. Any settings you have made will be lost. - Page 32 Troubleshooting Fault Symptoms Cause Solution The device cannot be The control processor Press the RESET Before going through the checklist please make all the operated, but „hangs of the device may button. connections fi rst. If you still have questions after going through up“.
-
Page 33: Guarantee
• Do not attach any stickers or adhesive tape to the CD. • Do not expose the CD to direct sunlight or sources of heat such as heating pipes. Do not leave CDs in the car if it is parked in direct sunlight as this will lead to a considerable rise in the temperature inside the car. -
Page 34: Index
Index AF....................25 Operating instructions ..............24 Operation ...................24 APS button .................25 AUX IN ..................27 PI (Programme Information) ............25 BND button.................25 Play / Pause ( II)..............26 Buttons on the Remote Control..........20 PTY button .................26 PWR button................24 CLK button .................27 Connection.................23 RANDOM (4RTM)..............26 REG (Regional)................24 REPEAT (2RPT) ................26 DVD Player.................27... -
Page 35: Menu Overview
Menu overview General Setup Page Preference Page TV Display Norm/PS TV Type Norm/LB Auto Wide NTSC Angle Mark Audio English French OSD Lang English Spanish French German German Italian Spanish Portuguese Italian Subtitle English Portuguese Spanish SPDIF-Output SPDIF Off German SPDIF/RAW Italian SPDIF/PCM... - Page 36 D-47906 Kempen/Germany · Industriering Ost 40 Internet: http://www.clatronic.de · email: info@clatronic.de 05-AR 737 DVD_D 36 21.08.2006, 11:51:45 Uhr...
Need help?
Do you have a question about the Clatronic AR 737 USB/TFT and is the answer not in the manual?
Questions and answers