Table of Contents
Advertisement
Advertisement
Table of Contents

Related Manuals for Modena BO 1635 LAR


Summary of Contents for Modena BO 1635 LAR
- Page 1 User Manual Book Built-in Electric Oven BO 1635 LAR BO 1635 IIR...
-
Page 2: Table Of Contents
Function Select Knob Function Warning Lamp MAINTENANCE Transport Information TROUBLESHOOTING SPECIFICATIONS APPENDIX Cooking Tips Miscellaneous Suggestions This guide book explains everything you need to know about your new product. Please contact our Customer Care should you need further assistance through www.modena.com. -
Page 3: Safety & Warning
SAFETY & WARNING The ovens are designed to operate with a monophase alternating current of 230 Volt, AC 50 Hertz. Before the installation of the appliance, we suggest you to always check the specifications on the rating label applied on the front bottom side of the oven. In electrical ovens, the data on energy labels are in conformity with EN 50304. - Page 4 handle), are dangerous and inappropriate. Any other use (such as heating the room, drying clothes or towels on the handle) is dangerous and must not be used. Our company is not responsible for damage to human health, the environment or property caused by improper use of the oven.
-
Page 5: Safety For Children
• Keep the oven clean and clean in a safe manner. Food residues that accumulate in the oven after use can damage the surface over time. • There must be a ventilation duct near the device. • Do not use a broken door or a door with a broken front glass. •... -
Page 6: Working About Electrical Safety
IMPORTANT! If you decide not to use the oven any more, it should be made inoperable by cutting the power supply cable, after unplugging it from the power supply. Disused appliances can be a safety risk as children often play with them. For this reason, it is advisable to make the oven safe. -
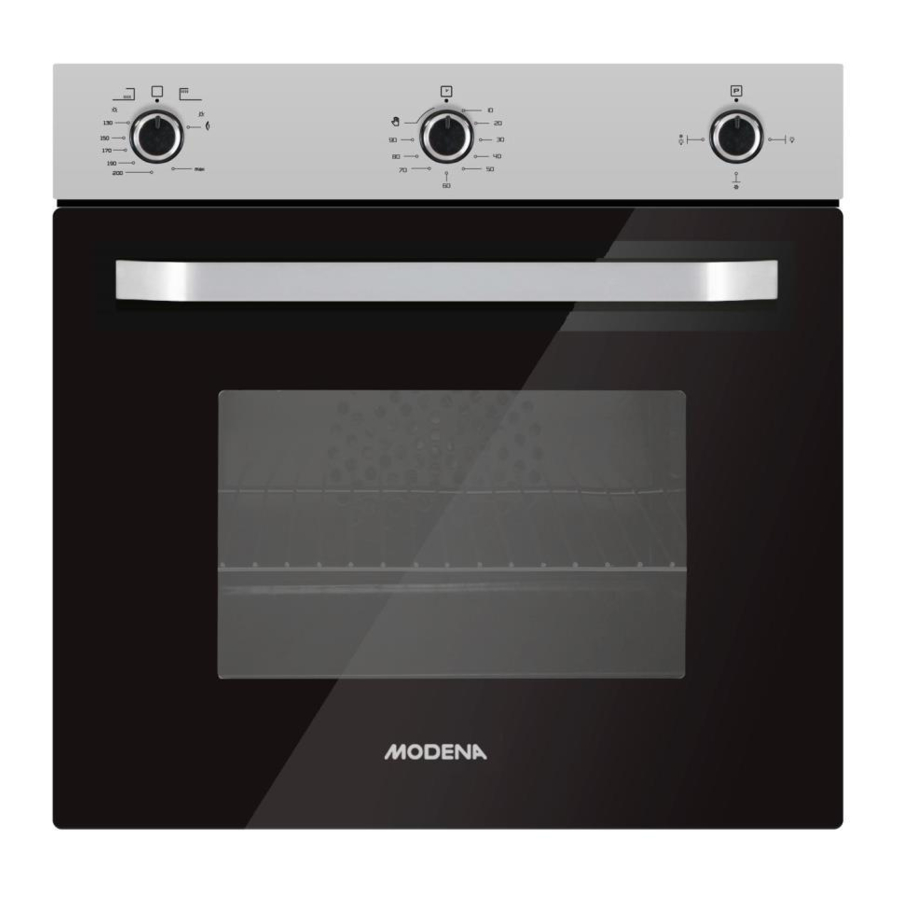
Page 7: Features
FEATURES Minute timer ovens Function warning lamp Function select knob Minute timer knob * Temperature adjustment knob Temperature warning lamp The control panel Heaters Oven dome light Rating label 10. The inner glass oven door The oven door 12. Turbo fan* *Only available on some models. - Page 8 NOTE! The position of minute timer knob may be different from shown. Accessories supplied can vary depending on the product model. All the accessories described in the manual may not exist on your product. Baking Tray Wire Grid Can be used for pastries, big roasts, and Used for the grilling, heating and to cook food with liquid content and during or to place the roasting food on the...
-
Page 9: Installation
INSTALLATION Installation should be carried out according to the instructions by a professionally qualified person. The manufacturer will not accept responsibility for any damage to persons, animals or things due to wrong installation. ENVIRONMENTAL WARNING! For safety and environmental reasons, after installing the appliance, it is necessary to dispose of the packaging materials, some of which can be reused (foil, cardboard, foam, etc.). - Page 10 cannot be removed without the aid of a tool. • To ensure air circulation, the oven should be fitted according to the dimensions shown in Figure 1. • The back panel of the kitchen cabinet must be removed to allow free air circulation.
-
Page 11: Mounting The Oven To The Cabinet
Figure 3 Mounting the Oven to the Cabinet • The device must be place balanced and centered inside the cabinet. • Oven, according to your preferrences, can be mounted higher into a closet or under your sink. • Open the door and secure the oven to the kitchen cabinet with four wood screws, which fit the holes provided in both side of the oven frame (A). - Page 12 SPACE В Slim model Large model...
-
Page 13: Before Connecting The Device Into Electrical Connection
Before Connecting The Device into Electrical Connection All electrical connections in accordance with applicable laws and rules should be done only by a qualified electrician. Connections must comply with national regulations. • Make sure the parameters of the electricity supplied from the main power in which positioned on the front bottom of the appliance. - Page 14 “N’’. • Black, brown or red electrical cables installed must be connected to edge indicated by “L’’. (See Figure 5) Figure 5 • Connection must comply with national regulations. • The oven must be positioned for easy access to wall outlet or a double pole switch for electrical connection.
-
Page 15: When The Oven Is First Installed
When The Oven is First Installed • Remove all the baking trays and oven racks. • Set the ‘Heat Setting’ to maximum level. • Switch on the top and bottom heating elements (and fan if present) using the corresponding button. •... -
Page 16: Tips For Saving Energy
Tips for Saving Energy The following tips will help you to use your appliance in an ecological way and to save energy. Inside the oven, heat is better transferred by using dark enamel cookware. 2. If you open the door frequently during cooking, air will get in and cause energy loss. -
Page 17: How To Use
HOW TO USE Before using the oven, you must set the time on an electronic or mechanical timer. Otherwise, the oven will not work. Temperature Adjustment Knob Used for setting the temperature of cooking between 50 to max º C while the oven is working. -
Page 18: Function Warning Lamp
Function Warning Lamp When you set any function with the function selector knob, the indicator lights up. The indicator is off when the handle is in the initial position "0". This function and operation may differ depending on the model. Function table: The table shows the functions of the oven and possible maximum and minimum temperature. - Page 19 Upper and Lower Heating (Static Cooking) • Both upper and lower heating elements is activated. 50 - 200 °C • This function is suitable for cakes, pies or muffins at the cooking patterns and casseroles. Please bake with a single tray. Lower Heater + Fan (Convection Cooking from The Bottom) •...
- Page 20 Grill + Fan (Convection Grill) • Grill heater is activated at the same time with the turbo fan. • The hot air, that is heated by grill heater, is distributed in oven evenly and quickly with the help of fan. Max °C •...
- Page 21 Dual Grill + Turnspit • Upper and grill heater, with turnspit activated at the same time. • This function is suitable for deep roasting food (meat, Max °C fish, chicken, etc.) that placed on the turnspit. • To avoid dripping grease on the inside of the oven, we recommend placing the baking tray on the lower shelf and adding 1-2 cups of water.
- Page 22 Turbo and Lower Heater + Fan (Pizza Cooking) • Turbo, the lower heater and turbo-fan is activated at the same time. • The hot air, that is heated by turbo heater, is distributed in oven evenly and quickly with the help of fan.
- Page 23 3. Place the skewer into the special hole from rear wall of the oven with the help of handle. 4. The skewer must be supported by support grid. 5. Take off the handle from skewer. 6. To avoid dripping grease on the inside of the oven, we recommend placing the baking tray on the lower shelf and adding 1-2 cups of water.
- Page 24 Cooling Fan Operation The air conditioning system is equipped with cooling fan that prevent overheating of the outer surface of the oven and it helps prevent damage. This fan creates an air stream that dissipates heat from the front grills (ventilation). At the same time, it creates an air curtain between control panel and cover and prevents overheating of these two parts and upper components.
-
Page 25: Maintenance
MAINTENANCE After each use, clean the oven with a cloth dampened with warm soapy water to remove food and oil residues from the oven. These residues can corrode internal and external surfaces • Before cleaning, the appliance must be disconnected from the mains or turned off using the button so that no electricity is supplied to the oven components. - Page 26 Oven Door Glass • Clean the oven door glass with warm water and a soft cloth only, then wipe until it dry. • Never use harsh abrasives such as steel, wool cleaners with bleach, as they could damage the glass. Inner Door Glass •...
- Page 27 guides on the top of the door. Then install the glass spring by pushing it down to insert the glass into the guides. After installing the glass, the lower tabs will lower, and the advance will end when you exit the guides. Figure 13 Oven Sealing Your oven has a sealing surrounding the inside edges which provides...
- Page 28 Side Racks * The guides for the racks and trays are easy to remove and clean. To remove the guides, pull down on the edge of the special plug as shown in the figure. Then, pull the guides outward and remove them from the upper tabs.
- Page 29 Changing the Oven Lamp • Before performing this step, make sure that no electricity is supplied to the appliance. • The oven light must meet the following requirements. − Heat resistance − Power supply: 200 Volts/ 50 Hertz − Rated electric power: 15/25 W •...
-
Page 30: Transport Information
Transport Information • During the transportation, carry/place your product parallel to the floor without turning it over. • Cover the inside of the door with cardboard to avoid damaging it with the wire rack or baking sheet. Secure it with duct tape to the sides of the door. -
Page 31: Troubleshooting
TROUBLESHOOTING Do not attempt to repair the device by yourself under any circumstances. Only an authorized service center is allowed to tamper with the product. Follow these steps before calling a service technician. The Oven Does Not Heat Up • Setting has not been made with the function selector knob and thermostat knob. - Page 32 Steam Escapes When The Oven is Working • It is normal when steam escapes during operations. Metal Sound Can Be Heard Inside The Oven • When the metal parts are heated, they may expand and cause noise. This is not a malfunction. Although the instructions in this section apply to resolve the issue, please contact an authorized service center.
-
Page 33: Specifications
SPECIFICATIONS Model BO 1635 LAR BO 1635 IRR Oven type Electric Oven Electric Oven Volume 64 L 64 L Heating modes Upper Heating Power 1100 W 1100 W Lower Heating Power 1300 W 1300 W Number of Door Glass 2 (removable glass) -
Page 34: Appendix
APPENDIX Cooking Tips Be careful when opening the door as steam can escape from the oven. Escaped steam can damage hands, face and/or eyes. Tips for Baking • Use metal plates with non-stick coating, aluminum containers or heat-resistant silicone molds. •... - Page 35 liquid, lower the temperature and increase the cooking time. Tips for Cooking Vegetables • If the vegetable dish runs out of juice and gets too dry, use a lid during cooking to keep the juice of the dish in the pan. •...
-
Page 36: Miscellaneous Suggestions
Miscellaneous Suggestions The values indicated in the table below are data indicative. They may vary according to type of food as well as your preference of cooking. Rack Time (Min) Food Function Temperature (°C) Position (Approx.) Cake in tray 25-30 Cake in mold 40-50 Cake in baking... - Page 37 Pasta bake 180-200 30-45 25 sec. 250/max. Steak 100-120 after 190 Fish 20-30 Fillet of beef 190-200 Grilled 190-200 8-10 meatballs Puff pastry 170-190 20-30 Chicken 1000 gr 60-90 Meat 500 gr 60-90 • While cooking with 2 trays at the same time, place the oven tray at the upper shelf and baking tray at the lower shelf.
- Page 38 This device, in Europe, accords to the directives 2002/96/EC Waste Electrical and Electronic Equipment. (WEEE) this device prior to disposing of junk and trash, the environment and human health against the potential negative consequences need to block. Otherwise, this would be an inappropriate waste. This symbol on the product, the product treated as household waste, electrical electronic alert is for the delivery of waste collection facilities.
- Page 39 03/21...
Need help?
Do you have a question about the BO 1635 LAR and is the answer not in the manual?
Questions and answers