Table of Contents
Advertisement
Available languages
Available languages
Quick Links
Instructions for use
GB
IT
Italiano,15
English,1
GR
DE
Deutsch,43
ΕΛΛΗΝΙΚΑ,57
RZ 1047 B
Contents
Installation, 2-3
FR
Français,29
Cutting off the water or electricity supply
Services, 10-11
Troubleshooting, 13
Service, 14
WASHING MACHINE
GB
1
Advertisement
Chapters
Table of Contents

Related Manuals for Hotpoint Ariston RZ 1047 B


Summary of Contents for Hotpoint Ariston RZ 1047 B
-
Page 1: Table Of Contents
Checking the water inlet hose Precautions and tips, 5 General safety Disposal Opening the porthole door manually Description of the washing machine, 6-7 RZ 1047 B Control panel Display Running a wash cycle, 8 Wash cycles and functions, 9 Table of wash cycles... -
Page 2: Installation
Installation venness by tightening or loosening the adju- ! This instruction manual should be kept in a stable front feet (see figure); the angle of incli- safe place for future reference. If the washing machine is sold, transferred or moved, make nation, measured in relation to the worktop, must not exceed 2°. -
Page 3: The First Wash Cycle
Auto-Clean (see “Care and mainte- nance”). Technical data Model RZ 1047 B alternatively, placed it over the edge of a width 59.5 cm basin, sink or tub, fa- Dimensions... -
Page 4: Care And Maintenance
Care and maintenance Cutting off the water and electri- Cleaning the pump city supplies The washing machine is fitted with a auto-clean • Turn off the water tap after every wash cycle. pump which does not require any maintenan- This will limit wear on the hydraulic system in- ce. Sometimes, small items (such as coins or side the washing machine and help to prevent buttons) may fall into the pre-chamber which leaks. -
Page 5: Precautions And Tips
Precautions and tips Opening the porthole door manually This washing machine was designed and constructed in accordance with international safety regulations. The fol- In the event that it is not possible to open the porthole lowing information is provided for safety reasons and must door due to a powercut, and if you wish to remove the therefore be read carefully. -
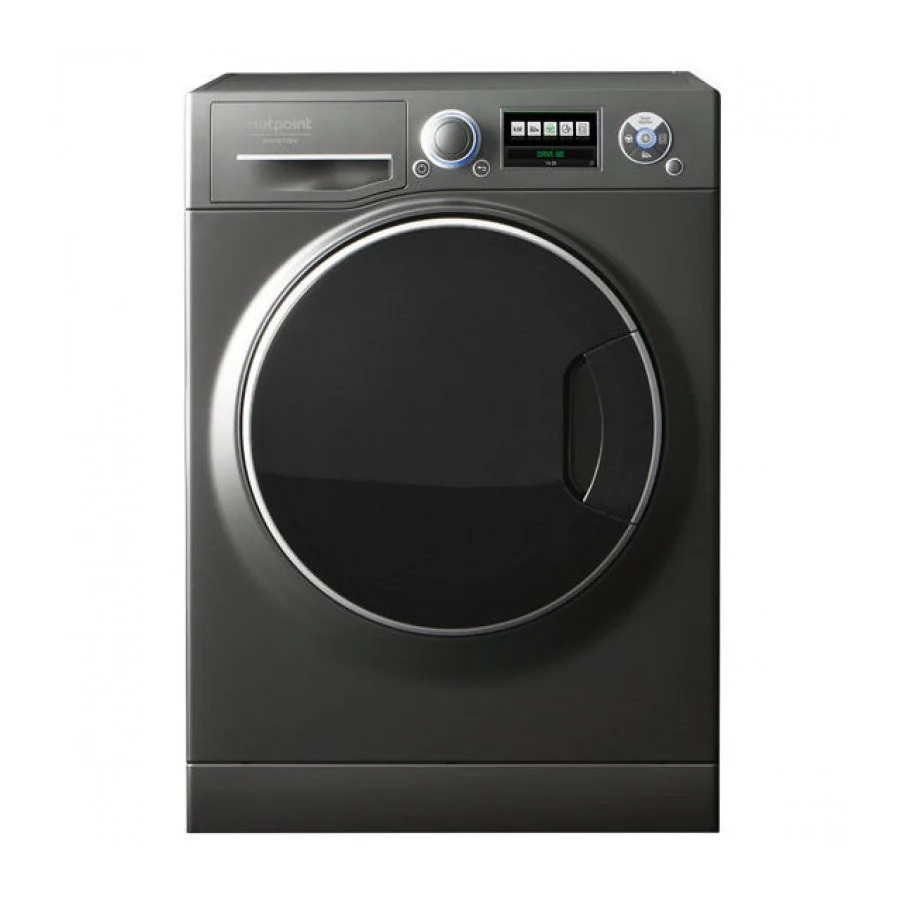
Page 6: Description Of The Washing Machine
Description of the washing machine Control panel AUTO- DRIVE ME ON/OFF CLEAN button button button DISPLAY START/PAUSE button with BACK indicator light DIRECT SELECTOR button INJECTION STATISTICS Detergent dispenser drawer button button Detergent dispenser drawer: used to dispense Standby mode detergents and washing additives (see “Detergents and This washing machine, in compliance with new energy sa- ving regulations, is fitted with an automatic standby system... -
Page 7: Display
Display You can display all information and access all functions on the display. There are three icons on the main menu, which you can select by rotating the SELECTOR to the right or to the left. A string is displayed with the name of the icon selected. -
Page 8: Running A Wash Cycle
Running a wash cycle Traditional programming. 3. MEASURE OUT THE DETERGENT. Pull out the detergent dispenser drawer and pour the detergent into 1. SWITCH THE MACHINE ON. Press the ON/OFF the relevant compartments as described in “Detergents button. The word “HOTPOINT-ARISTON” appears on and laundry”. -
Page 9: Wash Cycles And Functions
Wash cycles and functions Table of wash cycles Detergents Max. Max. Wash cycles temp. speed (°C) (rpm) Anti-Stain Power 20°C 20° 1400 20° Anti-Stain Turbo 45’ 1200 (Max. 40°C) Cotton 20°C: lightly soiled resistant and delicate colours. 20°... -
Page 10: Services
Services You can access the SERVICES section from all product sta- tuses except OFF, STANDBY and END. Access by turning the SELECTOR until the SERVICES icon is highlighted, then select the area by pressing it. The SERVICES section contains the following items: 1. - Page 11 2. STATISTICS COUNTERS You can access the STATISTICS section either by Select the COUNTERS item to display: choosing the item on the SERVICES menu or by pressing • KWh: total kWh consumed (up to the last cycle). the button on the control panel, for direct access to •...
-
Page 12: Detergents And Laundry
Detergents and laundry Detergent dispenser drawer by The Woolmark Company for the washing of wool gar- ments labelled as “hand wash” provided that the products Good washing results also depend on the correct dose of are washed according to the instructions on the garment detergent: adding too much detergent will not necessarily label and those issued by the manufacturer of this washing result in a more efficient wash, and may in fact cause a... -
Page 13: Troubleshooting
Troubleshooting Your washing machine could fail to work. Before contacting the Technical Assistance Centre (see “Assistance”), make sure that the problem cannot be solved easily using the following list. Problem: Possible causes / Solutions: The washing machine does not • The appliance is not plugged into the socket fully, or is not making contact. switch on. -
Page 14: Service
Service Before calling for Assistance: • Check whether you can solve the problem alone (see “Troubleshooting”); • Restart the programme to check whether the problem has been solved; • If this is not the case, contact an authorised Technical Assistance Centre using the telephone number provided on the guarantee certificate. Always request the assistance of authorised technicians. Have the following information to hand: • the type of problem; • the appliance model (Mod.); • the serial number (S/N). This information can be found on the data plate applied to the rear of the washing machine, and can also be found on the front of the appliance by opening the door. - Page 15 Controllare il tubo di alimentazione dell’acqua Precauzioni e consigli, 19 Sicurezza generale Smaltimento Apertura manuale della porta oblò Descrizione della lavabiancheria, 20-21 RZ 1047 B Pannello di controllo Display Come effettuare un ciclo di lavaggio, 22 Programmi e funzioni, 23 Tabella dei programmi...
-
Page 16: Installazione
Installazione ! È importante conservare questo libretto per Un accurato livellamento dà stabilità alla poterlo consultare in ogni momento. In caso di macchina ed evita vibrazioni, rumori e spo- vendita, di cessione o di trasloco, assicurarsi stamenti durante il funzionamento. In caso di che resti insieme alla lavabiancheria per infor- moquette o di un tappeto, regolare i piedini in mare il nuovo proprietario sul funzionamento e... -
Page 17: Primo Ciclo Di Lavaggio
65 e 100 Dati tecnici cm da terra; Modello RZ 1047 B larghezza cm 59,5 Dimensioni altezza cm 85 oppure appoggiar- profondità cm 60,5 lo al bordo di un lavandino o di una Capacità... -
Page 18: Manutenzione E Cura
Manutenzione e cura Pulire la pompa Escludere acqua e corrente elettrica La macchina è dotata di una pompa auto- • Chiudere il rubinetto dell’acqua dopo ogni la- vaggio. Si limita così l’usura dell’impianto idrau- pulente che non ha bisogno di manutenzio- lico della lavabiancheria e si elimina il pericolo di ne. Può però succedere che piccoli oggetti perdite. (monete, bottoni) cadano nella precamera • Staccare la spina della corrente quando si che protegge la pompa, situata nella parte pulisce la lavabiancheria e durante i lavori di inferiore di essa. manutenzione. ! Assicurarsi che il ciclo di lavaggio sia termi- Pulire la lavabiancheria nato e staccare la spina. • La parte esterna e le parti in gomma pos- Per accedere alla precamera: sono essere puliti con un panno imbevuto di acqua tiepida e sapone. Non usare solventi o 1. rimuovere il pan- abrasivi. nello di copertura sul • La lavabiancheria è dotata di un program- lato anteriore della ma di Auto-Pulizia delle parti interne che deve macchina con l’ausi- essere effettuato senza alcun tipo di carico... -
Page 19: Precauzioni E Consigli
Precauzioni e consigli Il simbolo del cestino barrato è riportato su tutti i prodotti La lavabiancheria è stata progettata e costruita in per ricordare gli obblighi di raccolta separata. Quando si conformità alle norme internazionali di sicurezza. Queste acquista una nuova apparecchiatura equivalente si può avvertenze sono fornite per ragioni di sicurezza e devono consegnare il RAEE al negoziante, che è... -
Page 20: Descrizione Della Lavabiancheria
Descrizione della lavabiancheria Pannello di controllo Tasto ON/OFF Tasto Tasto DRIVE ME AUTO-PULIZIA DISPLAY Tasto con spia AVVIO/PAUSA Tasto Tasto SELETTORE BACK DIRECT Tasto Cassetto dei detersivi STATISTICHE INJECTION Cassetto dei detersivi: per caricare detersivi e additivi Tasto con spia AVVIO/PAUSA: quando la spia lampeg- (vedi “Detersivi e biancheria”). -
Page 21: Display
Display Sul display è possibile visualizzare tutte le informazioni ed accedere a tutte le funzionalità. Nel menu principale si visualizzano tre Icone, selezionabili ruotando a destra o a sinistra il SELETTORE; viene visua- lizzata una stringa nella quale appare il nome dell’Icona evidenziata. -
Page 22: Come Effettuare Un Ciclo Di Lavaggio
Come effettuare un ciclo di lavaggio Programmazione tradizionale 3. DOSARE IL DETERSIVO. Estrarre il cassetto e versare il detersivo nelle apposite vaschette come spiegato in 1. ACCENDERE LA MACCHINA. Premere il tasto “Detersivi e biancheria”. ON/OFF, sul display comparirà la scritta “HOTPOINT- ARISTON”. -
Page 23: Programmi E Funzioni
Programmi e funzioni Tabella dei programmi Detersivi Velocità Temp. max. max. Programmi (°C) (giri al minuto) Anti Macchia Power 20°C 20° 1400 20° Anti Macchia Turbo 45’ 1200 (Max. 40°C) Cotone 20°C: bianchi e colorati delicati poco sporchi. 20°... -
Page 24: Servizi
Servizi Si può accedere alla sezione SERVIZI da tutti gli stati del prodotto eccetto OFF, STANDBY e END. Per accedere è necessario ruotare il SELETTORE, fino ad evidenziare l‘icona relativa ai SERVIZI e poi selezionare tale area premendolo. La sezione SERVIZI prevede le seguenti voci: 1. - Page 25 2. STATISTICHE CONTATORI Si può accedere alla sezione STATISTICHE sia scegliendo Selezionando la voce CONTATORI, vengono visualizzati: la relativa voce del menu SERVIZI, sia premendo il tasto • KWh: la somma dei kWh consumati (fino all’ultimo sul pannello di controllo, per un accesso diretto alla ciclo).
-
Page 26: Detersivi E Biancheria
Detersivi e biancheria Cassetto dei detersivi lavaggio venga eseguito nel rispetto delle istruzioni riportate sull’etichetta dell’indumento e delle indicazioni fornite dal Il buon risultato del lavaggio dipende anche dal corretto produttore di questa lavatrice. (M1135) dosaggio del detersivo: eccedendo non si lava in modo più... -
Page 27: Anomalie E Rimedi
Anomalie e rimedi Può accadere che la lavabiancheria non funzioni. Prima di telefonare all’Assistenza (vedi “Assistenza”), controllare che non si tratti di un problema facilmente risolvibile aiutandosi con il seguente elenco. Anomalie: Possibili cause / Soluzione: La lavabiancheria • La spina non è inserita nella presa della corrente, o non abbastanza non si accende. -
Page 28: Assistenza
Assistenza Prima di contattare l’Assistenza: • Verificare se l’anomalia può essere risolta da soli (vedi “Anomalie e rimedi”); • Riavviare il programma per controllare se l’inconveniente è stato ovviato; • In caso negativo, contattare il Numero Unico 199.199.199*. Non ricorrere mai a tecnici non autorizzati. Comunicare: •... - Page 29 Précautions et conseils, 33 Sécurité générale Mise au rebut Ouverture manuelle de la porte hublot Description du lave-linge, 34-35 RZ 1047 B Bandeau de commandes Écran Comment faire un cycle de lavage, 36 Programmes et fonctions, 37 Tableau des programmes...
-
Page 30: Installation
Installation ! Conserver ce mode d’emploi pour pouvoir Une bonne mise à niveau garantit la stabilité le consulter à tout moment. En cas de vente, de l’appareil et évite qu’il y ait des vibrations, de cession ou de déménagement, veiller à du bruit et des déplacements en cours de ce qu’il suive toujours le lave-linge pour que optionnement. -
Page 31: Premier Cycle De Lavage
à une distance du sol com- Caractéristiques techniques prise entre 65 et 100 cm ; Modèle RZ 1047 B largeur 59,5 cm ou bien l’accrocher Dimensions hauteur 85 cm à un évier ou à une profondeur 60,5 cm baignoire, dans ce Capacité... -
Page 32: Entretien Et Soin
Entretien et soin Coupure de l’arrivée d’eau et du Nettoyage de la pompe courant Le lave-linge est équipé d’une pompe auto- nettoyante qui n’exige aucune opération d’en- • Fermer le robinet de l’eau après chaque tretien. Il peut toutefois arriver que de menus lavage. Cela réduit l’usure de l’installation objets (pièces de monnaie, boutons) tombent hydraulique du lave-linge et évite tout danger dans la préchambre qui protège la pompe,... -
Page 33: Précautions Et Conseils
Précautions et conseils les obligations de collecte séparée. Les consommateurs Ce lave-linge a été conçu et fabriqué conformément aux devront contacter les autorités locales ou leur revendeur normes internationales de sécurité. Ces consignes sont concernant la démarche à suivre pour l’enlèvement de fournies pour des raisons de sécurité, il faut les lire attenti- leur vieil appareil. -
Page 34: Description Du Lave-Linge
Description du lave-linge Bandeau de commandes Touche Touche Touche AUTO- DRIVE ME ON/OFF NETTOYAGE Écran Touche Touche Touche avec voyant SÉLECTEUR PRÉCÉDENT INJECTION MARCHE/PAUSE Tiroir à produits lessiviels DIRECT Touche STATISTIQUES Tiroir à produits lessiviels: pour charger les produits l’allumage fixe. Pour activer une pause de lavage, appuyer lessiviels et les additifs (voir “Produits lessiviels et linge”). - Page 35 Écran L’afficheur permet de visualiser toutes les informations et d’accéder à toutes les fonctionnalités. Le menu principal prévoit trois icônes sélectionnables en tournant le SÉLECTEUR à droite ou à gauche ; le nom de l’icône sélectionnée apparaît au bas de l’écran. L ‘icône sélectionnée se réfère au CHOIX CYCLE et l’enfoncement du SÉLECTEUR permet dans ce cas d’ouvrir...
-
Page 36: Comment Faire Un Cycle De Lavage
Comment faire un cycle de lavage Programmation traditionnelle 2. CHARGER LE LINGE. Ouvrir la porte hublot. Charger le linge en faisant attention à ne pas dépasser la quantité 1. METTRE L’APPAREIL SOUS TENSION. Appuyer indiquée dans le tableau des programmes. sur la touche ON/OFF, l’écran affichera le message “HOTPOINT-ARISTON”. -
Page 37: Programmes Et Fonctions
Programmes et fonctions Tableau des programmes Produits lessiviels Vitesse Temp. maxi Programmes maxi. (tours (°C) minute) Anti-Taches Power 20°C 20° 1400 20° Anti-Taches Turbo 45’ 1200 (Max. 40°C) Coton 20°C: blancs et couleurs délicates peu sales. 20°... -
Page 38: Fonctionnalites
Fonctionnalites Il est possible d’accéder à la section FONCTIONNALITES depuis tous les états du produit, sauf OFF, STANDBY et END. Pour y accéder, tourner le SÉLECTEUR jusqu’à trou- ver l’icône correspondant aux FONCTIONNALITES. Sélec- tionner ensuite l’icône en appuyant sur le SÉLECTEUR. La section FONCTIONNALITES prévoit les options sui- vantes : CONSOMM. - Page 39 COMPTEURS 2. STATISTIQUES Pour accéder à la section STATISTIQUES sélectionner La sélection de l’option COMPTEURS permet de visualiser : l’option correspondante dans le menu FONCTIONNALITES • KWh : la somme des kWh consommés (jusqu’au ou bien, pour un accès direct, appuyer sur la touche dernier cycle).
-
Page 40: Produits Lessiviels Et Linge
Produits lessiviels et linge Tiroir à produits lessiviels lavage soit effectué conformément aux instructions indiquées sur l’étiquette du vêtement et aux indications fournies par le Un bon résultat de lavage dépend aussi d’un bon dosage fabricant de ce lave-linge. (M1135) de produit lessiviel: un excès de lessive ne lave pas mieux, il incruste l’intérieur du lave-linge et pollue l’environnement. -
Page 41: Anomalies Et Remèdes
Anomalies et remèdes Il peut arriver que le lave-linge ne fonctionne pas bien. Avant d’appeler le Service de dépannage (voir “Assistance”), contrôler s’il ne s’agit pas par hasard d’un problème facile à résoudre à l’aide de la liste suivante. Anomalies: Causes / Solutions possibles: Le lave-linge ne s’allume pas. -
Page 42: Assistance
Assistance Avant d’appeler le service après-vente: • Vérifier si on ne peut pas résoudre l’anomalie par ses propres moyens (voir “Anomalies et Remèdes”); • Remettre le programme en marche pour contrôler si l’inconvénient a disparu; • Autrement, contacter le Centre d’Assistance technique agréé au numéro de téléphone indiqué sur le certificat de garantie. Ne jamais s’adresser à des techniciens non agréés. Communiquer: • le type de panne; • le modèle de l’appareil (Mod.); • son numéro de série (S/N). Ces informations se trouvent sur la plaque signalétique apposée à l’arrière du lave-linge et à l’avant quand on ouvre la porte hublot. - Page 43 Pflege der Gerätetür und Trommel Reinigung der Pumpe Kontrolle des Wasserzulaufschlauchs Vorsichtsmaßregeln und Hinweise, 47 Allgemeine Sicherheit Entsorgung Manuelles Öffnen der Gerätetür Beschreibung Ihres Waschvollautomaten, RZ 1047 B 48-49 Bedienblende Display Durchführung eines Waschprogramms, 50 Programme und Funktionen, 51 Programmtabelle Verfügbare Optionen Funktionen, 52-53 Waschmittel und Wäsche, 54...
-
Page 44: Installation
Installation ! Es ist äußerst wichtig, diese Bedienungsanleitung Eine präzise Nivellierung verleiht dem Gerät die sorgfältig aufzubewahren, um sie jederzeit zu Rate erforderliche Stabilität, durch die Vibrationen, ziehen zu können. Sorgen Sie dafür, dass sie im Betriebsgeräusche und ein Verrücken des Falle eines Umzugs oder einer Übergabe an einen Gerätes vermieden werden. -
Page 45: Erster Waschgang
(siehe „Reinigung und Pflege“). Wand, in einer Höhe von 65cm bis 100cm Technische Daten Modell RZ 1047 B Breite 59,5 cm Abmessun- oder hängen Sie Höhe 85 cm diesen in ein Becken Tiefe 60,5 cm oder eine Wanne ein;... -
Page 46: Reinigung Und Pflege
Reinigung und Pflege Abstellen der Wasser- und Strom- Reinigung der Pumpe versorgung Ihr Gerät ist mit einer selbstreinigenden Pumpe • Drehen Sie den Wasserhahn nach jedem ausgerüstet, eine Wartung ist demnach nicht Waschvorgang zu. Hierdurch wird der Ver- erforderlich. Es könnte jedoch vorkommen, schleiß der Wasseranlage verringert und dass kleine Gegenstände (Münzen, Knöpfe) in Wasserlecks vorgebeugt. -
Page 47: Vorsichtsmaßregeln Und Hinweise
Vorsichtsmaßregeln und Hinweise „durchgestrichene Mülltonne“ auf jedem Produkt erinnert Der Waschvollautomat wurde nach den strengsten interna- Sie an Ihre Verpflichtung, dass Elektrohaushaltsgeräte ge- tionalen Sicherheitsvorschriften entworfen und gebaut. Nach- sondert entsorgt werden müssen. Endverbraucher können stehende Hinweise werden aus Sicherheitsgründen geliefert sich an Abfallämter der Gemeinden wenden, um mehr und sollten aufmerksam gelesen werden. -
Page 48: Beschreibung Ihres Waschvollautomaten
Beschreibung Ihres Waschvollautomaten Bedienblende Taste Taste AUTO Taste DRIVE ME ON/OFF REINIGEN DISPLAY Taste mit Kontrollleuchte Taste Taste START/PAUSE DIRECT SCHALTER BACK INJECTION Waschmittelschublade Taste STATISTIK Waschmittelschublade: für Waschmittel und Zusätze Ingangsetzung des Programms schaltet die Kontrollleuchte (siehe „Waschmittel und Wäsche“). auf Dauerlicht. -
Page 49: Display
Display Auf dem Display können alle Informationen angezeigt und die Funktionen gewählt werden. Im Hauptmenü werden 3 Symbole angezeigt, die durch Drehen des SCHALTER nach links oder rechts ausgewählt werden können; eine Zeichenkette gibt den Namen des angezeigten Symbols an. Das Symbol bezieht sich auf die PROGRAMM WÄHLEN, Wird es durch Drücken des SCHALTER gewählt, erscheint... -
Page 50: Durchführung Eines Waschprogramms
Durchführung eines Waschprogramms Herkömmliche Programmierung Sie hierbei bitte darauf, die in der Programmtabelle angegebene Wäschemenge nicht zu überschreiten. 1. EINSCHALTEN DES GERÄTES. Drücken Sie die Taste ON/OFF. Auf dem Display erscheint der 3. DOSIERUNG DES WASCHMITTELS. Ziehen Sie die Waschmittelschublade heraus und füllen Sie das Schriftzug “HOTPOINT-ARISTON”. -
Page 51: Programme Und Funktionen
Programme und Funktionen Programmtabelle Waschmittel Max. Tempera- Waschprogramme (°C) Fleckenstopp Power 20°C 20° 1400 20° 1200 Fleckenstopp Turbo 45’ (Max. 40°C) Baumwolle 20°C: leicht verschmutzte Weiß- und empfindliche Buntwäsche. 20° 1400 Baumwolle: stark verschmutzte Weiß- und farbechte Buntwäsche. 90°... -
Page 52: Funktionen
Funktionen Der Zugang zum Bereich FUNKTIONEN ist in jedem Zu- stand des Produkts mit Ausnahme von OFF, STANDBY und END möglich. Dazu den SCHALTER drehen, bis das Symbol für FUNKTIONEN angezeigt wird, und durch Drücken den Bereich aktivieren. Der Bereich FUNKTIONEN enthält folgende Angaben: 1. - Page 53 2. STATISTIK ZÄHLER Der Zugang zum Bereich STATISTIK ist über die Durch Wählen der Option ZÄHLER werden folgende Werte entsprechende Option im Menü FUNKTIONEN oder für angezeigt: einen direkten Zugang durch Drücken der Taste • kWh: die Summe der verbrauchten kWh (bis zum der Bedienblende möglich.
-
Page 54: Waschmittel Und Wäsche
Waschmittel und Wäsche Waschmittelschublade der Anweisungen auf Etikett des Kleidungsstück und den Angaben des Herstellers dieser Waschmaschine. (M1135) Ein gutes Waschergebnis hängt auch von einer korrekten Wa- schmitteldosierung ab: Eine zu hohe Dosierung bedeutet nicht unbedingt reinere Wäsche, sie trägt nur dazu bei, die Maschi- neninnenteile zu verkrusten und die Umwelt zu belasten. -
Page 55: Störungen Und Abhilfe
Störungen und Abhilfe Bei Funktionsstörung: Bevor Sie sich an den Technischen Kundendienst wenden (siehe „Kundendienst“), vergewissern Sie sich zuerst, ob es sich nicht um eine Kleinigkeit handelt, die Sie selbst beheben können. Ziehen Sie hierzu nachstehendes Verzeichnis zu Rate. Störungen: Mögliche Ursachen / Lösungen: Der Waschvollautomat schaltet sich • Der Stecker steckt nicht in der Steckdose, oder nicht so, dass der Kontakt herge-... -
Page 56: Kundendienst
Kundendienst Bevor Sie sich an den Kundendienst wenden: • Sollten einige Kontrollen vorab selbst durchgeführt werden (siehe „Störungen und Abhilfe“); • Starten Sie daraufhin das Programm erneut, um sicherzustellen, dass die Störung auch wirklich behoben wurde; • Ist dies nicht der Fall, dann kontaktieren Sie den autorisierten Kundendienst unter der auf dem Garantieschein befindlichen Telefonnummer. Wenden Sie sich auf keinen Fall an nicht autorisierte Techniker. Geben Sie bitte Folgendes an: • die Art der Störung;... - Page 57 Έλεγχος του σωλήνα τροφοδοσίας του νερού Προφυλάξεις και συμβουλές, 61 Γενική ασφάλεια Διάθεση Χειρονακτικό άνοιγμα της πόρτας Περιγραφή του πλυντηρίου, 62-63 RZ 1047 B Πίνακας ελέγχου Οθόνη Πως διενεργείται ένας κύκλος πλυσίματος, 64 Προγράμματα και λειτουργίες, 65 Πίνακας των Προγραμμάτων...
-
Page 58: Εγκατάσταση
Εγκατάσταση Μια φροντισμένη οριζοντίωση προσδίδει ! Είναι σημαντικό να διατηρήσετε το εγχειρίδιο αυτό για να μπορείτε να το σταθερότητα στη μηχανή και αποσοβεί συμβουλεύεστε οποιαδήποτε στιγμή. Σε δονήσεις, θορύβους και μετατοπίσεις κατά τη λειτουργία. Σε περίπτωση μοκέτας ή περίπτωση πώλησης, παραχώρησης ή τάπητα, ρυθμίστε... -
Page 59: Πρώτος Κύκλος Πλυσίματος
«Συντήρηση και φροντίδα»). χείλος ενός νιπτήρα ή μιας λεκάνης, Ôå÷íéêÜ óôïé÷åßá δένοντας τον οδηγό που σας παρέχεται ÌïíôÝëï RZ 1047 B στον κρουνό (βλέπε ðëÜôïò cm 59,5 εικόνα). Το ελεύθερο ÄéáóôÜóåéò ýøïò cm 85 άκρο του σωλήνα âÜèïò cm 60,5 αδειάσματος... -
Page 60: Συντήρηση Και Φροντίδα
Συντήρηση και φροντίδα Φροντίδα της πόρτας και του κάδου Αποκλεισμός νερού και ηλεκτρικού ρεύματος • Να αφήνετε πάντα μισόκλειστη την πόρτα • Κλείνετε τον κρουνό του νερού μετά για να μην παράγονται δυσοσμίες. από κάθε πλύσιμο. Έτσι περιορίζεται η Καθαρισμός της αντλίας φθορά... -
Page 61: Προφυλάξεις Και Συμβουλές
Προφυλάξεις και συμβουλές Οι καταναλωτές θα πρέπει να απευθύνονται στις τοπικές Το πλυντήριο σχεδιάστηκε και κατασκευάστηκε σύμφωνα με τους διεθνείς κανόνες ασφαλείας. Αυτές οι προειδοποιήσεις αρχές ή στα καταστήματα λιανικής για πληροφορίες που παρέχονται για λόγους ασφαλείας και πρέπει να διαβάζονται αφορούν... -
Page 62: Περιγραφή Του Πλυντηρίου
Περιγραφή του πλυντηρίου Πίνακας ελέγχου Κουμπί Κουμπί Κουμπί ΝΤΡΑΪΒ ΜΙ ON/OFF ΚΑΘΑΡΙΣΜΟΣ Οθόνη Κουμπί Κουμπί με ενδεικτικό Κουμπί ΕΠΙΛΟΓΕΑ ΠΙΣΩ φωτάκι ΑΜΕΣΗ ΕΝΑΡΞΗ/ΠΑΥΣΗ Θήκη απορρυπαντικών ΕΓΧΥΣΗ Κουμπί ΣΤΑΤΙΣΤΙΚΑ Θήκη απορρυπαντικών: για την προσθήκη του κύκλου το ενδεικτικό φωτάκι σταθεροποιείται. Για απορρυπαντικών... - Page 63 Οθόνη Από την οθόνη μπορείτε να δείτε όλες τις πληροφορίες και να μεταβείτε σε όλες τις λειτουργίες. Στο κύριο μενού εμφανίζονται τρία εικονίδια, τα οποία μπορείτε να επιλέξετε περιστρέφοντας τον ΕΠΙΛΟΓΕΑ προς τα δεξιά ή προς τα αριστερά. Μαζί με κάθε επισημασμένο...
-
Page 64: Πως Διενεργείται Ένας Κύκλος Πλυσίματος
Πως διενεργείται ένας κύκλος πλυσίματος Συμβατικός προγραμματισμός 3. ΔΟΣΟΛΟΓΙΑ ΑΠΟΡΡΥΠΑΝΤΙΚΟΥ. Βγάλτε το συρτάρι και τοποθετήστε το απορρυπαντικό στις κατάλληλες 1. ΕΝΕΡΓΟΠΟΙΗΣΗ ΜΗΧΑΝΗΜΑΤΟΣ. Πατήστε το λεκανίτσες, όπως εξηγείται στην ενότητα «Απορρυπαντικά πλήκτρο ON/OFF. Στην οθόνη θα εμφανιστεί η και μπουγάδα». επιγραφή “HOTPOINT-ARISTON”. 4. -
Page 65: Προγράμματα Και Λειτουργίες
Προγράμματα και λειτουργίες Πίνακας των Προγραμμάτων Áðïññõð- áíôéêÜ ÌÝãéóôç Προγράμματα èåñµïêñ. (°C) ΑΝΘ. ΛΕΚΕΔΕΣ ΙΣΧΥΣ 20° 20° 1400 20° ΑΝΘ.ΛΕΚ. ΤΟΥΡ.45’ 1200 (Max. 40°C) ΒΑΜΒΑΚΕΡΑ 20°C: Λευκά και χρωματιστά ανθεκτικά, πολύ λερωμένα. 20° 1400 ΒΑΜΒΑΚΕΡΑ: Λευκά... -
Page 66: Υπηρεσιες
Υπηρεσιες Μπορείτε να μεταβείτε στην ενότητα ΥΠΗΡΕΣΙΕΣ από όλες τις καταστάσεις του μηχανήματος εκτός από τις καταστάσεις OFF, STANDBY και END. Για να μεταβείτε εκεί, πρέπει να περιστρέψετε τον ΕΠΙΛΟΓΕΑ έως ότου επισημανθεί το εικονίδιο για τις ΥΠΗΡΕΣΙΕΣ και κατόπιν να... - Page 67 2. ΣΤΑΤΙΣΤΙΚΑ ΜΕΤΡΗΤΕΣ Μπορείτε να μεταβείτε στην ενότητα ΣΤΑΤΙΣΤΙΚΑ Αν επιλέξετε την καταχώρηση ΜΕΤΡΗΤΕΣ, εμφανίζονται επιλέγοντας τη σχετική καταχώρηση στο μενού τα εξής: ΥΠΗΡΕΣΙΕΣ ή πιέζοντας το πλήκτρο στον πίνακα • KWh: Το σύνολο kWh που έχουν καταναλωθεί (έως ελέγχου, για άμεση πρόσβαση στην ενότητα. τον...
-
Page 68: Απορρυπαντικά Και Μπουγάδα
Απορρυπαντικά και μπουγάδα Θήκη απορρυπαντικών στο χέρι”, αρκεί το πλύσιμο να εκτελείται σύμφωνα με τις οδηγίες της ετικέτας του ενδύματος και τις υποδείξεις Το καλό αποτέλεσμα του πλυσίματος εξαρτάται επίσης του κατασκευαστή του πλυντηρίου αυτού. (M1135) και από τη σωστή δοσολογία του απορρυπαντικού: υπερβάλλοντας... -
Page 69: Ανωμαλίες Και Λύσεις
Ανωμαλίες και λύσεις Μπορεί να συμβεί το πλυντήριο να μη λειτουργεί. Πριν τηλεφωνήσετε στην Υποστήριξη (βλέπε “Υποστήριξη”), ελέγξτε αν δεν πρόκειται για πρόβλημα που επιλύεται εύκολα με τη βοήθεια του ακόλουθου καταλόγου. Ανωμαλίες: Δυνατά αίτια / Λύση: Το πλυντήριο δεν ανάβει. •... -
Page 70: Υποστήριξη
Υποστήριξη Πριν επικοινωνήσετε με την Υποστήριξη: • Ελέγξτε αν η ανωμαλία μπορείτε να την αντιμετωπίσετε μόνοι σας (βλέπε “Ανωμαλίες και λύσεις”); • Επανεκκινήστε το πρόγραμμα για να ελέγξετε αν το πρόβλημα αντιμετωπίστηκε; • Σε αρνητική περίπτωση, επικοινωνήστε με την εξουσιοδοτημένη Τεχνική Υποστήριξη στον τηλεφωνικό αριθμό που υπάρχει... - Page 72 195140917.00 03/2016 Indesit Company Spa Viale Aristide Merloni, 47 60044 Fabriano (AN) Italy www.hotpoint.eu...
Need help?
Do you have a question about the RZ 1047 B and is the answer not in the manual?
Questions and answers