Advertisement
Quick Links
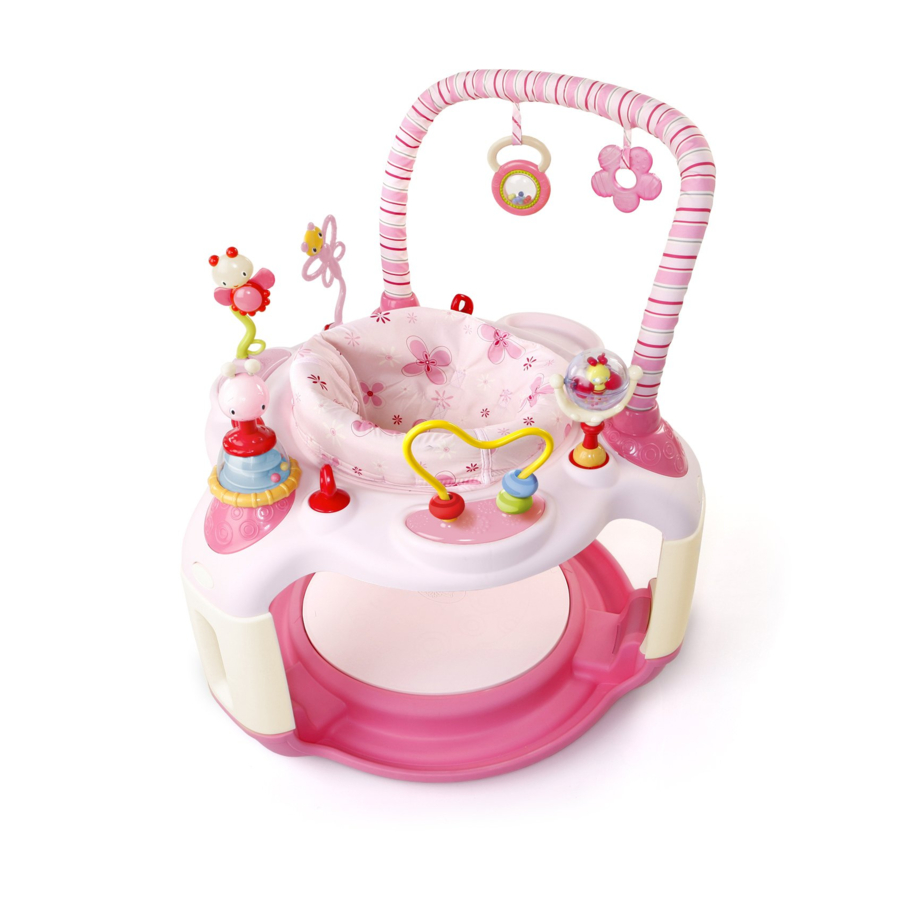
Activity Center • Centro de actividad
• Congratulations on your purchase of a new Bright Starts
instructions before assembly and use of the activity center.
• ¡Felicitaciones por haber comprado un nuevo producto de Bright Starts
lea todas las instrucciones antes de armar y usar este centro de actividad.
• Félicitations pour l'achat d'un nouveau produit Bright Starts
les instructions avant d'assembler et d'utiliser le centre d'activité.
IMPORTANT! KEEP FOR FUTURE REFERENCE.
¡IMPORTANTE! CONSÉRVELO PARA REFERENCIA FUTURA.
IMPORTANT! À CONSERVER POUR CONSULTATION FUTURE.
www.brightstarts.com
Bounce-A-Bout
Centre d'activité
ENGLISH • ESPAÑOL • FRANÇAIS
™
product! Please read all
™
! Prière de lire toutes
MC
6961/6895-WW
! Por favor
™
Advertisement

Related Manuals for Bright Starts Bounce-A-Bout


Summary of Contents for Bright Starts Bounce-A-Bout
- Page 1 ENGLISH • ESPAÑOL • FRANÇAIS Bounce-A-Bout ™ Activity Center • Centro de actividad Centre d’activité • Congratulations on your purchase of a new Bright Starts product! Please read all ™ instructions before assembly and use of the activity center. • ¡Felicitaciones por haber comprado un nuevo producto de Bright Starts ! Por favor ™ lea todas las instrucciones antes de armar y usar este centro de actividad. • Félicitations pour l’achat d’un nouveau produit Bright Starts ! Prière de lire toutes les instructions avant d’assembler et d’utiliser le centre d’activité. IMPORTANT! KEEP FOR FUTURE REFERENCE. ¡IMPORTANTE! CONSÉRVELO PARA REFERENCIA FUTURA. IMPORTANT! À CONSERVER POUR CONSULTATION FUTURE.
-
Page 2: Important Safety Instructions
IMPORTANT SAFETY INSTRUCTIONS WARNING TO PREVENT SERIOUS INJURY OR DEATH: • Use the activity center ONLY if the child meets ALL of the following conditions: ...is at least four (4) months of age ...can sit up by him or herself ...is less than 30” tall (76.2 cm) ...weighs less than 25 lbs. (11 kg) • DO NOT allow children who can stand or walk on their own to use the activity center. • Do not use the activity center in dangerous conditions or situations: • NEVER leave child unattended in the activity center. ALWAYS keep child in view while child is in the product. • NEVER move the unit while the child is in the seat. • It can be dangerous to allow other children to play near the activity center. • DO NOT add any strings or straps to any part of the activity center. • Strings can cause strangulation! DO NOT place items with a string around child’s neck, such as hood strings or pacifier (dummy) cords. DO NOT suspend strings over activity center or attach strings to toys. • DO NOT use any hardware other than that supplied. • ONLY use with the jump platform attached. • For indoor use only. • FALL HAZARD: DO NOT place the activity center on an elevated surface. A child’s movement can slide the activity center. • NEVER use near stairs. • To avoid tip-over, place the activity center on a flat, level floor. CAUTION • This product contains small parts. Adult assembly required. IMPORTANT • Care should be taken in unpacking and assembly. -
Page 3: Importantes Consignes De Sécurité
• ¡Las cuerdas pueden provocar estrangulamiento! NO coloque artículos con cuerdas alrededor del cuello de un niño, tales como cuerdas de capuchas o cordones de chupetes. NO suspenda cuerdas sobre el producto ni las ate a los juguetes. • NO use ningún otro elemento de ferretería que no sea de los proporcionados. • SOLO use el producto con la plataforma para saltar enganchada. • Sólo para uso en interiores. • PELIGRO DE CAÍDAS: NO coloque este centro de actividad en una superficie elevada. Un movimiento del bebé puede hacer que el centro de actividad se deslice. • NUNCA lo utilice cerca de las escaleras. • Para evitar que se vuelque, coloque el centro de actividad en un piso plano y nivelado. PRECAUCIÓN • Este producto contiene partes pequeñas. Se requiere el armado por parte de un adulto. IMPORTANTE • Se debe tener cuidado al desempacar y armar el producto. • Examine el producto con frecuencia en busca de partes dañadas, extraviadas o sueltas. • No use el producto si está dañado o roto. IMPORTANTES CONSIGNES DE SÉCURITÉ... - Page 4 IMPORTANT • Prendre toutes les précautions requises lors du déballage et de l’assemblage. • Examiner régulièrement le produit afin de vous assurer qu’aucune de ses pièces n’est endommagée, manquante ou mal fixée. • Ne pas utiliser le produit s’il est endommagé ou cassé. Parts • Partes • Pièces • Before assembling the product, ensure you have all parts listed and the correct quantities. • Antes de montar el producto, asegúrese de tener todas las partes enumeradas y las cantidades correctas. • Avant d’assembler le produit, vérifier que vous avez toutes les pièces énumérées et les bonnes quantités. Parts List and Drawing • Lista de partes y dibujo Liste de pièces et dessin Parts List • Lista de partes • Liste de pièces Qty.
- Page 5 Use only replacement parts supplied by Kids II. Solo use repuestos provistos por Kids II. Utiliser exclusivement des pièces de rechange fournies par Kids II. Tools needed Herramientas necesarias Outils nécessaires #2 Phillips screwdriver Destornillador Phillips Nro. 2 Tournevis Phillips n° 2 Hardware for assembly Equipo de ensamblado Quincaillerie d’assemblage – 5 –...
- Page 6 Drawing • dibujo • dessin Model 6961 NOTE: The actual toys may differ from those shown. NOTA: Los juguetes incluidos pueden diferir de los que se muestran. REMARQUE: Les jouets véritables sont susceptibles de varier par rapport à ceux figurant sur l’illustration. Model 6895 Model 6961 Model 6895 – 6 –...
- Page 7 Base Assembly • Ensamblaje de la base Ensemble de la base Step 1 (x 3) • Paso 1 (x 3)• Étape 1 (x 3) Step 2 (x 3) • Paso 2 (x 3) • Étape 2 (x 3) Click Clic Clic –...
- Page 8 Platform Assembly • Ensamblaje de la plataforma • Ensemble de la plate-forme Step 1 • Paso 1 • Étape 1 Step 2 (x 3) • Paso 2 (x 3) • Étape 2 (x 3) – 8 –...
- Page 9 Step 3 (x 6) • Paso 3 (x 6) • Étape 3 (x 6) Phillips screwdriver M4 screws with washer Destornillador Phillips Tornillos M4 con arandela Tournevis cruciforme Vis M4 avec rondelle Step 4 • Paso 4 • Étape 4 Step 5 •...
- Page 10 Legs and Play Surface Assembly Ensamblaje de la patas e superficie de juego Ensemble des jambes et la surface de jeu Step 1 (x 3) • Paso 1 (x 3) • Étape 1 (x 3) Step 2 (x 3) • Paso 2 (x 3) • Étape 2 (x 3) Click Clic Clic...
- Page 11 Step 3 • Paso 3 • Étape 3 Separate these parts: Separe estas piezas: Séparer ces pièces: × 4 Press Presione Appuyer Step 4 (x 3)• Paso 4 (x 3) • Étape 4 (x 3) Click • Clic • Clic – 11 –...
- Page 12 Step 5 (x 2) • Paso 5 (x 2 ) • Étape 5 (x 2) Toy tray Bandeja para juguetes Plateau pour jouets Click Clic Clic – 12 –...
- Page 13 Step 6 • Paso 6 • Étape 6 Toy tray Bandeja para juguetes Plateau pour jouets Click Clic Clic – 13 –...
- Page 14 Toys and Toy Bar • Juguetes y barra de juguetes Jouets et barre de jouets Step 1 (x 4) • Paso 1 (x 4) • Étape 1 (x 4) Toy tray Bandeja para juguetes Plateau pour jouets Align key on anchor to notch in socket. Alinee llave en el ancla para ranura en el receptáculo. Aligner la clef sur l’ancre pour encoche dans le manchon. Click • Clic • Clic –...
- Page 15 Step 2 • Paso 2 • Étape 2 Align key on toy to notch in socket. Alinee llave en el juguete para ranura en el receptáculo. Aligner la clef sur l’ancre pour jouet dans le manchon. Toy tray Bandeja para juguetes Plateau pour jouets Click • Clic • Clic Step 3 • Paso 3 • Étape 3 Toy tray • Bandeja para juguetes Plateau pour jouets Click • Clic • Clic Step 4 • Paso 4 • Étape 4 Toy tray • Bandeja para juguetes Plateau pour jouets Align key on toy to notch in socket. Alinee llave en el Click • Clic juguete para ranura...
- Page 16 Step 5 • Paso 5 • Étape 5 Click • Clic Clic Step 6 • Paso 6 • Étape Model 6961 Model 6895 Align key on toy to notch in socket. Alinee llave en el juguete para ranura en el receptáculo. Aligner la clef sur l’ancre pour jouet dans le manchon. Click Clic Clic Step 7 • Paso 7 • Étape 7 Click Clic Clic –...
- Page 17 – 17 –...
- Page 18 Seat Assembly • Ensamblaje del asiento Ensemble du siège Step 1 (x 6) • Paso 1 (x 6) • Étape 1 (x 6) Q × 6 Click • Clic • Clic Step 2 • Paso 2 • Étape 2 Align the center of the safety label to the arrow embossed on the seat carrier. Alinee el centro de la etiqueta de seguridad a la flecha grabada en el soporte del asiento. Aligner le centre de l’étiquette de sécurité à la flèche en relief sur le support du siège. Leg openings Aberturas para las piernas Ouvertures pour les jambes Arrow (at back of seat carrier) Flecha (en la parte posterior...
- Page 19 Step 3 (x 8) • Paso 3 (x 8) • Étape 3 (x 8) Find the tab nearest a loop. Pull the loop over the tab and slide it downward to attach the fabric seat to the seat carrier. Encuentre la pestaña más cercana un lazo. Tire del lazo sobre la pestaña y deslícelo hacia abajo para sujetar el asiento de tela al soporte del asiento. Trouvez la languette près de une boucle. Tirez la boucle sur la languette et glissez-la vers le bas pour fixer le siège de tissu sur le porte-siège. Seat Assembly Steps P 19- 21 Step 4 • Paso 4 • Étape 4 Click • Clic • Clic – 19 –...
- Page 20 9- 21 Step 5 • Paso 5 • Étape 5 Check the seat carrier installation. The seat carrier should rotate freely within the play surface. Revise la instalación del soporte del asiento. El soporte del asiento debe rotar libremente dentro de la superfi cie de juego. Vérifi ez l’installation du portesiège. Le porte-siège devrait tourner librement dans la surface de jeu. Operating Instructions • Instrucciones de funcionamiento • Mode d’emploi Adjusting the Seat Height • Ajuste de la altura del asiento Ajustez la hauteur du siège The goal of adjusting the seat height is to ensure the child is supported by both the seat and their legs. In this way, they can have assistance while learning how to transition from sitting to walking.
- Page 21 Three height settings are available. CAUTION: Do not adjust the height while the child is in the seat. Low Position – Leave straps unfastened. Middle position – Fasten straps (1) to (2). High position – Fasten straps (1) to (3). Existen tres configuraciones de altura disponibles. PRECAUCIÓN: No ajuste la altura mientras el niño esté en el asiento. Posición baja – Deje la tiras sin apretar. Posición el centro – Ajuste la tiras (1) a (2). Posición alta – Ajuste la tiras (1) a (3). Trois réglages en hauteur peuvent être effectués. MISE EN GARDE : n’ajustez pas la hauteur lorsque l’enfant y est assis. Position basse – Ne pas attacher les sangles. Position le milieu – Attacher la sangles (1) pour (2). Position haute – Attacher la sangles (1) pour (3).
- Page 22 Care and Cleaning • Cuidado y limpieza • Entretien et nettoyage Fabric Seat – First, you must remove the seat carrier... To wash the fabric seat... Machine wash the fabric seat in cold water. Use a gentle wash cycle with no bleach. Tumble dry, using low heat. To reinstall the fabric seat and seat carrier, reverse the steps or refer to the Assembly Instructions, page 18. Plastic Parts –Wipe clean with damp cloth and mild soap. Air dry. Do not immerse in water. Teether – Clean teether before use. Not dishwasher safe. Wipe clean with damp cloth and mild soap. Air dry. Asiento de tela – Primero debe retirar el soporte del asiento... Para lavar el asiento de tela... Lave el asiento de tela en una lavadora con agua fría. Use un ciclo de lavado suave. No use cloro. Séquelo en una secadora a baja temperatura. Para reinstalar el asiento de tela y el soporte del asiento, invierta los pasos o consulte las Instrucciones de Ensamblaje, pagina 18. Partes de plástico – Limpie con un paño húmedo y jabón suave. Deje secar al aire. No Care and Cleaning Step 1 P. 27 sumerja en agua.
- Page 23 Step 2 • Paso 2 • Étape 2 STORAGE STEPS P. 28 - 29 Storage • Almacenamiento • Rangement Step 1 (x 6) • Paso 1 (x 6) • Étape 1 (x 6) Press Presione Appuyer Step 2 • Paso 2 • Étape 2 –...
- Page 24 Step 3 • Paso 3 • Étape 3 Step 4 • Paso 4 • Étape 4 – 24 –...
- Page 25 – 25 –...
- Page 26 – 26 –...
- Page 27 – 27 –...
-
Page 28: Limited Warranty
Kids II Limited Warranty ® Kids II is committed to making innovative, high quality products for babies and children. We warrant this product to be free from defects in material and workmanship existing at the time of manufacture for a period of one year from the date of initial purchase (sales receipt is required for proof of purchase). If any defect is discovered during the limited warranty period, we will, at our sole option, repair or replace your product at no cost to you. This limited warranty does not cover claims resulting from misuse, failure to follow the instructions (assembly, installation, maintenance, and use), abuse, alteration, involvement in an accident, and normal wear and tear. Your statutory rights are unaffected. Garantía Limitada de Kids II ® Kids II asume el compromiso de fabricar productos innovadores y de alta calidad para bebés y niños. Garantizamos que este producto no contiene defectos en los materiales o en la mano de obra al momento de su fabricación durante un período de un año desde la fecha de compra inicial (se requiere recibo de venta como comprobante de la compra). Si se descubre algún defecto durante el período de garantía limitada, repararemos o reemplazaremos, a nuestra entera discreción, su producto sin ningún costo para usted. Esta garantía limitada no cubre las reclamaciones que surjan por uso inapropiado, no seguir las instrucciones (armado, instalación, mantenimiento y uso), abuso, alteración, participación en un accidente y desgaste por el uso normal. Sus derechos en virtud de las leyes no se ven afectados. Garantie limitée Kids II Kids II s’engage à fabriquer des produits innovants et de grande qualité pour les nourrissons et les enfants. Nous garantissons ce produit contre tout défaut de matériel et de fabrication existant au moment de la fabrication et cela, pour une année à partir de la date d’achat initiale (le reçu faisant preuve d’achat). Si un défaut quelconque est découvert pendant la période de garantie limitée, nous nous engageons, à notre seule discrétion, à réparer ou à remplacer votre produit gratuitement. Cette garantie limitée ne s’applique pas en cas de mauvaise utilisation, de non-respect des instructions (assemblage, installation, entretien et utilisation), d’abus, d’altération, d’implication dans un accident ou de l’usure normale. Vos droits prévus par la loi ne sont pas affectés.
Need help?
Do you have a question about the Bounce-A-Bout and is the answer not in the manual?
Questions and answers